Article Contents:
- Why a baseboard is needed on a wooden staircase
- Three problems that a staircase baseboard solves
- When a staircase "requires" a baseboard — and when it doesn't
- Riser baseboard: concealing the joint between the tread and the vertical panel
- Anatomy of the tread-riser joint
- Baseboard profile for the riser: what works
- Baseboard placement at the riser: two positions
- Baseboard installation at the riser: details
- Baseboard around the perimeter of the bottom step: finishing the staircase base
- Why the bottom step is a special element
- Typical bottom step configurations and their baseboard solutions
- Baseboard height at the staircase base vs floor baseboard height
- Choosing a profile for the staircase baseboard: triangular, shoe molding, quarter round
- Triangular profile (corner bead): strict and modern
- Quarter round: soft and traditional
- Shoe molding: where the step "sits" on the stringer
- Ornate classic profile at the staircase base
- Matching the staircase baseboard with the floor baseboard
- Key task: seamless transition
- Three typical joining nodes
- Baseboard height at the staircase and floor baseboard: visual rhyme
- Installation on complex step relief: cutting tricks
- Overhanging step nosing: baseboard at the riser considering the overhang
- Steps with a profiled nosing: overlay strip
- Different step heights: how to align the baseboard
- Wooden house with baseboard: shrinkage as an installation factor
- Staircase baseboard finish: coordinating with the step wood
- Staircase and baseboard: unified finishing system
- Parquet varnish for stair skirting
- Oil for oak stair skirting
- Staircase in a wooden house: unified skirting ensemble
- Why the skirting of the entire house should be coordinated
- Stair skirting and door skirting: joining in the hallway
- FAQ: answers to popular questions about skirting for wooden stairs
- About the Company STAVROS

A staircase is the only interior element perceived simultaneously from below, from the side, from above, and from within. When ascending it, the gaze slides along the step ends, along the risers, along the joint of the step with the vertical panel, along the skirting line at the base. And it is here—in these small details of joints and transitions—that the impression of the entire structure is formed or shattered.
Wooden staircase skirting— is not an addition, not a 'finishing touch.' It is the final line of the constructor that closes technological gaps, hides fasteners, and creates a continuous line along which the gaze slides upward easily and without 'snags.'
Mistakes in this zone are costly. Redoing the skirting along the stair flight after final finishing involves dismantling, puttying, repainting. It's better to do it right once, understanding the logic of each decision. This article is precisely about that logic.


Why skirting is needed on a wooden staircase


Three tasks solved by skirting on a staircase
Wooden staircase with skirting— is not just a decorative technique. Skirting in the stair zone has three specific functions, each important in its own way:
Function 1: Closing technological gaps. During stair flight installation, gaps remain between structural elements: between the step and the riser, between the riser and the horizontal surface of the lower step, between the stringer and the wall, between the bottom step and the floor. Each of these gaps is a potential point for dust and debris accumulation, and with wooden structures—also a place for deformation due to shrinkage. Skirting closes these gaps without rigid fixation, allowing the wood to move.
Function 2: Visual unification of elements. A staircase consists of structural elements—stringer, steps, risers, carriage. Each is a separate part. Horizontal skirting at the base of the flight and vertical skirting at the riser create a continuous line, visually 'stitching' the structure into a unified whole.
Function 3: Protecting ends from mechanical wear. The exposed end of a riser or lower step is an area that receives impacts and abrasion during normal staircase use. The end grain of wood absorbs moisture 3–5 times more actively than the side surface. Skirting that covers the end protects it from mechanical impact and moisture absorption.
Our factory also produces:


When a staircase 'requires' skirting—and when it doesn't
Open-construction staircase (metal frame with wooden steps, no risers, no side panels)—skirting is not needed. Each step 'floats' in space, there are no joints.
Closed-construction staircase (wooden flight with risers, enclosed space under the flight, stringer against the wall)—skirting is necessary at the following points:
-
Joint of step with riser (horizontal with vertical)
-
Lower perimeter of the flight at the floor
-
Joint of stringer or carriage with the wall
-
Joint of the bottom step with the first-floor floor
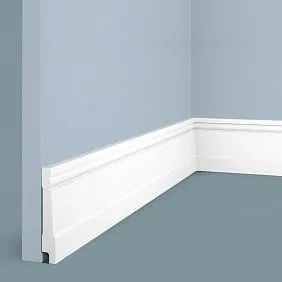
In wooden houses withskirting in wooden housesalong the entire wall perimeter—stair skirting should be part of a unified system: the same profile, the same wood species, the same finish.
Get Consultation
Riser skirting: concealing the joint of the step with the vertical panel
Anatomy of the step-riser joint
A riser is a vertical board that closes the space between two horizontal steps. Its upper end abuts the lower surface of the step above, its lower end abuts the rear part of the step below.
It is precisely the lower joint 'riser - back of the lower tread' that is the area where a baseboard is needed.
Why does a gap form there?
Wooden treads and risers are made from solid wood, kiln-dried to 8–12%. In the first years after installation, the wood continues to move: house settling, seasonal humidity fluctuations. The horizontal tread and vertical riser are different structural elements; they move independently. Over time, a 1–3 mm gap appears at the joint — a normal situation for a wooden staircase.
A baseboard at the base of the riser covers this gap without impeding the movement of the wood.
Profile for the baseboard at the riser: what is suitable
For the joint 'horizontal tread - vertical riser' — an internal corner. This is a task for one of three profiles:
Cove (quarter-round): a concave triangular profile. The front face is an arc that fits into the angle between the horizontal and vertical. Minimalist and clean. A classic for wooden staircases in Scandinavian and modern styles. Leg size — 20–25 mm for the tread-riser joint: enough to cover the gap, and not too noticeable.
Corner baseboard: rectangular cross-section, 45° angle. A more 'industrial' character. Looks good in loft interiors and on staircases made of dark oak in a modern home. Leg 20×20 mm.
Small classic profile K-034, K-125, K-105: a small shaped profile 30–40 mm high. In a staircase with rich classical detailing — a small profile at the riser continues the 'language' of the decoration of the entire staircase.
Important rule: the profile for the tread-riser joint must be smaller in size than the baseboard at the base of the entire flight. Otherwise — visual imbalance: a small baseboard at the floor and a huge cove on the steps.
Positioning of the baseboard at the riser: two positions
Position 1: Baseboard on the horizontal tread at the base of the riser.
The baseboard is nailed to the surface of the tread (horizontal) along the riser. Its rear vertical plane is pressed against the riser. This option visually 'lowers' the height of the riser, making it neat.
Position 2: Baseboard on the riser at the base of the tread.
The baseboard is nailed to the lower part of the riser (vertical), lying on the tread. This option is more vulnerable to mechanical impact (easily caught by a foot).
For general-use staircases (residential house) — Position 1 is preferable: less risk of catching, looks more natural.
Installing the baseboard at the riser: details
Fastening: finish nails diameter 1.4–1.6 mm, length 30–40 mm. The nail is driven through the horizontal part of the baseboard into the tread surface. Spacing — 200–250 mm: on one tread 800–1000 mm wide — 3–4 fastening points.
Glue on the riser (rear vertical plane of the baseboard): a small amount of PVA wood glue before installation. Double fixation — nail from below, glue from behind.
Angle cuts: at the side ends of the tread (where the tread meets the stringer or side panel) — the baseboard is cut flush with the tread end or a smooth 45° cut is made. Precise cutting — miter saw.
Baseboard around the perimeter of the bottom tread: finishing the base of the staircase
Why the bottom tread is a special element
The bottom tread is the visual 'anchor' of the entire staircase. It is the first thing seen when entering the hallway or hall, it connects the flight of stairs with the first-floor floor. And here — the maximum number of joints: tread with floor, stringer with floor, riser with floor.
A baseboard at a wooden staircasearound the perimeter of the bottom tread — is the 'frame' of the staircase base. It creates a visual separation of the 'staircase volume' from the floor plane and covers all technological gaps in the junction area.
Gaps at the bottom tread are typical:
-
Between the stringer and the floor: 5–15 mm due to uneven base
-
Between the riser of the first step and the floor: 3–8 mm during settling
-
Between the staircase side panel and the hallway wall: 5–20 mm
All these gaps are covered by the baseboard. With one continuous perimeter that wraps around the base of the staircase.
Typical configurations of the bottom step and their skirting solutions
Bottom step with a straight perimeter (rectangular plan, no protrusions): skirting runs along three sides — front and both sides. Joint with floor skirting — straight 90° or 45° miter cut.
Bottom step with a 'volute' (rounded nosing): front edge of the step is rounded. Skirting for the front edge — flexible profile with kerf cuts or flexible polyurethaneKPU-profile STAVROS. Side faces — standard rigid profile.
Bottom step with a 'baluster' protrusion (step protrudes beyond the stringer plane on both sides): skirting wraps around this protrusion with external corners. Two external 45° miter cuts — on a sliding compound miter saw.
Skirting height at the staircase base vs floor skirting height
Classic mistake: different skirting height at the staircase and floor skirting in the hallway. Visual result — the staircase skirting 'pocket' sticks out above or below the main room perimeter.
Rule: The baseboard at the foot of the stairs must be the same height as the floor baseboard in the entryway/hall area. They form a continuous horizontal line at the floor. Exception — if the staircase is specifically designed as a 'heavy' architectural feature with a baseboard taller than in adjacent rooms.
Profile selection for staircase skirting: triangular, 'sapozhok' (shoe), ogee
Triangular profile (corner): strict and modern
Triangular profile — isosceles wooden corner 20×20, 25×25, 30×30 mm. Face surface — flat diagonal facet. Right angles of the two legs adhere to the horizontal and vertical.
For staircase skirting, triangular corner is the optimal choice in:
-
Minimalist and loft interiors — clean geometry, no decorative elements
-
Dark oak staircases — triangular corner made of dark oak as a 'calligraphic' detail
-
Staircases on metal frame with wooden treads — corner continues the 'industrial' character of the structure
Wooden corners from STAVROS K-series— made from the same solid oak and beech, same P180 sanding. Compatible with skirting, architraves, and other elements of the same series.
Ogee: soft and traditional
Ogee — triangular profile with a concave face facet (arc). Creates a soft, rounded transition of the corner. For staircase skirting — in interiors:
-
Classical style with wooden staircase and turned balusters
-
Wooden house with log or timber walls — ogee 'in tone' with the overall character
-
Scandinavian style — small-sized ogee (leg 15–20 mm), white or natural wood finish
Ogee at the riser — traditional solution for classic wooden staircase: soft transition tread-riser without sharp corners, visually 'calms' the structure.
'Sapozhok' (shoe): where the tread 'sits' on a stringer
Wooden boot skirtingin staircase context — specific application. L-shaped 'sapozhok' profile is used where the bottom step 'stands' on a stringer or support beam with a gap that needs to be closed not only from the front but also from below (bottom edge of the riser or face of the bottom step).
This is an atypical use of 'sapozhok', but it occurs in open structures where the side edge of the bottom step has an undercut. 'Sapozhok' covers this undercut with a 'shelf' from below.
Ornamental classical profile at the staircase base
For staircases with rich classical decor — turned balusters, carved newel posts, ornamental handrailsSTAVROS K-series— skirting at the base of the flight must have corresponding 'weight'. Profiles K-009 (height 100–120 mm), K-018, K-066 — at the staircase base in a hall or living room with high ceilings — create architectural scale. Skirting here is not just a gap cover, but a decorative molding, the 'plinth' of the staircase volume.
Combining stair skirting with floor skirting
Key objective: seamless transition
One of the most complex details when finishing a staircase is joining the skirting at the base of the flight with the floor skirting of the hallway or foyer. This is the point where two skirtings meet at an angle that is rarely a standard 90° or 45°.
The angle between the frontal plane of the bottom step and the side wall of the hallway is often not 90°. The staircase may stand at an angle to the wall, or the bottom step has a 'volute' (a rounded nosing that protrudes beyond the main axis of the flight). Each of these cases requires an individual cut.
Three typical joining details
Detail 1: Straight joint (staircase perpendicular to the wall)
Floor skirting runs along the wall and butts against the side stringer of the staircase. The stringer is covered by the side skirting of the base. At the joint point, two skirtings meet at a right angle. Solution: straight cut of the ends of both skirtings (90°), both ends meet flush against the stringer.
Detail 2: Joint at an arbitrary angle (staircase at an angle to the wall)
The angle between the staircase and the wall is not 90°. The floor skirting approaches the stringer at an angle α. Solution: measure angle α with a protractor, divide it in half — this is the cut angle for each of the two skirtings. The floor skirting is cut at α/2, the side skirting of the stringer base is also cut at α/2. They meet at the joint point.
Detail 3: Floor skirting 'bypasses' the bottom step
The bottom step protrudes beyond the plane of the stringer towards the passage. The floor skirting runs along the wall, reaches the protrusion of the bottom step, makes an 'L-shaped' bypass, and continues further. Here, there are two external 45° angles. The element that 'wraps around' the protrusion is cut from a single piece (L-shaped cut) or assembled from three pieces with cuts.
Skirting height at the staircase and floor skirting: visual rhyme
Ideal solution: the same profile, same height, same wood species, same finish — for both the staircase and the floor. This creates a continuous horizontal band at floor level that runs around the entire perimeter of the room, including the staircase base.
Acceptable option: skirting at the staircase base is the same height as the floor skirting, but with a different profile — provided both profiles are from the same 'family' (same manufacturer, same series, same wood species). For example, K-006 on the floor and K-005 on the staircase — both from the STAVROS K-series oak, similar scale and 'language' of forms.
Unacceptable: different heights for floor skirting and staircase skirting (unless it is an intentional design technique).
Installation on complex step relief: cutting tricks
Overhanging step nosing: skirting at the riser considering the overhang
Most steps have a 'nosing' — the protrusion of the horizontal step plane beyond the vertical plane of the riser. Standard nosing overhang: 20–30 mm.
How this affects the skirting at the riser:
A cove or corner skirting is mounted in the corner formed by 'the rear part of the step — the upper end of the lower riser'. But the 'rear part of the step' is not the entire step plane; it is the part that lies behind the lower riser. The step nosing protrudes forward — into the area where there is no riser. Therefore, the skirting ends flush with the front plane of the riser — not with the step nosing.
The side end of the skirting at the riser (where it terminates at the stringer) — is cut at 90° and either hidden behind the stringer or neatly trimmed flush with the inner plane of the stringer.
Steps with a profiled nosing: overlay strip
A professional wooden staircase often has a profiled overlay nosing strip — a decorative strip covering the step end with a characteristic rounding or chamfer. This isa component for STAVROS staircases.
The skirting at the riser is installed after the overlay nosing. The side end of the skirting must neatly 'meet' the overlay nosing: the flat surface of the skirting end butts against the side face of the overlay nosing without a gap.
For a perfect fit: place the skirting at the installation location with a 5–10 mm overlap over the overlay nosing, mark the front edge of the nosing on the skirting with a pencil, remove it, cut exactly along the mark. The result — the skirting end sits exactly against the nosing without a gap.
Different step heights: how to align the skirting
In a wooden house with settling — the height of steps after structural settling may vary slightly: one step 180 mm, the neighboring one 182 mm. The skirting at the riser will then be installed at a slightly different height from the floor on each step.
For visual uniformity: the skirting is mounted relative to the horizontal plane of the step (the same distance from the rear part of the step downwards — 0 mm, flush), not relative to the floor. Then, on all steps, the skirting sits identically 'in place,' and the slight difference in step height does not create a 'jagged' line.
Wooden house with skirting: settling as an installation factor
Baseboards in a Wooden House— a separate topic when there is a staircase. In a new log or timber house, active shrinkage occurs for 2–4 years: vertical dimensions of structures decrease by 3–8% of the initial height. The stair flight during this time:
-
Slightly "settles" in height
-
Risers change their angle relative to the horizontal treads
-
Joints between tread and riser open up more
Solution for the baseboard at the riser in a new house:
-
Install baseboard — no earlier than 1.5–2 years after construction completion
-
Baseboard fastening — sliding (not rigid): a clip with a longitudinal groove allowing vertical movement of the baseboard together with the riser
-
Acrylic sealant in joints — elastic, works during structural movement
Stair baseboard coating: coordination with the wood of the treads
Staircase and baseboard: unified coating system
A wooden staircase in a residential house is an object with intensive mechanical impact. Treads experience impact loads, abrasion, vibration. The baseboard at the riser — lesser loads, but it is always perceived as part of the tread.
Requirement: stair baseboard coating = tread coating. This means:
-
The same varnish or oil
-
The same degree of matte finish
-
The same tint tone
Difference in coatings (baseboard matte, treads semi-gloss) — visual dissonance that is visible every time you look at the tread.
Parquet varnish for stair baseboard
Treads are coated with parquet (polyurethane or alkyd-urethane) varnish with increased hardness and wear resistance. The same varnish — on the baseboard.
Applying varnish to the baseboard is more convenient before installation: first coat on a horizontal stand, sanding with P400, second coat. After installation — final third coat over the entire mounted surface, including joints and ends at the stringer.
Oil for oak stair baseboard
Oak treads with oil — a growing popular option for modern houses. Osmo Polyx-Oil Hard Wax Oil (specifically for floors) — increased hardness of the wax layer, abrasion resistance.
On the baseboard at the riser — the same Osmo. Result: a continuous matte warm oak surface from the horizontal tread to the vertical riser.
Staircase in a wooden house: unified baseboard ensemble
Why the baseboard of the entire house should be coordinated
In a wooden house with a wooden staircase — the baseboard throughout all rooms and the baseboard at the staircase should be part of a unified ensemble. This is a key rule for the interior of a wooden house.
What is included in the ensemble:
-
Floor baseboard around the perimeter of all rooms
-
Baseboard at the base of the staircase
-
Baseboard at the risers
-
Door trims
-
Window reveals (if wooden)
All these elements are from the same series, same wood species, with the same finish. Then the house reads as a cohesive wooden interior, not as a set of separate renovations.
STAVROS Staircase Components and Elements— balusters, handrails, newel posts — from the same solid oak and beech asK-series baseboardsandCarved Mouldings. This is not a coincidence — it is the manufacturer's systematic approach, which allows the designer to get all the wooden elements of the house from a single source with a guarantee of compatibility.
Stair skirting and door skirting: joining in the hallway
The hallway is an area where several skirting systems meet: perimeter floor skirting, stair skirting, door casing skirting.
Wooden skirting at the doorin the hallway adjoins the door frame. The floor skirting is interrupted at the doorway. The stair skirting runs from the stairs and may 'meet' the floor skirting at one point.
Rule for managing the 'meeting point': all skirtings converging at one corner (e.g., the corner of the hallway where the stair flight, doorway, and side wall meet) are cut and joined before final fastening. First, a dry fit of all elements — ensure all ends meet correctly — then sequential installation.
FAQ: answers to popular questions about skirting for a wooden staircase
Is skirting needed at every riser or only at the bottom step?
Depends on the design and aesthetics. In a strict minimalist house — skirting only at the base of the flight (perimeter of the bottom step), none at the risers. In a classic house with rich finishes — a bead at each riser creates a rhythmic 'calligraphy' of the steps when viewed from below.
Which profile to choose for an oak staircase in a classic style?
A 20–25 mm cathetus bead from oak at each riser + K-009 or K-018 from the K-series at the perimeter of the bottom step. All from oak, under the same lacquer. This is a classic solution with architectural weight.
How to install skirting at the staircase in a new wooden house with settling?
Wait 1.5–2 years. Installation only with sliding fasteners (cleats with a longitudinal groove). Joints — acrylic sealant. Reinstallation may be required after 3–4 years when the house 'settles'.
How to fasten skirting to the step — with nails or glue?
Optimally: finish nails + wood glue. Glue only — risk of delamination due to wood movement. Nails only — without glue, the skirting 'clatters' when walking.
Is skirting needed under the staircase (space under the flight)?
If the space under the flight is paneled and accessible as a storage or niche — skirting along the perimeter of this space at the floor is needed. If the space is open (stringers are visible) — skirting is not needed there, it's not visible.
How to join stair skirting with parquet floor skirting in the hallway?
Same profile, same height, same wood species, same finish. At the joint point — cut both skirtings at 45° with end gluing. If the angles are non-standard — measure the angle with a protractor, divide in half, get the cutting angle.
About the company STAVROS
Components and elements for wooden staircases STAVROS— balusters, handrails, newel posts — from kiln-dried solid oak, beech, pine and other species, manufactured with CNC precision and hand-finished to the details. Each element is from natural wood with 8–10% moisture content, each part is geometrically precise for correct assembly.
To the staircase components —K-series baseboardsfrom the same solid wood (from K-034 at 230 rub./lm to K-104 at 6,060 rub./lm),Carved Mouldingsfor doorways in the hallway,KZ-series cornicesfor the ceiling area of the stair hall — the entire wooden interior from one source, in a unified material logic.
Warehouse in Moscow and St. Petersburg — shipment on the day of order. Samples: 180 rub. per set. Production for non-standard sizes subject to a production run. Loyalty program for designers and architects. Consultation: 8 (800) 555-46-75.
STAVROS — because a wooden staircase begins and ends in the details.