Article Contents:
- Selecting slat parameters: cross-section, wood species, treatment
- Finishing treatment: oil, wax, varnish, enamel
- Calculating material quantity: formulas and coefficients
- Calculating the frame: battens for mounting
- Preparing the base: leveling and marking
- Marking: precision as the basis of quality
- Mounting on a frame: classic technology
- Mounting with adhesive: a quick method for even walls
- Finishing treatment: sanding, painting, protection
- Concealing fasteners and joints
- Combining with furniture: creating a harmonious space
- Lighting: emphasizing relief
- Maintenance and Operation: Preserving Beauty
- Conclusion: from purchase to operation

Slatted wall cladding has transformed from a professional designer technique into an accessible solution for DIY implementation — materials have become more diverse, technologies clearer, tools more accessible.Buy oak wooden planks for wallsSlats can be purchased ready for installation — dried to 8-10% moisture content, planed on four faces with an accuracy of ±0.3 millimeters, sanded to smoothness, treated with protective compounds or prepared for finishing. The task boils down to three stages: correct calculation of material quantity considering gaps, trimming, and waste allowance; proper base preparation — leveling, reinforcement, marking; choosing a mounting method according to wall type, slat weight, desired durability. Calculation errors lead to material shortages, work stoppages, searching for additional purchases from the same batch — which is not always possible with small-scale production where wood shades vary from batch to batch. Mounting errors create unevenness, misalignments, peeling, destroying visual harmony and requiring rework. The goal of this article is a practical guide to avoid typical mistakes, perform installation correctly the first time, and achieve results indistinguishable from professional work.
Slatted cladding solves several tasks simultaneously. Decorative — vertical or horizontal lines create a graphic wall structure, rhythm, visual dynamics, transforming a plane into a three-dimensional interior element. Acoustic — the textured surface scatters sound, reduces echo, especially when installing sound-absorbing material behind the slats. Concealing — slats hide wall defects, unevenness, cracks, old finishes without the need for major leveling. Functional — utilities, electrical wiring are routed behind slats, sockets, switches, and fixtures are mounted. Zoning — a slatted partition divides space into zones without creating a solid wall, maintaining light and air permeability, visual connection. The combination of functions makesBuy wooden planks for decorationslatted cladding not only an aesthetic choice but also a practical solution for many interior tasks.


Selecting slat parameters: cross-section, wood species, treatment
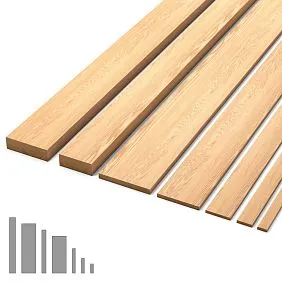
Slat width determines graphic scale — narrow slats 20-30 millimeters create a fine, frequent rhythm suitable for compact spaces, detailed compositions. Medium 40-50 millimeters — a universal size forming a balanced rhythm, readable from any distance, suitable for standard-sized living rooms. Wide 60-80 millimeters create a monumental, large rhythm characteristic of spacious rooms, commercial interiors where visual impact is important. Slat thickness 15-25 millimeters provides strength, reduces warping during humidity fluctuations, creates a tangible relief on the wall. Thin slats 8-12 millimeters are lighter, cheaper, but less stable, more prone to deformation.
Standard slat length 2000-2400 millimeters corresponds to wall height in most apartments 2600-2800 millimeters considering floor-to-ceiling gaps. For non-standard heights — lofts with ceilings 3.5-4 meters, private houses with ceilings 3-3.2 meters — custom cutting from long-length blanks or slat splicing in height is required, with the joint placed on a horizontal frame element concealed by a decorative overlay. Joints are noticeable with any treatment, so for visible areas, a solid slat for the entire height is preferred.
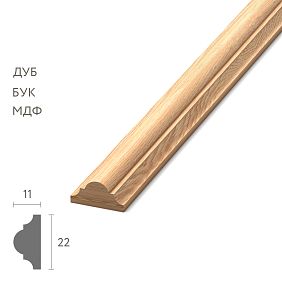
Wood species determines color, texture, hardness, cost. Pine — light yellowish-beige wood with pronounced annual rings, resin pockets, soft (hardness 1.6 on the Brinell scale), affordable at 80-150 rubles per linear meter. Beech — light pinkish-cream wood with fine uniform texture, hard (3.5), stable, 250-400 rubles per meter. Oak — light brown to dark brown wood with pronounced texture, very hard (3.7), durable, 400-700 rubles per meter. Ash — light grayish-beige wood with beautiful striped texture, hard (4.0), elastic, 350-600 rubles per meter.


Finishing treatment: oil, wax, varnish, enamel
Oil — a natural finish that absorbs into wood, emphasizes texture, preserves the tactile warmth of wood, breathability, and allows for local repair.Buy wooden skirting boardSlats with factory oil treatment are ready for installation — the oil has cured, the surface is not sticky or smudgy. Colored oil tints wood, changes shade from slight deepening of natural color to radical change — bleaching, darkening, graying. Oil-wax — a combined composition where oil nourishes wood, wax creates a protective film increasing moisture resistance and dirt repellency. Oil coating renewal is performed every 3-5 years by applying a fresh layer without removing the old one.
Varnish — a film finish creating a transparent or semi-transparent coating on the wood surface, providing high protection from moisture, scratches, and dirt. Matte varnish preserves the natural wood appearance without shine, suitable for modern interiors. Semi-matte adds a slight noble sheen. Glossy creates a mirror shine, emphasizes texture but highlights defects, characteristic of classic interiors. Varnish is more durable than oil — renewal every 7-10 years, but local repair is impossible — a damaged area requires complete re-sanding and re-varnishing of the element.
Enamel — an opaque finish completely hiding wood texture, creating a monochrome surface of any color. White enamel — a classic for Scandinavian, neoclassical, minimalist interiors where line purity without material specificity is important. Black creates graphic contrast characteristic of lofts, contemporary styles. Gray, beige, pastel shades coordinate with the overall interior color scheme. Enamel requires perfect surface preparation — sanding to P220, priming — any defect invisible under oil is critical under enamel.
Our factory also produces:


Calculating material quantity: formulas and coefficients
The number of slats for vertical layout is calculated by the formula: N = (L / (a + b)) + 1, where N — number of slats, L — wall width in millimeters, a — slat width in millimeters, b — gap width in millimeters. Example: wall width 3000 millimeters,Wooden planks for wall decorationslat width 40 millimeters, gap 30 millimeters. N = (3000 / (40 + 30)) + 1 = (3000 / 70) + 1 = 42.86 + 1 = 43.86, rounded to 44 slats. Wall height 2600 millimeters, standard slat length 2400 millimeters is sufficient with allowance. Total required: 44 slats 2400 millimeters long = 105.6 linear meters.
Gap irregularity adjustment — actual gap varies ±2-5 millimeters due to installation inaccuracies, wall unevenness, slat deformation. To compensate, add 2-3 slats to the calculated quantity. For the example above: 44 + 2 = 46 slats = 110.4 linear meters. Allowance for defects and cutting — 10-15 percent of the calculated quantity compensates for possible wood defects discovered during unpacking, cutting errors, installation damage. 110.4 × 1.12 = 123.6 linear meters. When purchasing slats 2.4 meters long: 123.6 / 2.4 = 51.5, rounded up to 52 slats.
For horizontal layout, the calculation is performed similarly, but N is the number of horizontal slat levels, L is the wall height. The number of linear meters is multiplied by the number of walls being clad with slats. For L-shaped cladding of two adjacent walls 3 and 4 meters wide: each wall is calculated separately, results are summed. For U-shaped cladding of three walls — similarly. Corner joints require a 45-degree miter cut — each corner 'consumes' 50-100 millimeters of slat length depending on width; this is accounted for in the allowance.
Get Consultation
Frame calculation: battens for mounting
Frame made of wooden battens — horizontal for vertical slat layout, vertical for horizontal — provides a rigid base for mounting, compensates for wall unevenness, creates a technological gap for ventilation, utility routing. Batten cross-section 40x40 or 50x50 millimeters provides strength with reasonable weight. Horizontal batten spacing 600-800 millimeters — optimum between structural strength and material economy. For a wall 2600 millimeters high, 4 horizontal battens are installed — at heights of 200, 900, 1700, 2400 millimeters from the floor.
Batten quantity for one wall 3 meters wide: 4 battens × 3 meters = 12 linear meters + 10 percent allowance = 13.2 meters. Batten attachment to wall — 6x60 millimeter hammer-in anchors for concrete and brick, 4.5x70 millimeter screws for wood and drywall with pre-drilling. Fastening spacing 500-700 millimeters — a 3-meter batten requires 5-6 fasteners. For 4 battens on a wall — 20-24 hammer-in anchors. Shims under battens — wooden wedges, plywood plates — compensate for wall unevenness, ensure batten contact, prevent sagging. A wall requires 10-20 shims depending on curvature.
Metal frame made of galvanized CD 60x27 millimeter profiles — an alternative to wood, lighter, not prone to warping, moisture-resistant. Profile attachment to wall via straight hangers allows leveling the frame plane independently of wall curvature. Profile spacing 600 millimeters. Slat attachment to metal frame — 3.5x25 millimeter metal screws with pre-drilling a hole in the slat to prevent wood splitting.
Base preparation: leveling and marking
Assess wall evenness with a 2-meter spirit level, straightedge, laser level. Apply level vertically and horizontally at several points, evaluate deviation from plane. Irregularities up to 10 millimeters over 2 meters are compensated by shims under the frame. Irregularities 10-30 millimeters require local leveling with filler, plaster in problem areas. Irregularities over 30 millimeters are critical for adhesive mounting — slats do not adhere, peel off; for frame mounting they are compensated by adjustable hangers, but create greater structure depth, 'consuming' room area.
Cleaning wall of old coatings, weak areas, dust, grease contamination is critical for adhesive bond or frame attachment reliability. Wallpaper is removed completely, residues washed off with water. Whitewash is scraped off with a putty knife, washed off with water. Paint is checked for strength — tape is stuck to the surface, ripped off sharply; if paint peels, complete removal is required. Dust is removed with a vacuum, damp cloth. Grease stains in kitchen are degreased with solvent, alcohol.
Priming with acrylic deep-penetration primer strengthens the surface, improves adhesion, reduces absorbency. Primer is applied with a roller or brush in one-two coats with intermediate drying 2-4 hours. For loose bases — old plaster, aerated concrete — a strengthening primer with higher binder concentration is used. For damp rooms — kitchens, bathrooms, hallways — antiseptic primer prevents mold, fungus development behind slat cladding where air circulation is limited.
Marking: accuracy as the foundation of quality
Marking starts with determining a baseline — vertical or horizontal, from which other elements are referenced. For vertical layout, baseline is a vertical line in the center of the wall or at the edge, drawn with a laser level, plumb line, long spirit level. Parallel lines are marked from the baseline with spacing equal to the sum of slat width and gap. For a wall 3000 millimeters wide, slats 40 millimeters, gap 30 millimeters, starting from center: baseline at 1500 millimeters from edge, next at 70 millimeter intervals — 1430, 1360, 1290... to the left and 1570, 1640, 1710... to the right.
Frame marking — horizontal lines for batten attachment, drawn with laser level or water level ensuring perfect horizontality along the entire wall length. First line at height 200 millimeters from floor, next at 700 millimeter intervals — 900, 1600, 2300 millimeters. On lines, anchor points are marked with 600 millimeter spacing. Holes are drilled with a hammer drill using a 6 millimeter bit to depth 50-60 millimeters, anchors are inserted.
Control check of marking before starting installation — measure distances from baseline to outermost lines, check symmetry for central layout, check horizontality and verticality with a level. A 5-10 millimeter error in marking, unnoticeable on paper, is critical in reality — last slats do not fit, gaps are uneven, composition is asymmetrical. Redoing marking takes 15-20 minutes, redoing installed cladding — a day's work and ruined material.
Mounting on frame: classic technology
Frame installation starts with attaching the bottom batten at height 200 millimeters from floor — this is a technological gap for air circulation, floor unevenness compensation, possibility of installing a baseboard. Batten is placed against the wall along the marked line, holes are drilled through it into the wall at 600 millimeter spacing, anchors are inserted, screws are tightened or hammer-in anchors are driven. Batten levelness is checked with a level — deviations are compensated with shims. Remaining horizontal battens are mounted similarly.
Slat attachment to frame is done with screws, nails, or clips — hidden fasteners, invisible after installation. Screws 3x30 or 3.5x35 millimeters are driven through the slat into the frame batten with pre-drilling a 2 millimeter hole to prevent splitting. Screw is positioned at the center of slat width, countersunk 2-3 millimeters below the surface. Head is concealed with a wooden plug, filled, sanded, or left visible as a decorative element in industrial interiors.
Finish nails 1.2x40 millimeters are driven at a 45-60 degree angle through the side edge of the slat into the frame — a hidden fastening method where fastener enters from the side, invisible from the front. Nail is driven with a hammer, final blows are made with a nail set — a metal rod that sinks the head below the surface. The next slat covers the nail entry point, making the fastener completely invisible. This method requires precision — error in angle leads to slat splitting, nail exiting on the front surface.
Mounting with adhesive: quick method for even walls
Adhesive mounting — direct gluing of slats to wall without a frame — saves space (structure is 40-50 millimeters thinner), time (no need to install battens), money (no cost for frame, fasteners). Applicable only for perfectly even walls — deviation no more than 2-3 millimeters over 2 meters. Irregularities create gaps under slats — slat presses in some points, pulls away in others, adhesive does not hold, slat peels off. Checking evenness with a straightedge or 2-meter level is mandatory before choosing this method.
Mounting adhesive like 'liquid nails' based on synthetic rubbers provides instant initial adhesion, allowing the slat to be released after 30-60 seconds. Full polymerization 24 hours. Adhesive is applied to the back of the slat in a zigzag line 5-8 millimeters wide with wave spacing 100-150 millimeters from a cartridge using a sealant gun. Adhesive consumption 50-70 milliliters per slat 2.4 meters long, a 310 milliliter cartridge for 4-5 slats.
Slat with applied adhesive is placed against the wall exactly according to marking, pressed along its entire length with palms, tapped with a rubber mallet for even adhesive distribution. Position is adjusted within 1-2 minutes, before adhesive sets. Next slat is installed with a gap controlled by inserting a spacer strip — a wooden batten with width equal to the gap. Strip is inserted between the installed and mounting slat, ensuring gap uniformity along the entire height. After adhesive sets, strip is removed, used for the next gap.
Temporary fixation with painter's tape — tape strips are stuck from the slat to the wall at an angle, holding the slat pressed while adhesive sets. After 2-4 hours tape is removed. Alternative — finish nails 1x30 millimeters, driven into the top and bottom of the slat at an angle, additionally fixing it until adhesive cures. After curing, nails can be left or removed, filling the holes.
Finishing: sanding, painting, protection
Sanding slat ends after cutting — a mandatory procedure, eliminating chips, burrs, roughness left by the saw. Use sandpaper P120-P180, wrapped around a wooden block to create an even surface. The end is sanded with strokes along the grain 10-15 times until smooth. Dust is removed with a brush or blowing. An unsanded end looks unfinished, absorbs more paint or oil, differs in color from the rest of the surface.
Painting or oil treatment are performed after installation for slats supplied without finish, or before installation for those supplied untreated, if a specific color is required. Painting after installation is easier — no need to worry about scratches, no need to store painted slats for drying. But it's harder to paint gaps between slats — brush or roller cannot reach the wall behind the slat. Painting before installation ensures even coating of all faces, including sides, but requires care during installation.
Oil is applied with a brush or cloth pad along the grain in a thin, even layer. Excess is removed after 10-15 minutes with a dry cloth. First layer absorbs in 4-6 hours, second layer is applied after 6-12 hours. Two layers provide sufficient protection and color saturation. Enamel or varnish are applied with a brush or mini-roller in two coats with intermediate drying 6-12 hours and sanding with P220 to remove raised wood fibers. Second coat creates an even, dense coating without gaps.
Concealing fasteners and joints
Filling screw holes, chips, cracks is done with acrylic wood filler matching the wood species or finish coating. Filler is applied with a rubber spatula, packed into the hole, leveled flush with the surface. Excess is removed immediately with a damp cloth. After drying 2-4 hours, the filled area is sanded with P180-P220 until smooth, painted or treated with oil. Quality filler is barely noticeable, cheap filler stands out as a contrasting spot.
Wooden plugs — cylindrical inserts 6-8 millimeters in diameter from the same wood species — are installed in countersunk screw holes for maximum concealment. Hole is drilled with a plug cutter to depth 5-8 millimeters, creating a neat cylindrical recess. Plug is cut with a plug cutter from a board of the same species, coated with glue, inserted into the hole, lightly tapped to sit flush with the surface. After glue cures, protruding part is cut off with a chisel, sanded. Plug grain blends with slat grain.
Slat lengthwise joints — when wall height exceeds slat length, extension is required — are made on a horizontal frame batten with a 2-3 millimeter gap or flush with a 90-degree cut. The joint is always noticeable, so it is positioned either symmetrically on all slats at the same height, forming a horizontal line as a design technique, or asymmetrically with staggering 300-500 millimeters, where joints are less noticeable. Concealing the joint with a decorative horizontal strip, overlapping the joint from the outside, turns a structural necessity into a decorative element.
Combination with furniture: creating a harmonious space
Modern FurnitureSTAVROS is designed with slatted interiors in mind — the linear fronts of dressers, shelves, and cabinets repeat the rhythm of the slats on the walls, creating a visual rhyme. A dresser with fronts made of 40-millimeter wide horizontal planks with 20-millimeter gaps echoes the vertical slats of the same width on the wall behind it — the unity of material with contrasting orientation creates coherence without monotony. A shelving unit with open shelves on vertical posts made of the same solid wood species as the slats creates material unity.
Color coordination is critical — furniture and slats treated with the same oil or painted with the same paint are perceived as a single composition. Natural beech on slats and natural beech on furniture create a warm monochrome palette. Whitewashed oak on slats and whitewashed oak on furniture form a light Scandinavian space. Contrast is acceptable but controlled — dark oak slats and light ash furniture work through contrast, but the unity of the wood species (hardwood) preserves the visual connection.
Furniture arrangement takes slatted cladding into account — large items, cabinets, shelving units, beds with headboards are placed against a slatted wall, visually connecting with it. Compact items — tables, chairs, armchairs — are placed on free walls, creating a balance of density and emptiness. A slatted wall should not be overloaded with furniture — 40-60 percent of its area should remain open, allowing the slat pattern to be readable and create a visual effect. A slatted wall completely covered by furniture loses its purpose — the cost of cladding is not justified if it is invisible.
Lighting: emphasizing relief
Side lighting — wall sconces installed to the left or right of the slatted wall, floor lamps placed at the edge — creates pronounced shadows in the gaps between the slats, emphasizes the relief, and enhances the graphic quality. Light glides along the surface of the slats, reflects off the protruding edges, and is absorbed in the recesses. This is the most expressive lighting option for slatted cladding, especially effective in the evening when a single side light source turns the wall into a chiaroscuro composition.
Hidden backlighting behind the slats — an LED strip installed vertically behind the slats in the gaps, directed along the wall — creates a glow that breaks through the gaps as vertical stripes of light. The effect is especially expressive on a contrasting background — a dark wall, light slats, light between them. Backlight installation is performed before mounting the slats — the strip is glued to the wall in vertical stripes in the gap locations, wires are routed behind the frame to a power supply hidden behind furniture or in a niche.
Spot lighting — LED spotlights, recessed into the ceiling opposite the slatted wall, directed at it at a 30-45 degree angle — creates accent lighting, highlighting the slatted wall as the main decorative element of the room. Adjustable spotlights allow changing the light direction, experimenting with effects. Dimmable sources provide brightness adjustment — from full for task lighting to minimal for an intimate atmosphere in the evening.
Care and Maintenance: Preserving Beauty
Dry cleaning with a soft brush, microfiber cloth, or vacuum with a soft brush attachment removes dust settled on the slats and in the gaps. Frequency: once a week for living rooms, every 2-3 days for kitchens, hallways where there is more dust and dirt. Movements along the slats, not across — the brush or cloth slides along, not catching on the gaps. Vacuum on minimum power — strong suction can damage thin slats, deform them.
Wet cleaning with a slightly damp cloth without excess water is acceptable for varnished and enamel-painted slats. Oil finish is sensitive to water — wiping with a barely damp cloth without soaking is acceptable. Cleaning agents are not used — they dissolve oil, varnish, enamel, leave streaks, change color. To remove grease stains in the kitchen — spot treatment with a special wood cleaner applied to a cloth, then wiping with a damp cloth, drying.
Refinishing for oiled slats is performed every 3-5 years by applying a fresh coat of oil after cleaning the surface. Slats are wiped with a clean cloth moistened with mineral spirits to remove dust, grease, old oxidized oil. After drying for 1-2 hours, a fresh thin coat of oil is applied, excess is removed after 10-15 minutes. The surface restores its original appearance, color saturation, protective properties. Varnished and painted slats do not require refinishing for decades with careful use.
Conclusion: from purchase to operation
Buy oak wooden planks for wallsand install it yourself — a realistic task for a person without construction experience, but with care, willingness to follow instructions, and a minimal set of tools. Correct quantity calculation with a 10-15 percent margin prevents material shortage. Quality base preparation — leveling, priming, precise marking — determines 70 percent of success. Choosing the installation method according to wall evenness — frame for uneven, adhesive for even — ensures durability. Final treatment with oil, varnish, or enamel protects the wood, emphasizes the texture, coordinates with the interior.
STAVROS offers a full range ofof wooden slats for wall decoration— pine, beech, oak, ash with cross-sections from 20x40 to 60x80 millimeters, length 2-2.4 meters. Kiln drying to 8-10 percent moisture, four-sided planing with ±0.3 millimeter accuracy, P180 sanding ensure readiness for installation. Oil treatment, tinting, painting are performed at the factory upon request. Specialist consultations on quantity calculation, installation method selection, selection of related materials — frame, fasteners, adhesive, finishing compounds — are free.
Modern FurnitureSTAVROS with linear fronts, slatted elements harmonizes with slatted walls, creating a coordinated space. Delivery to Moscow, St. Petersburg, Russia ensures accessibility for any region. Create interiors where the pattern of wooden slats structures the space, the materiality of solid wood creates tactile warmth, DIY installation fills you with pride in the result.Buy wooden planks for decorationin STAVROS — get quality material, professional support, confidence in the result from calculation to project completion.