Article Contents:
- What is a wooden cornice and why is it needed
- Ceiling transition: softness or contrast
- Wall cornice: vertical composition
- Wooden cornice profiles: from simplicity to complexity
- Simple geometric profiles: minimalism in action
- Classic multi-level profiles: architectural tradition
- Filé: soft transition without protrusions
- Bead: decorative expressiveness
- Wood species for cornices: selection based on purpose
- Oak: standard of strength and status
- Beech: uniformity and universality
- Ash: contrasting texture
- Spruce: accessibility and lightness
- Style of wooden cornices: alignment with era and direction
- Classic: order traditions and symmetry
- Neoclassicism: modern interpretation of traditions
- Modern style: minimalism and geometry
- Provence and country: naturalness and texture
- Sizes and proportions: calculation based on room height
- Empirical rules for selecting height
- Cornice overhang and play of light and shadow
- Cornice thickness: practicality and visual lightness
- Installation of wooden cornices: technology and nuances
- Base preparation: key to reliability
- Marking and cutting: precision to the millimeter
- Mounting methods: glue, self-tapping screws, combination
- Joining elements: invisible connections
- Final finishing: concealing fasteners and protection
- Combination with Other Interior Elements
- Crown and baseboard: vertical composition axis
- Crown and casings: door and window frames
- Crown and ceiling molding: decorative integrity
- Care and maintenance of wooden crowns
- Regular dust cleaning
- Humidity and temperature control
- Updating protective coating
- Repair of damage
- Frequently asked questions about wooden crowns
- Which wood species is better for a crown?
- Can wooden crowns be installed in bathrooms or kitchens?
- How to choose crown size based on ceiling height?
- Should the crown match wall color or contrast?
- Can I install a wooden crown myself?
- How often should the crown's finish be refreshed?
- What to do if the crown has peeled off the wall?
- Can a wooden crown be painted?
- Why is a wooden crown better than polyurethane?
- How much does a wooden crown cost?
- Conclusion: an architectural detail that creates style

Wooden cornicesIt is not just a decorative element at the junction of wall and ceiling, but an architectural tool that shapes the perception of space, sets the interior style, and creates compositional completeness. A properly selected profile transforms a standard room into a harmonious space where every detail contributes to the overall concept. Correct installation ensures the crown will last for decades without deformation or loss of aesthetics. Choosing between a ceiling transition and a wall crown, understanding the differences between classic and neoclassical styles, knowing how to work with molding — all of this determines the success of the project.


What is a wooden crown and why is it needed
In modern interior design, there is confusion about terminology: 'crown' refers to both ceiling molding and a structure for hanging curtains. Historically, a crown is a horizontal projecting element that finishes the wall at the top, creating a transition to the ceiling. It is an architectural term originating from classical order systems, where the crown crowned the entablature of a column.
A wooden ceiling crown performs several functions simultaneously. Visually, it masks the junction between wall and ceiling, hiding irregularities, gaps, and traces of construction work. Structurally, it creates compositional completeness, frames the space, making it cohesive. Psychologically, it influences the perception of room height: a heavy crown with a large overhang 'lowers' the ceiling, making the room cozier; a thin and light one visually raises the space.


Ceiling transition: softness or contrast
Ceiling transition is the area where the vertical plane of the wall meets the horizontal plane of the ceiling. Without a crown, this transition is sharp and geometrically rigid.Buy wooden crownmeans to create a smooth or accentuated transition, depending on the profile.
A smooth transition is achieved with crowns featuring curved profiles — gables, fillets, concave sections. Such a crown visually softens the angle, creating a seamless transition from one plane to another. This is characteristic of classical, traditional interiors, where softness of forms is important.
A contrasting transition is emphasized by crowns with sharp edges, right angles, protruding elements. Modern style often uses exactly such solutions: the crown does not mask the junction but accentuates it, making it an architectural element. A rectangular profile installed flat or at an angle creates a clear horizontal line that organizes the space.
The choice between softness and contrast is determined by the overall interior style. Classical spaces require smoothness, while modern interiors value geometric clarity. However, there are intermediate options — neoclassical interiors, where classical proportions are combined with modern minimalism.
Our factory also produces:


Wall crown: vertical composition
In addition to ceiling cornices, there are wall cornices — horizontal profiled strips installed on the wall at the level of one-third or half the room's height. A wall cornice divides the vertical wall surface into zones, creating horizontal segmentation that affects the perception of proportions.
Historically, wall cornices were used to protect the lower part of the wall from mechanical damage — at the level of chair backs. Today, this is purely a decorative element that adds rhythm to large vertical surfaces. A wall cornice is especially effective in rooms with high ceilings — from 3.5 meters and above, where a bare wall appears empty and monotonous.
The profile of wall cornices is usually simpler than ceiling cornices — less height, less overhang, less detailing. This is because a wall cornice is viewed up close and at eye level, where excessive complexity overwhelms perception. Simple rectangular, semi-circular, or slightly profiled strips are the optimal choice.
The combination of ceiling and wall cornices creates a classic three-part wall composition: base (lower third), body (middle section), cornice (upper section). This structure originated in classical architecture and is still considered the standard of proportionality.
Get Consultation
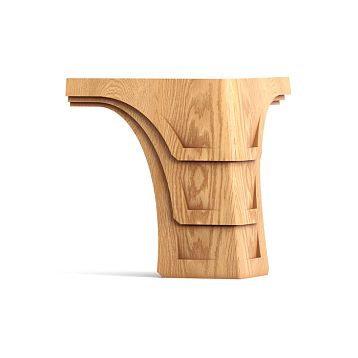
Wooden cornice profiles: from simplicity to complexity
The profile of a cornice is its cross-section, the shape that repeats along the entire length of the element. The profile determines how the cornice casts shadows, interacts with light, and is perceived from different viewing angles. There are hundreds of profile variations, but they are grouped into several categories by complexity.
Simple geometric profiles: minimalism in action
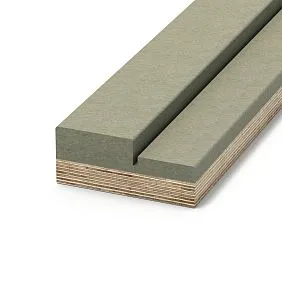
A rectangular profile — a strip with a rectangular cross-section, without rounding or bevels. This is the simplest and most universal option. Dimensions vary from compact 30×40 mm to massive 60×100 mm. A rectangular cornice is mounted flat against the wall (creating a protruding ledge) or installed on edge (creating a vertical strip).
The advantage of a rectangular profile is ease of manufacturing and installation, low cost, and universality. It suits modern interiors, Scandinavian style, and minimalism. The disadvantage is the lack of decorative appeal; its visual simplicity appears inappropriate in classical interiors.
A beveled profile is obtained by cutting one or several edges of a rectangular strip at an angle. A trapezoidal cross-section creates dynamism and direction. If the top edge is wider than the bottom, the cornice visually 'sticks' to the ceiling. If the bottom is wider, the cornice 'overhangs,' creating a canopy.
A semi-circular profile — a strip with one rounded edge, resembling a quarter of a cylinder. Such a profile is softer than rectangular, creating a smooth transition while remaining minimalist. Semi-circular cornices are popular in neoclassicism, where restraint is valued but not primitive forms.
ForBuy polyurethane wall moldingsSimple profiles are also relevant, but wood provides tactility and warmth that polyurethane lacks.
Classic multi-level profiles: architectural tradition
A classical cornice is a complex multi-level construction with several protrusions and recesses, creating a relief pattern. Such profiles are based on the canons of classical architecture — Doric, Ionic, Corinthian orders. Each element of the profile has a name and function.
A typical classical cornice includes:
-
The capping bead (astylus) — a convex rounded element at the top
-
The shelf (strip) — a horizontal plane creating a protrusion
-
The drip (gutta) — a hanging decorative element
-
The concave transition — a curved transition between levels
-
Grooves — vertical channels creating rhythm
The height of classical cornices is significant — from 90 to 150 mm, the overhang (distance from the wall to the edge of the cornice) is proportional to the height and measures 60–120 mm. Such a cornice visually appears massive, creating an impression of solidity and rich decoration.
Multi-level profiles require high precision in manufacturing. Each transition, each curve must be executed perfectly; otherwise, when elements are joined, steps, gaps, and mismatched patterns will form. Manufacturing uses CNC routers or manual routers with profiled cutters.
Classic cornices harmonize withBalusters for staircasethe same style, creating a unified decorative language in the interior.
Gable: soft transition without protrusions
A gable (gallet) is a cornice with a concave profile that smoothly connects the wall and ceiling without a protruding overhang. The shape of a gable is part of a circle or ellipse that fits into the right angle between planes. The radius of the gable varies from 20 to 100 mm depending on the room's scale.
A gable creates the softest, least noticeable transition between wall and ceiling. It is the optimal choice for rooms with low ceilings — up to 2.5 meters, where a massive protruding cornice visually 'presses' on the space. The concave profile visually widens the angle, making it feel more airy.
In a classic French interior, a gable is often used not as a standalone element, but as the lower part of a more complex cornice. Above the gable are protruding elements — shelves, beads — creating a rich composition. However, in minimalist and Scandinavian interiors, a gable is used solo.
Installing a gable requires precise miter cuts. Since the profile is concave, standard 45° angles are unsuitable — precise calculation must be made considering the radius of curvature. Special miter saws or circular saws with adjustable bevel angles are used.
Bead: decorative expressiveness
The term 'bагет' in the context of interior cornices refers to a profile with pronounced decorative elements — carving, ornamentation, complex relief. Unlike a simple cornice, a bагет carries both structural and artistic load.
Wooden bагет can be carved — with plant motifs, geometric ornaments, historical patterns. Carving is done manually or on CNC machines using digital models. The carving depth ranges from 3 to 15 mm, creating expressive light and shadow play.
Bагет is used in high-style interiors — baroque, rococo, neoclassical — where visual opulence and detail are important. It requires a suitable environment: if walls are smooth and neutral, and furniture is minimalist, carved bагет looks out of place. But in an interior with ceiling moldings,— everything must correspond to the chosen era.on the walls, with classical furniture — bагет becomes an organic part of the composition.
The cost of wooden bагет is high — 3 to 5 times more expensive than a simple cornice. This is due to the complexity of manufacturing, material consumption, and manual labor. However, the effect created by quality bагет justifies the cost in interiors of the appropriate level.
Wood species for cornices: selection based on purpose
The choice of wood species affects the strength, stability, appearance, and cost of the cornice. Different species have varying density, texture, color, and behavior under humidity changes.
Oak: the standard of strength and status
Oak is a classic choice for premium-grade cornices. Density around 720 kg/m³ ensures high strength and stability. Oak cornices practically do not deform under humidity and temperature fluctuations, maintaining their geometry for decades.
Oak's texture is expressive: annual rings are clearly visible, large pores create a distinctive pattern. After toning or staining, the relief of the texture intensifies — pores remain dark, dense wood lightens, creating contrast. This allows achieving various visual effects.
The natural color of oak ranges from light yellow to brownish-gray. Toning expands the palette: from bleached oak (almost white with a grayish tint) to stained oak (dark brown, almost black). Forwooden planks on the walloak is also an optimal choice.
Oak's drawback is its high cost. An oak cornice costs 2 to 3 times more than a pine one. However, for premium and luxury interiors, oak is a standard quality choice.
Beech: uniformity and versatility
Beech combines sufficient strength (density around 680 kg/m³) with exceptional structural uniformity. Small pores and indistinct annual rings create a nearly smooth texture. This is ideal for complex profiled cornices, where line purity is important.
Carving on beech surfaces results in clear, chip-free, and scratch-free edges. Milling produces smooth curved surfaces. Sanding beech is simple — the wood quickly levels out, achieving ideal smoothness.
Beech's color is light, with pink or yellowish tints. It is neutral and harmonizes well with any interior color schemes. Beech is easily toned, accepting any color — from white to wenge. After toning, uniformity is preserved — no distinct stripes or spots appear.
Beech's drawback is its sensitivity to humidity. Under sharp humidity changes, beech products may deform. Therefore, beech cornices are not recommended for rooms with unstable climates — bathrooms, unheated cottages, damp basements.
Ash: contrasting texture
Ash is close to oak in strength (density around 700 kg/m³), but features a more contrasting texture. Light sapwood and dark heartwood create a striped pattern, which is accentuated by lacquering or oiling. This makes ash cornices a striking interior element.
Ash wood is elastic and tough, resistant to cracking. Ash cornices hold their shape well, do not warp. Processing requires sharp tools due to the toughness of fibers, but the result is high quality.
Ash's color is light, grayish-white with yellow or pink stripes. Toning ash accentuates its striped pattern, creating a striking design. For modern interiors where natural wood texture is valued, ash is the optimal choice.
Ash cornices are more expensive than beech but cheaper than oak. This is a middle-ground option for those seeking quality without premium pricing.
Pine: accessibility and lightness
Pine is the most accessible wood species for cornices. Density around 520 kg/m³ makes pine lightweight and easy to process. With proper treatment, pine is sufficiently strong for use in cornices.
Pine's texture is pronounced: alternating light and dark annual rings, resin canals, knots. This creates a distinctive 'rustic' look, suitable for country, Provence, and rustic styles. For classic interiors, pine's texture is too rough.
Pine's color ranges from light yellow to reddish. Over time, pine darkens, acquiring a honey tone. Toning pine is limited — resinous areas absorb stain differently than dense wood, creating blotching. For even staining, pine must be pre-treated to remove resin.
Pine's drawback is low stability. Under humidity changes, pine cornices deform more than oak or beech. Pine is prone to cracking, especially if not properly dried.
Pine cornices are a choice for budget projects, garden furniture, or temporary solutions. For permanent interiors, it's better to choose more stable wood species.
Stylistic aspects of wooden cornices: alignment with era and direction
Each interior style has its own canons of proportions, forms, and decoration. The cornice must conform to these canons; otherwise, a stylistic dissonance arises.
Classic: order traditions and symmetry
The classic style is based on ancient architectural traditions — the order systems of ancient Greece and Rome. Classicism features multi-level profiles, symmetry, proportionality, and the use of canonical elements — moldings, brackets, and fluting.
The height of classical cornices is significant — from 90 to 150 mm depending on ceiling height. For ceilings 2.7–3.0 meters high, the optimal height is 90–110 mm; for 3.0–3.5 meters — 110–130 mm; for higher rooms — 130–150 mm and more. The overhang is proportional to the height, usually 70–100% of it.
The profile of a classical cornice includes three to five levels, creating a rich play of light and shadow. The upper level — a crowning molding or bracket; the middle levels — transitional projections and recesses; the lower level — a finishing element that creates a smooth transition to the wall.
The color of classical cornices — usually white or matching the wall color. A white cornice on colored walls creates a clear frame, emphasizing architectural character. A cornice in the wall color is less contrasting, creating unity of planes. Gilding or patination is used in luxurious interiors — Baroque, Empire.
For classical interiorsWall moldingon the ceiling, complements wooden cornices, creating a cohesive composition.
Neoclassicism: modern interpretation of traditions
Neoclassicism preserves classical proportions and principles but simplifies forms and reduces ornamentation. A neoclassical cornice has a multi-level profile but with fewer details, smoother transitions, and restrained plasticity.
The height of neoclassical cornices is moderate — 60–90 mm, less than classical ones. The overhang is proportional but not excessive — 40–70 mm. The profile is two- or three-level, without fine details. Emphasis is on clean lines, craftsmanship quality, and noble material.
The color of neoclassical cornices is usually white, light gray, or cream. Occasionally, natural wood color with transparent lacquer or oil is used. Gilding is practically not applied — neoclassicism avoids excessive luxury.
Neoclassicism is the optimal choice for modern interiors where connection to traditions is important without literal copying. A neoclassical cornice looks noble but does not overload the space.
Modern style: minimalism and geometry
Modern style — minimalism, Scandinavian direction, high-tech — requires simple, restrained cornices. Rectangular or trapezoidal profiles, sharp edges, no ornamentation. Dimensions are moderate: height 40–70 mm, overhang 30–50 mm.
Emphasis is placed on material quality and precision of execution. Wood grain becomes the main decorative element. Natural color with transparent finish highlights authenticity. Painted cornices in modern style are usually white, black, or gray — neutral colors.
Modern cornices are often asymmetrical. The profile may be sloped, with one edge longer than the other, creating dynamism. Or the cornice is installed not strictly horizontally, but with a slight incline.
For modern interiors whereWooden boards in interiorwooden cornices become part of a unified system of horizontal and vertical elements.
Provence and country: naturalness and texture
Provence and country styles value natural materials, visible texture, simple forms without excessive ornamentation. Cornices have simple profiles with smooth rounded edges and gentle transitions. Height 50–80 mm, moderate overhang.
The wood species matters. Pine, with its pronounced texture and knots, is ideal for country style. Oak or ash with natural color suits Provence. Minimal processing — transparent oil or matte lacquer, highlighting the texture.
The color of Provence cornices — whitewashed, light gray, beige, with a worn or patina effect. This creates an impression of age and lived-in time. Country style features natural wood tones without tinting.
Provence and country cornices pair well with ceiling beams, creating a unified composition of natural materials.
Dimensions and proportions: calculation based on room height
The cornice must be proportional to the room. An overly large cornice in a low room feels heavy and creates a sense of confinement. A small cornice in a high room becomes insignificant and visually unimportant.
Empirical rules for selecting height
For ceilings 2.5–2.7 meters high, cornices 40–60 mm high are optimal. This creates a neat frame without excessive bulk. The overhang 30–50 mm is proportional to the height.
For ceilings 2.7–3.0 meters — cornices 60–90 mm high, overhang 40–70 mm. This is the standard height for most residential rooms. Such a cornice is noticeable, adds architectural character, but does not overload.
For ceilings 3.0–3.5 meters — cornices 90–120 mm high, overhang 60–90 mm. High ceilings require more substantial cornices to maintain proportionality. A small cornice in a high room looks like a narrow strip.
For ceilings higher than 3.5 meters — cornices at least 120 mm in height, overhang proportional. In historical buildings with 4-5 meter ceilings, cornices can reach 200-250 mm in height.
These values are approximate. The exact size depends on interior style, profile complexity, and overall composition. Classical interiors require more substantial cornices, while modern interiors favor more restrained ones.
Overhang and play of light and shadow
Overhang — the distance from the wall to the protruding edge of the cornice. The greater the overhang, the deeper the shadow beneath the cornice, the more pronounced the relief. A large overhang visually separates the ceiling from the wall, creating a clear boundary.
Small overhang (20-30 mm) creates a delicate framing, casting almost no shadows. This suits modern minimalist interiors where lightness is important.
Medium overhang (40-60 mm) — a universal option. Creates a noticeable but not excessive shadow, emphasizes the cornice without making it dominant.
Large overhang (70-100 mm and more) — for classical and neoclassical interiors. Deep shadow accentuates architectural character, creating expressive play of light. Hidden lighting under the cornice can create an impressive ceiling glow.
Overhang is limited by structural constraints. If it exceeds twice the cornice height, there is a risk of sagging, especially over long spans between mounting points. For large overhangs, use composite cornices made of multiple elements or reinforce with internal brackets.
Cornice thickness: practicality and visual lightness
Thickness — the dimension of the cornice perpendicular to the wall. For simple rectangular cornices, thickness equals the plank width. For complex profiles — it is the maximum cross-sectional dimension.
Minimum thickness is determined by strength. For 2.5-meter-long cornices mounted at three points, minimum thickness is 20 mm for softwoods (pine, spruce), 18 mm for hardwoods (oak, beech, ash). Thinner cornices sag under their own weight.
Optimal thickness for most interiors — 20-30 mm. This ensures sufficient strength while maintaining visual lightness. The cornice does not appear as a bulky beam, yet it does not look fragile or thin.
For heavy classical cornices, thickness can reach 40-50 mm. This creates an impression of monumentality and solidity, matching the stylistic intent.
Installing wooden cornices: technology and nuances
Proper installation ensures the cornice will last decades without detaching or deforming. Installation errors lead to cracks, gaps, peeling, and sagging.
Preparing the base: key to reliability
Cornices are mounted either to the wall under the ceiling or directly to the ceiling, depending on construction. The base must be strong, flat, dry, and clean. Irregularities exceeding 3 mm per meter will create gaps between the cornice and base, reducing contact area and mounting strength.
If the wall is uneven, it must be leveled in the cornice mounting zone. Use putty or plaster to create a flat strip equal to the cornice width plus 20 mm. After drying, sand and prime the surface.
For heavy cornices — massive classical profiles made of oak — a bracket may be required: a wooden beam 40×40 or 50×50 mm, attached to the wall with dowels or anchors. The bracket creates a strong base to which the cornice is screwed with self-tapping screws.
Before installation, the cornice must be acclimated — left in the room for 2-3 days. The wood will absorb or release moisture, reaching equilibrium humidity. If installed immediately after delivery, it may deform after installation.
Marking and cutting: precision to the millimeter
Start by determining the cornice installation height. Typically, its bottom edge is placed 10-30 mm below the ceiling, creating clearance for unevenness compensation. Mark a horizontal line around the room using a laser or water level.
Measure wall lengths, subtracting 5 mm from each end to compensate for corner irregularities. Cut cornices to required length using a miter saw with a fine-toothed blade. The cut must be strictly perpendicular, without chipping.
Cut corners at 45° for butt joints. Use a miter box or miter saw with adjustable angle. It is crucial that both mating parts have identical angles; otherwise, a gap will form at the joint. After cutting, sand the ends with fine-grit sandpaper to remove burrs.
For cornices with complex profiles, corner cutting requires calculation. If the profile is symmetrical, cut at 45° along the centerline. If asymmetrical — calculation is individual.
Mounting methods: glue, screws, combination
Glue mounting — the cornice is glued to the base using carpentry glue, polyurethane glue, or liquid nails. Apply glue in a 10-15 mm wide strip to the back of the cornice, press the cornice against the wall, and hold until set.
Advantage — no visible fasteners, clean surface. Disadvantage — inability to remove without damage, dependence on base quality. On loose, crumbling walls, glue does not hold.
Mechanical mounting with screws — drill holes in the cornice equal to screw diameter, spaced 40-60 cm apart. Position the cornice against the wall, mark screw points on the wall through the holes, drill holes for dowels, and screw in the screws.
Advantage — reliability, possibility of removal, independence from base type. Disadvantage — visible screw heads, which must be masked with plugs or putty.
Combined mounting — adhesive plus screws — is the most reliable. The adhesive creates a continuous bond, while screws reinforce the connection and hold the cornice against the wall during the adhesive's setting time. After one day, when the adhesive has polymerized, the screws can be removed, the holes filled, or left in place for additional security.
For heavy cornices,Decorative brackets for shelvesthey can also be used as mounting elements, providing additional support.
Jointing elements: invisible connections
Standard cornice length is 2.4–2.6 meters. For longer walls, multiple elements must be joined. The joint is a weak point where gaps, pattern misalignment, and height discrepancies may occur.
Straight joint — the ends of the cornices are cut at 90° and butted together. The joint is coated with adhesive and pressed tightly. After drying, the joint is sanded, spackled, and painted. A straight joint is simple but visible — the joint line is noticeable.
Beveled joint — the ends are cut at a 30–45° angle and joined with offset. A beveled joint is less noticeable than a straight joint but requires precise cutting. It is used for cornices with simple profiles.
Hidden joint — a tongue is routed into one end of the cornice, and a groove is routed into the other. The tongue fits into the groove, creating a strong connection. The joint is glued and clamped until dry. A hidden joint is invisible, strong, but requires precise processing.
Corner joints (90°) — the most complex. The ends are cut at 45° and joined at the corner. It is crucial that the angles are precisely 45° and the end faces are strictly vertical. Even the slightest deviation will create a gap. After joining, the corner is reinforced from the back with a wooden strip glued on or a metal angle bracket screwed on.
Final finishing: concealing fasteners and protection
After installation, visible screw heads are concealed. Use wooden plugs — round inserts that are glued into holes and sanded flush. Alternatively, apply acrylic spackle to wood, matching the cornice’s color.
Even perfectly fitted joints often require finishing touches. Small gaps are filled with acrylic sealant, which is painted after drying. Larger gaps are spackled and reinforced with serpentine.
If the cornice is made of natural wood without finish, it is coated with a protective finish — oil, wax, or varnish. Oil enhances the texture and creates a matte surface. Varnish provides a protective film, available in matte, satin, or glossy finishes. Apply 2–3 coats with intermediate sanding.
Painted cornices often require touch-ups after installation — at joints, screw heads, or accidental scratches. Use the same paint as the base coat, applied with a brush in two coats.
Combination with other interior elements
A wooden cornice does not exist in isolation — it is part of an interior composition that includesWooden baseboarddoor and window casings, wall panels, and furniture. Harmonious combinations create unity; dissonance disrupts perception.
Cornice and baseboard: vertical axis of composition
Cornice and baseboard — two horizontal elements framing the wall above and below. They must match each other in style, proportions, and color. Mismatch creates visual chaos.
In classical interiors, cornice and baseboard have similar profiles — multi-level with moldings and rounded elements. Proportions differ: baseboard is usually lower than cornice (baseboard height 60–100 mm, cornice 90–150 mm), but the profile echoes.
In modern interiors, cornice and baseboard are simple, rectangular, or beveled. Clean lines and precise execution are essential. Color is often white — a white cornice and white baseboard on colored walls create a clear frame.
The wood species of the cornice and baseboard may match or differ. Matching creates material unity; differing creates contrast. For example, an oak baseboard and beech cornice look harmonious if both have natural finishes.
Cornice and casings: door and window frames
Door and window casings — vertical framing elements. They must also match the cornice stylistically. In classical interiors, casings have profiled shapes; in modern interiors, they are simple rectangular forms.
Casing and cornice colors often match. White casings and white cornice — a classic combination. Casings in wood color and cornice in wood color — for interiors valuing naturalness.
Sometimes casings contrast with walls and cornice. Dark casings on light walls with a white cornice create a graphic composition typical of Scandinavian style.
Cornice and ceiling molding: cohesive decoration
In classical interiors, cornice is often complemented by ceiling molding — rosettes, coffered panels, and moldings. Molding may be wooden or polyurethane, but it must stylistically match the cornice.
If the cornice has carved elements, the molding should echo them ornamentally. Floral motifs on the cornice and floral motifs on the rosette create unity. Geometric patterns on the cornice and geometric patterns on the coffered panels — similarly.
Molding and cornice colors usually match — white or in the ceiling’s tone. Gold elements on the cornice require gold on the molding.
Care and maintenance of wooden cornices
Proper care extends the lifespan of cornices, preserves their appearance, and prevents damage.
Regular dust cleaning
Dust settles on horizontal surfaces of the cornice, especially on protruding shelves. Accumulated dust is not only unattractive but also absorbs moisture, creating a mold-prone environment.
Clean with a dry, soft cloth, microfiber, or a long-bristled brush once a month. For cornices with complex profiles, use a vacuum cleaner with a soft brush attachment. Wet cleaning is infrequent — only for heavy soiling, using slightly damp cloth without excess water.
Humidity and temperature control
Wood reacts to changes in humidity and temperature. When humidity increases, wood absorbs moisture and expands. When humidity decreases, it releases moisture and contracts. These cycles create internal stresses that may lead to cracks.
Optimal humidity for wooden items is 40-60%, temperature 18-24°C. Maintain a stable climate indoors, using humidifiers in winter (when heating dries the air) and dehumidifiers in summer (during high humidity periods).
Avoid sudden changes. Do not place wooden cornices near heat sources — radiators, fireplaces, or heat curtains. Prevent direct water exposure — roof leaks, condensation from air conditioners.
Updating protective coating
Lacquer, oil, and wax wear over time and lose their protective properties. Unprotected wood absorbs moisture and dirt, darkens, and deforms. Renew the coating every 3-5 years.
For lacquered cornices: lightly sand the surface with 220-320 grit sandpaper, remove dust, and apply a new layer of lacquer with a brush. For oil-based coatings: clean the surface, apply new oil with a cloth, allow it to absorb, then wipe off excess.
If the coating is severely damaged — cracks, peeling, clouding — full restoration is required: remove old coating with solvent or sanding, fill defects with putty, sand, and apply new coating in multiple layers.
Repair of damage
Scratches on lacquered surfaces are filled with matching touch-up lacquer or wax pencil. Deep scratches are filled with acrylic wood putty, sanded, and touched up.
Wooden cracks are filled with epoxy resin or putty, reinforced with fiberglass. Small cracks can be filled with glue, injected with a syringe, then clamped with a clamp until dry.
Detached cornice sections are coated with glue, pressed against the base, and temporarily secured with supports or clamps. If mechanical fasteners have loosened, additional screws are driven in.
Frequently asked questions about wooden cornices
What type of wood is best for cornices?
For premium interiors, oak is optimal — strong, stable, with an expressive texture. For complex profiles, beech is suitable — uniform, easily routed. Ash is a middle option with contrasting texture. Pine is a budget choice for simple projects.
Can wooden cornices be installed in bathrooms or kitchens?
Yes, if the wood is protected with moisture-resistant coating — yacht lacquer, waxed oil, or water-resistant paint. Avoid direct water contact. Ensure ventilation to prevent moisture buildup. For humid areas, stable species — oak, larch — are preferred.
How to choose cornice size based on ceiling height?
For ceilings 2.5–2.7 m — cornices 40–60 mm; for 2.7–3.0 m — 60–90 mm; for 3.0–3.5 m — 90–120 mm. The higher the ceiling, the heavier the cornice should be. Classic interiors require larger cornices; modern interiors prefer more restrained ones.
Should the cornice match wall color or contrast?
It depends on the style. Classic interiors often use white cornices on colored walls — creating architectural framing. Modern interiors prefer cornices matching wall color — visual unity. Contrasting cornices accent transitions; monochromatic ones soften them.
Can I install a wooden cornice myself?
Yes, if you have basic woodworking skills and tools — circular saw, drill, level. Simple cornices take 4–6 hours per room. Intricate carved cornices require experience — precise corner joints, hiding fasteners, matching patterns.
How often should cornice coating be renewed?
Lacquered cornices should be renewed every 3–5 years. Oil-based ones every 2–3 years. Signs of wear: clouding, flaking, loss of gloss. In dry rooms, coatings last longer; in humid rooms, they degrade faster.
What to do if the cornice has detached from the wall?
Remove the detached section, clean the backside and wall of glue residue and dust. Apply fresh glue (polyurethane or liquid nails), press the cornice into place, and temporarily secure with supports. Additionally, drive in screws for added security.
Yes. First, sand the surface with 180-220 grit sandpaper, prime with acrylic primer for wood. Paint with acrylic or alkyd paint in 2-3 coats with intermediate sanding. The final coat is a matte or semi-gloss lacquer for protection.
What makes wooden cornice better than polyurethane?
Wood is a natural material with expressive texture, warm to the touch, and durable. Polyurethane is lighter, cheaper, doesn't deform from humidity, but lacks naturalness. For premium interiors, wood is chosen; for budget options, polyurethane.
How much does a wooden cornice cost?
Price depends on species, profile, and finish. A simple pine cornice — from 300-500 rubles/m. Oak with a classic profile — from 1500-2500 rubles/m. Carved oak molding — from 3000-5000 rubles/m. Installation adds 30-50% to the material cost.
Price depends on species, profile, and finish. Simple pine crown molding — from 300-500 rubles/m. Oak crown molding with classic profile — from 1500-2500 rubles/m. Carved oak molding — from 3000-5000 rubles/m. Installation adds 30-50% to material cost.
Conclusion: an architectural detail that creates style
Wooden cornicesIt is not just a decorative strip under the ceiling, but a full architectural element that defines the character of the space. A correctly chosen profile, matching the interior style, creates harmony. High-quality materials — oak, beech, ash — guarantee longevity and aesthetics. Proper installation ensures secure mounting and clean execution. Understanding the difference between ceiling transitions and wall cornices, between classic and neoclassic styles, between molding and filigree allows for thoughtful choices, creating interiors where every detail contributes to the overall concept.
STAVROS has been producing wooden cornices from solid oak, beech, and ash since 1992. The assortment includes more than 50 profiles: from simple rectangular ones for modern interiors to complex multi-level profiles for classic spaces. Each cornice is milled on CNC machines, ensuring perfect geometry and profile repeatability. Final finishing with oil, lacquer, or paint is done manually in multiple layers, creating a protective coating that lasts for years. STAVROS offers not onlywooden cornices for sale, but also a full range of products for interior decoration:wooden skirting boards, door casings,Wooden planks, outlets, allowing you to create a unified style throughout the space. Choosing STAVROS means investing in quality proven by thousands of completed projects, craftsmanship accumulated over three decades, and materials that serve generations. Your interior will gain completeness, elegance, and the architectural precision that distinguishes true design from a random collection of elements.