Article Contents:
- Stage 1: Designing — The Foundation of Success
- Determining Staircase Type
- Basic Calculations: The Mathematics of Comfort
- Creating a Blueprint
- Stage 2: Material Selection — From Wood to Fasteners
- Wood Species for Load-Bearing Elements
- Cross-Section and Quantity
- Fasteners and Consumables
- Tools
- Stage 3: Fabricating Stringers — The Staircase Skeleton
- Stringer Marking
- Cutting the Groove
- Sanding and Finishing
- Stage 4: Installing Stringers — The Structural Foundation
- Preparing the Area
- Installing the First Stringer
- Installing the Second Stringer
- Stage 5: Installing Treads and Risers
- Element Preparation
- Installing from Bottom to Top
- Structural Reinforcement
- Stage 6: Balusters — Vertical Safety and Beauty
- Option 1: Buying Ready-Made Balusters
- Option 2: Making Balusters Yourself
- Option 3: Simplified Balusters from Boards
- Stage 7: Installing Balusters and Handrails — Completing the Guardrail
- Calculating Quantity and Marking
- Installing Support Posts
- Newel Installation
- Trimming Top Ends
- Attaching the Handrail
- Stage 8: Final Finishing — Protection and Beauty
- Surface Preparation
- Fastening Cover
- Choosing the Finish
- Applying the Finish
- Protection During Drying
- Stage 9: Final Inspection and Handover for Use
- Quality Control
- First Ascent
- Common Mistakes and How to Avoid Them
- Project Cost: Savings by Doing It Yourself
- Conclusion: From Idea to Reality

Building a two-story house is half the job. The second half begins with the question: how to get upstairs? You can hire a crew, order a pre-made staircase for two hundred to three hundred thousand rubles, wait a month for manufacturing and another week for installation. Or you can roll up your sleeves, pick up tools, and build a wooden staircase yourself — a structure that will serve for decades, become a source of pride, save half your budget, and bring invaluable hands-on experience with wood. In 2026, building a staircase yourself is no longer the exclusive domain of professional carpenters. The accessibility of information, quality materials, and modern power tools has made this project achievable for anyone with basic woodworking skills, willing to learn and not afraid of challenges.
This guide will walk you through the entire process — from initial calculations on paper to the moment you first ascend your finished staircase with beautiful balusters and polished handrails. We will break down each stage in detail: how to calculate optimal dimensions for a comfortable and safe staircase; how to choose wood species considering budget and usage conditions; how to fabricate stringers or treads without expensive equipment; how to install steps level and securely; where to source balusters or how to make them yourself; how to install handrails so they don’t wobble; what finish to apply to wood for durability and beauty. Step-by-step instructions, calculation formulas, drawings, practical tips — everything you need for successful project implementation.


Stage 1: Design — Foundation of Success
The biggest mistake beginners make when building staircases is starting to cut boards before the project is fully calculated and drawn. A staircase is not a stool where you can improvise. Here, every detail is critical: incline angle, step height, tread width, number of balusters. An error during the design phase will turn subsequent work into a nightmare and result in an uncomfortable structure.


Determining Staircase Type
Straight single-run — the simplest option for beginners. Direct ascent without turns, all steps identical. Requires a lot of space (run length is usually four to five meters), but easy to construct. Ideal for spacious halls, cottages, workshops.
L-shaped with landing — a compromise between simplicity and space-saving. Two straight runs connected by a landing at a 90-degree angle. More complex to build due to the need to construct the landing, but saves space.
L-shaped with winder steps — instead of a landing, the turn is achieved through trapezoidal steps. More complex to calculate and build, but more compact and elegant.
Helical — maximum space-saving, but very difficult to build for beginners. Requires precise calculations, specialized tools, experience in bending wood. Not recommended for the first project.
For this guide, we’ll take a straight single-run staircase on stringers — this is the optimal balance of simplicity and result.
Our factory also produces:


Basic Calculations: Mathematics of Comfort
Measuring Height: Accurately measure the height from the first floor to the second floor. Let’s say it’s 2700 millimeters.
Determining Step Height: Optimal step height (riser) for comfortable ascent — 150–180 mm. Let’s take 170 mm. Divide total height by step height: 2700 / 170 = 15.88. Round to 16 steps.
Recalculating exact riser height: 2700 / 16 = 168.75 mm. Round to 169 mm — this is the final riser height.
Determining Tread Width: Optimal tread width (horizontal part of the step) — 250–300 mm. There is a comfort formula: 2h + b = 600–650 mm, where h is step height, b is tread width. Substitute: 2×169 + b = 630, so b = 292 mm. Round to 290 mm.
Run Length: Fifteen treads (the sixteenth step is the second floor) multiplied by tread width: 15 × 290 = 4350 mm. Horizontal run length — 4 meters 350 mm. Ensure you have this space.
Incline Angle: Calculated by the formula: tg(α) = height / length = 2700 / 4350 = 0.62, so α ≈ 32°. This is a comfortable incline (optimum 30–40°).
Staircase Width: Minimum for comfortable passage of one person — 900 mm. Recommended 1000–1200 mm.
Get Consultation
Creating a Drawing
Transfer calculations to paper. Draw the staircase to scale (e.g., 1:20). Show side view: stringers, steps, railing height. Top view: staircase width, baluster placement. Label all dimensions. This drawing is your blueprint throughout the entire construction period.
Stage 2: Choosing materials — from wood to fasteners
The quality of materials determines the durability and appearance of the finished staircase.
Wood species for load-bearing elements
Spruce — the most affordable option (from 300 rubles per linear meter of beam). Medium density, easy to process, but requires reinforced fastening and larger cross-sections. Suitable for cottages, workshops, temporary structures. Must be treated with antiseptic.
Larch — the golden middle (from 500 rubles per meter). Denser than spruce, more resistant to moisture, does not rot. Ideal for staircases in homes with inconsistent heating, on verandas, in saunas. Harder to process due to hardness.
Oak — premium option (from 1200 rubles per meter). Maximum strength, century-long durability, elegant texture. Requires powerful tools for processing. Choice for grand staircases in mansions.
Beech, ash — excellent alternatives to oak (from 700-900 rubles). Strong, beautiful, easier to process than oak.
For your first DIY staircase, we recommend larch — optimal balance of price, strength, and workability.
Cross-sections and quantities
Stringers (load-bearing beams): beam with cross-section 50x250 mm or 60x300 mm. Length — diagonal length of the run: √(4350² + 2700²) ≈ 5120 mm. Round to 5200 mm. Need two beams (for staircases up to 1200 mm wide) or three (for wider ones).
Steps: board thickness 40 mm (minimum), preferably 50 mm. Width 290 mm (calculated). Length equals staircase width plus 30-40 mm overhang on each side. For 1000 mm staircase: 1000 + 70 = 1070 mm. Quantity: 16 pieces.
Treads (vertical parts between steps): board thickness 20-25 mm, width 170 mm (riser height), length equals staircase width. Quantity: 15 pieces (last step is the second floor, no tread for it).
Balusters: ready-made turned pieces from manufacturer’s catalog or homemade. Height 900 mm, diameter 50 mm. Quantity depends on installation spacing. At 120 mm spacing, for a 4350 mm long staircase, you’ll need about 35-40 balusters plus two support posts with 80x80 or 100x100 mm cross-sections.
Handrail: round or oval section beam with diameter 50-60 mm or rectangular section 45x70 mm. Length equals diagonal run length plus overhangs on support posts: approximately 5500 mm.
Fasteners and consumables
-
Self-tapping screws: diameter 4-5 mm, length 60, 80, 100, 120 mm (200-300 pieces of each size)
-
Reinforced metal angles 50x50 mm for attaching steps to stringers (32 pieces — two per step, to two stringers)
-
M8-M10 threaded rods 70-90 mm long for attaching balusters (40-50 pieces)
-
Threaded bushings (furniture nuts) for rods
-
Water-resistant PVA wood glue, class D3 — 1-2 liters
-
Wooden dowels with diameter 8-10 mm (100-150 pieces)
-
Anchor bolts for attaching stringers to wall and floor (4-6 pieces)
Tools
Minimum required:
-
Circular saw with guide or hand circular saw
-
Electric jigsaw
-
Drill/driver (preferably two — one for drilling, another for driving)
-
Wood drill bit set (3-20 mm)
-
Electric or hand plane
-
Orbital or belt sander
-
5-meter tape measure, square, level, pencil
-
Clamps (minimum four pieces)
It is desirable to have:
-
Hand-held router for cutting grooves and rounding edges
-
Chisel set for fitting joints
-
Vertical drill press stand
Stage 3: Making stringers — the ladder's skeleton
Stringers are load-bearing beams with cut notches, on which the treads rest. The accuracy of their fabrication determines the horizontal alignment of the treads and the overall geometry of the staircase.
Stringer marking
Take a larch beam 50x250 mm in cross-section and 5200 mm long. Place it on sawhorses or a flat floor.
Make a template from plywood or cardboard: a right triangle with legs 290 mm (tread width) and 170 mm (riser height). This is the shape of one step.
Place the template at the bottom end of the beam so that the horizontal leg (tread) is horizontal and the vertical leg (riser) is vertical. Trace around it with a pencil. Move the template upward along the beam, aligning the vertex of the previous triangle with the base of the next. Trace again. Repeat this sixteen times until reaching the top end of the beam.
Check the marking: the distance from the bottom end of the beam to the first horizontal line should equal the tread thickness (50 mm) — this is compensation to ensure the first step is at the same height as the subsequent ones. From the last horizontal line to the top end of the beam, there should be enough length for attachment to the second-floor floor joist (minimum 300 mm).
Cutting the notches
Carefully cut the notches using a jigsaw or a hand-held circular saw, strictly following the marking lines. Start with horizontal cuts (tread), then vertical cuts (riser). Be especially careful at the corners where cuts meet — do not cut beyond the marking lines to avoid weakening the structure. Corner sections can be trimmed with a hand hacksaw or chiselled with a chisel.
After cutting the first stringer, use it as a template for the second (and third, if making more). Place the finished stringer on the new beam, trace the notch outline, and cut. This ensures identical stringers.
Sanding and finishing
Sand all stringer surfaces using an orbital sander, starting with 80-grit sandpaper (to remove roughness), then 120-grit, and finally 180-grit. Pay special attention to the notches — they must be smooth and free of burrs.
Use a router with a roundover bit to round all outer edges of the stringers, creating a 2–3 mm radius. This is not only aesthetically pleasing but also safer — sharp edges are hazardous.
Treat the stringers with a penetrating wood preservative (e.g., Senеж, Neomid). Apply with a brush in two to three coats, allowing intermediate drying. This protects the wood from rot, mold, and insects.
Stage 4: Installing stringers — the foundation of the structure
Preparing the location
Determine the exact location for installing the staircase. The bottom end of the stringers will rest on the first-floor floor, and the top end will rest on the second-floor floor joist or beam.
On the first-floor floor, mark the line where the bottom ends of the stringers will be placed. The distance between stringers equals the staircase width minus twice the stringer thickness. For a 1000 mm wide staircase with 50 mm thick stringers: 1000 - 2×50 = 900 mm between inner faces of the stringers.
Also mark the attachment points on the second-floor floor. Use a plumb bob or laser level for accurate vertical projection.
Installing the first stringer
Lift the first stringer (a helper is required — the structure is heavy and long), place the bottom end on the marked spot on the floor, and position the top end against the floor joist. Check the horizontal alignment of the notches using a construction level — each horizontal surface must be perfectly level.
If there are deviations, adjust them: place shims under the bottom end or trim it to the required angle. Once perfect horizontal alignment is achieved, temporarily secure the stringer with supports.
Attach the bottom end to the floor: drill two 10 mm diameter holes through the stringer into the concrete base, insert M10 anchor bolts, and tighten. If the floor is wooden, secure with 120–150 mm long heavy-duty screws into the floor joists.
Attach the top end to the floor joist or beam: drive 120 mm long screws (minimum four) through the stringer into the beam, or use a metal mounting bracket (support plate).
Install the second stringer.
Similarly, install the second stringer at a distance of nine hundred millimeters from the first (between inner edges). Critically important: the horizontal surfaces of both stringers must be at the same level. Check with a long level placed across both stringers on each step. Even the slightest deviation will cause the steps to be misaligned.
Stage 5: Installing treads and risers
Element preparation
Cut the tread boards: width 290 mm, length 1700 mm (1000 mm for the staircase), thickness 50 mm. Sixteen pieces.
Cut the riser boards: width 170 mm, length 1000 mm, thickness 25 mm. Fifteen pieces.
Sand all elements: first with 120-grit sandpaper, then 180-grit. Surfaces must be smooth, without burrs.
Using a router with a roundover bit, round the front edge of the treads (which will protrude), creating a radius of 5–7 mm. This is the classic tread profile, safe and aesthetically pleasing.
Install from bottom to top
Start with the bottom step. First, install the riser: position the board vertically between the two stringers, aligning it with the vertical cuts of the tread. Attach it to the stringers with 50–60 mm screws (three to four on each side). Drive the screws from the back of the riser into the stringer so the heads are not visible from the front.
Install the tread: place the board on the horizontal surfaces of the tread of both stringers. Align it so that the overhangs on both sides are equal (35 mm), and the front edge protrudes 30–40 mm. Check for levelness with a level.
Attach the tread to the stringers: first, apply wood glue (PVA) to the contact surfaces. Then, drive 80–100 mm screws from the top of the tread down into the stringer (three to four on each side). Sink the screw heads into pre-drilled holes by 2–3 mm — you will cover them later.
Additionally, attach the tread to the riser: drive 60 mm screws from the tread’s back down into the top edge of the riser (four to five along the full width).
Move upward, installing riser and tread alternately until you reach the top. The last step is the floor of the second level — it has no riser.
Structural reinforcement
For additional rigidity, you can install support blocks 40x60 mm between the stringers under each tread, attached to the stringers with metal brackets. This is especially relevant for wide staircases (over 1200 mm) or when using soft wood species.
Here you have three options: buy ready-made, order custom, or make them yourself.
Option 1: Buying ready-made balusters
The simplest and fastest option. The company STAVROS offers more than a hundred models
in various styles: from classic turned to modern minimalist. Prices start from 300 rubles per piece for simple pine models up to 2–3 thousand rubles for intricate carved oak models.wooden balustersAdvantages: time-saving, professional quality, wide selection, ready for installation (often with pre-drilled holes). Disadvantages: cost, waiting for delivery.
Advantages: time-saving, professional quality, wide selection, ready for installation (often with pre-drilled holes). Disadvantages: cost, waiting for delivery.
When ordering, specify the exact quantity (with a reserve of two to three pieces in case of defects during installation), wood species (preferably the same as the main staircase — larch, oak), height (standard 900 mm suits most cases).
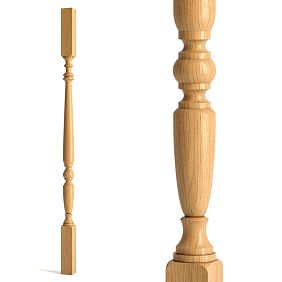
Option 2: Making balusters yourself
If you have a wood lathe or access to one (in a carpentry workshop, through a friend), you can turn balusters yourself. This requires lathe skills, but offers full design freedom and saves money.
Material: square-sectioned blocks 50x50 mm or 60x60 mm, length 1000 mm (with allowance for mounting in the lathe and trimming ends).
Process: Secure the block between centers in the lathe. Using a roundover bit, turn the square into a 50 mm diameter cylinder. Then, using profiled bits (chisel, gouge), create the profile: bulges, grooves, rings — according to your sketch. After turning, sand the baluster with sandpaper directly on the lathe, starting with 120-grit and finishing with 300-grit.
Trim the ends of the baluster to the required length (900 mm). Drill holes in the ends for dowels: center-drill 8 mm holes to a depth of 40 mm.
Lathe work requires practice. If you lack experience, start with a simple profile: a cylinder with one or two decorative rings. As your skills grow, move on to more complex shapes.
Option 3: Simplified balusters from blocks
If you don’t have a lathe and buying ready-made is expensive, you can make simple square or rectangular balusters from planed blocks.
Buy dry planed blocks with cross-sections of 40x40 mm or 50x50 mm. Cut them into 900 mm segments. Using a router with a roundover bit, round all four edges of each block along its full length, creating a 5–8 mm radius. You will get balusters with rounded edges — a simple, modern, and neat look.
Sand the surfaces smooth using 180-220 grit sandpaper. Drill holes at the ends for fasteners.
Stage 7: Installing balusters and handrails — completing the railing system
Calculating quantity and marking
Building codes require a maximum spacing between balusters of 150 mm. For child safety, 100–120 mm is recommended.
The diagonal length of the staircase (handrail length) is approximately 5100 mm. With 120 mm spacing between baluster centers: 5100 / 120 ≈ 42 balusters. Add two support posts at the ends of the run. Total: 44 elements.
Mark the centers for baluster installation on each tread. You can place one baluster centered on each step (16 pieces) — simple but less safe. Or two balusters per step (32 pieces) — more secure. Or a continuous row with 120 mm spacing regardless of tread boundaries — maximum safety and rhythm.
Choose the last option: stretch a string along the edge of the treads, 50–70 mm from the front edge. Along this string, mark 'X's with a pencil every 120 mm — these are the baluster centers.
Installation of Support Posts
Start with the support posts. The first is installed on the lower tread (or on the floor before the staircase), the second on the upper landing of the second floor.
Drill holes at the marked points with an 8–10 mm diameter and 50–60 mm depth. Insert and tap in M10 threaded bushings. Screw in M10 threaded rods 80–100 mm long to a depth of 50 mm, leaving 30–50 mm protruding.
In the lower ends of the support posts (80x80 or 100x100 mm cross-section), drill 11 mm diameter holes 50–60 mm deep at the center. Apply PVA glue to the rods and holes, slide the post onto the rod, tap it down with a mallet. Check vertical alignment with a level in two planes, and temporarily secure with supports until the glue dries (24 hours).
Installing balusters
Install all balusters using the same technique: drill holes in the treads, install bushings and rods, slide on balusters with glue. Check each baluster’s vertical alignment with a level. Work sequentially, allowing glue to set on each group of five to seven balusters before moving to the next.
Trimming upper ends
After installing all balusters and letting the glue dry, trim the upper ends at the staircase’s incline angle so the handrail fits properly. Stretch a string between the tops of the support posts — it will indicate the cut line. Mark the cut line on each baluster along the string with a pencil.
Trim each baluster along the marked line using a circular saw set at a 32-degree angle (staircase incline), or with a hand hacksaw. Sand the ends smooth with 180-grit sandpaper.
Handrail mounting
In the upper ends of the balusters and support posts, drill 8 mm diameter holes 30 mm deep at the center. Screw in M8 threaded rods 50–60 mm long to a depth of 25 mm with glue. Leave 25–30 mm protruding.
Take the handrail (a round-sectioned timber with 50 mm diameter). Mark the exact positions of all balusters on its underside — transfer the markings from the treads. Drill blind holes 9 mm in diameter (1 mm larger than the rod) to a depth of 30–35 mm at each point.
Apply glue to all protruding rods and holes in the handrail. Slide the handrail onto all rods simultaneously (a helper is needed), tap it down with a mallet along the entire length. Secure with clamps at several points to the balusters. Check that the handrail fits tightly against the ends of all balusters. Let the glue dry for 24 hours.
For added strength, you can screw in 50–60 mm long screws from the sides, angled through the handrail into the balusters. Sink the heads and mask them with wooden plugs.
Stage 8: Final finishing — protection and aesthetics
Surface preparation
All staircase elements have already been pre-sanded. Now, perform a final sanding of the assembled structure. Use an orbital sander with 180-grit sandpaper on all surfaces: treads, risers, balusters, handrail. Remove all dust with a vacuum cleaner, then wipe with a damp (not wet!) cloth. Let dry.
Masking fasteners
Mask screw heads on treads with wooden plugs (available pre-made or turn your own from the same wood species). Insert 8–10 mm diameter plugs into countersunk holes with glue, let dry, trim flush with a chisel, then sand smooth.
Alternative — wood-colored acrylic filler. Apply with a putty knife, let dry, then sand with 220-grit sandpaper.
Finish selection
Wood oil — a modern, eco-friendly option. Penetrates wood, enhances grain, creates matte or satin finish. Durable, easy to renew. Apply with brush or cloth in 2–3 coats with intermediate drying (4–6 hours) and light sanding with 320-grit paper. Recommended brands: Osmo, Biofa, Saicos. Consumption: approximately 100 ml per square meter per coat.
Wood varnish — classic protective coating. Forms a film on the surface, can be matte, satin, or glossy. Wear-resistant parquet varnish (two-component polyurethane) withstands heavy loads. Apply with brush or roller in 2–3 coats with intermediate drying (12–24 hours) and light sanding with 320-grit paper. Recommended brands: Tikkurila Unica Super, Belinka Parketi Lak, Varathane. Consumption: 100–120 ml per square meter per coat.
Wood wax — traditional finish, creating a silky surface. Less durable than oil or varnish, requires regular renewal (every 1–2 years). Suitable for low-traffic staircases. Apply with cloth using rubbing motions, polish with soft cloth after drying.
For residential staircases with heavy use, we recommend oil or parquet varnish. Oil is easier to apply for beginners, varnish provides a harder finish.
Applying finish
First coat: Generously apply oil (or varnish) with a brush to all surfaces. Treads, risers, stringers, balusters, handrail — everything must be covered. Let it soak in (oil) or dry (varnish) according to manufacturer’s instructions.
Intermediate sanding: After the first coat dries, lightly sand all surfaces with 320-grit sandpaper. This removes raised wood fibers, leaving a smooth surface. Remove dust.
Second and third layers: Apply the second coat. After drying, lightly sand with 320 grit. Apply the third coat (for oil, two to three coats are usually sufficient; for varnish, three are recommended).
Final polishing: After the final coat has fully dried (for varnish, wait three to seven days until full polymerization), polish the surface with a soft cloth to achieve a silky finish.
Protection during drying
During the drying period of the coating (minimum three to five days), do not use the stairs. Hang a sign and block access. Ensure ventilation in the room to allow solvent evaporation, but avoid drafts that could bring dust onto the fresh coating.
Step 9: Final inspection and self-handover for use
Quality control
Geometry: Check the horizontal level of all steps with a level. Verify the vertical alignment of all balusters. Confirm the straightness of the handrail.
Strength: Press firmly on the handrail, applying outward horizontal force. The structure should not wobble, creak, or sag. Try rocking individual balusters — there should be no play.
Safety: Check the distance between balusters — no more than 120 mm. Ensure there are no sharp protrusions, protruding screws, or burrs. Verify the strength of the attachment of the stringers to the floor and ceiling.
Aesthetics: Inspect the finish — it should be uniform, without streaks, bubbles, or uncoated areas. All balusters should be the same height and equally sanded. The handrail should be smooth along its entire length.
First ascent
When everything has been checked, the coating has dried, and temporary supports and guardrails have been removed — it’s time for the first ascent up the staircase you built yourself. Place your hand on the handrail, feel its smoothness. Ascend step by step, feeling the strength of the structure beneath your feet. At the top landing, turn around and look at your work — a beautiful wooden staircase, created by your own hands from the first sketch to the final layer of varnish.
Typical mistakes and how to avoid them
Error 1: Inaccurate calculations during the design phase. Result: inconvenient step height or width, staircase doesn’t fit the opening. Solution: Measure carefully, double-check calculations, make a full-scale drawing.
Error 2: Using green (unseasoned) wood. Result: after drying, elements warp, cracks appear, and squeaking occurs. Solution: Use only dry wood with moisture content of 8–12%, check with a moisture meter.
Error 3: Insufficient stringer fastening. Result: staircase wobbles and is unreliable. Solution: Use strong anchors or screws at least 120 mm long, fasten into load-bearing elements (beams, concrete), not into finish materials.
Error 4: Unequal step heights. Result: tripping, discomfort, risk of falling. Solution: Use a template when marking stringers, check each step with a level during installation.
Error 5: Weak baluster fastening. Result: loosening, play, unsafe. Solution: Use threaded rods with a minimum diameter of 8 mm, always apply adhesive, embed fasteners at least 40 mm deep.
Error 6: Applying finish to unprepared surfaces. Result: poor adhesion, uneven color, rapid wear. Solution: Sand all surfaces thoroughly, remove dust before applying finish.
Project cost: savings by doing it yourself
Approximate material cost for a staircase 4.5 meters long and 1 meter wide:
-
Stringer beams (larch 50×250×5200 mm, 2 pcs): 6000 rubles
-
Step boards (50×290×1070 mm, 16 pcs): 8000 rubles
-
Tread boards (25×170×1000 mm, 15 pcs): 3000 rubles
-
Pre-made balusters (40 pcs at 500 rubles each): 20000 rubles
-
Support posts (2 pcs): 3000 rubles
-
Handrail (5.5 m): 4000 rubles
-
Fasteners (screws, rods, bushings, angles): 3000 rubles
-
Adhesive, putty, sandpaper: 2000 rubles
-
Protective coating (2 liters of oil): 4000 rubles
Total: approximately 53000 rubles
Similar staircase from a manufacturer "turnkey": 120000–180000 rubles. Savings: 67000–127000 rubles (55–70% of cost).
Plus invaluable experience, satisfaction from the result, confidence in the quality of each connection.
Conclusion: from idea to reality
Wooden staircase by your own hands— this project may seem dauntingly complex at the start. But broken down into sequential stages, each technically achievable, it becomes attainable. Design requires attention to detail and precision, but not supernatural abilities. Cutting the stringers is careful template routing. Installing the treads is sequential fastening with level control.installation of balusters and handrails— repetitive drilling and mounting on bolts. Final finishing — patient application of coating layers.
The key to success — don’t rush, follow instructions, check each element twice before final fixation, don’t fear redoing if something goes wrong. Professionals too started with their first staircase, made mistakes, learned. The difference is merely experience, which comes with practice.
In one month to one and a half months of work (on weekends and evenings for someone with a regular schedule), you will receive not just a functional structure for moving between floors. You will create an architectural element that will serve your family for decades, which you will see every day, proud of the result of your labor. Every time you ascend the steps, you will remember: I did this myself. From the first drawing to the final layer of varnish. From calculating tread height to installing the last baluster.
This is more than saving seventy to a hundred thousand rubles. It is an experience that stays with you, skills useful in other projects, confidence in your own abilities, knowledge that you can create complex things by your own hands. And this staircase tells a story — the story of your craftsmanship, patience, and dedication to results.
Start planning today. Take measurements, draw the first sketch, calculate your budget. Order materials. And in a couple of months, your home will have a beautiful, reliable wooden staircase, created by your own hands. Good luck with your construction!