


Article Contents:
- When removal of a wooden baseboard is needed
- Four main scenarios
- Partial vs complete removal
- Removal with preservation vs without preservation
- Tools for removing wooden baseboards without damaging the wall
- Basic tool set
- What not to use during removal
- How to remove an old wooden baseboard attached with nails
- Diagnostics: how to determine the type of fastening
- Algorithm for baseboard removal on nails: step by step
- Typical mistake with nails: applying force in the wrong place
- How to remove a wooden baseboard attached with glue
- Why glue is more difficult than nails
- Two methods for removing a baseboard attached with glue
- How to work in corners with glue
- What to do with gaps and damage after removal
- What remains on the wall after removing the baseboard
- Removing glue residue
- Repairing plaster damage
- What to do with gaps after removal near the floor
- Preparing the wall for a new baseboard
- Replacement with a new baseboard: work sequence
- Correct timing for replacement
- Choosing a new baseboard: matching with existing interior
- Installing a new baseboard after floor replacement
- Can the old baseboard be reused — condition assessment
- Four assessment criteria
- Preparing the old baseboard for reuse
- Economic calculation: reuse vs new material
- Special cases of dismantling
- Baseboard painted "in multiple layers"
- Baseboard under wallpaper
- Baseboard near underfloor heating
- FAQ: Answers to Popular Questions
- About the Company STAVROS

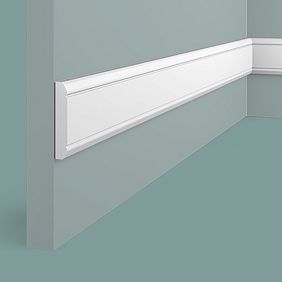
Dismantling is not destruction. It is reverse assembly. And it has its own technique, its own sequence of actions, and its own tools — just as specific as during installation. The only difference is that during installation an error is correctable, but during dismantling it is not: a torn piece of plaster, a deep scratch on parquet, a crushed profile — that's all that remains from careless work.
Remove wooden baseboardwithout damaging the wall — is a completely solvable task. But only if you know how it was installed, what tools to use, and in what sequence to proceed. This is precisely the subject of this article.
Here is a complete practical guide: when dismantling is needed, how to remove an old wooden baseboard on nails and on glue, what to do with the wall afterward, how to properly perform replacement, and whether it's worth preserving the old material.


When dismantling of a wooden baseboard is needed


Four main scenarios
Before picking up tools, it's important to understand: why remove it? The answer to this question determines not only the dismantling method but also how carefully you need to work with the material.
Scenario 1: Flooring replacement. Parquet, engineered wood flooring, laminate — all require baseboard dismantling before floor replacement. The baseboard is attached to the wall and must be removed to access the expansion gap at the base of the wall and lay the new flooring. This is the most common scenario.
Scenario 2: Complete renovation with finishing replacement. Repainting, re-wallpapering, wall leveling — all require baseboard dismantling, because working "over" it is low-quality, and masking joints with paint under the baseboard is a temporary solution that will show results in a year.
Scenario 3: Restoration and replacement of worn baseboard. An old wooden baseboard after 20–30 years can have critical defects: cracks along its length, profile chips, deformation from moisture, darkened non-restorable finish. In this case — complete replacement.
Scenario 4: Laying utilities. Cable ducts, low-voltage wiring, internet cables — are often laid behind the baseboard or in special baseboard cable ducts. To access them — dismantling.
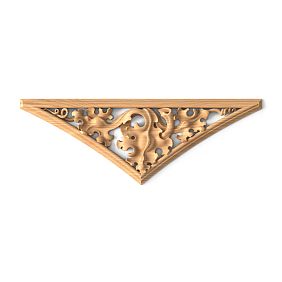
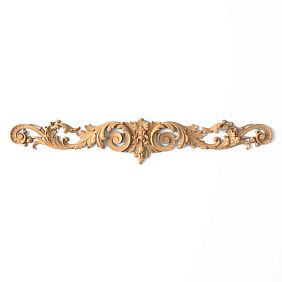
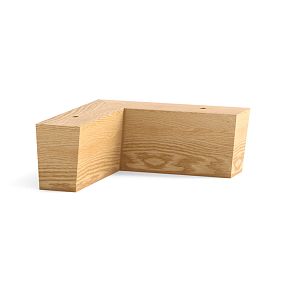
Our factory also produces:


Partial vs complete dismantling
Partial dismantling — removal of one or several sections of baseboard: for local replacement, laying a cable over a short segment, or replacing one damaged section. Requires increased care: you need to keep adjacent sections untouched and ensure a correct joint between the new material and the old.
Complete dismantling — removal of all baseboard along the perimeter of the room or throughout the entire space. Simpler to execute: you don't need to necessarily preserve any of the removed pieces. Allows for greater freedom of action.
Get Consultation
Dismantling with preservation vs without preservation
If the baseboard is planned for reuse — dismantling of the wooden baseboard is performed as carefully as possible: without jerking, without deforming the profile. If the baseboard is being replaced — you can work faster, but still without rough blows: the task is to preserve the wall.
Tools for removing wooden baseboard without damaging the wall
Basic tool set
The right tool is 80% of success in dismantling. The wrong one — guarantees damage either to the baseboard or to the wall.
1. Wide putty knife 100–120 mm
The main tool for "inserting" between the baseboard and the wall. A thin blade made of hardened steel — not a flexible painter's putty knife, but a rigid metal one. Such a knife is inserted into the seam and serves as a lever when prying the baseboard away from the wall.
Why wide? Because a narrow one concentrates pressure on a small area and cuts through the plaster. A wide one — distributes the load and slides over the surface without destruction.
2. Small pry bar (crowbar) — 300–400 mm
For baseboards on nails. Placed behind the putty knife to create leverage. Small length — for precise control of force.
3. Chisel 20–25 mm with wooden handle
For working in corners — where a putty knife cannot reach due to limited space. A chisel is used to cut through the layer of old sealant or paint that 'glues' the baseboard to the wall beyond the primary fastening.
4. Scissors or a utility knife (painter's knife)
For cutting through the layer of paint or sealant along the top and bottom seams of the baseboard before removal. This is a critically important step — without it, the layer of paint or dried sealant tears the plaster when the baseboard is removed.
5. Pliers or flat-nose pliers
For extracting finishing nails from the wall or baseboard after removal. Needle-nose pliers are more convenient for small nails with a diameter of 1.8–2.0 mm.
6. Sanding sponge P80–P120
For cleaning the wall in the removal area after adhesive and sealant have been taken off.
7. Floor protection
Heavy cardboard or fiberboard laid along the baseboard on the floor. When working with a pry bar or chisel, accidental contact with the floor is inevitable. The cardboard absorbs these impacts.
What not to use during removal
An axe or hammer without padding — crude, damages both the wall and the baseboard.
An angle grinder along the baseboard — acceptable for cutting through the paint layer, but requires extreme care: the disc must be 1 mm away from the plaster.
A powerful pry bar 600+ mm — creates excessive leverage, uncontrollably tears the plaster. Only a small pry bar should be used.
A heat gun without temperature control — overheats, melts varnish, scorches wood. Unacceptable when working with a baseboard intended for reuse.
How to remove an old wooden baseboard fastened with nails
Diagnostics: how to determine the type of fastening
Before removal, it is necessary to understand how the baseboard is installed. This determines the removal technique.
Nail fastening — characteristic signs:
-
Small holes are visible on the front surface of the baseboard (filled with putty or unfilled) spaced 40–60 cm apart
-
When tapped with a finger — a solid 'wooden' sound, without dullness
-
When trying to pull the baseboard away by hand, it 'holds' at specific points — at the nail locations
Dowel fastening — similar to nails, but the heads are larger (diameter 5–6 mm) and sometimes visible without filling.
Adhesive fastening — signs:
-
No visible nail holes
-
When tapped — a uniformly solid sound along the entire length
-
When trying to pull away by hand — it 'holds' uniformly along the entire length, not at specific points
Combined — both nails and adhesive. The most common professional installation. The combination creates the strongest fastening, and removal requires applying both methods.
Algorithm for removing a baseboard fastened with nails: step by step
Step 1. Cut the seams.
With a utility knife and a new blade — cut along the top seam (border between baseboard and wall) and bottom seam (border between baseboard and floor) along the entire length of the section being removed. Guide the knife with moderate pressure, without digging into the plaster — only cut through the layer of paint, sealant, or wallpaper that covers the seam.
This step cannot be skipped. The layer of dried paint over the seam is the number one cause of plaster damage during removal: when the baseboard is pulled off, the paint 'pulls' the top layer of plaster with it.
Step 2. Start from the end — at the doorway or corner.
The end section is the most accessible starting point for removal. The baseboard at the doorway typically has an open end or extends 5–10 mm behind the frame. Insert the putty knife into the seam at this end and begin 'opening' the baseboard.
Step 3. Insert a wide putty knife into the seam.
The insertion angle is approximately 20–30° relative to the wall. Not perpendicular! Perpendicular insertion damages the plaster. A shallow angle allows the putty knife to slide along the wall surface without digging into it.
Step 4. Pry the baseboard away from the wall.
Apply gentle levering force with the putty knife — the baseboard moves 5–10 mm away from the wall. Not with a jerk — use smooth pressure. If the baseboard 'doesn't budge' — do not increase force, but move the putty knife left or right: likely, the next nail is closer, and you need to start prying from there.
Step 5. Move the putty knife to the next fastening point.
After prying the first nail — move along the baseboard to the next one. Step: 40–60 cm. At each nail — gentle prying. The goal: not to 'rip out' the entire baseboard at once, but to sequentially free each fastening point.
Step 6. Completely separate the baseboard from the wall.
After freeing all nails — the baseboard is held only by the residual adhesive layer (if used) and sealant. With a smooth movement along the wall, remove the baseboard completely.
Step 7. Remove the nails.
Nails remaining in the wall — remove with pliers. Nails in the baseboard itself — drive through with a nail set (if the baseboard is to be reused) or remove with pliers.
Typical mistake with nails: force applied in the wrong place
If the putty knife is inserted midway between two nails — the baseboard 'bends' but does not pull away. The load concentrates on the nails, and with increased force, one of them tears out a piece of plaster. Rule: always work as close as possible to the fastening point.
How to remove a wooden baseboard glued with adhesive
Why adhesive is more difficult than nails
A baseboard on nails is held pointwise. Free each fastening point — and the baseboard is removed. A baseboard on adhesive is held across the entire area of its back surface. The adhesive layer may be applied in a 'snake' pattern (point contact) or as a continuous layer — and then removal becomes a real challenge.
Liquid nails crystallize after 2–3 years: they become rigid and brittle. This is good news for removal: brittle adhesive breaks under vibration. But PVA D3 or epoxy compounds are a different matter: they retain strength for years.
Two methods for removing a baseboard glued with adhesive
Method 1: 'Gradual prying' — for liquid nails
Liquid nails (acrylic) become brittle after 2–3 years. With slow, smooth prying using a putty knife — they 'chip off' from the wall or the baseboard in small fragments, leaving the surfaces relatively clean.
Technique: insert a wide putty knife into the seam at a minimal angle (10–15° to the wall). Slow, smooth pressure — without jerks. The adhesive 'snaps off' in small sections. Progress — 5–10 mm per movement. Total for one meter of baseboard — 5–10 minutes.
Method 2: 'Thermal' — for PVA and resilient compounds
A heat gun (temperature 150–180°C, no higher) is directed at the baseboard — heating the adhesive layer through the wood. At an adhesive layer temperature of 70–80°C, most PVA and dispersion adhesives soften and lose strength.
Heating: 30–40 seconds per 15–20 cm section. Immediately after heating — insert the putty knife into the seam, smooth prying. The adhesive is still warm — separates easily.
Important limitations of the thermal method:
-
Heat gun temperature not above 180°C — otherwise the varnish on the front surface of the baseboard will melt
-
Do not direct the heat gun at drywall: it withstands direct heating worse than plaster
-
If the baseboard is intended for reuse — after the thermal method, let it cool for 30 minutes before stacking
How to work in corners when gluing
Corners are the most difficult areas duringremoval of a wooden baseboardthat is glued. Access with a putty knife is limited. Here, a chisel is used: vertical insertion of the blade into the corner joint, careful widening of the gap.
If both pieces of baseboard in the corner are glued and clamped—start with the longer one: it is freed first, providing access to the corner piece.
What to do with gaps and damage after removal
What remains on the wall after removing the baseboard
After removing a wooden baseboard, the wall near the floor typically has the following defects:
-
Adhesive residue—fragments of liquid nails or PVA on the plaster
-
Mechanical damage to the plaster—chips, scratches, local pits from nails
-
A strip of unpainted surface—where the baseboard concealed the wall, paint or wallpaper may end in a straight line
-
Gaps from the wooden baseboard—traces of gaps and seams that were in the old baseboard are now exposed
-
Traces from dowels—holes 6–8 mm in diameter in the wall
Removing adhesive residue
Liquid nails (acrylic): cut off large fragments with a sharp chisel. Remaining residue—use a water-based solvent ('anti-glue' or 646 for small areas). Moisten, wait 2–3 minutes, remove with a putty knife. On plaster—sand with P80 sanding sponge.
PVA: warm water + sponge. PVA dissolves in water—the main thing is not to over-wet the gypsum plaster. Work in small sections, allow to dry between treatments.
Epoxy adhesive: mechanical removal with a chisel or angle grinder with a brush attachment. Chemical solvents—only acetone for small areas, with floor protection.
Repairing plaster damage
Minor scratches and chips up to 5 mm: gypsum-based finishing putty (or ready-made acrylic). Apply with a putty knife, smooth out, after drying (2–4 hours)—sand with P180 sandpaper.
Pits 5–15 mm: base coat putty in two layers—first to fill the volume, second as finishing. Reinforcing mesh tape for deep pits. After complete drying (12–24 hours)—sanding with P120, then P220.
Holes from dowels: press putty into the hole with a finger or narrow putty knife. Remove excess. After drying—sand smooth.
What to do with gaps after removal near the floor
Expansion gap between floor and wall—5–15 mm, sometimes up to 20–30 mm. After removing the baseboard, it is exposed. Before installing a new baseboard, it does not need to be filled: the new baseboard will cover it completely. But if there is a pause between removing the old one and installing the new one (e.g., floor replacement first)—temporarily seal the gap with painter's tape to prevent dust and debris from entering.
Preparing the wall for a new baseboard
After removing adhesive and repairing damage—prime the area near the floor. Deep penetration primer, applied with a brush along the entire strip 200–250 mm wide near the floor:
-
Strengthens repaired areas
-
Improves adhesion of new liquid nails
-
Reduces water absorption in the installation area
Allow primer to dry 2–4 hours—and the surface is ready for installation of the new baseboard.
Replacement with a new baseboard: work sequence
Proper Replacement Timing
After removing the old baseboard and preparing the wall — the correct sequence for different scenarios:
If floor replacement is not planned:
-
Old baseboard removed
-
Wall repaired
-
If necessary — lower wall zone repainted
-
New baseboard acclimatization 48 hours
-
Coating new baseboard with oil/varnish/paint before installation
-
New baseboard installation
If floor is being replaced simultaneously:
-
Old baseboard removed
-
Old flooring removed
-
Screed leveled (if necessary)
-
New flooring installed
-
Finished coating "cured" before baseboard installation (for oiled parquet — 72 hours after final coat)
-
Wall area near floor repaired
-
New baseboard acclimatization 48 hours
-
Baseboard coating before installation
-
Installation
Choosing new baseboard: matching with existing interior
When replacing part of the baseboard (partial removal) — the new piece must match the profile and wood species of the old one. If an exact match cannot be found — replace the entire room perimeter.
With complete replacement — opportunity to update the style. If the old baseboard was narrow (40–50 mm) — replacing with wide K-066 or K-104 fromSTAVROS K-serieswill dramatically change the visual weight of the room's lower zone. This is a small change with a big visual effect.
When replacing wooden baseboard in a room with woodenplinthandKZ-series cornices— the new baseboard is selected in a unified ornamental register with all existing wooden elements.
Installing new baseboard after floor replacement
After installing new flooring, it's often discovered that the floor level has changed: the new floor is slightly higher than the old one. This is an important nuance: if the baseboard is selected "flush" with the old level — it won't sit properly on the new floor.
Solution: measure the new floor level relative to the wall before purchasing baseboard. Choose baseboard with sufficient "overlap" of the expansion gap.
When installing newwooden baseboardafter floor replacement — everything follows the standard installation algorithm: acclimatization, coating, mitering corners, attaching to wall (not floor), sealing joints.
Can old baseboard be reused — condition assessment
Four assessment criteria
Removed old wooden baseboard is potentially valuable material. Solid beech or oak doesn't age structurally: if there are no cracks or deformation — it can be used again. We assess based on four criteria.
Criterion 1: Profile Geometry
Place two pieces end to end — the profile must match perfectly. If the baseboard "leads" (is curved along its length) — in a dry room, this could have occurred due to improper storage or installation on a damp wall. A slight bend (up to 3 mm over 2.4 m) — can be corrected during installation with adhesive. A severe bend — the baseboard is scrap.
Criterion 2: Condition of Ends and Cuts
Ends from removal are always damaged — this is normal. Before reuse, the ends are recut. Question: is the remaining length after the new cut sufficient? Minimum working length for a straight section — 200 mm (for short sections near doors). For corners — minimum 400 mm.
Criterion 3: Surface Condition
Scratches, scuffs, faded varnish — all can be eliminated by sanding and a new finish. Acceptable for reuse.
Deep dents from furniture over 1 mm, profile chips (a decorative element broken off), cracks along the grain — no, cannot be used.
Criterion 4: Signs of Moisture and Biological Damage
Darkened stains at the base of the baseboard, bluish tint, mold — this is biological damage. Such a baseboard — scrap, no options. Biological damage in solid wood cannot be treated by surface sanding.
Preparing an Old Baseboard for Reuse
If the baseboard has passed inspection on all four criteria:
-
Remove nails. All finish nails — remove from the baseboard. A nail left in the body of the baseboard during reinstallation can "spread" with a new nail and split the profile.
-
Remove adhesive residue from the back side. Chisel + P80 sanding sponge. The back side must be flat for good contact with the new adhesive.
-
Sanding the front surface. P120 → P180 → P220. Removes old varnish, evens out scratches. If the finish is oil-based — P180 is sufficient for removing dirt and P220 for the final finish.
-
New finish. Oil, varnish, or paint — according to the same rules as during initial installation. The back side and ends — mandatory.
-
Recutting. All ends that will be in joints or corners — are recut. Old cuts contain traces of removal (tears, chips) that will result in unsightly joints.
Economic Calculation: Reuse vs. New Material
With a cost of K-006 at 440 rub./lm and a typical room of 15 m² with a baseboard perimeter of ~15 lm — the cost of new material is ~6,600 rub. Labor costs for preparing the old material (removing nails, sanding, finishing, recutting) — 3–4 hours of work. With a master's hourly rate of 1,500–2,000 rub. — preparing the old material costs more than new material for profiles K-034 and K-006. For expensive profiles K-066, K-104 — reuse is financially justified.
Conclusion: reuse is advisable only for profiles costing from 1,500 rub./lm and above, provided the material is in good condition.
Special Cases of Removal
Baseboard painted "in multiple layers"
In old apartments, baseboards were often painted 4–6 times — over previous layers. The total paint thickness can reach 2–3 mm. This creates a problem: when cutting the seam, the knife "gets stuck" in the thick layer of paint, not reaching the wall. And during removal, this layer tears off a strip of plaster along with it.
Solution: heat gun (150–160°C) on the seam — the paint softens. Immediately, the knife cuts it without resistance. Baseboard removal — immediately after heating.
Baseboard under wallpaper
Sometimes during Soviet and post-Soviet installation, wallpaper was glued over the baseboard — or the wallpaper came right up to the top edge of the baseboard without being cut. When removing such a baseboard, the wallpaper "stretches" along with it.
Solution: with a sharp knife and a straightedge, cut the wallpaper strictly along the top edge of the baseboard — not on the baseboard, but on the wallpaper 3–5 mm above it. Then removing the baseboard will not affect the wallpaper.
Baseboard near underfloor heating
With underfloor heating (electric or water), it is important to know the location of heating elements near the wall. Cable underfloor heating often runs right up to the baseboard. When drilling for dowels — risk of damaging the cable.
During removal — do not use sharp tools at the base of the baseboard on the floor side. Only gentle prying force using a putty knife from the top.
FAQ: Answers to popular questions
How to remove a wooden baseboard without damaging the wallpaper?
Use a sharp knife to cut the wallpaper along the top edge of the baseboard, 3–5 mm above it — before starting removal. Insert a putty knife into the seam at a minimal angle (10–15°). Apply slow, gentle pressure — without jerking. After removal, the exposed strip of wall will be covered by the new baseboard.
Can a wooden baseboard be removed without a chisel?
For nail-fastened ones — a wide putty knife and a small pry bar are sufficient. A chisel is needed for corners and for cutting dried sealant in hard-to-reach places. Without a chisel — there is a higher risk of damaging the wall in the corners.
What to do if a piece of plaster breaks off during removal?
Clean the chip, remove all loose fragments. Apply deep-penetration primer. Fill with starter putty in two layers (first — volume, second — finish). After drying — sand with P120, then P220. The new baseboard will cover the repaired area.
Gaps in the wooden baseboard after removal — what to fill before installing the new one?
Do not fill anything before installation. The new baseboard will cover the expansion gap. After installation — apply acrylic sealant along the top and bottom seams. This is the correct sequence.
Can a wooden baseboard be removed and immediately reinstalled?
Yes, if the baseboard has passed a condition assessment (geometry, surface, absence of biological damage). Required: remove nails, clean adhesive from the back side, re-cut the ends, refresh the finish. Installation — according to the standard algorithm with 48-hour acclimatization.
How to replace a single piece of baseboard in the middle of a wall?
Partial removal: carefully remove the required section without affecting adjacent pieces. Find a replacement of the same profile (or an analogue). Joints with adjacent pieces — cut at 45° with overlap. Finish the new piece before installation. Seal all seams.
About the company STAVROS
Repair is always a beginning. And if you've read this far — it means the old baseboard is removed, the wall is prepared, and ahead lies the installation of the new one. This is where the main decision begins: what exactly to install.
wooden K-series millworkSTAVROS — over 30 profiles made from kiln-dried beech and oak solid wood with 8–10% moisture content, from the minimalist K-034 (from 230 rub./lm) to the monumental K-104 (from 6,060 rub./lm). Geometry — stable, drying — proper, room acclimatization — and the baseboard will fit as it should: tightly, evenly, without deformation.
Included with the baseboard —K-series casings and cornicesfor doorways and ceilings,wooden cornices KZ-seriesfor curtains,Furniture legsfor a wooden ensemble in the lower zone. If the room is humid —polyurethane moldings of the KPU seriesfrom 30+ profiles for any occasion.
Profile samples — from 180 rub. per piece. Stock program. Shipment on the day of order. Delivery across Russia and CIS countries.
STAVROS — is when replacing a baseboard ends not with 'yet another repair,' but with a true interior update.


