Article Contents:
- From Flat Surface to Artistic Panel
- Vertical and Horizontal Board Schemes
- Patterns: Fine Graphics on Panel
- Wooden Profile: Transition Elements
- Baseboard Role: Finishing the Panel
- Three-Dimensionality Through Rhythm
- Working with Light and Shadows
- Application Scenarios: Walls, Niches, Television Walls
- Conclusion: Art of Wooden Panels by STAVROS
- Frequently Asked Questions

The wall is no longer just a vertical plane limiting space. Modern interiors transform the wall into a canvas where a three-dimensional composition made of wood, light, and shadows is created.wooden planks on the wallThey create rhythm, verticals that draw the eye upward to the ceiling or horizontals that expand narrow spaces.Wooden moldingThey refine fine graphics, divide large forms into sections, and create structure.Wooden profileIt ensures smooth transitions between materials, finishes corners, and hides technical joints.Floor baseboard woodIt completes the composition at the bottom, creating a logical transition from the vertical panel to the horizontal floor plane. All of this together transforms an ordinary wall into a three-dimensional artistic panel that changes depending on lighting, viewing angle, and time of day. Let's explore the technologies for creating decorative walls, where each element contributes to the overall image.


From Flat Surface to Artistic Panel
A flat painted wall is a background, a neutral surface that does not attract attention. It works in minimalism, where the main focus is space, light, and the absence of unnecessary details. But when expressiveness, character, and individuality are needed, a flat wall becomes the basis for a three-dimensional composition.Wooden planks for wall decoration— the first tool for this transformation.
The concept of a three-dimensional wall is built on adding the third dimension — depth. If a flat wall is two-dimensional (width and height), then a board wall is three-dimensional (width, height, depth of the protruding boards). Even a minimal protrusion of 20-30 mm creates relief that catches light, casts shadows, and changes perception as the viewer moves. This effect is enhanced by proper lighting — side, directional, creating long shadows.
The basic structure of a board wall is simple: a frame made of 40x40 mm beams, mounted vertically or horizontally on the wall with a spacing of 600-800 mm. Boards 30-50 mm wide are attached to the frame at a specified interval. The interval determines the character of the composition: dense placement with an interval of 20-40 mm creates almost a solid surface, sparse placement with an interval of 100-150 mm — a graphic structure. The choice depends on the concept.
The material of the boards is critical for durability and aesthetics.Decorative oak plank— the choice for serious interiors, where expressive texture and maximum stability are important. The oak texture with pronounced annual rings creates a living surface that does not repeat from board to board. The density of oak 700-800 kg/m³ ensures resistance to mechanical damage — boards do not deform from accidental impacts and retain their geometry for decades.
Interior oak plankIt differs from construction in terms of processing care. All four sides are sanded with grit 120-180 abrasives, edges are rounded with a radius of 2-3 mm (removal of sharp edges), ends are processed. The finish — oil or lacquer in three layers with intermediate sanding — protects the wood and emphasizes the texture. Interior boards are ready for installation without additional processing on-site.
The functional role of a decorative wall goes beyond aesthetics. Acoustic correction — a board structure with air gaps disperses sound waves, reduces reverberation, and makes the room more comfortable for conversation. This is especially valuable in living rooms, offices, and meeting rooms. Concealing wall defects — uneven plaster, cracks, traces of old finishes — are hidden behind boards without the need for major leveling. Savings on wall preparation can amount to 20-30 thousand rubles.
The psychological impact of a three-dimensional wall is scientifically proven. Humans have evolved to be accustomed to natural environments with their relief, textures, and variability. Smooth flat surfaces are subconsciously perceived as artificial and cold. A wooden board wall returns natural complexity to the interior, creating a sense of coziness, warmth, and safety. This is especially important in city apartments, where people are disconnected from nature.


Vertical and Horizontal Board Schemes
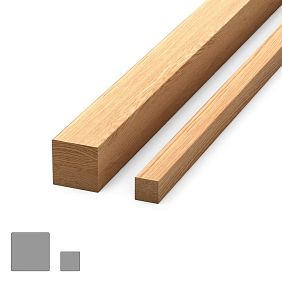
Vertical boards — a classic scheme visually increasing the height of the room. The gaze slides along vertical lines upward, making the ceiling appear higher. The effect is enhanced in rooms with low ceilings 2.5-2.7 meters, where every visual trick counts.Wooden railsBoards with a cross-section of 40x20 mm, installed vertically with an interval of 80 mm, create a fence of parallel lines from floor to ceiling. This is a powerful visual trick that works reliably.
The technology of installing vertical boards begins with a horizontal frame. 40x40 mm beams are mounted horizontally on the wall at heights of 300, 900, 1500, and 2100 mm from the floor — four levels for a standard ceiling height of 2.7 m. Each beam is leveled horizontally with a bubble level, secured with dowels and self-tapping screws at 600 mm intervals. Boards are mounted vertically on self-tapping screws 35-40 mm long, two screws per frame level. Screw heads are recessed by 2 mm and filled with putty.
The interval between vertical rails determines visual density. Dense arrangement with an interval of 40-60 mm creates almost a solid structure, resembling picket fencing. Through such a structure, almost nothing is visible; it effectively zones space and ensures privacy. Medium arrangement with an interval of 80-100 mm — a balance between enclosure and permeability, a popular solution for accent walls. Sparse arrangement with an interval of 120-200 mm — a graphic structure, more decorative than zoning.
Horizontal rails create the opposite effect — visually expand space, making it appear wider. The gaze slides along horizontal lines, making the room seem more spacious. This is valuable in narrow rooms — corridors, entryways, narrow bedrooms, where it is necessary to visually push back the walls. Horizontal rails also create a sense of stability and calm — horizontal lines are associated with the ground, foundation, and rest.
Installing horizontal rails requires vertical battens. The battens are installed vertically with a spacing of 600-800 mm. Rails are mounted horizontally; it is crucial to maintain strict parallelism — even a deviation of 2-3 degrees is noticeable to the eye, creating an impression of curvature or carelessness. A long level (1.5-2 meters) or a laser level, creating a horizontal light line across the entire wall length, is used. Each rail is positioned along this line.
Combined schemes — vertical + horizontal — create complex geometric compositions. The main array is vertical rails. Several horizontal rails pass through them, dividing the wall into tiers, creating intersections and nodes. These nodes become compositional centers that attract attention. A combined scheme is more complex to install — precise fitting of intersections is required, but the result is impressive.
Diagonal schemes — rails at 30-60 degree angles — create dynamism, energy, and originality. Diagonal lines break the familiar geometry of rectangular rooms, establishing a directional gaze movement. Used in modern, avant-garde interiors where originality is valued. Installing diagonal rails is more complex — the battens must be perpendicular to the rails (if rails are at 45°, battens at 135°), precise angle calculations are required, and extensive end trimming is needed.
Our factory also produces:


Panel patterns: fine graphics on panels
Decorative wooden moldingPanel patterns operate on a different scale than rails. If rails create a large-scale structure (width 30-50 mm, intervals 60-150 mm), then panel patterns create small-scale graphics (width 20-30 mm, forming frames of 80x100 cm or smaller). Panel patterns divide large surfaces into sections, creating a panel structure characteristic of classical and neoclassical interiors.
The wall panel system is built on the combination of rails and panel patterns. A large frame of 40x40 mm rails divides the wall into large sections of 120x150 cm. Within each section, a 25x12 mm panel pattern creates smaller frames of 40x50 cm. The filling between panel patterns — painted MDF, patterned wallpaper, fabric covering, mirrored inserts. Each section becomes an individual composition, but together they create a unified system.
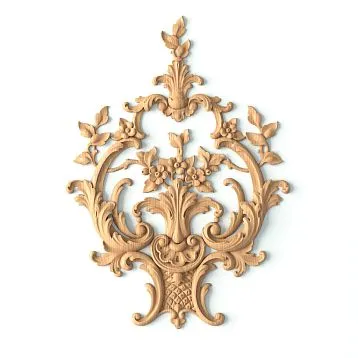
The panel pattern profile determines the stylistic character. A flat rectangular-section panel pattern — for minimalism and modern interiors. A panel pattern with one rounded corner of 4-6 mm radius — a universal solution that softens geometry. A decorative panel pattern with a complex profile (grooves, rounded corners) — for classic styles. A carved panel pattern with botanical motifs — for luxurious historical styles (Baroque, Rococo).
Panel pattern mounting over a base panel (MDF, gypsum board, plywood) is done with wood glue and additional fixation using finish nails 25-30 mm long. Nails are driven in at 300-400 mm intervals, strictly perpendicular, and nail heads are recessed 1-2 mm with a nail set, then filled with wood-colored putty. After sanding, mounting points are invisible. The quality of 45-degree corner joints of the panel pattern — a measure of craftsmanship.
The geometry of panel pattern frames follows proportional systems. The golden ratio (1:1.618), classical proportions (2:3, 3:4, 3:5) create harmonious forms. A 60 cm wide frame with a 2:3 proportion should have a height of 90 cm. Square frames (1:1) and overly elongated frames (1:3 and larger) are perceived as disproportionate and are avoided by professional designers. Precise calculation of proportions — a sign of a well-thought-out project.
Panel pattern color solutions vary. Panel pattern in wall color creates a monochromatic relief surface, where the effect is built on play of light and shadow. Contrasting panel pattern (white on gray, black on white, natural oak on painted wall) emphasizes geometry, making the structure graphic. Patinated panel pattern (dark pigment in texture recesses) creates an aged wood effect, popular in country and Provence styles.
Multi-level panel patterns create a complex hierarchy of forms. First level — large 35x15 mm panel pattern forms large sections of 100x120 cm. Second level — medium 25x10 mm panel pattern divides large sections into medium 50x60 cm. Third level — small 20x8 mm panel pattern creates final division into 25x30 cm. Such complexity is characteristic of high-end classical interiors, where detail and richness of forms are valued.
Get Consultation
Wooden profile: transition elements
Profile made of woodIn decorative walls, it performs both technical and aesthetic roles. Technically, it covers joints between different materials (wood-gypsum board, wood-wall, wood-wood), protects corners from damage, and creates neat transitions. Aesthetically, it completes the composition, emphasizes boundaries, and creates a frame.
L-shaped corner profile protects external corners of decorative panels. The width of the flanges is 25-35 mm, the external corner is rounded with a radius of 5-8 mm or beveled at 45 degrees. Oak corner profile does not deform from accidental impacts and retains its shape. Mounted with glue and finish nails into both flanges at 300 mm intervals. Mounting points are filled, sanded, and painted to match the profile.
Transition profile between decorative panel and flat wall creates a smooth visual transition. If the decorative panel protrudes from the wall by 50 mm (batten thickness 40 mm + rail thickness 20 mm - recess depth 10 mm), a sharp break looks unfinished. A transition profile with a smooth bevel or step makes the transition neat and complete. Profile width 40-60 mm, thickness 15-25 mm.
Connecting profile with an H-shaped cross-section covers joints between decorative cladding panels. When a decorative wall is assembled from separate modules (e.g., 120x150 cm panels), technological gaps of 2-3 mm remain between them (to compensate for thermal deformation). The connecting profile covers these gaps, creating visual continuity. Profile width 30-50 mm, slots on the sides for inserting panel edges.
Ceiling profile-cornice completes the decorative wall from above. If the rail wall extends to the ceiling, the transition from rail to ceiling must be finished. Cornice 60-100 mm wide, mounted along the top of the wall, creates a visual finish, hides possible joint irregularities, and can serve as a base for hidden lighting (LED strip behind the cornice, light directed upward toward the ceiling).
Floor profile-baseboard completes the decorative wall from below. But it deserves a separate section — its role is so significant that it merits detailed consideration. Here, we merely note that coordination of profiles — corner, transition, ceiling, floor — in terms of material (same wood species), color (same finish) is critical for the integrity of the composition.
Decorative profiles with carving, patina, and gold leaf are used in luxurious interiors to accentuate panel boundaries. Carved profiles with botanical motifs frame the central panel, turning it into a picture. Patinated profiles with an aged effect create a historical atmosphere. Gold-leafed profiles (gold leaf or gilding) add luxury characteristic of palace interiors. Such solutions are expensive but justified in premium projects.
Baseboard role: finishing the panel
Floor baseboard woodIn the context of decorative walls — it is not merely an element hiding the gap between floor and wall. It is the lower boundary of the composition, the visual base on which the vertical structure 'stands'. Baseboard connects the decorative wall to the floor, creating a sense of grounding and solidity.
The height of the baseboard under the decorative wall is chosen proportionally to the room height and the scale of the rail structure. For standard ceilings 2.7 m and rails 40 mm wide, an optimal baseboard is 80-100 mm. For high ceilings 3.2-3.5 m and wide rails 50-60 mm — a baseboard 120-150 mm. A narrow baseboard 60 mm under a tall rail wall looks disproportionately small and does not create the required visual base.
The baseboard profile must match the rail profile. If rails are flat rectangular-section (minimalism), the baseboard should also be simple — a rectangle with one rounded corner of 5-8 mm radius on the top edge. If rails have a decorative profile (grooves, rounded corners), the baseboard should have similar profile elements. Uniformity of profiles creates visual connection between elements.
The baseboard color solution is determined by the concept. Baseboard in rail color creates a monolithic vertical structure from floor to ceiling. The decorative wall and baseboard are perceived as a single unit. Baseboard in floor color visually expands the floor covering, creating a horizontal base from which the vertical wall rises. Contrasting baseboard (white with dark rails, dark with light rails) emphasizes the boundary, creating graphic contrast.
The junction of the baseboard with the decorative wall is technically complex. Rails protrude from the base wall by 40-60 mm. The baseboard must wrap around these protrusions, creating a neat joint. Two solutions: baseboard is installed only on the base wall, not extending onto the decorative section (a gap remains between the end of the decorative wall and the start of the baseboard, covered by a end cap); baseboard protrudes forward by the thickness of the rails, creating a unified plane with the rails (requires a groove on the back of the baseboard for the batten).
Baseboard installation in the decorative wall zone requires precision. Actual dimensions of sections are measured, taking rail protrusions into account, and baseboard segments of required length (by the meter, with cutting to size) are ordered. Ends are mitered at 45 degrees in corners, at 90 degrees in longitudinal joints. Mounted with finish nails or hidden mounting on a mounting strip. Nail heads are recessed, filled, sanded, and painted.
Accentuating baseboard with LED backlighting creates a floating wall effect. A 15-20 mm gap is left between baseboard and floor, into which an LED strip is installed. Light is directed downward onto the floor, creating a light strip along the wall. In darkness, the decorative wall appears to detach from the floor, floating in the air. An effective technique for modern interiors, requiring precise installation and quality LED strips with even illumination.
Three-dimensionality through rhythm
Rhythm — the repetition of elements at equal intervals — is the foundation of perceiving a lath structure. Vertical laths 40 mm wide with an 80 mm interval form a 1:2 rhythm (lath width to interval). This rhythm creates visual music that the eye reads instantly. Disrupting the rhythm (a random lath with a different interval) is perceived as an error, dissonance, and is irritating.
Monotonic rhythm — all intervals are identical — creates a calm, balanced structure. This is a basic solution that works reliably. The gaze glides along parallel lines, finding no anchor points, sinking into a meditative state. Monotonic rhythm is suitable for bedrooms, relaxation zones, spaces where one needs to calm down and relax.
Variable rhythm — intervals change according to a specific rule — creates dynamism and visual interest. For example, groups of three laths with a 60 mm interval, with 120 mm intervals between groups. The rhythm groups into clusters, which the eye reads as separate units. Variable rhythm is more complex than monotonic in design and installation, but creates a richer perception.
Accent rhythm — most laths of one width, a few accent laths of another width — creates hierarchy. For example, main laths 40 mm, accent laths 60 mm installed every fifth. Accent laths attract attention, divide the wall into sections, create visual markers. Accent rhythm is suitable for large walls, where monotonic rhythm would be dull.
Mathematical rhythms — based on number sequences (Fibonacci, arithmetic progressions) — create complex but harmonious structures. Intervals change according to the Fibonacci sequence: 20, 30, 50, 80, 130 mm. Such rhythm is organic (found in nature — leaf arrangement on a stem, shell spiral), subconsciously perceived as harmonious. Mathematical rhythms — a tool for architects and designers who master composition theory.
Rhythm disruption as an artistic technique — deliberate deviation from the rule to create an accent. All laths are installed with an 80 mm interval, except for one zone where the interval is 40 mm (denser). This zone attracts attention and becomes a compositional center. Or one lath is installed at an angle, disrupting the verticality of the others. Such techniques work in avant-garde interiors, requiring a sense of measure — excessive disruptions turn into chaos.
Relief depth enhances rhythm perception. If all laths protrude 30 mm, the rhythm is read through shadows. If laths protrude at different depths (30, 40, 50 mm), a multi-level relief emerges, more complex and interesting. Multi-level relief requires a complex grid with boards of different thicknesses, precise installation, but the result is impressive — the wall becomes a sculpture.
Working with light and shadows
Light — the primary tool for revealing the potential of decorative lath walls. With flat frontal lighting (chandelier in the center of the ceiling), relief is almost unreadable — laths appear as dark vertical stripes on a light background, volume is not perceived. With side lighting (wall sconces, floor lamps), relief is maximally revealed — each lath casts a long shadow, the wall becomes three-dimensional.
Directional lighting is specifically designed to highlight relief. Linear LED fixtures are installed at the bottom of the wall (in the baseboard or behind it), directing light upward along the laths. Light glides over the protrusions of the laths, falls into gaps, creating alternating light and deep shadows. This scheme is dramatic, creating a theater spotlight effect, suitable for accent walls in living rooms and offices.
Backlighting — light source behind the lath structure — creates a glowing wall effect. A 30-50 mm gap is created between the base wall and laths, and an LED strip is mounted in this gap. Light passes through gaps between laths, and laths appear as dark silhouettes against the glowing background. The effect is cosmic, futuristic, popular in modern interiors, clubs, bars.
Dynamic lighting — changing intensity, color, and direction of light — transforms a decorative wall into a living interior element. A "smart home" system controls LED fixtures, changing scenes. In the morning, bright cool light (5000-6000K), highlighting wood texture. During the day, diffused neutral light (4000K), background lighting. In the evening, warm dim light (2700-3000K), creating coziness. At night, minimal backlighting, functioning as a nightlight.
Color lighting with RGB strips transforms a wooden wall into a design object. Oak laths under blue light acquire a cool graphite tone. Under red — warm copper. Under green — natural mossy. Changing colors allows altering the room’s atmosphere, adapting it to mood or event. Color lighting is suitable for entertainment spaces, youth interiors, creative studios.
Natural lighting — daylight from a window — creates a changing picture. In the morning, when the sun is low, slanted rays highlight every detail of the relief, shadows are long and sharp. During the day, when light is diffused, the relief is smoothed, the wall appears calmer. In the evening, when the sun sets on the other side, shadows fall in the opposite direction, the wall is perceived differently. This variability — a valuable property — makes the interior alive.
Application scenarios: walls, niches, TV zones
Accent wall in the living room — the most popular application scenario for decorative laths. One wall (usually behind the sofa or opposite the entrance) is fully or partially covered with vertical laths. Other walls remain neutral — painted in one color. Accent wall attracts attention, becomes a compositional center, sets the character of the entire space. Dimensions: wall width 4-5 m, height from floor to ceiling 2.7 m, oak laths 40x20 mm with 80 mm interval.
A decorative niche in the wall transforms from a technological recess into an artistic object thanks to laths and backlighting. A niche 200-300 mm deep is clad internally with horizontal laths. Between laths — an LED strip, light directed toward the back wall of the niche. The niche glows from within, laths create a graphic structure. Decorative items — vases, sculptures, books — are placed inside the niche. Dimensions: niche width 1.2-1.5 m, height 1.8-2.0 m.
TV zone requires a special approach. The TV screen — a dark rectangle — needs framing, visual integration into the wall. Around the TV, a panel of laths is created that "embeds" the screen into the wall structure. Laths can be arranged vertically on both sides of the TV, creating a frame. Or the wall is fully covered with laths, with a rectangular window cut out in the center for the TV. Important: cable channels for TV wires and sockets must be provided behind the laths.
Headboard wall in the bedroom — another popular scenario. The wall behind the bed is clad with laths from floor to ceiling or up to 1.2-1.5 m (only in the headboard zone). Horizontal lath placement creates a calm atmosphere conducive to sleep. Vertical — more dynamic, suitable for modern bedrooms. Built-in LED fixtures in the laths function as nightlights, bedside lamps, reading lamps.
Zoning space with lath partitions divides a studio or loft into functional zones without erecting load-bearing walls. A partition 2.2-2.5 m high made of vertical laths with 80-100 mm intervals divides space while maintaining visual continuity. Light, air, and human silhouettes pass through the laths, creating a sense of separate zones. The partition can be stationary (fixed to floor and ceiling) or mobile (on wheels).
Staircase zone benefits from lath cladding of the side wall. Vertical laths along the staircase emphasize upward movement, creating dynamism. Horizontal laths slow movement, creating step rhythm. Built-in or behind-lath lighting illuminates steps, ensures safety, and creates atmosphere. The staircase transforms from a technical element into an architectural object.
Hallway with a lath wall welcomes guests with an expressive composition. A narrow hallway visually expands with horizontal laths. A low hallway appears elevated with vertical laths. Laths can integrate functional elements — hooks for clothes, shelves for shoes, mirrors. All this is integrated into the lath structure, becoming part of the composition, not random hanging elements.
Conclusion: Art of Wooden Panels from STAVROS
Creating a decorative wall from laths, planks, profiles — is not just assembling elements. It is designing a three-dimensional composition where every line, every interval, every shadow contributes to the overall image. STAVROS offers a full range of materials to realize any concept.
wooden planks on the wallfrom STAVROS — premium oak and beech wood, kiln-dried to 8±2%, high-precision processing with tolerance ±0.3 mm, multi-stage sanding. Each lath is ready for installation — rounded edges, processed ends, protective finish of oil or lacquer.
Wooden planks for wall decoration, Wooden molding, Wooden profile, baseboard for floor— all elements from one batch of wood with a unified processing and coating process. This guarantees color, texture, and quality consistency. Ordering a materials kit for a project from one source — a guarantee of result integrity.
STAVROS specialists’ consultations help select optimal lath sizes, calculate intervals, choose wood species and finish. Material samples are provided for visual assessment. Custom solutions are developed for complex projects — curved structures, multi-level reliefs, lighting integration.
Moscow and St. Petersburg warehouse program ensures prompt delivery. Standard laths, planks, profiles are shipped from the warehouse within 1-3 days. Non-standard sizes and profiles are manufactured to order within 10-14 days. Materials can be cut to customer-specified dimensions, optimizing layout and reducing waste.
STAVROS — a partner of professionals creating high-level interiors, where every detail is thought out, where material quality matches execution quality, where wood fully reveals its potential.
Frequently asked questions
What interval between laths is optimal for an accent wall?
80-100 mm for planks 40 mm wide — universal solution. Less than 60 mm — too dense, more than 120 mm — too sparse for basic scenario.
How much does a 10 m² plank wall cost with materials and installation?
60,000–120,000 rubles depending on wood species (spruce, beech, oak), construction complexity, and presence of lighting. An oak wall with lighting — upper limit.
Can planks be mounted on an uneven wall?
Yes, the framing compensates for unevenness up to 20 mm. It is set level, and compensating elements are placed under the beams. Planks are attached to the even framing.
How to care for a decorative plank wall?
Regular dry vacuuming with a soft attachment once a week. Wet wiping with a well-wrung cloth once a month. Oil finish renewal every 3–5 years.
Are wooden boards suitable for humid rooms?
With additional treatment using a water-resistant coating (yacht varnish, special oil) — yes. But for bathrooms, it’s better to use water-resistant MDF planks with oak veneer.
Which wood species is better for a plank wall — oak or beech?
Oak for expressive texture and maximum durability. Beech for a more uniform appearance and 20–30% savings. Both options are quality.
How long does it take to install an 8 m² plank wall?
2–3 working days for a crew of two installers. One day for framing, one day for plank installation, half a day for finishing (puttying, touch-up).
Can a curved plank wall be made?
Yes, for radii from 2 meters. Planks are bent according to a template after steaming (for beech) or assembled from short segments forming a polygon that mimics a curve.