


Article Contents:
- What is a Coffered Ceiling and Why It's Trending Again
- Advantages of Wooden Slats for Ceilings
- Lightweight construction
- Naturalness and eco-friendliness
- Visual Warmth
- Design Flexibility
- Acoustic Effect
- Two Approaches: Imitating Classic Coffers or Modern Geometry
- Classic Coffers
- Modern geometry
- Structural Calculation: Dimensions, Spacing, Height
- Determining Cell Size (for Classic Coffers)
- Slat Width and Height
- Material Quantity
- Installing Wooden Slats on the Ceiling: Technology
- Preparing the ceiling
- Marking
- Frame Installation (Optional)
- Mounting rails
- Joining Slats at Nodes
- Finishing
- Integrating Lighting into a Slatted Ceiling
- Recessed Spotlights
- LED Strips in Gaps
- Perimeter Lighting
- Chandelier as a Central Element
- Ceiling Slats and Vertical Lines: Three-Dimensional Grid
- Principle of Consistency
- Vertical Lines of Furniture
- Horizontal Lines and Furniture
- Play of Scales
- Interior Styles and Wooden Ceilings
- Classic and neoclassic
- Scandinavian Style
- Loft and Industrial Style
- Eco-style and naturalness
- Minimalism
- Mistakes When Creating a Slatted Ceiling
- Incorrect Cell Proportion
- Ignoring Room Height
- Poor Fastening
- Lack of Finishing
- Inconsistency with the rest of the interior
- Wooden ceiling care
- Frequently asked questions about wooden slat ceilings
- Can wooden slats be installed on a stretch ceiling?
- How much does it cost to create a wooden slat ceiling?
- Is a wooden ceiling suitable for a bathroom?
- Does a slat ceiling reduce room height?
- Can a slat ceiling be made DIY?
- How to calculate the number of lights for a slat ceiling?
- Does a slat ceiling improve acoustics?
- Can wooden slats be combined with other materials?
- Conclusion: architecture begins with the ceiling

The ceiling is the fifth wall of a room that we undeservedly ignore. Most interiors are limited to a white plane, at best a stretch fabric with spotlights. But just add three-dimensional elements to the ceiling, and the space transforms: depth appears, architectural expressiveness, a sense of thoughtfulness in every detail. One of the most effective techniques is usingdecorative wooden stripsto create a ceiling structure that mimics classic coffers or forms a modern geometric pattern.
Why wooden slats specifically? They are lightweight, don't overload the ceiling's load-bearing structure, are easy to install, and create natural warmth in the interior. At the same time, they can recreate the luxury of palace coffered ceilings without the cost of massive drywall or plaster constructions. And if you connect the ceiling slats with vertical elements on the walls and furniture lines, a three-dimensional compositional grid emerges, organizing the entire room space into a unified architectural system. Let's figure out how this works and how to implement it in practice.


What is a coffered ceiling and why is it trending again
Coffers are recessed cells in a ceiling formed by the intersection of beams or ribs. Originally, this was a structural necessity: in stone and wooden ceilings, coffers lightened the weight of the structure, allowing for larger spans. Over time, functionality took a back seat, and decorativeness came to the forefront. Coffered ceilings became a symbol of luxury—they were adorned with carvings, paintings, and gilding.
During the minimalist era, coffers faded into the background. Smooth white ceilings dominated for decades. But today we see a resurgence of interest in three-dimensional ceilings. Why? Because flat surfaces have created visual fatigue. Interiors have become boring, similar to each other. Architects and designers are once again turning to techniques that add complexity, rhythm, and character to space.
Modern coffers are not necessarily classic square cells with molding. It can be a free geometric pattern made ofdecorative wooden planks, creating a dynamic grid. Or parallel beams running across the entire room and visually elongating the space. Or an asymmetrical composition where slats of different widths and heights form a unique relief. The main things are volume, rhythm, and the play of light and shadow.


Advantages of wooden slats for ceilings
Why wood specifically, and not drywall, polyurethane, or MDF? Naturaldecorative wooden plankshave a number of undeniable advantages.
Our factory also produces:


Lightweight construction
Wood is a lightweight material compared to drywall constructions or concrete beams. Wooden slats do not create a critical load on the ceiling, which is especially important in apartments with limited load-bearing capacity. One linear meter of oak slat with a 50×30 mm cross-section weighs about 500-600 grams. For decorating a 20 m² room ceiling, approximately 100-120 linear meters of slats are needed, with a total weight of 50-70 kg. This is an acceptable load even for old ceilings.
Get Consultation
Naturalness and eco-friendliness
In an era when people pay more attention to the composition of materials in their homes, natural wood is an obvious choice. It does not emit harmful substances, breathes, and creates a healthy microclimate. This is especially important in bedrooms and children's rooms, where air quality directly affects health.
Visual warmth
Wood adds warmth, coziness, and a connection to nature to an interior. Even if the walls and floor are neutral, a wooden ceiling creates a sense of lived-in comfort and intimacy. This is critical for large rooms with high ceilings, where smooth surfaces can create coldness and alienation.
Design flexibility
Wooden slats can be painted, tinted, or patinated, creating any desired shade—from white Scandinavian to dark wenge. You can combine slats of different widths, creating rhythmic patterns. You can install them at different levels, forming a multi-layered relief. The variability is enormous.
Acoustic effect
Wood has sound-absorbing properties. A ceiling with wooden slats improves room acoustics by dampening echo and reverberation. This is especially valuable in large living rooms, studios, and rooms with high ceilings where sound can bounce around and create discomfort.
Two approaches: imitation of classic coffers or modern geometry
When designing a wooden slat ceiling, you have two main paths.
Classic coffers
This is a regular grid of intersecting beams forming square or rectangular cells. Classic coffers imply symmetry, clear rhythm, and traditional proportions. Cells are typically square with sides of 60-120 cm, beams are 80-150 mm wide and 50-80 mm high.
This approach is ideal for interiors in classic, neoclassical styles, for studies, libraries, dining rooms where an atmosphere of solidity and tradition is important. Classic coffers pair well witha ceiling with molding, cornices, and rosettes around the chandelier.
Color for classic coffers is typically natural wood with a transparent finish highlighting the grain, or painted in dark noble tones (walnut, stained oak, wenge). Less commonly, white or cream, which creates a lighter, more elegant look.
Modern geometry
This is a free composition where slats are not necessarily perpendicular, where cells can be of different sizes, where the rhythm is deliberately broken to create dynamism. The modern approach allows for asymmetry, diagonals, alternating wide and narrow slats, and multi-level structures.
Such a ceiling suits modern interiors—loft, minimalism, Scandinavian style, eco-style. It creates a sense of freedom, airiness, and unconventionality. Colors are light (whitewashed oak, ash), natural, sometimes contrasting (black slats on a white ceiling).
Modern geometry allows for integrating lighting into the ceiling—recessed fixtures, LED strips in the gaps between slats, creating soft diffused glow. This is not only functional but also visually impressive—the ceiling transforms into a luminous plane with a three-dimensional pattern.
Structural calculation: dimensions, spacing, height
Before rushing to buy slats, it's important to carefully design the ceiling structure. The correct calculation determines whether the result will be harmonious or chaotic.
Determining cell size (for classic coffers)
Cell size should relate to the room size. For small rooms (up to 15-20 m²), cells of 60-80 cm are optimal. For medium rooms (20-40 m²)—80-100 cm. For large rooms (over 40 m²)—100-120 cm and larger.
Too small cells in a large room will look fussy, overloaded. Too large cells in a small room—empty and disproportionate. Find a balance based on the ceiling dimensions.
It's important to consider not only the area but also the room proportions. In an elongated rectangular room, it's better to use rectangular cells oriented along the long side. In a square room—square cells.
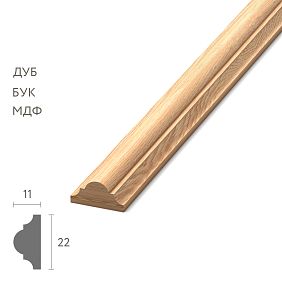
Slat width and height
Slat width (the visible part from below) determines how massive the structure will appear. Narrow slats (40-60 mm) create a light, graphic pattern. Wide slats (100-150 mm)—a powerful, substantial one.
For classic coffers, slats 80-120 mm wide are used—they visually resemble beams, creating a sense of support. For modern structures, narrower profiles of 50-70 mm can be chosen, making the ceiling more airy.
Slat height (how far they protrude downward from the ceiling) affects volume and shadows. Minimum height—30 mm, such slats create only a hint of relief. Medium—50-60 mm, this is the optimal choice for most rooms. Maximum—80-100 mm, used in high rooms to create a dramatic effect.
Important: the higher the slats, the more they 'eat up' the room height. In a standard apartment with a 2.7 m ceiling, 80 mm high slats will lower the ceiling to 2.62 m, which can create a feeling of pressure. For typical apartments, a slat height of 40-50 mm is optimal.
Material quantity
Let's calculate for a 4×5 m room with a classic coffered grid. Cells 80×80 cm, slat width 100 mm.
Longitudinal beams: along the room (5 m), beams need to be placed at 80 cm intervals. Quantity: 4 m / 0.8 m = 5 beams. Length of each—5 m. Total: 5 × 5 = 25 linear meters.
Transverse beams: across the room (4 m) with the same spacing. Quantity: 5 m / 0.8 m ≈ 6 beams. Length of each—4 m. Total: 6 × 4 = 24 linear meters.
Total: 25 + 24 = 49 linear meters of slats.
Add 10% for cutting and possible errors. Total: 54 linear meters.
For modern free-form layouts, the calculation is individual and depends on the specific sketch.
Installation of wooden slats on the ceiling: technology
Installing ceiling slats is more difficult than wall slats — the work is overhead, requiring precision and reliable fastening. Let's consider the process step by step.
Ceiling preparation
The ceiling must be level, strong, and dry. Ideally, it should be a concrete slab or a drywall ceiling on a metal frame. If the ceiling is wooden (in private houses), check its condition — ensure there is no sagging, rot, or damage.
Clean the ceiling of old finishes, dirt, and dust. If you plan to paint the space between the slats, do it before installation — it will be more difficult later.
Marking
Transfer the project onto the ceiling. Use a laser level or stretched strings to create precise markings. Mark the position of each slat. Check the perpendicularity of the lines and the symmetry of the composition.
If installing classic coffers, start marking from the center of the room, moving toward the edges. This ensures symmetry. For modern layouts, you can start from any wall, but monitor the overall balance of the composition.
Frame installation (optional)
If the slat height is significant (more than 50 mm) or the ceiling is not perfectly level, it is better to first install a frame of battens and then attach the slats to it. The frame levels the plane and ensures the strength of the structure.
Battens of 40×40 or 50×50 mm are attached to the ceiling with dowels or anchors at intervals of 50-70 cm. Check the level — all battens should lie in the same horizontal plane.
Plank mounting
Slats are attached to the ceiling (or to the frame) with screws. The fastening interval is 40-60 cm. Use screws of sufficient length to pass through the slat and securely fix into the concrete (with dowels) or into the frame.
Screws can be driven from below, through the face of the slat — then the heads will be visible. They can be masked with wooden plugs in a matching tone. Alternatively, screws can be driven at an angle from the end of the slat — then the fasteners will be hidden, but this method requires more skill.
For heavy structures or at joints, additionally use mounting adhesive (liquid nails) — it enhances adhesion and reduces the risk of sagging over time.
Joining slats at nodes
The most complex moment is joining longitudinal and transverse slats at the nodes of the coffered grid. There are several options.
Simple option: all slats lie in the same plane, intersecting end-to-end. At intersections, one slat is cut and attached to the end of the other. This is practical but does not create a pronounced volume.
Multi-level option: slats are attached at different levels. For example, longitudinal beams are lowered 50 mm from the ceiling, and transverse beams are lowered 70 mm, creating an interweaving effect. This is more impressive but more difficult to execute.
Using decorative elements at nodes: at the intersections of slats, you can install square or round overlays, carved rosettes — this is a classic technique characteristic of traditional coffered ceilings. Such elements hide joints and add decorativeness.
Final finishing
After installation, the slats require finishing. If the wood was pre-painted or oiled, it is enough to mask the fastening points. If the slats were installed unfinished, now is the time to apply the finish.
Clean the surface of dust and degrease it. Apply primer (if painting is planned) or oil (if you want to preserve the texture). Paint with a brush, thoroughly covering all edges, ends, and joints. Apply 2-3 coats with intermediate drying.
If using tinting or patina, apply it before the final coat of varnish or wax. This will create an aged effect and emphasize the relief.
Integrating lighting into a slatted ceiling
One of the main advantages of a wooden slat ceiling is the ability to integrate lighting, making it part of the architectural composition.
Recessed spotlights
Spotlights can be placed in the cells between the slats. They are installed in the base ceiling before the slats are mounted. After installing the slats, the lights end up inside the cells, creating soft, even lighting.
Use fixtures with directional or diffused light depending on the task. Directional lights (spots) are suitable for accent lighting, diffused lights for general ambient light.
LED strips in the gaps
If there are gaps between the slats (rather than solid filling), you can hide an LED strip behind the slats. Light will pass through the gaps, creating a glowing grid effect.
The strip is glued to the base ceiling before installing the slats. Use a strip with warm or neutral white light. RGB strips allow you to change the lighting color, creating different moods.
Perimeter lighting
A classic technique is to hide an LED strip in a cornice around the perimeter of the ceiling. The light is directed upward, onto the ceiling, creating a floating ceiling effect. Under such lighting, wooden slats cast expressive shadows that emphasize the relief.
This method requires a ceiling cornice with a niche for the strip. The strip is placed in the niche and covered with a diffuser so that individual LEDs are not visible.
Chandelier as a central element
In classic coffered ceilings, a chandelier is a mandatory element. It is placed at the center of the composition, often within the central cell, which may be larger than the others.
Around the chandelier mounting point, a ceiling rosette can be installed—a decorative round or polygonal element that frames the hook and wires. This is a classic technique that gives the ceiling a finished look.
Ceiling slats and vertical lines: a three-dimensional grid
Now let's move on to the most interesting part: how to connect ceiling slats with vertical interior elements, creating a unified spatial composition.
Imagine: on the ceiling—a horizontal grid of wooden beams. On one of the walls—vertical slats. In the room stands Modern Furniture with clear vertical lines—a tall shelving unit, a tall cabinet, high chair legs. When all these elements are coordinated in rhythm and proportions, a three-dimensional coordinate grid emerges, organizing the space on all levels.
Principle of coordination
The key to creating a harmonious grid is consistency in spacing. If the ceiling slats are spaced 80 cm apart, use wall slats with the same 80 cm spacing or a multiple of it (40 cm, 160 cm). If furniture has a modular structure with 60 cm spacing, adjust the ceiling grid to this rhythm.
This doesn't mean everything must be absolutely identical. But there should be a common mathematical principle that connects the elements into a system.
Vertical lines of furniture
Tall furniture—cabinets, shelving units, étagères, high backs of chairs and armchairs—creates vertical lines in space. If these lines coincide or resonate with the lines of the ceiling slats (in position, spacing, thickness), a visual connection arises.
For example, a tall cabinet stands against a wall. Above it, on the ceiling, runs one of the beams of the coffered grid—and visually, the beam seems to 'rest' on the cabinet, creating the impression of a supporting structure. This enhances the feeling of stability and solidity in the interior.
Horizontal lines and furniture
Similarly, horizontal slats on walls or horizontal furniture elements (countertops, shelves, sofa backs) work. If their height coincides with the level of the lower edge of the ceiling slats or with the level of the cells, a horizontal layering of space emerges.
This creates an effect of architectural integrity: not just a collection of disparate items in a room, but a unified structure where each element is connected to the others.
Play of scales
An interesting effect occurs when elements of different scales resonate with each other. A large ceiling beam 150 mm wide and a thin chair leg 30 mm wide—a 5:1 proportion. If this proportion repeats in other elements (width of a wall slat to the width of a baseboard, width of a door frame to the width of a cornice), a harmonious scale hierarchy is created.
Such proportions are subconsciously perceived and create a sense of correctness and pleasantness in the interior, even if the viewer cannot explain exactly why.
Interior styles and wooden ceilings
A ceiling made of wooden slats is versatile—it can be adapted to any style, from classic to high-tech. Let's examine the main directions.
Classicism and neoclassicism
Here, coffered ceilings with precise geometry, symmetry, and decorative elements at the joints are appropriate. Slats are painted in natural wood tones or dark, noble colors. Cells can be adorned with stucco, rosettes, and moldings around the perimeter.
A classic wooden ceiling pairs well with crystal chandeliers, stucco cornices, parquet flooring, and solid wood furniture.
Scandinavian style
A light, airy ceiling made of light-colored slats—whitewashed oak, ash, pine. Slats can run parallel, creating a simple rhythm, or form a minimalist grid. No excess—only clean lines and the natural texture of wood.
A Scandinavian ceiling pairs well with white walls, light floors, simple furniture, and an abundance of natural light.
Loft and industrial style
Rough, wide beams in dark colors (wenge, stained oak, graphite) against a concrete or white ceiling. Slats can be deliberately massive, creating the impression of a load-bearing structure.
A loft-style ceiling combines well with exposed utilities, metal light fixtures, brick walls, and industrial-style furniture.
Eco-style and naturalness
A ceiling made of natural wood without painting, finished with clear oil or wax. Knots, texture, natural shades—all are welcome. Slats can vary in width, creating an organic, irregular pattern.
An eco-ceiling pairs with natural materials in the interior — stone, rattan, linen textiles, live plants.
Minimalism
Perfectly even, thin slats, painted the same color as the ceiling (often white). The pattern is simple, geometric, without excess. The slats merely hint at structure, not dominating the interior.
A minimalist ceiling serves as a backdrop for furniture and lighting, not as an independent focal point.
Mistakes when creating a slatted ceiling
As with any project, it's easy to make mistakes during the installation of ceiling slats that will ruin the result.
Incorrect cell proportion
Too small cells in a large room create visual noise and overwhelm the space. Too large cells in a small room look empty and disproportionate. Maintain a balance between cell size and room area.
Ignoring room height
Massive ceiling slats in a low room create a feeling of pressure, making the room seem even lower. In apartments with ceilings 2.5-2.7 m high, use thin, low-profile slats (40-50 mm in height) or avoid volumetric structures altogether in favor of flat decorative overlays.
Poor fastening
Ceiling slats are subject to pull-out forces under their own weight. Insufficient attachment points or weak fasteners can lead to sagging or even collapse of the structure. Use reliable anchors, enough screws, and if necessary, a frame and adhesive.
Lack of finishing treatment
Untreated wood on the ceiling will quickly gather dust, darken, and lose its appearance. Be sure to coat the slats with oil, wax, or varnish — this will protect the wood and make maintenance easier.
Lack of coordination with the rest of the interior
A ceiling made of dark, massive slats in a light, minimalist interior will look alien. Or vice versa — light, airy slats in a classic interior with heavy furniture and velvet curtains. Ensure stylistic unity.
Caring for a wooden ceiling
The ceiling is an area rarely reached by hand, so its care should be as simple as possible.
Wooden slats coated with oil or varnish do not require frequent care. It's enough to remove dust every 3-6 months with a dry, soft cloth or a vacuum with a brush attachment. If the surface is heavily dusty, you can wipe it with a slightly damp cloth, but without excess water.
Every 2-3 years, you can refresh the oil coating — this will revive the color and restore protective properties. To do this, wipe the surface, apply a thin layer of oil, let it absorb, and remove the excess. The task is not difficult but will require a stepladder or scaffolding.
Avoid aggressive cleaning agents, abrasives, steam cleaners — they can damage the wood or coating.
Frequently asked questions about wooden slatted ceilings
Can wooden slats be installed on a stretch ceiling?
No, the stretch fabric will not support the weight of the slats. The slats must be attached to the base ceiling before installing the stretch ceiling. Or use a combination: a stretch ceiling between the slats, with the slats attached to the ceiling via special mounting inserts.
How much does it cost to create a wooden slatted ceiling?
For a 20 m² room with a classic coffered grid, approximately 100 linear meters of slats are needed. Oak slats cost 200-300 rubles per linear meter, totaling 20-30 thousand rubles. Plus fasteners, finishing, labor (if hiring professionals). The final budget is 40-60 thousand rubles.
Is a wooden ceiling suitable for a bathroom?
Yes, but with caveats. Use moisture-resistant species (oak, larch), treat with moisture-protective compounds (yacht varnish, oil-wax), ensure good ventilation. In the dry zone of the bathroom (away from the shower), a wooden ceiling is quite appropriate.
Does a slatted ceiling reduce room height?
Yes, by the height of the slats plus the thickness of the frame (if present). Typically, the ceiling is lowered by 5-10 cm. For standard apartments, this is acceptable, but in low rooms, it may cause discomfort.
Can a slatted ceiling be made DIY?
Yes, with basic woodworking skills and tools. You'll need: a screwdriver, a saw (preferably a miter saw), a tape measure, a level, and a stepladder. The most difficult part is precise marking and overhead fastening. If unsure, it's better to invite a professional.
How to calculate the number of fixtures for a slatted ceiling?
General formula: 1 recessed light fixture per 1.5-2 m² of ceiling area. For a 20 m² room, you need 10-13 fixtures. Place them evenly in the cells between the slats, avoiding clustering in one area.
Does a slatted ceiling improve acoustics?
Yes, wood has sound-absorbing properties. Additionally, the ceiling texture scatters sound waves, reducing echo. To enhance the effect, you can place sound-absorbing panels behind the slats.
Can wooden slats be combined with other materials?
Yes, wood pairs excellently with concrete, metal, and glass. You can create a ceiling where slats alternate with metal profiles or glass inserts. This adds modernity and complexity to the interior.
Conclusion: architecture begins with the ceiling
A ceiling made ofdecorative wooden strips— is not just a decorative technique, but an architectural solution that changes the perception of the entire space. It adds depth, structure, and rhythm to the interior. It connects the ceiling with walls and furniture, creating a three-dimensional compositional grid. It transforms a room into a thoughtful, cohesive space where every element is in its place.
Classical coffers bring solidity and tradition, suitable for studies, libraries, and dining rooms. Modern geometric layouts create dynamism and freshness, ideal for living rooms, lofts, and studios. Integrated lighting turns the ceiling into a functional element that not only decorates but also illuminates.
The key is to properly design the structure, choose quality materials, and execute installation meticulously. And here, the company STAVROS comes to the rescue—a manufacturer of wooden slats and solid wood millwork. STAVROS offers a wide selection of slats in various sizes and wood species, kiln-dried lumber, precise processing on professional equipment, and consulting support at all project stages.
ChoosingWooden planks for decorationFrom STAVROS, you get material that will last for decades without deformation, preserving the beauty of natural wood. Delivery across St. Petersburg and all of Russia, flexible terms for large orders, and the possibility of custom sizes—all this makes STAVROS the optimal choice for implementing ceiling projects of any complexity.
Create spaces that inspire. Look up—and turn your ceiling into a work of architectural art with STAVROS!


