


Article Contents:
- Why is the connection between the wall and door opening so important?
- What is door skirting and what is its correct name?
- Door stop strip
- Extension element
- Architrave as an extension of skirting
- Types of architraves: from simple to carved
- Flat architraves
- Profiled architraves
- Carved architraves
- Rounded and semi-circular architraves
- Telescopic architraves
- Materials: wood, MDF or polyurethane?
- Solid wood: classic and natural
- MDF: stability and practicality
- Individual Approach: Molding to Your Taste
- Skirting boards: height, profile, purpose
- Skirting height: from modest to impressive
- Skirting profile: straight, rounded, shaped
- Skirting with cable channel: functionality above all
- How to connect architraves and skirting boards: principles of harmony
- First principle: unity of material
- Second principle: unity of profile
- Third principle: unity of color
- Fourth principle: unity of width (proportionality)
- Joining skirting and architrave: three main methods
- First method: butt joint at a right angle
- Second method: miter joint at a 45-degree angle
- Third method: using a corner element
- Errors in selection and installation: how to avoid them
- First mistake: style incompatibility
- Second mistake: different colors
- Third mistake: different materials with different textures
- Fourth mistake: incorrect width/height
- Fifth mistake: sloppy joining
- Sixth mistake: ignoring room geometry
- Installation technology: step by step
- Surface Preparation
- Marking
- Trimming
- Attaching door casings
- Attaching baseboards
- Finishing
- Modern trends: where design is heading
- First trend: tall baseboards
- Second trend: hidden door casings
- Third trend: contrasting colors
- Fourth trend: natural materials
- Fifth trend: integrated systems
- Questions and Answers: Everything You Wanted to Know
- Can baseboard be used instead of door casing?
- Which material is better: wood or MDF?
- Should door casings and baseboards be painted before installation?
- How to join baseboard in corners?
- How much do door casings and baseboards cost?
- Can door casings and baseboards be installed independently?
- How to care for door casings and baseboards?
- What to do if a gap forms between the door casing and the wall?
- Is it necessary for door casing and baseboard profiles to match?
- Can different colors be used for door casings and baseboards?
- STAVROS: where craftsmanship meets quality

What makes an interior feel complete? Furniture? Lighting? Wall finishes? All of these are important, but there are details that often go unnoticed, even though they create the sense of a cohesive space. We're talking about those elements that connect different planes and zones of a room — door casings and baseboards. Seems like a small thing? Try to imagine a room without them: bare corners, visible gaps between the door frame and the wall, abrupt floor lines. It immediately becomes clear how much these 'invisible' details define the perception of the entire interior.
decorative door architravesDoor casing and baseboard are not just functional elements covering technical gaps. They are architectural tools that establish the visual logic of a space, connect vertical and horizontal surfaces, and create a unified composition. When door casings and baseboards are chosen correctly, the room looks thoughtful and harmonious. When chosen incorrectly — visual dissonance arises, which is hard to explain in words but is felt immediately.


Why is the connection between the wall and the door opening so important?
A door opening is a boundary, a transition between spaces. It's a place where different planes meet: the vertical of the door frame, the vertical of the wall, the horizontal of the floor. And if this meeting point is carelessly finished, the entire interior loses its integrity.
Imagine: the door is installed, leaving a 10-20 mm wide installation gap between the frame and the wall, filled with expanding foam. The gap is uneven, with foam protruding in some places and receding in others. Without a door casing, this defect is visible. The casing conceals it, creating a neat frame that visually separates the door from the wall while tying them together into a unified composition.
Now imagine: the floor is finished, the walls are painted, and a joint remains between them—a 90-degree angle. This is precisely where dust accumulates, where paint is easily damaged when washing the floor, and where thermal gaps appear due to floor covering expansion.Skirtingcloses this joint, protects the lower part of the wall from mechanical damage, and visually completes the vertical plane.
But most importantly—door casings and baseboards create visual connections. If they are executed in a unified style, from the same material, in the same color, they unite all vertical elements of the room into an integrated system. The eye glides from the door to the baseboard, from the baseboard to the door, and perceives this connection as harmony. If the casings and baseboards are mismatched—different profiles, different colors, different materials—visual cacophony arises.


What is a door baseboard and what is its correct name?
Many people wonder:what is a door baseboard calledin professional terminology? In fact, this term is not entirely correct. Strictly speaking, a baseboard is a horizontal element installed around the perimeter of a room at the junction of the wall and floor. It runs as a continuous line, wrapping around corners, bypassing obstacles, creating a visual foundation for the space.
When the baseboard approaches a door opening, the question arises: how to join it with the vertical door casing? There are several solutions, each with its own name and logic.
Our factory also produces:


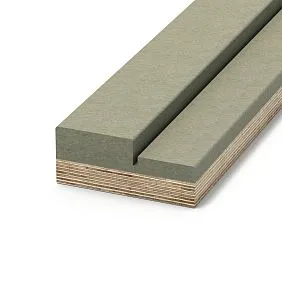
Stop molding
If the door opening is without a door (an open doorway, an arch), the baseboard can continue vertically up along the door jamb. Such a vertical strip framing the opening on the sides is sometimes called a stop molding. It has the same profile as the floor baseboard, creating a visual continuation of the horizontal line into the vertical.
Get Consultation
Extension piece
If a door is installed in the opening, but the wall thickness is greater than the depth of the door frame, an extension board (jamb extension) is used—a flat strip that widens the frame to the wall thickness. The extension is installed between the frame and the casing, creating a transition from the depth of the opening to the wall plane.
Casing as a continuation of the baseboard
In the classic scheme, the baseboard approaches the door opening and butts against the vertical casing. The joint can be finished in different ways: at a right angle (the casing sits over the end of the baseboard), at a 45-degree angle (the baseboard and casing are mitered and joined with a neat seam), or using corner elements (special decorative corners cover the joint).
So which term is correct? In professional circles, they simply say: the baseboard meets the casing. There is no special term "door baseboard," but everyone understands what is meant—how the transition from the horizontal baseboard to the vertical framing of the door opening is finished.
Types of door casings: from simple to carved
door framingbegins with the choice of casings. Their variety is enormous, and each type has its own aesthetic and area of application.
Flat casings
The simplest type—a flat strip of rectangular cross-section with a slight bevel along the edge. Width is usually 60-90 mm, thickness 10-15 mm. A flat casing creates a minimalist frame, does not attract attention, and suits modern interiors.
Advantages: low price, easy installation, versatility. Disadvantages: lack of decorativeness, visual simplicity that may look cheap in classic interiors.
Profiled casings
A casing with a shaped profile—a strip whose front side has relief: flutes, beads, grooves, coves. The profile creates play of light and shadow, adds volume, makes the casing more expressive.
The width of profiled casings is usually 70-110 mm. The profile can be symmetrical (same relief across the entire width) or asymmetrical (relief shifted to one edge). Profiled casings suit classic and neoclassical interiors.
Carved casings
A casing with carving—a highly decorative element. Carving can be machine-made (milled) or hand-carved. Machine carving is precise, repeatable, and affordable. Hand carving is unique, deep, detailed, but significantly more expensive.
Carved casings are used in interiors that value craftsmanship, historicity, luxury. This can be classic style, Baroque, Russian style, ethnic directions. Carving can cover the entire surface of the casing or be localized in the upper part, in the corners, creating accents.
Rounded and semi-circular casings
A casing with a rounded profile—a strip whose front side has a smooth semi-circular shape. Such a profile is soft, streamlined, pleasant to the touch. Rounded casings suit interiors where tactility, softness of forms, and absence of sharp corners are important—for example, in children's rooms, bedrooms.
Telescopic casings
A special type is the telescopic casing, which has a special groove on the back side. This groove fits into a corresponding protrusion on the door frame or extension, creating a hidden fastening without visible nails or screws. Telescopic casings are more expensive than regular ones but provide a cleaner appearance.
Materials: wood, MDF, or polyurethane?
The choice of material for casings and baseboards affects appearance, durability, cost, and installation technology.
Solid wood: classic and natural
Wooden casings made of solid oak, beech, ash are a traditional choice for classic interiors. Wood has a natural texture, warmth, and nobility. Each plank is unique—the grain pattern, shade, and small structural features create a living surface.
Wooden casingsThey are durable, eco-friendly, and can be restored. They can be sanded, repainted, and tinted. With proper care, they last for decades. Wood can be coated with clear varnish to emphasize the texture or with opaque enamel to create a smooth, uniform surface.
Disadvantages of wood: it reacts to changes in humidity and temperature. If stored improperly or subjected to sudden environmental changes, a wooden casing can warp or crack. Wood requires a protective coating—without it, it darkens, absorbs moisture, and loses its appearance. Carved wooden casings are expensive due to the labor-intensive manufacturing process.
MDF: stability and practicality
MDF door casingMDF is medium-density fiberboard, pressed under high pressure. MDF is more stable than solid wood: it does not warp, crack, or react as strongly to humidity changes as wood.
MDF casings can be painted with enamel, laminated with wood-grain film, or veneered with natural veneer. High-quality painted MDF is visually indistinguishable from solid wood, yet cheaper and more stable. Veneered MDF has the texture of natural wood on the surface but a stable fiber core inside.
MDF is well-suited for mechanical processing: milling and profiling. Profiled casings with classic profiles are made from MDF. Carving is not done from MDF—the material does not hold fine details, but for most tasks, this is not critical.
Disadvantages of MDF: if the protective coating is damaged, the board can swell from moisture. MDF lacks the natural texture of wood (unless veneered). For high-humidity areas (bathrooms, kitchens), it is better to use moisture-resistant MDF or other materials.
Polyurethane: Lightness and Moisture Resistance
Polyurethane casings are produced by casting. They are lightweight, moisture-resistant, unaffected by temperature fluctuations, and do not deform. Polyurethane allows for the reproduction of complex ornaments with high detail—what requires hand carving in wood is achieved through casting in polyurethane.
Polyurethane casings are easy to install—they are glued with special adhesive or liquid nails. They can be painted in any color, creating effects like patina, gilding, or aging. Polyurethane does not absorb moisture, making it suitable for damp areas.
Disadvantages: polyurethane is a synthetic material, which matters to those who value naturalness. If mechanically damaged, a polyurethane element is harder to restore than a wooden one. In interiors where material authenticity is important (ethnic, rustic styles), polyurethane may look out of place.
Baseboards: height, profile, purpose
A baseboard is not just a plank at the floor. It is an element that affects the perception of room height, the visual weight of walls, and the character of the interior.
Baseboard height: from modest to impressive
Standard baseboard height is 60-80 mm. This is a universal size suitable for most rooms with standard ceiling heights (2.5-2.7 m). A baseboard 60-70 mm high looks restrained, does not attract attention, and suits small rooms.
High baseboard (100-120 mm) is used in spacious rooms with high ceilings (from 3 m). It creates a more expressive boundary between wall and floor, adds status, and visually enlarges the scale of the space. High baseboards are characteristic of classic interiors, palace styles, and representative spaces.
Low baseboard (40-50 mm) is a choice for modern minimalist interiors where visual lightness and the absence of massive elements are important. A low baseboard almost blends with the wall, creating a delicate frame for the floor.
Baseboard profile: straight, rounded, shaped
Straight profile—a baseboard with a rectangular cross-section, often with a small chamfer on the top edge. This is a modern, laconic option suitable for minimalist interiors. A straight baseboard is easy to join in corners and simple to install.
Rounded profile—a baseboard whose upper part has a smooth rounding. This is a traditional form that gently transitions the vertical wall to the horizontal floor. A rounded baseboard is universal and suits most styles.
Shaped profile—a baseboard with classic beading, fluting, or multi-step relief. A shaped profile creates interplay of light and shadow, adds decorative appeal, and suits classic interiors. The more complex the profile, the more expressive the baseboard, but the more difficult it is to join in corners.
Baseboard with cable channel: functionality above all
Modern baseboards often have a built-in cable channel—a cavity inside or on the back side where electrical wires and communication cables can be routed. This is a convenient solution that allows hiding utilities without wall chasing.
Baseboards with cable channels are usually made of MDF or plastic. Wooden baseboards rarely have cable channels, as wood is more difficult to process to create cavities. If a cable channel is needed in a wooden interior, wires are routed between the baseboard and the wall, covered with a special strip or using a separate cable channel.
How to coordinate casings and baseboards: principles of harmony
The main question: how to make casings and baseboards form a unified system rather than looking like disparate elements? There are several principles.
Principle one: material unity
The ideal option is architraves and skirting boards made from the same material. If the architraves are wooden oak, the skirting boards should also be wooden oak. If the architraves are MDF, the skirting boards should be MDF. Material unity guarantees matching texture, reaction to painting, and behavior under changing conditions.
Of course, combinations are possible: wooden architraves with MDF skirting boards, if both elements are painted the same color with enamel that hides the material structure. But if a transparent finish (varnish, oil) is planned, showcasing the wood texture, the materials must be identical.
Principle two: profile unity
If the architrave has a shaped profile with flutes, the skirting board should have a similar or close profile. Not necessarily identical—the architrave is narrower than the skirting board, so the profile can be simplified, but the relief character should be similar.
If the architrave is flat rectangular, the skirting board should also be simple—straight or with a concise rounding. A combination of a flat architrave and a complex shaped skirting board creates a visual imbalance.
Principle three: color unity
Architraves and skirting boards should be painted the same color. This creates a visual frame for the room—the vertical lines of the architraves and the horizontal line of the skirting board form a single contour.
The classic option is white architraves and white skirting boards. This is a universal solution that suits any wall and door colors. White creates cleanliness, lightness, and visually enlarges the space.
An alternative is architraves and skirting boards matching the door color. For example, dark brown doors, dark brown architraves and skirting boards. This creates a heavier but more expressive frame. Suitable for spacious rooms where visual enlargement is not the goal.
The third option is architraves and skirting boards matching the wall color. This is a minimalist solution where the framing almost blends with the background. Suitable for interiors where visual integrity and the absence of contrasting borders are important.
Principle four: width unity (proportionality)
The width of the architrave and the height of the skirting board should be proportional. If the architrave is narrow (60-70 mm), the skirting board should also be low (60-70 mm). If the architrave is wide (100-120 mm), the skirting board can be high (100-120 mm).
A combination of a narrow architrave and a high, massive skirting board creates imbalance—the skirting board visually outweighs, the architrave gets lost. A combination of a wide architrave and a low skirting board is also unsuccessful—the architrave looks heavy, the skirting board insufficient.
Skirting board and architrave joining: three main methods
When the skirting board approaches the door opening, the question arises: how to join it with the architrave? There are three main methods, each with its own features.
Method one: right-angle joint
The simplest method—the skirting board approaches the architrave perpendicularly and butts against it with its end. The architrave sits on top of the skirting board's end. The joint is visible, but with neat cutting and painting, it looks acceptable.
This method requires minimal skills—just cutting the skirting board straight at a right angle. No complex miter cuts are needed. Suitable for modern, laconic interiors where absolute invisibility of joints is not critical.
Disadvantage: the skirting board's end is visible. If the skirting board is solid wood with a wood texture, the end will contrast with the front side. If the skirting board is painted, the end may look under-painted. To minimize this effect, the skirting board's end needs thorough sanding and painting before joining.
Method two: 45-degree angle joint
A more complex but aesthetic method—the skirting board and architrave are cut at a 45-degree angle and joined with a neat seam. With proper cutting, the joint is almost invisible—it creates the impression that the skirting board smoothly transitions into the architrave.
This method requires precision. The angles must be cut perfectly—the slightest inaccuracy will lead to a gap. A miter box or miter saw is used for cutting. The profiles of the skirting board and architrave should be close so the joint looks like a logical continuation.
Advantage: the joint looks professional, creating visual unity of vertical and horizontal elements. Disadvantage: requires skills, time, and precise tools. If the profiles of the skirting board and architrave differ significantly, the joint will look unnatural.
Method three: using a corner element
The third option is to use a special decorative corner element that covers the joint of the skirting board and architrave. This could be a carved rosette, decorative corner piece, or overlay. The corner element is installed at the joint location, the skirting board and architrave approach it, and the joint is hidden under the decoration.
This method suits interiors where decorativeness is valued. The corner element becomes an accent, adding richness to the details. The joint with this method does not require perfect cutting—small gaps will be hidden under the decorative element.
Disadvantage: requires the availability of suitable corner elements. Not suitable for minimalist interiors where excessive decoration is inappropriate.
Errors in selection and installation: how to avoid them
Even understanding the principles, one can make mistakes that will spoil the result. Let's consider typical ones.
Error one: style incompatibility
Classical carved architraves combined with a modern minimalist baseboard create a visual conflict. Or vice versa: minimalist flat architraves with a Baroque high baseboard featuring molding. The style of architraves and baseboards should match or at least be compatible.
Second mistake: mismatched colors
White architraves and dark brown baseboards are a common mistake. This creates a visual break: vertical and horizontal elements are not connected. The exception is when it's a deliberate design decision where the baseboard continues the floor color, and the architraves match the door color. But such a solution requires careful development of the entire interior color palette.
Error three: different materials with different textures
Wooden architraves under varnish (wood texture visible) and MDF baseboards painted with enamel (no texture) are incompatible. If different materials are used, both should be painted with opaque paint that hides structural differences.
Fourth mistake: incorrect width/height
Narrow architraves (60 mm) and a high baseboard (120 mm) create a proportion imbalance. The baseboard dominates, the architrave gets lost. Or vice versa: wide architraves (120 mm) and a low baseboard (50 mm) make the architrave overpowering.
Fifth mistake: careless joining
Gaps at the junction of the baseboard and architrave, uneven cuts, visible gaps are signs of unprofessionalism. Use quality tools, don't rush, check every joint before final fastening.
Sixth mistake: ignoring room geometry
If walls are uneven, corners are not right angles, the floor has level differences, installing architraves and baseboards becomes more complicated. You can't just place a strip against a curved wall—gaps will appear. Before installation, walls need to be leveled (at least in the areas where architraves will be installed) or flexible baseboards that follow irregularities should be used.
Installation technology: step by step
Quality installation of architraves and baseboards requires preparation, precision, and patience. Let's examine the technology.
Surface preparation
Walls must be clean, dry, and even. Remove remnants of old coatings, dust, and dirt. Degrease the surface with alcohol or a special compound. If walls are painted, the paint must be durable, without peeling.
The door frame must be securely fixed. Check for any play. The mounting foam between the frame and wall should be cut flush with the wall plane, not protruding.
The floor must be ready—flooring laid, dried, and secured. Baseboards are installed after all flooring work is completed.
Marking
Measure the height and width of the door opening. Mark where vertical architraves will be installed (usually with a 5-10 mm offset from the inner edge of the frame). Measure the length of the horizontal architrave (if present) considering the joint with the vertical ones.
Measure baseboard lengths for each wall. Consider angles: internal corners (joining two baseboards at 45 degrees), external corners (also at 45 degrees), joints with architraves.
Cutting
Use a miter box for cutting corners at 45 degrees. A miter box ensures a precise cutting angle, which is critical for tight joints. For straight cuts, use a fine-toothed saw or a miter saw.
Cut with a margin—it's better to cut a little at a time, checking the joint, than to cut too much at once and ruin the piece. After each cut, place the element in position, check if it fits tightly.
Fastening architraves
Architraves can be fastened in several ways:
-
With nails—traditional method. Finish nails (with a small head) or brads (no head at all) are used. Nails are driven in at 30-40 cm intervals. Heads are countersunk into the wood, holes are filled with putty, sanded, and painted after drying. Advantage: reliability. Disadvantage: fastener marks are visible (though minimal).
-
With glue—the architrave is glued to the wall and frame. Wood glue PVA (for wood), polyurethane glue, or liquid nails are used. Glue is applied in a thin, even layer to the back of the architrave, the element is pressed against the wall and fixed with painter's tape or clamps until dry. Advantage: no visible fastener marks. Disadvantage: requires even walls; the architrave may be damaged during removal.
-
With screws—rarely used, mainly for wide MDF architraves. Screws are driven from the front side, heads are countersunk and covered with decorative caps. Advantage: maximum reliability. Disadvantage: visible attachment points.
Fastening baseboards
Baseboards are fastened to the wall, not to the floor. This is important: if the floor deforms (laminate expands, parquet shifts), the baseboard should not move with it.
Methods for fastening baseboards:
-
With glue—the baseboard is glued to the wall. Liquid nails, mounting adhesive are used. The wall must be even. Advantage: simplicity, no visible fasteners. Disadvantage: difficult to remove.
-
Clip-on system — a modern concealed fastening system. Plastic clips are mounted to the wall (using screws or dowels), and the baseboard snaps onto the clips. Advantages: quick installation and removal, no visible marks. Disadvantage: not suitable for all types of baseboards.
-
Screw-on — the baseboard is screwed to the wall with screws. The screw heads are countersunk and covered with caps. Advantages: reliability, suitable for uneven walls. Disadvantage: visible fastening points.
Final finishing
After installing the architraves and baseboards, check all joints. Fill small gaps (up to 0.5 mm) with acrylic sealant matching the color of the elements. Apply the sealant in a thin strip, smooth it with a wet finger or spatula, and remove excess.
If the elements are unpainted, paint them now. Use high-quality interior paint. Apply two to three thin coats with intermediate drying. Lightly sand between coats with fine sandpaper (P220-P320) for smoothness.
If the elements are factory-painted, check for any paint chips after installation. Touch up damaged areas with a fine brush.
Modern trends: where design is heading
Interior design trends change, and this affects the choice of architraves and baseboards.
Trend one: tall baseboards
In recent years, tall baseboards — 100-150 mm and even higher — have grown in popularity. This visually increases the room's height, creates a more pronounced boundary, and adds a sense of status. Tall baseboards are often painted the same color as the walls, becoming an extension of them rather than a separate element.
Trend two: concealed architraves
Doors with concealed frames are emerging, where the door leaf is flush-mounted into the wall. For such doors, architraves are either unnecessary or minimalist, invisible profiles are used. This is a solution for interiors that value visual cleanliness and the absence of unnecessary details.
Trend three: contrasting colors
Bold color combinations: dark architraves and baseboards on light walls, colored elements on a neutral background. This creates graphic appeal, expressiveness, and modern dynamism. However, it requires a precise sense of color and proportions.
Trend four: natural materials
A return to natural materials with emphasized texture. Wooden architraves and baseboards treated with clear oil or matte varnish, showcasing the wood grain. This trend emphasizes eco-friendliness, authenticity, and a connection with nature.
Trend five: comprehensive systems
Manufacturers offer comprehensive systems where architraves, baseboards, moldings, and cornices are designed in a unified style and easily combine. This simplifies the selection of elements, ensures stylistic consistency, and saves time searching for compatible parts.
Questions and answers: everything you wanted to know
Can baseboard be used instead of architrave?
Technically, yes — baseboard can be installed vertically as door frame trim. But aesthetically, this is not always justified: baseboard profiles are designed for horizontal placement and may look unnatural when installed vertically. It's better to use specialized architraves or universal profiles.
Which material is better: wood or MDF?
For rooms with stable conditions (living room, bedroom) and transparent finishes — wood. For rooms with humidity fluctuations (kitchen, hallway) and opaque painting — MDF. Both materials are good; the choice depends on specific conditions and budget.
Should architraves and baseboards be painted before installation?
Painting before installation simplifies the process — there's no need to protect walls and floors with painter's tape. But after installation, touch-ups are needed at joints, ends, and possible chips. An alternative is painting after installation, but this requires more time for surface protection.
How to join baseboard in corners?
Internal corners — cut both baseboards at 45-degree angles and join. External corners — also at 45 degrees. For complex profiles, ready-made corner elements are used. For modern straight profiles, joining at a right angle is possible (one baseboard butted against the other).
How much do architraves and baseboards cost?
Price depends on material, profile, and manufacturer. MDF architraves — from 150 rubles per linear meter. Wooden architraves — from 500 to 1500 rubles per meter. MDF baseboards — from 200 rubles per meter. Wooden baseboards — from 600 to 2000 rubles per meter.
Can architraves and baseboards be installed independently?
Yes, if you have basic tool skills. You'll need: tape measure, level, miter box, saw, glue or nails, paint. The key is precision in marking and cutting. For complex profiles and carved elements, it's better to hire a specialist.
How to care for door casings and baseboards?
Regularly wipe with a soft dry or slightly damp cloth. Do not use abrasive cleaners—they damage the finish. For wooden elements, renew the protective coating (varnish, oil, paint) every few years.
What to do if a gap forms between the casing and the wall?
For gaps up to 3 mm, fill with acrylic sealant matching the casing color. Gaps larger than 3 mm may indicate wall unevenness—in this case, either level the wall or use more flexible materials.
Is it necessary for casing and baseboard profiles to match?
Exact matching is not required, but stylistic harmony is desirable. Both elements should be either simple or ornate. Combining simple and complex profiles creates imbalance.
Can different colors be used for casings and baseboards?
Yes, but it should be part of a well-thought-out interior color concept. Different colors break the visual connection between elements, so they require compensation through other color accents in the room.
STAVROS: where craftsmanship meets quality
When the task is to choosedoor casings and baseboardsthat not only cover technical gaps but become full-fledged architectural elements creating spatial harmony—professionals choose STAVROS.
For over twenty years, STAVROS has specialized in producing high-quality wooden millwork.solid oak and birch thresholds, baseboards of various profiles and heights, extension pieces, moldings—the full range of products for professional interior finishing.
What distinguishes STAVROS products from the mass market? Geometric precision. Each plank has perfectly calibrated dimensions, straight angles, and even edges. This is critical for tight joints without gaps. Processing quality. The surface is carefully sanded, profiles are milled with high precision, and carving (if present) is executed with detailed refinement.
Material stability. The wood undergoes kiln drying to 8-10% moisture content, guaranteeing no deformation after installation. Grading by quality allows selection of the desired material—from extra grade (knot-free and defect-free) to natural grade (with characteristic wood features).
Wide assortment. Dozens of casing profiles—from minimalist flat to classic ornate and carved. Baseboards from 60 to 120 mm in height, straight and ornate profiles, for different interior styles. Capability to produce custom sizes and profiles based on individual drawings.
But products are only part of it. STAVROS offers a comprehensive approach. Specialist consultations help select compatible elements, calculate quantities considering all room specifics, and choose optimal installation techniques. Technical support at all stages—from planning to final finishing.
For wholesale buyers and construction companies, STAVROS is a reliable partner with streamlined logistics, consistent quality, and adherence to deadlines. For private customers—the opportunity to obtain professional materials with delivery across Russia, consultation, and warranty.
Wooden door casings and baseboards STAVROS is the choice of those who value quality, understand the importance of details, and strive to create an interior that will delight for decades. It is an investment in the beauty and durability of your home.
Choosing STAVROS, you choose not just materials. You choose craftsmanship accumulated through years of experience. Technologies proven by thousands of completed projects. Quality confirmed by the trust of professionals nationwide. And most importantly—you choose confidence that every detail of your interior will be exactly as it should be: precise, beautiful, durable.


