Article Contents:
- Why decorative overlays for furniture fronts are needed — transformation without replacement
- Economics and psychology of renewal
- Decorative overlay as an architectural element of furniture
- Types of overlays: carved, milled, flat, three-dimensional
- Carved overlays: handcrafted and CNC milling
- Milled overlays: geometry and profile
- Flat overlays with ornament
- Three-dimensional overlays — accent on the center of the front
- Decorative sets: composite systems
- Attaching wooden decor to fronts — PVA glue, double-sided tape, screws
- Method 1: PVA-D3 glue and construction adhesive
- Method 2: Liquid nails
- Method 3: Double-sided mounting tape
- Method 4: Screws — for heavy overlays
- Important: surface preparation
- How to decorate a kitchen set with wooden overlays
- Principles of layout on kitchen fronts
- Step-by-step plan for kitchen decoration
- Decorating the upper and lower tiers differently
- Combining with wooden moldings
- Updating a sliding wardrobe and dresser — step-by-step process
- Sliding wardrobe: working with a large plane
- Dresser: rhythmic row of drawers
- Bedroom wardrobe doors: classic style without renovation
- Toning and painting overlays to match the front
- Basic principle: unified tone
- Technology of painting an overlay "to match the front"
- Contrast solution: overlay of a different tone
- Patination of overlays
- Combining with moldings and handles for a unified style
- Molding as a frame for the overlay
- Handles as the finishing touch
- The connection between furniture decor and architectural decor
- FAQ - answers to popular questions
- About the Company STAVROS

Imagine: a kitchen set that's already eight years old. The fronts are intact, the hinges are fine, the carcasses are sturdy—but something feels subtly outdated. The paint has lost its freshness, the flat door surfaces seem boring, the interior stands still while the world around has changed. What to do? Replacing the entire set is expensive and labor-intensive. Repainting is a temporary measure. But installing on the frontsDecorative solid wood overlays—is not a repair. It's a transformation.
decor for furniturein the form of carved and milled wooden overlays is one of the most effective tools for interior renewal. Without dismantling, without dust, without an estimate with six zeros. Overlays change the character of a furniture piece just as a replaceable part changes an image: it was neutral—it became individual; it was cheap—it became refined. This article is about how to choose, attach, and combine wooden overlays on furniture fronts so that the result looks like a designer's work, not an attempt to 'decorate.'


Why decorative overlays on furniture fronts are needed—transformation without replacement
A question thousands of owners of good but outdated furniture ask themselves: can you change the appearance without changing the substance? The answer is yes, that's exactly whatwooden overlays for kitchen frontsand furniture in general are for.


The economics and psychology of renewal
A complete replacement of a kitchen set starts from 200,000 rubles for an average kitchen and up. At the same time, the carcass part of most sets lasts 25–30 years: the mechanics are reliable, the structure is sound. It's the fronts—the visual shell—that suffer. Replacing fronts without replacing carcasses is cheaper, from 50–80,000 rubles. But even that can be avoided by addingto buy, which will allow you to transform your furniture using carved wooden elements. You can use the C-003-3 decor set to decorate furniture, walls, doors, or any other surface. The C-003-3 decor set is made of oak or beech, known for their strength, durability, and beauty. You can buy the C-003-3 decor set at the Stavros decor store, which specializes in producing and selling decorative elements and hardware for furniture and interiors. At the Stavros decor store, you will find a wide selection of decor sets of various shapes, sizes, and styles. You can chooseto existing fronts: the cost of a set of overlays for a kitchen of 10–15 modules is 15,000–40,000 rubles depending on the chosen models—several times cheaper than any replacement.
The psychological mechanism is the same as in fashion: a new detail refreshes the entire look. A carved overlay N-106 (from 2,080 rub.) on a smooth cabinet door instantly elevates the item from the 'ordinary' category to the 'with character' category. This effect is disproportionate to the cost of the overlay itself.
Our factory also produces:


Decorative overlay as an architectural element of furniture
Furniture without decor is function. Furniture with decor is architecture. A front with an integrated carved insert or an applied ornament gains hierarchy: there is a field, there is an accent, there is a frame. The eye gets a point of focus, the interior—an internal rhythm.
This is exactly the principle on which furniture of all historical styles was built. A Baroque-style cabinet differs from a modern one not in size or wood species—it differs in that its fronts have cartouches, acanthus leaves, floral garlands. Remove the decor—and nothing of the style remains. Add it—and an ordinary cabinet will speak the language of architectural classicism.
Get Consultation
Types of overlays: carved, milled, flat, three-dimensional
Catalogof wooden decor for furniture itemsSTAVROS has over 400 models. To navigate this variety, you need to understand the classification by processing type and relief character.
Carved overlays: handcrafted and CNC milling
Carved wooden inserts for cabinet doors are products with three-dimensional relief created by a multi-axis CNC-controlled milling machine. The tool moves along the workpiece surface along a complex trajectory, removing material in several planes and creating relief with a depth from 5 to 25 mm.
This is the most expressive type of overlay. Acanthus leaves, grape clusters, floral garlands, rococo scrolls, cartouches with ribbons—all these are carved overlays. They provide maximum decorative effect even on a plain front: the relief plays with light, creating shadows and highlights that change throughout the day.
N-421 (from 8,150 rub.)—a monumental symmetrical overlay with a central floral cartouche and side acanthus shoots. N-422 (from 15,030 rub.)—even more elaborate, with several levels of relief. N-034 (from 5,480 rub.)—an elegant floral ornament of medium scale. For upper-row kitchen fronts—N-173.1 (from 6,330 rub.) with a refined plant pattern.
Milled overlays: geometry and profile
Milled overlays for furniture are products with profile relief created by milling: ogee, cavetto, bevel, ovolo, torus. The relief here is not a three-dimensional ornament but a profile section—an architectural motif repeated along the perimeter of the product.
These overlays are organic in neoclassical, Empire, and transitional styles. N-214 (from 1,790 rub.), N-217 (from 2,760 rub.), N-316 (from 1,700 rub.)—models with classic profiling, suitable for framing a front. N-270 (from 2,720 rub.)—a more complex multi-tiered profile with pronounced horizontal lines.
Flat overlays with ornament
Flat overlays are products of minimal thickness (4–8 mm) with ornamentation in 'flat' relief: slight variations in height create a graphic pattern visible under oblique lighting. They are suitable for minimalist and Scandinavian interiors: there is ornamentation, but it is 'quiet,' not shouting.
N-093 (from 1,370 rub.) — a flat overlay with a simple geometric motif. N-092 (from 1,920 rub.) — with a delicate floral pattern of minimal relief. N-372 (from 1,210 rub.) — the most affordable in the line, with a laconic design.
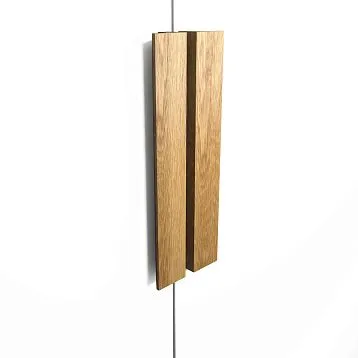
Volumetric overlays — accent on the center of the facade
Volumetric overlays are products with significant relief height (15–30 mm), creating a true sculptural accent on the facade surface. They are installed in the center of the facade or in its upper part, protruding several centimeters above the door plane.
N-276 (from 8,100 rub.), N-095 (from 12,220 rub.), N-464 (from 14,250 rub.) — monumental overlays for large facades: tall cabinet towers, central buffet sections, mezzanine doors. Their scale requires a corresponding facade: door width at least 400 mm, height at least 600 mm.
Decorative sets: composite systems
A separate type —Decor SetsC-015 (from 7,270 rub.), C-016 (from 18,690 rub.), C-017 (from 21,880 rub.), C-018 (from 21,240 rub.), C-020 (from 31,540 rub.), C-021 (from 29,260 rub.). These are ready-made systems where the central element is combined with corner overlays, side tendrils, or frame elements. The set is installed on the facade as a single decorative composition — without the need to assemble individual parts yourself.
C-015 — a starter set for medium-sized facades. C-016 and C-017 — more monumental, with developed ornamentation. C-020 and C-021 — formal systems for tall cabinets and buffet sections.
Attaching wooden decor to facades — PVA glue, double-sided tape, screws
Installation is the stage where even perfectly selected decor can be ruined by the wrong choice of fastening method. Let's examine all options with their specific advantages and limitations.
Method 1: PVA-D3 glue and construction adhesive
PVA-D3 glue (water-resistant version) — the primary method for attaching wooden overlays to wooden and MDF facades. Apply glue evenly to the back surface of the overlay, let it open for 2–3 minutes, press onto the facade, secure with painter's tape or clamps for 2–4 hours.
PVA glue creates a rigid, non-removable bond with a pull-off strength of 6–8 MPa — more than sufficient for overlays of any size. Feature: the glue sets slower than polyurethane, allowing time for precise positioning. Ideal for complex ornamental overlays where placement accuracy is important.
Polyurethane mounting adhesive — for overlays on painted or varnished facades where PVA adhesion is insufficient. Applied in a 'snake' pattern on the back surface, open time 3–5 minutes.
Method 2: Liquid nails
Mounting adhesive of the 'liquid nails' type — a universal option for any substrates: wood, MDF, coated chipboard, plastic. Advantage — high initial adhesion: the overlay does not need to be held for long. Disadvantage — limited 'window' for position correction (5–7 minutes, after which shifting becomes difficult).
For kitchen facades with PVC film coating — use liquid nails or specialized adhesive for plastic and PVC. Standard PVA does not hold on PVC coating.
Method 3: Double-sided mounting tape
High-strength double-sided tape (thickness 1.5–2 mm, foam core) — a mounting method for lightweight overlays weighing up to 100–150 g. Advantage — instant fixation, no need for clamps or waiting. Disadvantage — strength is lower than adhesive bonds, and after several years with temperature fluctuations (especially in kitchens) the tape may weaken.
Recommendation: tape + an additional dot of glue in the center of the back surface. The tape provides immediate fixation, the glue ensures long-term reliability.
Method 4: Screws — for heavy overlays
Monumental overlays N-095, N-422, N-464 weighing 300–600 g can be installed with glue, but for maximum reliability — especially on vertical facades — additional fastening with 3.5×25 mm screws through pilot holes is recommended. Screw heads are concealed with wooden plugs or filler for painting.
Important: surface preparation
The facade surface for installation must be degreased (acetone or a special degreaser). Grease, oils, wax-containing furniture care products are the main enemies of any adhesive's adhesion. After degreasing — let the surface dry for 10–15 minutes. Only then apply the adhesive.
How to decorate a kitchen set with wooden overlays
The kitchen is the most popular space for working with decorative overlays. It is here that the transformation effect is most evident: a large number of similar facades creates a rhythmic row that, with overlays, becomes an expressive architectural frieze.
Principles of composition on kitchen facades
The first principle — unity of pattern. All overlays in the kitchen are taken from one collection or one stylistic series. Mixing a Baroque cartouche and a strict geometric ornament is a mistake that destroys stylistic integrity.
The second principle — the scale of the overlay corresponds to the facade. For a facade 300 mm wide and 400 mm high — an overlay no more than 60–70% of the facade area. An overlay covering the entire surface is no longer an accent, but a carpet.
The third principle is the hierarchy of accents. Central facades (above the stove, above the sink) — large overlays. Side facades — smaller or without overlays. Not everything should be decorated equally.
Step-by-step plan for decorating a kitchen
Step one: marking. On each facade, mark the central point or central axis — vertical and horizontal — using a laser level or ruler. Positioning of the overlay starts precisely from these points.
Step two: dry fitting. Place the overlay against the facade, ensure the proportions are correct, check the margins from the edges and from the hardware. The standard minimum margin from the edge of the handle is 30 mm. From the edge of the facade — 25–40 mm.
Step three: installation. Apply adhesive, secure, check the level vertically and horizontally. Clamp with a clamp or painter's tape.
Step four: finishing. After the adhesive dries (24 hours) — paint or tint the overlay to match the facade color. Details on this are in the painting section.
Decorating the upper and lower tiers differently
The upper tier of the kitchen (wall cabinets) and the lower tier (floor modules) can be decorated with different overlays from the same collection: the upper tier — more elegant and smaller, the lower — larger and more monumental. This creates a visual rhythm where 'light' is on top and 'heavy' is at the bottom — a classic architectural logic.
Combination withwooden moldings
Overlays work twice as effectively when complemented by frame molding around the perimeter of the facade. Molding MLD-001 (from 210 rub./linear meter) or MLD-004 (from 330 rub./linear meter) is installed along the edge of the facade, creating a frame. Inside the frame — a central overlay. The 'frame + central accent' system is a classic scheme of furniture decor from all historical eras.
Updating a sliding wardrobe and a chest of drawers — a step-by-step process
Sliding wardrobe and chest of drawers — items with large flat facades, ideally suited for decoration.
Sliding wardrobe: working with a large plane
The sliding doors of a wardrobe are typically flat MDF or chipboard panels with a finish. A large plane without decor looks neutral, sometimes dull. One large overlay in the center of the door (N-421 or N-276) instantly turns a neutral plane into an accent element of the interior.
For a two-door wardrobe — mirror symmetry: on the right door, the overlay is oriented to the right, on the left — to the left. STAVROS offers a wide selection of models with mirrored left and right versions — L/R pairs — specifically for this task.
Important technical note: sliding doors are removed from the track for overlay installation. Do not work with a door standing in the track — the adhesive will not set properly on a vertical facade without fixing clamps.
Chest of drawers: a rhythmic row of drawers
A chest of drawers is a vertical row of drawers. Decorating each drawer with overlay elements creates a rhythmic vertical composition. N-171 (from 2,010 rub.) and N-107 (from 2,630 rub.) — medium-format overlays, ideal for drawer fronts with a height of 120–180 mm.
Scheme: one overlay in the center of each drawer front. All overlays — of the same model. Drawer handles — metal, matching the tint of the overlays (bronze + tinted wood, matte silver + white enamel). The result — a chest of drawers from the 'IKEA' category transitions into the 'custom furniture' category.
For large drawer fronts (height 250–350 mm) — overlays N-237 (from 2,630 rub.) or N-270 (from 2,720 rub.) provide the correct proportions.
Bedroom wardrobe doors: classic style without renovation
A built-in wardrobe with hinged doors is a universal object for decoration. The 'frame molding + central overlay' scheme turns a simple wardrobe into a furniture piece in English or classic style.wooden moldingMLD-019 (from 600 rub./linear meter) or MLD-014 (from 690 rub./linear meter) creates a frame. Overlays N-154.1 (from 3,050 rub.) or N-106 (from 2,080 rub.) — the central accent. Painting everything in a unified white tone — and the wardrobe is ready for a photoshoot.
Tinting and painting overlays to match the facade color
The success of working with decorative overlays is half determined by proper painting. An overlay that does not match the tone of the facade looks like a 'glued piece of wood'. An overlay in the exact tone — like part of the original construction.
Basic principle: unified tone
The safest solution is to paint the overlays exactly to match the tone of the existing facade. For this:
-
If the facades are painted — order a can of the same paint (use the tinting formula or a spectrophotometer at a hardware store).
-
If the facades are laminated — select an acrylic enamel of the closest tone and add a finish varnish with the same sheen as the laminate (matte/glossy).
-
If the facades are wood-veneered — tint the overlay with stain until you achieve a matching tone, then apply finish varnish.
Technology for painting overlays "to match the facade"
Step one — priming. For oak — shellac-based sealer primer (1 coat with a brush). For beech — acrylic primer. Drying time 1 hour.
Step two — first coat of paint or stain. Apply with a brush in one direction, avoiding "puddles" in the recesses of the relief.
Step three — sanding with P320 on flat areas (without touching the relief recesses).
Step four — final coat of paint or stain. After complete drying — final varnish with the desired sheen.
Contrast solution: overlay in a different tone
A bolder but effective solution: facades in one tone, overlays — in a contrasting one. White facades + dark walnut solid wood overlays without painting. Gray facades + white overlays. Light beige facades + gold patina on overlays.
This approach requires stylistic confidence, but when executed correctly, it yields the most expressive result. The overlay stops "hiding" in the facade's tone and openly declares itself as a decorative element.
Patination of overlays
For overlays with deep relief — N-421, N-422, N-095 — patination is especially effective: dark base painting + application of gold or bronze wax patina on the raised parts of the relief. The relief is "revealed" by a light metallic tone on a dark background — the visual effect of volume is greatly enhanced.
Combining with moldings and handles for a unified style
An overlay is not a solitary element. It is part of a system that includes moldings, handles, finish tone, and the overall interior context.
Molding as a frame for the overlay
Decorative wall moldingas a frame around the overlay — a classic technique of furniture decoration. The molding creates a clear boundary for the field inside the facade, and the overlay occupies the center of this field. The eye perceives the structure: frame → field → accent.
MLD-001 (from 210 rub./l.m.) — simplest molding for modest decoration. MLD-002 (from 420 rub./l.m.) and MLD-004 (from 330 rub./l.m.) — slightly more expressive. MLD-019 (from 600 rub./l.m.) and MLD-014 (from 690 rub./l.m.) — classic profiles with pronounced cross-section. MLD-015 (from 1,050 rub./l.m.) and MLD-016 (from 1,320 rub./l.m.) — for rich, monumental decoration.
STAVROS series "constructor overlays" are specially designed with jointing recesses that match the cross-section of moldings from the same catalog — combination occurs without gaps or fitting.
Handles as the finishing touch
Handles are the only element of furniture that the hand touches. They must be coordinated with the overlays in material and tone. Wooden overlays in a warm walnut tone — handles in matte bronze or gold. White overlays — handles in matte nickel or chrome. Dark overlays with patina — handles in aged bronze.
Rule: never combine wooden carved overlays with shiny chrome handles in an aggressive design. The material conflict between "living" wood and "industrial" metal destroys stylistic unity.
Connection between furniture decoration and architectural decoration
When furniture decoration is combined with architectural decoration —wooden moldings on walls, ceiling cornice, moldings on the ceiling— the interior acquires true systematicity. Overlays on the cabinet from the same collection as the cornice above it. The frame molding of the cabinet from the same series as the wall panel molding nearby. This is no longer "we decorated a cabinet" — this is creating an interior.
FAQ — answers to popular questions
Can a wooden overlay be glued to a PVC film facade?
Yes, but the choice of adhesive is important. Standard PVA does not hold on PVC coating. A special contact adhesive for plastics or double-sided foam-based mounting tape + spot adhesive in the center is needed. Pre-degrease the PVC surface with an alcohol-based cleaner.
Oak overlay or beech overlay — which is better for a kitchen?
Both are suitable. Oak — naturally moisture-resistant, hard, with expressive texture. Beech — more uniform, slightly softer to work with, accepts white paint better (no risk of "bleeding" of tannic acids). For white kitchen overlays — beech with a sealer primer. For stained wood-toned ones — oak.
How to correctly select the size of the overlay for the facade?
The overlay occupies 30–60% of the facade area. For a 400×600 mm facade: overlay up to 240×360 mm. Indent from the edges of the facade — minimum 30–40 mm on all sides.
What to do if the overlay has slightly come away from the facade?
Inject liquid PVA or polyurethane glue into the gap using a syringe, press it down, and secure it with painter's tape for 24 hours. In case of complete detachment — clean both surfaces, apply new glue, and clamp with a clamp for 4–6 hours.
Can wooden overlays be used on kitchen facades in the area above the stove?
Yes, if maintaining a distance from the heat source: at least 400 mm from the edge of the burner to the bottom of the wall cabinet with overlays. Wooden overlays are not afraid of short-term heat exposure but should not be in the direct heating zone.
How to calculate the cost of kitchen decoration?
Count the number of facades requiring decoration (not necessarily all). Multiply by the cost of the overlay. Add molding: perimeter of each facade × price per linear meter. Total — these are the materials. Installation can be done independently (2–4 hours for a kitchen with 10 facades) or by hiring a professional.
Which overlays are best for the Provence style?
Floral patterns with lavender, grapevines, birds, and butterflies. In the STAVROS catalog — the "Summer Garden" collection with original Baroque carving, filled with lively plant motifs. Painting in a milky-white tone or light tinting in a caramel shade.
About the company STAVROS
Furniture is what surrounds us every day. But what turns furniture into an interior is the details. An overlay on a cabinet facade, molding around a door, a coordinated handle — these are details that cannot be improvised. Behind them should be a manufacturer who understands architectural context, not just "sells carved wooden pieces."
STAVROS is a Russian manufacturer of wooden decor for furniture and interiors. In the catalogdecorative inserts— over 400 models made of solid oak and beech, starting from 1,210 rubles per element. Six ready-made decor sets C-015—C-021 for quick and accurate assembly. The "Summer Garden" series — an original collection with a modern interpretation of Baroque carving.
In addition to overlays, STAVROS manufactureslinear products — moldingsfor frame decoration of facades,Wooden cornicesfor ceiling tiers,pilasters and columnsfor architectural accents,Polyurethane Moldingsfor walls and ceilings. All products are from the same production, made from the same wood species, with unified quality standards. Delivery across all of Russia. Orders from 1 piece.