


Article Contents:
- Why Joints and Shadows Matter
- Surface Diagnosis: Identifying Issues Before Installation
- Leveling: Creating a Foundation for Quality
- Priming: The Invisible Foundation of Adhesion
- Marking: Precision That Prevents Re-work
- Adhesive: Selection and Application Technique for Tight Contact
- Joining elements: the art of invisible seams
- Joint Filling: Erasing Boundaries
- Painting: Achieving Monolithic Perception
- Lighting: The Physics of Shadows and Visual Quality
- Typical Mistakes That Create Unattractive Shadows
- Professional Secrets of Quality
- Conclusion

You look at photos of classic interiors in magazines — the molding looks flawless. Clean lines of cornices, perfect angles, relief casts a smooth, elegant shadow. A picture of perfection. Then you see real molding installation — and you’re disappointed. Gaps at joints, the cornice repeats every wave of the curved wall, shadows are uneven, ragged, the ornament sinks into emptiness.
The difference between professional results and amateur ones? Not in the cost of molding — even expensive elements look shabby with poor installation. Not in the tools — a basic set is accessible to everyone. The difference lies in understanding the technology, attention to preparatory stages, knowledge of light and shadow physics, willingness to invest time in invisible work that makes the visible perfect.
Neat joints and even shadows are not coincidence, but the result of a systematic approach. It begins with assessing surface flatness even before buying molding. It continues with careful preparation — leveling, priming, marking. It is realized through precise installation with the right adhesive, properly aligned joints, flawless joint filling. It concludes with proper painting and understanding how lighting affects perception.
In this article, we will reveal professional secrets of installationdecorative moldingwhere the result is indistinguishable from that of a master with twenty years of experience. You will learn how to assess and correct wall curvature, what degree of flatness is sufficient for molding, how priming affects joint quality. You will understand the technique of adhesive application that ensures tight contact without voids. You will master joint filling until it becomes invisible. You will learn how to paint so that the molding and wall appear monolithic. You will learn how to plan lighting for beautiful shadow play.


Why Joints and Shadows Matter
Molding is perceived not in isolation, but in the context of the surface it is mounted on and the light that illuminates it. The joint — the boundary between molding and substrate — is a critical zone. The human eye is sensitive to boundaries, contrasts, and transitions. A 2 mm gap at a distance of 2 meters is clearly visible. A height difference of 1 mm creates a shadow that is perceived as a defect.
Even shadows indicate correct molding geometry and proper placement relative to light sources. The relief of the molding casts a shadow that emphasizes the ornament and creates volume. If the surface beneath the molding is curved, the molding repeats the curvature, and the relief varies in height above the plane at different points. The shadow becomes uneven — deep in some places, absent in others. This reveals poor installation.
Professional results are characterized by three features: tight joints without gaps, straight molding lines regardless of wall condition, even shadows along the entire length of the element. Achieving this is possible, but requires understanding the causes of defects and methods to prevent them.


Surface Diagnosis: Identifying Issues Before Installation
Quality installation begins not with buying molding, but with assessing surfaces. Walls and ceilings in standard apartments are rarely perfectly flat. Deviations of 5–15 mm over a 3-meter length are normal for mass construction. Such curvature is critical for molding.
Vertical wall alignment is checked with a 2-meter rule and level. Apply the rule vertically to the wall at several points. Gaps between the rule and wall indicate deviations. Gaps up to 3 mm are acceptable — molding will conceal them. Gaps of 5–10 mm require local leveling. Gaps over 10 mm require full wall leveling.
Horizontal alignment is checked with the same rule horizontally. The junction line between wall and ceiling is especially critical, as the cornice is mounted there. Any waviness in this line will be transferred to the cornice, creating uneven shadows. A laser level provides an ideal horizontal line around the room — compare it with the actual junction line to assess deviations.
Ceiling flatness is checked similarly. Apply the rule to the ceiling in different directions and assess gaps. A ceiling rose on a curved ceiling will fit unevenly — tightly on one side, with a gap on the other. This will create a crescent-shaped shadow instead of even framing.
Room angles are checked with a square. Internal angles should be close to 90°. Deviations of 2–3° are acceptable — corner molding elements will conceal them. Deviations of 5–10° require adjustment during cutting elements to non-standard angles. External angles (projections) are more critical — their deviations are more noticeable, requiring more precise geometry.
Surface condition is assessed visually and by touch. Peeling paint, loose joint compound, dust, greasy stains are unacceptable — adhesive won’t stick to such a surface. The surface must be strong, clean, and dry. Tap walls — a dull sound indicates voids under plaster, requiring local repair.
Fixing diagnostic results on a room schematic helps plan renovation. Mark areas requiring leveling and indicate deviation magnitudes. This will allow calculating the volume of work and materials needed for preparation.
Our factory also produces:


Alignment: creating the foundation for quality
Surface leveling — a stage many skip, saving time and money. This is a fatal mistake. Moldings on a crooked wall will never look good, no matter how carefully you install them.
Local leveling is applied for deviations of 3–7 mm on individual sections. Imperfections are filled with putty, protrusions are sanded down. The goal is to create a flat strip 150–200 mm wide along the molding installation line. It is not necessary to level the entire wall — only the contact zone is sufficient.
Technique for local leveling: apply putty with a 300–400 mm wide trowel to the problematic area. Level it, creating a smooth transition to the main plane. After drying (4–6 hours), sand with P80–P120 grit paper on a sanding block. Check with a straightedge — gaps should reduce to 1–2 mm. Apply a second layer if necessary.
Full leveling is required when the wall has an overall curvature exceeding 10 mm or waviness across the entire area. Two techniques are used: plastering on guides or drywall framing. Plastering is labor-intensive and messy, but creates a monolithic, strong base. Drywall is faster and cleaner, but less strong and requires reinforcement at heavy element mounting points.
Plastering on guides is performed by professionals. Vertical guides (guides) are installed in one plane at level. Plastering compound is applied between guides and leveled with a straightedge. Result — perfectly flat wall. Work time: 1–2 days plus one week for full drying. Cost to level a 20 m² room — 15,000–25,000 rubles.
Drywall framing on a frame — an alternative to plastering. A metal frame is installed strictly at level, covered with drywall sheets. Joints are filled with putty and sanded. Result — flat surface in 1–2 days. Minus — consumes 5–7 cm of space, requires embedded supports for heavy moldings. Cost is comparable to plastering.
The degree of flatness sufficient for moldings — deviations no more than 2 mm over 2 meters. This is not an ideal plane (for which the tolerance is 1 mm per 3 meters), but it is sufficient. Checked with a straightedge — gaps are minimal, molding fits tightly along the entire length.
Special attention to the junction line between wall and ceiling during cornice installation. This line must be perfectly horizontal along the entire perimeter. A laser level projects an ideal horizontal line — the cornice is mounted strictly along it, ignoring the actual junction line if it is curved. The gap between ceiling and cornice (if ceiling is lowered) is filled with putty after installation.
Get Consultation
Primer: the invisible foundation of adhesion
Primer — a stage whose omission guarantees problems. Even on visually clean surfaces, microscopic particles of dust, grease from hands, and detergent residues reduce adhesive bond. Primer solves several tasks: cleans at the molecular level, equalizes absorption, creates an intermediate layer that enhances adhesion.
Primer type is selected based on the base material. For concrete, plaster, putty — use an acrylic deep-penetration primer. It penetrates pores to a depth of 5–10 mm, strengthens the surface, and binds dust. For painted walls — use an adhesive primer (concrete contact), creating a rough layer that the adhesive grips. For drywall — use a universal acrylic primer.
Primer application is done with a roller or brush. Roller is faster for large areas, brush is more precise for strips along the installation line. Apply primer in an even layer, avoiding puddles and missed spots. One layer is sufficient for good base, two layers — for problematic (dusty, loose) surfaces. Second layer is applied after the first layer dries.
Primer drying time — 2–4 hours at 20–25°C and 50–60% humidity. In cold or high humidity — dries longer — up to 6–8 hours. Molding installation is performed only on fully dried primer. Readiness can be checked by touch — surface is dry, not sticky, does not leave a mark on the finger.
Primer for polyurethane molding before installation is optional. Factory surfacemoldings from polyurethaneis dense, adhesive holds well. But primer on the back side improves adhesion by 15–20%, which is critical for heavy, wide cornices. Use the same acrylic primer, apply in a thin layer, let dry for 2 hours.
Checking primer quality — run your hand over the surface. There should be no white residue (dust), no feeling of looseness. Surface is slightly rough (primer creates microtexture), but strong. If in doubt — apply a second layer, better to be safe.
Marking: precision preventing rework
Marking — planning on the surface. Accurate marking eliminates installation errors, saves material, time, and nerves. Marking is performed after the primer is fully dry.
For cornice marking — horizontal line around the room perimeter. Use a laser level projecting a line. Set the level so the line is at a distance from the ceiling equal to the cornice width minus 10–20 mm. This is the bottom edge line of the cornice. Mark it every 30–50 cm with a pencil — the laser will turn off, and marks will remain as reference points.
If no laser level is available, use a water level (hydro-level). Mark a point at the required height on one wall. Transfer this height to all corners of the room using the hydro-level. Connect the points with a chalk line or straightedge. Accuracy is lower than laser, but acceptable.
For moldings marking — rectangles or frames on the wall. Start with the room’s central axis — a vertical line from the center of the ceiling to the center of the floor. Mark symmetrical panels relative to this axis. Use a level for verticals, a straightedge for horizontals. All lines must be strictly vertical and horizontal, angles — 90°.
Checking marking before installation is critical. Measure distances from corners to marks — they must be symmetrical. Check with a level — lines must be strictly horizontal/vertical. A 5 mm error at opposite ends of a wall will create a visible cornice tilt.
Adhesive: selection and application technique for tight contact
Adhesive — critical material, determining the longevity of installation and quality of joints. Wrong adhesive — element detachment after months, voids under molding, causing uneven shadows.
Adhesive is a critical material that determines the durability of the installation and the quality of joints. Incorrect adhesive leads to element delamination after months, voids under moldings, causing uneven shadows.
Adhesive for polyurethane molding — specialized polymer composition on acrylic or polyurethane base. Key properties: high initial adhesion (sets in 5–10 minutes), elasticity after polymerization (compensates for thermal expansion), white color (does not show through), thick consistency (does not drip during application). Recommended brands: Orac Decofix, DecoMaster, Tytan for molding.
Universal construction adhesives (liquid nails, general-purpose adhesives) are unsuitable. They may not bond to polyurethane, or bond but lose adhesion over time. Do not experiment — use adhesive specifically designed for polyurethane.
Adhesive application technique determines contact tightness. Adhesive is applied to the back of the molding — the surface facing the wall. For narrow elements (moldings, baseboards up to 80 mm) — one central strip applied in a zigzag pattern. For wide elements (cornices 100–200 mm) — two strips along the edges or a continuous layer applied with a notched trowel.
Adhesive quantity — critical parameter. Insufficient amount — incomplete contact, voids through which shadow is visible. Excess — adhesive protrudes upon pressing, stains the wall, requiring tedious cleaning. Optimum — strip width 5–7 mm for narrow elements, 8–10 mm for wide elements. Upon pressing, adhesive spreads, filling the contact zone, with minimal excess.
Applying adhesive to the wall in addition to applying it to the molding enhances adhesion for heavy elements. Wide cornices 150-200 mm and long moldings have significant weight. Double-sided application — a thin layer with a notched trowel on the wall, strips on the molding — creates maximum adhesion.
After applying adhesive, pressing the element against the surface must be even and sufficient. Press the element against the wall along its entire length, applying equal pressure. The adhesive spreads, fills microscopic irregularities of the wall and molding, creating a monolithic bond. Hold pressure for 10-20 seconds until the adhesive sets initially.
Fixation during full polymerization — using painter’s tape every 40-60 cm. The tape is adhered to the molding, stretched, and adhered to the wall above or below, holding the element in place and preventing it from sliding under its own weight. Heavy cornices can be additionally supported from below with temporary supports (wooden blocks, screws driven into the wall under the cornice). Fixation remains until full polymerization of the adhesive — 24 hours.
Checking the tightness of fit during installation — inspection after pressing. Run your finger along the joint — there should be no gap or step. If there is a gap — add adhesive at this spot and press again. If there is a step (molding protrudes above the wall surface) — possibly too much adhesive or an uneven surface. Check with a straightedge.
Jointing elements: the art of invisible seams
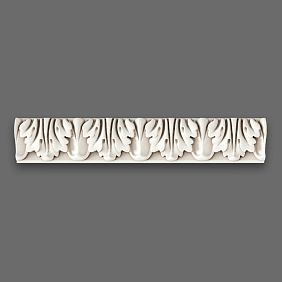
Joints of molding elements — the most noticeable areas. A 1 mm gap is visible from 3 meters, especially under side lighting. An ideal joint — monolithic, ornament matches, boundary is invisible.
Trimming elements for joints — precision to the degree and millimeter. For corner joints (cornices in room corners) — trim at 45°. Use a miter saw with precise angle setting or a miter box. The element during cutting should be positioned as it will be on the wall — cornices in a slanted position, simulating the wall-ceiling angle.
Checking the joint before installation — dry-fit two cut elements on a flat surface. The joint must be tight, without gaps. The ornament must match — one molding profile transitions into another, one curve into another. If there is a gap or mismatch — adjust the angle, cut again. Three minutes for checking and correction will save hours of patching an imperfect joint.
Corner elements — pre-made corner pieces — a revolution in installation simplicity. A corner element is installed in the room’s corner, with straight strips trimmed at 90° to it. The joint between the corner element and straight strip is minimal, and ornament alignment is guaranteed by the manufacturer. This justifies the cost of corner elements — on complex cornices with rich ornamentation, a 45° joint is difficult even for a professional.
Joint adhesive for seams — a special polyurethane compound that works like cold welding. Apply a thin layer 1-2 mm on both mating ends. Allow 30-60 seconds (adhesive thickens). Elements are joined and pressed tightly, held for 1-2 minutes. The adhesive polymerizes, making the joint monolithic — joint strength equals material strength.
Aligning elements during jointing — first join the joint, then press against the wall. Apply mounting adhesive to both elements. Apply joint adhesive to the ends. Attach the first element to the wall and press. Attach the second element, align the joint (ornament must match), press against the first. Hold the joint for 1-2 minutes. Then press the second element against the wall along its entire length.
Straight joints (extending elements) are technically simpler than corner joints. Ends are cut at 90°, joined butt-to-butt. Important — ends must be perpendicular to the element’s axis, otherwise there will be a gap. Checking with a square before cutting is mandatory. Joint adhesive ensures the seam is invisible.
Plan the placement of straight joints in the least noticeable areas. Do not place a joint in the center of a long wall at eye level. Place the joint in a corner (behind furniture), or under the ceiling/above the baseboard (outside direct view). On a cornice, place the joint on side walls, not on the main wall.
Spreading: erasing boundaries
Even perfectly cut and joined elements have a minimal gap of 0.3-0.5 mm — a result of unavoidable cutting inaccuracy and imperfect material geometry. The gap becomes more noticeable when viewed at an angle, especially under side lighting. Spreading joints and junctions makes them invisible.
Acrylic finishing putty — optimal material. It does not shrink, sands well, and paints easily. Consistency should be paste-like, not liquid (it will run) and not too thick (it won’t fill narrow gaps). If the putty is too thick, add a few drops of water and mix.
Apply putty with a narrow 40-60 mm trowel or rubber trowel. Load putty onto the trowel, press into the gap with motion along the joint. Ensure the gap is fully filled — putty should be level with or slightly above the surface (excess will be removed). Smooth it, creating a seamless transition to the molding and wall surface.
Remove excess putty immediately while it is still wet. A damp sponge or cloth, squeezed out, gently wipes the area around the joint, removing excess. Do not press hard — you don’t want to squeeze putty out of the gap. Light movements, removing only what is on the surface.
Putty drying time — 2-4 hours under normal conditions. Deep gaps may require 6-8 hours. Check readiness by touch — putty is firm, does not indent with a fingernail. If still soft — wait.
Sanding after drying — final operation. Fine sandpaper P220-P320 on a sanding block or by hand gently sands the puttied areas. Goal — make the surface perfectly smooth, erase the boundary between putty and molding. Light movements, no pressure. Remove dust with a dry cloth or vacuum cleaner.
Checking putty quality — visually and by touch. Run your hand along the joint — no step or depression should be felt. Look at it under angled light (a flashlight from the side) — no shadow from the gap, only a flat surface. If you see a defect — reapply putty and sand again.
Sealant for joints where micro-movements are possible — joint between cornice and ceiling/wall. Acrylic sealant is elastic and does not crack during thermal expansion. Extrude a thin bead of sealant along the joint, smooth with a wet finger. Immediately wipe away excess with a damp cloth. Sealant cannot be sanded, so application must be precise the first time.
Painting: monolithic perception
Painting molding — not just decoration, but integration of elements into a single surface. Properly painted molding is perceived as part of the wall/ceiling, inseparable from the base. Improperly painted molding appears as a glued-on element, foreign and noticeable.
Priming before painting equalizes absorption. Polyurethane has a dense surface, almost non-absorbent. Putty at joints is porous and absorbs actively. Without primer, paint will lay unevenly — glossy film on polyurethane, matte spots on putty. Primer equalizes, paint lays evenly.
Apply acrylic primer with a brush to the molding and adjacent wall area 50-100 mm wide. Thin, even layer, no drips or puddles. Drying time 2-4 hours. For porous putty, two coats of primer are recommended — first coat absorbs, second coat forms a film.
Paint for molding — water-based (acrylic, latex). Cannot use solvent-based paints (alkyd, nitro enamel) — they may dissolve or deform polyurethane. Matte paint gives a soft, noble appearance, hides minor defects. Glossy paint emphasizes relief, creates reflections, but reveals any irregularities.
Color solution for molding determines its role. Molding in wall/ceiling color — relief is visible only by shadow, elegant modern solution. White molding on colored walls — classic contrast, molding is an accent. Contrasting colored molding — bold solution for designer interiors.
Paint application is done with a brush for detailed relief coating. First coat — primer, thin. Dip brush shallowly, squeeze out excess at the edge of the can. Paint with smooth motions along the element, coloring the ornament recesses. Watch for drips in recesses — periodically pass a dry brush, removing excess.
Second coat — covering, main. Applied 3-4 hours after the first, when the first is fully dry. Second coat covers gaps, creates a uniform, saturated color. Two thin coats are better than one thick coat — no drips, more even coverage.
Molding color — the wall/ceiling area adjacent to the molding, 30–50 mm wide, is painted with the same paint simultaneously with the molding. This eliminates visual boundaries and creates a monolithic effect. The molding and adjacent area are perceived as a single element, not as a surface sticker.
Painting tape for edge protection — if the molding contrasts with the wall. After installation and spackling, apply tape to the wall along the molding, leaving a 2–3 mm gap. Paint the molding. Remove the tape after 30–60 minutes, before the paint is fully dry — if you wait, the paint will peel off with the tape.
Lighting: physics of shadows and visual quality
Shadow is the absence of light. The relief of the molding casts a shadow when light hits at an angle. The direction, intensity, and character of the light critically affect how the molding is perceived. What looks perfect under one lighting condition may appear defective under another.
Natural light from windows — a variable factor. Morning sun from the east, midday sun from the south, evening sun from the west create different angles of incidence, different shadows. A cornice on a west-facing wall is front-lit in the morning (from the east) — shadow is minimal, relief is barely discernible. In the evening, it is side-lit (from the west) — shadow is maximal, relief is pronounced, but any defects (unevenness, gaps) are also maximally visible.
Planning molding with windows: determine the primary light source. Place main decorative elements (accent walls with panels, trim) on walls illuminated by side light — relief will be pronounced. Avoid placing them on walls opposite windows, where light is front-facing — relief is lost.
Artificial lighting is under your control. Properly placed fixtures highlight the molding, while poorly placed ones hide or reveal defects. For beautiful shadow play oncornicesuse concealed backlighting — LED strip placed in the niche behind the cornice illuminates the wall and ceiling, creating a soft shadow from the cornice.
Directional spotlights (spotlights) mounted on the ceiling or walls can illuminate the molding from the side. This creates a dramatic, deep shadow that accentuates the relief. However, it requires perfect installation quality — under side lighting, any unevenness, gap, or height difference creates parasitic shadows visible as defects.
A central chandelier provides diffused light, under which the molding is perceived softly, without sharp shadows. This is a safe option — installation defects are less noticeable. However, decorative impact is lower — relief is poorly discernible. For living rooms where molding should impress, central lighting alone is insufficient — add local backlighting.
Light color temperature affects perception. Warm light (2700–3000K) creates a cozy atmosphere, suits classic interiors, softens contrasts. Cool light (4000–5000K) creates brightness, clarity, highlights details — suits modern interiors, but is merciless to defects.
Testing lighting before painting — turn on different fixtures, observe how the installed molding looks under different lights. If defects (unevenness, gaps) are visible under any variant — fix them before painting, while still accessible. After painting, corrections are more difficult.
Typical errors creating unattractive shadows
Knowing errors prevents them. Let’s consider defects that ruin the impression of molding.
Installation on uneven surfaces — the main error. A cornice installed on a wavy wall repeats the waves. Under side lighting, the shadow from the cornice is uneven — sometimes wide, sometimes narrow, sometimes absent. This looks like installation defects, even though the cornice itself is perfectly flat. Solution — level the surface before installation or install level and spackle gaps afterward.
Gaps under molding due to insufficient adhesive. If adhesive is lacking, molding adheres only at points, not over the entire surface. Gaps under molding create parasitic shadows under side lighting — it appears as if the molding is detached from the wall, even though it holds firmly. Solution — sufficient adhesive, even application, and checking adhesion during installation.
Gaps at joints and transitions — a classic defect. A 1 mm gap under side lighting creates a 3–5 mm shadow — looks like a crack. A gap between cornice and ceiling creates a dark stripe, spoiling the impression. Solution — precise trimming of elements, joint adhesive, careful spackling of all gaps.
Height differences between elements at joints. One element protrudes 0.5 mm relative to another — barely noticeable under front lighting, but under side lighting creates a stepped shadow. Solution — precise alignment of elements at joints, control with a level, and if necessary, sanding to smooth transitions.
Uneven painting creates visual inconsistency. Thin paint layer on protrusions, thick layer in ornament recesses — relief is perceived as blurred and indistinct. Solution — two thin paint layers with careful coverage of all areas, using quality brushes.
Ignoring light direction during planning. Molding on a wall illuminated frontally loses expressiveness — relief is unreadable, shadows are minimal, elements appear flat. Solution — plan molding on walls with side lighting or add local backlighting.
Professional quality secrets
Master craftsmen with years of experience know techniques not described in instructions. These techniques produce flawless results.
Molding large elements with painter’s tape. Wide cornices, heavyMoldingshave weight, adhesive sets slowly. Apply painter’s tape to the molding every 30 cm, stretch it, and adhere it to the wall — creating temporary supports. Remove after 6–8 hours, when the adhesive has set. This is more reliable than just using tape.
Dry assembly of complex compositions on the floor. Before installation, lay out all elements in the correct configuration on a flat surface. Fit joints, mark positions. This allows you to see the entire composition, adjust it before mounting on the wall, where corrections are more difficult.
Using a tripod-mounted laser level for marking. Project a horizontal line around the room’s perimeter, mount the cornice strictly along it. Keep the laser on during installation — continuous control of levelness. This guarantees a perfectly level cornice line even on curved walls.
Two-stage spackling for deep gaps. First layer fills the gap to 70–80%, dries, and shrinks minimally. Second layer fills the remainder, leveling the surface. This prevents spackling from settling in deep gaps, which would create depressions after drying.
Control lighting before painting — a flashlight or lamp from the side, simulating side lighting. Illuminate the installed molding from the side, examine the shadows. If defects (unevenness, gaps, height differences) are visible — fix them now. After painting, defects will remain, and correction will require repainting.
Painting before full installation of all elements. Install the cornice, paint it and the adjacent wall/ceiling area. Then install moldings, paint them and surrounding zones. This creates neat boundaries and makes it easier to protect already painted elements with tape. Alternative — paint everything after full installation — requires more care but ensures color unity.
Conclusion
Neat transitions and even shadows — the result is not by chance, but by a systematic approach to molding installation. It begins with surface diagnostics, identifying curvature, and planning leveling. It continues with meticulous preparation — leveling mounting zones, priming for adhesion, precise marking by level.
It is installed as a mounting — correct adhesive in sufficient quantity, even pressing, fixation until polymerization. Precise trimming of elements, dry joint checking, use of joint adhesive for monolithic joints. Control of fit with a rule, correct defects immediately while still possible.
Finished with finishing work — thorough spackling of all joints and junctions, sanding to perfect smoothness, priming before painting. Two-layer painting with relief and adjacent zone coverage for monolithic perception. Quality check under inspection lighting.
Understanding the physics of light and shadow allows planning the placement of moldings and lighting so that the relief is expressive, yet no defects are visible. Side lighting highlights the beauty of correctly installed moldings and is merciless to errors. Plan lighting before mounting, test options, choose the optimal one.
The company STAVROS offerspolyurethane decorative moldinghigh density with precise geometry and clear relief. Quality elements simplify installation — ideal geometry ensures tight joints, clear relief creates beautiful shadows. Wide assortmentcrown moldings, molding, baseboards, rosettesallows selecting elements for any project.
Professional STAVROS consultants will help select elements, calculate quantities, recommend adhesive and preparation materials. Product quality is confirmed by certificates and experience from thousands of completed projects. Delivery ensures timely receipt of materials.
Create an interior with molding that looks professional — with neat junctions, even shadows, visual monolithism. Apply the technology described in this article. Do not rush, pay attention to each stage, control quality at every step. The result will exceed expectations.
Quality in details. Junctions without gaps, shadows without breaks, composition without defects — this is possible.Decorative stuccofrom STAVROS and correct installation technology — everything needed for perfection. Start your project today.


