


Article Contents:
- Why Door Decor is Needed and What Can Be Changed Without Replacing the Door Panel
- Three Problems That Decorating Solves
- What Exactly Can Be Changed Without Removing the Door
- Door Molding and Overlays: How to Choose, How to Glue, What Style They Create
- What is Molding and How It Differs from an Overlay
- Door Decor Styles with Molding: From Minimalism to Baroque
- How to Properly Glue Molding onto a Door: Step-by-Step Technology
- Wooden Door Casings and Cornices Above the Door
- Casing: Not Just 'Covering the Gap'
- Cornice Above the Door: An Architectural Technique Few Think About
- Corner Rosettes and Capitals: A Small Detail with a Big Effect
- DIY Door Decorating: Step-by-Step Master Class
- Scenario 1: Quick Update — One Molding Frame on the Panel
- Scenario 2: Replacing Casings with Installation of Corner Rosettes
- Scenario 3: Full Doorway Decor with Overdoor Cornice
- Wooden Overlays for Door Decor: STAVROS Catalog in Detail
- Door Molding: Key Items
- Capitals for Doorway Decor
- Hardware as Part of Decor: Handles and Hinges That Change Everything
- Handles: Material, Shape, Style
- Hinges: Function and Aesthetics
- Lock Hardware: Don't Forget the Decorative Rosette
- Cabinet Door Decor: A Separate Story
- FAQ: Popular Questions About Door Decor
- STAVROS: Decorative Elements for Doors from the Manufacturer

There is one detail in an apartment that is almost never noticed — until it becomes a work of art or, conversely, a source of chronic irritation. This is the door. Not the panel itself — not an inch of width, nor the manufacturer's brand. It is the door's design: moldings, casings, cornice above the opening, hardware, framing. This is the boundary between 'just a door' and 'an architectural detail of the space.'
Door DecorationDIY door decor is not a weekend hobby. It is a conscious work with the interior that yields results disproportionate to the effort spent. A few hours, a few elements — and the room changes its tone. Without renovation. Without replacing furniture. Simply because the door has become different.
This article is a complete practical guide: from choosing style and materials to step-by-step installation instructions. Written not to impress with terminology. Written so that you do it and don't regret it.


Why Door Decor is Needed and What Can Be Changed Without Replacing the Door Slab
Before picking up a tool, it's worth answering the main question: what exactly is wrong with the door in its current state? Everyone has their own answer—but the diagnoses usually coincide.


Three Problems That Decorating Solves
A bare slab without character. Standard mass-produced interior doors are functional items without a visual message. A smooth slab without relief, without a profile, without details. In an expensive interior, such a door looks like a random guest: it doesn't contradict anything, but it doesn't resonate with anything either.
Mismatch with the room's style. The renovation was done in stages: first the floors and walls—carefully, with love and budget, then the doors—as an afterthought. As a result, a classic living room with molding, parquet, and a carved console ends at the doorway with a smooth door without a casing. The dissonance is obvious.
Wear and tear. A door is used more intensively than any other item in an apartment. After a few years, scratches, scuffs, and chips on the edges appear. Replacing the door because of this is expensive. Decorating it is sensible.
Door Decoratingsolves all three problems at once. Overlay moldings hide surface defects. A cornice above the opening visually 'raises' the ceiling. Solid wood casings complete the connection between the door and the wall as it should look in a quality interior.
Our factory also produces:


What Exactly Can Be Changed Without Removing the Door
List of specific interventions—without replacing the slab, frame, or hinges:
-
Glue or screw decorative overlays onto the slab (imitation of panels, creating a frame structure)
-
InstallWooden moldingsaround the perimeter of the slab or in the central zone
-
Replace or install solid wood casings instead of standard plastic or MDF profiles
-
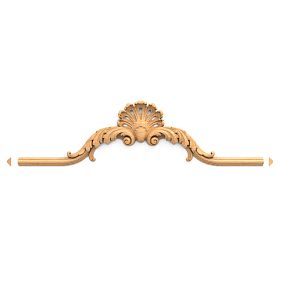
Add a cornice above the door opening—a horizontal decorative element that 'architecturally' completes the opening
-
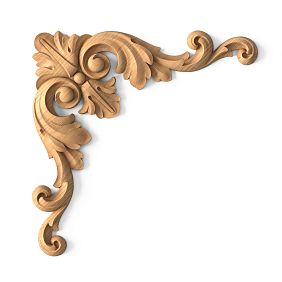
Install corner rosettes or capitals at the junction points of the casing with the horizontal strip
-
Change the handle, hinges, locking hardware
-
Repaint the door completely or create a two-color solution
All of this is weekend work with basic tools and properly selected materials.
Get Consultation
Moldings and Door Overlays: How to Choose, How to Glue, What Style They Create
Molding is the main tool of a door decorator. It's where the transformation begins: a flat, smooth door acquires structure, volume, and character after a few hours of work.
What is Molding and How It Differs from an Overlay
Molding is a linear profile with a decorative cross-section. It's sold by the meter, cut to the required size, and mounted with adhesive or fasteners. Creates linear relief—horizontal, vertical, or framing.
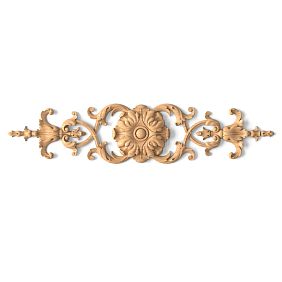
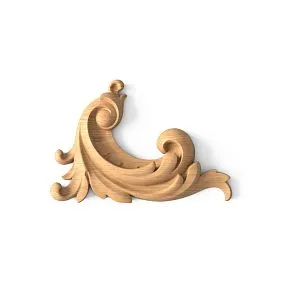
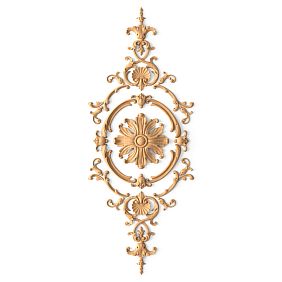
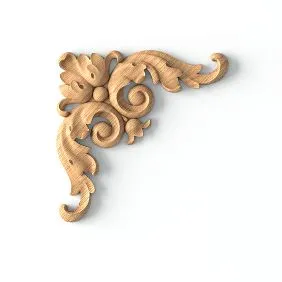
Overlay is a three-dimensional decorative element of a fixed size. A rosette for a corner, a central ornament, a corner insert. An overlay is not cut—it's installed as a finished product.
In door decor, moldings and overlays most often work together: moldings create a linear frame, overlays decorate the corners and central points of this frame.
Door Decor Styles with Moldings: From Minimalism to Baroque
Scandinavian minimalism. Two or three horizontal moldings on the slab, creating zoning without relief. Profile—flat rectangular, height 15–25 mm. Color—white or gray, matching the slab color. Effect: a structured door without decorative 'noise'.
Modern classic / neoclassicism. Frame system: moldings form one or several frames on the slab. Corner rosettes in the frame corners. Profile—with moderate relief (bevel, ogee), height 30–50 mm. Color—white with a gold or silver detail on the rosettes. Effect: the door acquires a 'furniture' character, becomes part of the room's decorative ensemble.
Classic and Baroque. Multi-tiered frame system with a shaped molding profile.Wooden moldingswith an expressive cross-section—MLD-014, MLD-015, MLD-016 from the STAVROS catalog—create dense relief, which, combined with gilded corner overlays, gives a Baroque or neoclassical atmosphere. This option requires a wider slab (from 900 mm) and taller doors (from 2100 mm).
Provence style. One wide frame made of molding with rounded corners. The door is repainted white or cream, the molding—in a slightly darker shade or with a light patina effect. Characteristic feature: distressing—intentional rubbing of the molding edges with sandpaper after painting, revealing a darker underlayer.
Loft and industrial style. Instead of classic moldings — wooden slats, nailed vertically with equal spacing. They create a rhythmic 'grid' of dark wood on a gray or anthracite background. This technique only works on wide double doors or cabinet doors — on a narrow standard door, few slats will fit, and the effect will be blurred.
How to properly glue molding onto a door: step-by-step technology
Step 1. Marking. Draw the placement of the moldings on the door panel with a pencil or painter's tape. Use a level — even a slight tilt of the frame relative to the horizontal will be noticeable under operational lighting. A common mistake: drawing 'by eye'.
Step 2. Cutting corners. For a rectangular molding frame, each of the four segments is cut at a 45° angle at the ends. A miter saw with a 45° stop is the necessary tool. A miter box + handsaw is an acceptable alternative but requires skill. Before final cutting, check the dry fit: place the segments on the door and ensure the corners meet without gaps.
Step 3. Applying adhesive. Polyurethane adhesive or liquid nails are two working options. Liquid nails (acrylic or polyurethane) are applied in a thin zigzag pattern on the back of the molding. Press the segment against the panel, hold for 30–60 seconds, secure with painter's tape for 2–4 hours.
Step 4. Sealing joints. Joints at corners and minor gaps are sealed with acrylic sealant. Apply a thin strip, smooth with a finger dipped in water, remove excess with a damp cloth. After drying — sand with fine sandpaper.
Step 5. Final painting. The molding is painted to match the panel or in a contrasting color. Two to three thin coats with a brush or mini-roller are better than one thick coat. For solid oak or beech molding, apply an acrylic primer first.
Wooden architraves and cornices above the door
If molding on the panel is interior work with the door, then the architrave and door cornice are work with the opening. They determine how the door 'fits' into the wall, how the transition between planes looks.
Architrave: not just 'covering the gap'
Architrave — a strip of material covering the joint between the door frame and the wall. Functionally — yes, it's a technical element. Aesthetically — it's the frame of the opening, which either makes the door part of the room's architecture or turns it into a 'hole in the wall'.
Standard MDF architraves with white film — the most common and least interesting option. They solve the technical task but completely ignore the decorative one.
Wooden architraves made of solid oak or beech — a different dimension. Profile MLD-043 from the STAVROS catalog (border/molding/architrave, from 1,380 rubles per linear meter) — a universal element, working simultaneously as a door opening architrave and as a wall molding. Install it on all door and window openings in one room — and the space will gain architectural integrity, which cannot be achieved with any furniture or textiles.
The width of the architrave is selected proportionally: for a standard opening 800–900 mm wide and 2000–2100 mm high, the optimal architrave width is 60–90 mm. For tall doors from 2300 mm — 90–120 mm. A narrow architrave on a tall door looks insufficient — it doesn't hold the proportion.
Cornice above the door: an architectural technique few think about
A horizontal decorative element above the door opening — a technique that came from palace architecture. In a classic interior, the door is completed with an architrave (a horizontal beam above the opening) just like a window. This creates a sense of completeness: the opening is 'closed' from above, the door becomes an architectural object, not just a hole.
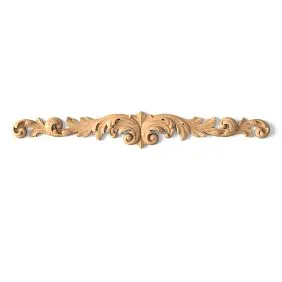
Modern interpretation: a horizontalwooden cornice80–150 mm wide is attached horizontally above the door frame, extending 30–60 mm beyond the width of the architraves on each side. Thickness — 20–40 mm. The profile can be straight (minimalism) or shaped (classic).
This technique is especially effective with an opening height up to 2000–2100 mm: the door cornice visually 'raises' the ceiling, creating the illusion of a higher opening and, accordingly, a taller room. This is not a designer trick — it's working optical physics.
Corner rosettes and capitals: a small detail with a big effect
The point where the vertical architrave meets the horizontal one — structurally, this is a joint at a right angle. The standard solution is a 45° miter cut. The professional one is a corner rosette.
Corner rosette — a square or rectangular decorative element covering the joint corner and creating an ornamental accent at that spot. It is wider than the architrave and protrudes slightly above its surface — this 'protrusion' creates a play of shadows and tactile perceptibility when touched.
Result: the door opening looks like a finished architectural element — with 'shoulders' (vertical architraves), a 'cap' (horizontal element), and 'fasteners' in the corners (rosettes). This is a full-fledged classic scheme that works in any room with a ceiling from 2.7 m.
DIY door decoration: step-by-step master class
Moving on to practice. We'll analyze three scenarios — from simple to complex.
Scenario 1: Quick update — one molding frame on the panel
Task: give a simple smooth door visual structure without painting and serious investment.
Time: 3–4 hours including adhesive drying.
Materials:
-
Molding MLD-001 (from 210 rub./linear m) — about 4 linear meters
-
Acrylic liquid nails — 1 tube
-
Painter's tape — 1 roll
-
White acrylic sealant — 1 tube
-
Miter saw or miter box
Sequence:
-
Determine the frame size. Offset from the edge of the canvas — 60–100 mm on each side. Mark with a pencil.
-
Cut 4 pieces of molding with 45° miter cuts at the ends. Top and bottom — horizontal, length = inner width of the frame. Sides — vertical, length = inner height of the frame.
-
Dry-fit: corners should meet without gaps.
-
Apply liquid nails to the back of each piece, press along the markings, secure with tape.
-
After 4 hours, remove the tape. Seal the corner joints with sealant.
-
Paint the molding to match the door color.
Result: the door gained a 'paneled' character — like doors 2–3 times more expensive.
Scenario 2: Replacing trim with corner rosettes
Task: replace plastic trim with solid wood trim with corner rosettes.
Time: 4–6 hours.
Materials:
-
Solid wood trim (profile MLD-043 or similar) — 2× opening height + 1× width + small margin
-
Corner rosettes — 2 pieces (for top corners), optionally 2 bottom rosettes
-
Screws 3.5×40 mm or liquid nails
-
Nail set
-
Wood filler
Sequence:
-
Remove old trim — pry carefully with a mounting spatula, avoiding wall damage.
-
Install corner rosettes at the junction points of vertical and horizontal trim. Rosettes are installed first: they set the reference point from which all linear elements start.
-
Cut vertical trim: bottom end — straight cut, top — straight cut (rosette covers the joint).
-
Install vertical trim with adhesive or screws. When using screws — pre-drill with a thin bit to avoid splitting the wood.
-
Cut horizontal trim: both ends — straight cuts (length = distance between outer edges of corner rosettes).
-
Install horizontal trim. Sink screws with a nail set, cover with matching filler.
-
Paint or stain to the desired color.
Scenario 3: Full door opening decor with over-door cornice
Task: create a classically styled door opening 'like in a palace interior' — with trim, corner rosettes, and a horizontal cornice on top.
Time: a full workday.
In addition to scenario 2:
-
Horizontal cornice — straight or shaped profile, width 80–120 mm, length = trim width + overhang of 40–60 mm on each side
-
Dowel anchors 6×40 mm for attaching the cornice to the wall above the opening
-
Level (laser — perfect)
The cornice is installed after the trim is in place. Determine the mounting height—typically 20–40 mm above the top edge of the horizontal trim. Mark the horizontal line using a laser level. Drill holes in the wall through the cornice body, insert wall plugs, and screw in the self-tapping screws. Check the level again after tightening—the cornice may shift slightly during screwing.
The result of this scenario: the doorway transforms into a full-fledged architectural element with emphasized verticality and a completed horizontal line.
Wooden overlays for door decoration: the STAVROS catalog in detail
The practice of door decoration hinges on material quality. Let's examine what STAVROS offers in its production program.
Door moldings: key items
The STAVROS catalog features over 40 molding profiles made of solid oak and beech. For tasksdecorating doorsthe most in demand are:
-
MLD-001 (from 210 rub./linear meter) — a thin rectangular profile, versatile for any style. Minimalism, Scandinavian, contemporary. Width 15–20 mm, suitable for small doors.
-
MLD-004 (from 330 rub./linear meter) — a profile with a slight bevel. Creates soft relief without being overloaded. Ideal for creating frame systems in modern classic.
-
MLD-014 (from 690 rub./linear meter) — an expressive figured profile. Classic, Baroque, Neoclassical. Provides significant relief — works well on wide doors from 800 mm.
-
MLD-015 (from 1,050 rub./linear meter) and MLD-016 (from 1,320 rub./linear meter) — rich decorative profiles with multi-level cross-sections. For representative interiors with high ceilings.
-
MLD-043 (from 1,380 rub./linear meter) — a border/molding/architrave with triple purpose. Functions as a doorway architrave, a frame molding on the door leaf, and a wall border.
Capitals for doorway decoration
wooden capitalsSTAVROS — KL-029 (from 4,130 rub.) — a decorative element with ornamental relief. Installed in the upper corners of the doorway as an architectural accent. This is not a corner rosette — it is a larger, more expressive element that, combined with pilasters on the sides of the opening, creates a full-fledged "portal" in the classical style.
Application: living rooms and halls with ceilings from 3 m, doors with a height from 2200 mm, classical and neoclassical interiors.
Hardware as part of decoration: handles and hinges that change everything
To talk about door decoration and not touch on hardware is like describing a suit without accessories. The handle is the "face" of the door. The first point of contact. The only functional element touched by hand every day.
Handles: material, shape, style
For classic style: forged or cast brass handles with a matte gold or bronze finish. Shape — "bracket," "goose foot," "ring." No chrome plating — chrome is inorganic in a classic interior.
For neoclassical and modern classic: matte brass or nickel. Straight shapes with a decorative accent — a small rosette under the handle in brass gives a "mobile" character.
For minimalism and Scandinavian style: matte black iron or satin stainless steel. Simple straight "brackets" without ornament. Long handles (300–600 mm) — also known as "architectural" — create a modern, laconic statement.
For loft: massive forged metal with a textured surface. Dark bronze or dark brown gold.
Hinges: function and aesthetics
The hinge is an element noticed less often than the handle. But in a classic interior, an open decorative hinge (not mortise, but surface-mounted) is an additional decorative element. Forged surface-mounted hinges with rosette-shaped heads or engraved ornamentation are a characteristic detail of historical doors that is back in fashion today.
In modern interiors — concealed hinges (hidden). They are not visible when the door is open: the door appears "floating," devoid of mechanism. This is maximalist minimalism.
Lock hardware: don't forget the decorative rosette
A decorative surface-mounted rosette for the keyhole or cylinder — a small element that, when replaced from a standard plastic one to a brass or bronze one, literally transforms the door. Costs a few hundred rubles, takes 15 minutes to replace, the effect is disproportionately large relative to the cost.
Wardrobe door decoration: a separate story
Wardrobe doors are the largest vertical surface in most bedrooms. Yet, they receive minimal design attention. This is an error that is easy to correct.
A wardrobe with flat, solid-color doors serves as a neutral background. The same wardrobe with solid wood frame moldings or decorative overlays becomes an accent piece in the interior. The principle is the same as for interior doors, but considering the scale: a wardrobe is typically multi-paneled, and the decor must be consistent across all panels.
Frame system for wardrobe doors: one vertically elongated molding frame on each panel, positioned centrally. Frame-to-panel ratio: the frame occupies 60–70% of the height and 40–50% of the width of each panel. Centered symmetry is a fundamental requirement.
Mirrored inserts with wooden framing: glass in a wooden molding frame is one of the most effective techniques for small bedrooms. The mirror visually expands the space, and the wooden frame made ofsolid wood moldinggives it a 'furniture' character instead of a 'cabinet' one.
Decorative Insertsfor wardrobe doors: three-dimensional elements in the center of each panel — an ornamental rosette, a geometric overlay, a carved detail. They function as a visual 'keystone': pulling the entire composition toward the center.
FAQ: Popular Questions About Door Decor
Can wooden moldings be glued onto an MDF veneer door?
Yes. The surface should be lightly sanded with P180 sandpaper for better adhesion, degreased with white spirit or isopropyl alcohol, then apply liquid nails or polyurethane adhesive. Moldings adhere reliably to MDF veneer — the surface is flat and accepts adhesive well.
Which molding is suitable for a door 2000 mm high and 700 mm wide?
For a small door — a moderate profile 25–40 mm wide (MLD-001, MLD-004). A wide or ornate profile on a narrow door will create visual heaviness. A perimeter frame with a 50–70 mm inset from the panel edge is the optimal scheme.
How to properly paint a solid wood molding after installation?
Step 1: acrylic primer in 1–2 coats, drying time 2 hours. Step 2: light sanding with P320. Step 3: final acrylic enamel applied with a brush or mini roller in 2 coats. Between coats — 1–2 hours. Total: full cycle — 6–8 hours.
Is it necessary to remove the door from its hinges to decorate with moldings?
Not necessarily. It's more convenient to work with the door open and secured in place. Removing the door only makes sense for a complete repaint — to paint horizontally, avoiding drips.
Are wooden architraves difficult to install yourself?
No. The main work involves removing old architraves, taking precise measurements, and careful fastening. Tools: miter saw (or miter box), screwdriver, level. The only complexity is cutting 45° angles for miter joints. A miter box solves this without special skills.
How to coordinate moldings on the door with moldings on the walls?
Use the same profile or profiles from the same stylistic series. If the walls haveMLD-014 moldings, then on the door — MLD-014 or a thinner profile of the same design. Different profiles in one room are acceptable provided they share the same style and color.
Can wooden moldings be used to decorate doors in a bathroom?
Yes, with moisture-protective finishing. Oak molding with 3–4 coats of water-based polyurethane varnish and sealing of all joints is a workable solution for a bathroom with good ventilation. Without sealing the joints, moisture will get behind the molding and cause delamination.
STAVROS: Decorative Elements for Doors from the Manufacturer
Door decor begins with material selection — and here every detail matters. A cheap MDF molding with a white film will solve the problem for a year or two. Solid oak molding will solve it for 30 years.
STAVROS is a Russian manufacturer of decorative elements made from solid oak, beech, and high-density MDF, with its own production and full technological cycle: from wood drying to final coating. The production program includes over 40 molding profiles, wall and ceiling trim,Capitals, Furniture legs, Solid wood handles, frames for mirrors and paintingsandClassic Furniturefor creating a fully coordinated interior.
All this means one thing: instead of assembling door decor from various sources and struggling with mismatched profiles, colors, and wood species, you get a unified system from a single manufacturer. The molding on the door, the architrave of the opening, the cornice above it, the moldings on the walls, the baseboard at the floor, and the cornice at the ceiling — one wood species, one tint, one decorative language.
Delivery across Russia and CIS. Custom profile manufacturing from drawings — from 50 linear meters. Free consultation with a technologist for profile selection for a specific project when placing an order.
A door is not the final touch of a renovation. It is an architectural element that deserves attention. STAVROS helps you give it the proper attention.


