Article Contents:
- How borders affect the perception of interior
- Visual division of space
- Correcting Room Proportions
- Creating accent zones
- Color and stylistic connections
- Types and materials of borders
- Paper borders
- Vinyl and non-woven borders
- Wooden and MDF moldings
- Polyurethane moldings
- Specialized borders
- Border for wallpaper and its installation
- Planning placement
- Surface Preparation
- Installation process
- Final finishing
- Errors in selection and installation
- Errors in selection
- Errors in placement
- Installation Errors
- Conclusion
- Frequently Asked Questions

Interior design is the art of details, where each element plays its role in creating a harmonious space.Border for wallpaperis one of those tools that can radically change the perception of a room, adding structure, character, and completeness. It is not just a decorative strip on the wall — it is an element of interior architectural language that can zone space, adjust proportions, create visual accents, and unify different finishing elements.
The history of using borders in interior decoration spans centuries. In palace halls and aristocratic mansions, borders were used to create complex compositions on walls, separating different finishing zones, highlighting architectural elements, and framing murals and frescoes. Today, borders are experiencing a new rebirth — modern designers have once again recognized their potential as a tool for creating expressive, individual interiors.
The modern approach to using borders differs in greater freedom and variability. We are not obliged to follow strict historical canons, and we can boldly experiment with placement, combinations, and materials.Decorative bordercan be made not only of paper, but also of wood, MDF, polyurethane, metal — each material opens up its own possibilities for creativity.
The popularity of borders in modern design is linked to their versatility and functionality. They are equally suitable for classical and contemporary interiors, children's rooms and offices, residential and commercial spaces. The key is to correctly choose the type, material, placement, and color scheme of the border so that it supports the overall interior concept.


How borders affect the perception of interior
The influence of borders on the perception of space significantly exceeds their physical dimensions. These relatively small elements can change the visual geometry of a room, create an illusion of height or width, divide or unite space, draw attention to certain zones or, conversely, make them less noticeable.


Visual division of space
A horizontal border running along the perimeter of the room at a certain height creates a clear visual boundary dividing the wall into two parts. This technique, inherited from classical architecture, where the lower third of the wall was traditionally finished with panels or more durable materials, remains relevant today. The boundary can be placed at a height of 80-120 centimeters from the floor, creating a classic panel, or at the level of two-thirds of the wall height, creating an upper frieze.
Visual division works not only aesthetically but also practically. The lower part of the wall is generally more susceptible to dirt and mechanical damage. Using more durable, darker, or easily washable wallpapers below the border and more delicate, lighter, decorative ones above, we create not only an attractive but also a functional solution. If necessary, only the lower part can be reinstalled without affecting the upper part.
Psychologically, horizontal division creates a sense of structure and organization in space. This is especially important in large rooms with high ceilings, where solid, uniform walls may appear empty and cold. A border creates visual anchor points, making the space more proportionate to the human scale, more cozy, and easier to understand.
In children's rooms, a border can serve as a boundary between a playful area below and a calm area above. Below the border, vibrant, playful wallpapers with images of characters, animals, and toys are used. Above, more soothing, neutral tones help relax before bedtime. Such division helps the child structure the space and understand the functional purpose of different zones in the room.
Our factory also produces:


Correction of room proportions
A horizontal border has the ability to visually adjust the proportions of a room. In a room with very high ceilings, a border placed at a height of 2-2.2 meters visually lowers the ceiling, making the space feel cozier and more intimate. The area above the border is painted in the ceiling color or a shade close to it, creating the effect of a lower ceiling.
In rooms with low ceilings, a border is better either not used at all or placed very low — at a height of 30-40 centimeters from the floor, creating a kind of high skirting board. Horizontal division at chest or head height in a low room will further emphasize the lack of height, visually pressing down the ceiling.
Vertical borders, although used less frequently, can visually expand a narrow room. Vertical stripes created by repeating borders or border frames direct the gaze horizontally, creating an illusion of greater width. This technique is especially effective in narrow hallways and elongated rooms.
The width of the border itself also affects the perception of proportions. A wide border of 15-25 centimeters creates a more pronounced division and may visually lower the height of the room. A narrow border of 5-10 centimeters creates a delicate boundary, having little effect on proportions. The choice of width should correspond to the size of the room and the desired effect.
Get Consultation
Creating Accent Zones
A border can be used to create a frame around a specific wall zone, transforming it into an accent element of the interior. A rectangular frame made of border on a plain wall creates a panel, within which contrasting wallpapers, photo wallpapers, a mirror, a painting, or a group of photos can be placed. Such a frame focuses attention and makes the zone especially significant.
In a bedroom, a border frame behind the headboard of the bed highlights the sleeping zone, creating a compositional center of the room. Within the frame, wallpapers with patterns, decorative plaster, or fabric upholstery can be used. The bed visually integrates into the room's architecture, becoming not just furniture, but part of the overall composition.
In a living room, a border frame can highlight the fireplace, television, or bookshelf area. This helps organize the space and create functional zones within a single room. Such a solution is especially effective in open-plan layouts, where it is important to structure the space without physical partitions.
A ceiling border, creating a frame around a chandelier or central zone, draws the gaze upward, making the ceiling an active element of the interior. This solution is characteristic of classic interiors, but can be adapted for modern spaces using minimalist borders.
Color and stylistic connections
Buy border for wallpaperA border is not only for functional division of space, but also for creating color and stylistic connections between different interior elements. A border can repeat colors present in textiles, furniture, and decor, linking them into a unified composition.
If curtains with a pattern are used in a room, the border can repeat this pattern, creating a visual connection between the window and the walls. If furniture facades have a certain color or pattern, the border can repeat it, integrating the furniture into the overall space. Such repetitions create rhythm, harmony, and a sense of thoughtful interior design.
A border can serve as a transitional element between wallpapers of different types or colors. When using two types of wallpaper on one wall — solid and patterned, light and dark — a border creates a smooth visual transition, making the combination more harmonious. Without a border, such a transition may appear abrupt and random.
In eclectic interiors, where elements of different styles and eras are mixed, a border can serve as a unifying element. A classic ornamental border in a modern space creates an interesting tension, linking the old and the new, making eclecticism intentional and thoughtfully designed, rather than chaotic.
Types and materials of borders
The variety of borders available on the modern market allows finding a solution for any interior style, any budget, and any functional requirements. From simple paper strips to luxurious wooden moldings — each type of border has its advantages, specific applications, and visual effects.
Paper borders
Paper borders are the most accessible and common type. They are narrow rolls of wallpaper, often produced by manufacturers specifically as an addition to certain wallpaper collections. The width of paper borders is usually 5-25 centimeters, and the roll length is 5-10 meters.
Advantages of paper borders — affordable price, vast variety of designs, ease of application, and the ability to easily replace them. Paper borders are glued with the same adhesive as paper wallpaper, and the technology is identical. If desired, a paper border can be easily removed and replaced with a new one.
Disadvantages of paper borders — low durability, susceptibility to moisture, tendency to fade in sunlight, fragility. Paper borders are not suitable for humid rooms, lower wall sections exposed to mechanical impacts. The service life of paper borders usually does not exceed 3-5 years.
Paper borders are ideal for children's rooms, where a child's interests and preferences change as they grow. The ease of replacement allows updating the interior according to changes, without major renovations. Borders with images of cartoon characters, animals, and toys create a playful, cheerful atmosphere.
Vinyl and fabric borders
Vinyl borders are strips of vinyl wallpaper — paper or fabric-based with a vinyl coating. Fabric borders are made entirely of fabric. Both types significantly surpass paper borders in durability, moisture resistance, and longevity.
Vinyl borders can be washed, they are not afraid of moisture, do not fade in sunlight, and withstand mechanical impacts. This makes them suitable for kitchens, bathrooms, hallways, and lower wall sections in corridors. The service life of vinyl borders is 7-10 years and more.
Fabric borders have an additional advantage — they are glued using a technique where adhesive is applied only to the wall, not to the border. This simplifies the process, making it less labor-intensive and messy. Fabric does not swell from adhesive, does not stretch, ensuring precise installation.
The design variety of vinyl and fabric borders is enormous. Available are classic ornaments, modern geometric patterns, imitations of various materials — wood, stone, metal. Vinyl borders can have textured surfaces imitating plaster, fabric, or leather.
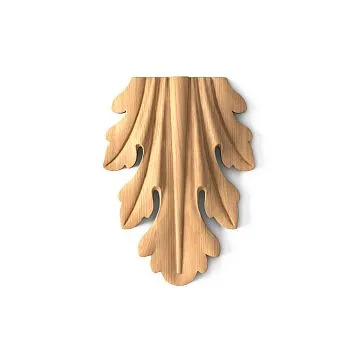
Wooden and MDF moldings
Wooden moldings and MDF strips represent a qualitatively different level of borders — they are three-dimensional elements with profiled cross-sections, creating a pronounced three-dimensional relief on the wall. They are not glued with wallpaper adhesive, but with special mounting adhesive or mechanically, creating a strong, long-lasting frame.
Wooden borders are made from solid oak, beech, ash, and pine. They are eco-friendly, have a natural texture, feel warm to the touch, and create a unique atmosphere of natural quality. Wooden borders can have various profiles — from simple rectangular to complex classical ones with moldings and ridges.
MDF borders combine the advantages of wood with greater dimensional stability and availability. MDF does not deform from humidity, has a perfectly smooth surface, and can be painted in any color. After quality painting, an MDF border visually indistinguishable from wood, but significantly cheaper.
Wooden and MDF borders require professional installation — precise corner trimming, quality mounting, and finishing. The result is solid, long-lasting, and prestigious. Such borders are suitable for classical interiors, offices, libraries, and reception areas.
Polyurethane moldings
Polyurethane moldings are a modern material combining the lightness of plastic with the ability to create complex classical forms. Polyurethane allows precise reproduction of plaster molding and wooden carving at significantly lower cost and weight.
Polyurethane borders are completely unaffected by moisture, making them ideal for bathrooms, kitchens, and swimming pools. They do not deform, crack, or fade, and are easy to clean. After painting, quality polyurethane visually indistinguishable from plaster or wood.
Installing polyurethane borders is simple — they are attached with special adhesive, easily cut with a regular saw, and do not require complex tools. Joints are filled with putty, becoming invisible after painting. This allows installing polyurethane borders independently without professional help.
The design variety of polyurethane borders is immense — from minimalist smooth profiles to ornate classical moldings with floral motifs, dentils, and Ionic elements. This allows finding a solution for any interior style.
Specialized borders
Textile borders are fabric strips on a paper base. They create a unique tactile feel, softness, and coziness. Textile borders are suitable for bedrooms and living rooms in Provence or shabby chic styles. However, they require careful handling, poorly withstand moisture and mechanical impacts.
Self-adhesive borders have an adhesive layer protected by a film. Installation requires only removing the film and attaching the border to the wall. This simplifies the process significantly, but the holding quality usually lags behind traditional methods with applied adhesive. Self-adhesive borders are suitable for temporary decor, children's rooms, and rental housing.
Borders with glitter, metallic, or pearlescent effects create a special festive, glamorous atmosphere. They suit glamorous interiors, art deco-style bedrooms, and girls' rooms. Under artificial lighting, such borders create light play, making the interior more dynamic.
Border for wallpaper and its installation
Proper border installation is critical for the final result. Even the most beautiful border will look poorly installed — with uneven lines, peeling edges, and visible joints. Correct installation technology ensures a neat, professional appearance and longevity.
Placement planning
The first question — at what height to place the border. For creating a classic panel, the border is placed at 80–120 centimeters from the floor — roughly at the height of a chair’s backrest or slightly higher. This creates a visual proportion of approximately 1:2 between the lower and upper wall sections, which is harmonious.
For creating a high skirting board, the border is placed at 30–50 centimeters from the floor. Below, use darker or more durable wallpaper; above, use the main wallpaper. This solution is practical for hallways, children’s rooms, and high-traffic areas.
Borders placed under the ceiling are positioned 10–30 centimeters from the ceiling, replacing or complementing the ceiling cornice. This visually reduces very high ceilings, making the room more cozy. It is important that the distance from the border to the ceiling is uniform around the entire room perimeter.
When creating frames on walls, carefully calculate the dimensions and proportions. Frames should be symmetrical and centered relative to the wall or a specific element — bed, sofa, fireplace. The distance between frames and from frames to corners should be uniform and proportional.
Surface preparation
Borders can be glued either to a clean prepared wall before wallpapering or over already applied wallpaper. The second option is more common, as it is easier to execute and allows adjusting the border position.
When gluing borders onto wallpaper, wait for the wallpaper to fully dry — at least 24 hours after wallpapering is complete. Wet wallpaper may peel off under the weight of the border. The wallpaper surface must be clean, degreased, and free of dust.
To create frames or horizontal lines, precise marking is required. A laser or water level is used to mark horizontal lines, and a plumb bob for vertical lines. Marking is done with a light pencil, which is later covered by the border. Painter’s tape can be used, applied along the marking line as a guide.
When gluing borders onto thick textured wallpaper, cut the wallpaper edge along the future border line, remove the cut strip. The border is glued into the formed gap, creating a smooth joint without overlap. This requires precision and experience, but the result is ideal.
Gluing process
The choice of adhesive depends on the border type. Paper borders are glued with standard wallpaper adhesive for paper wallpaper. Vinyl borders — with vinyl wallpaper adhesive. Fleece borders — with fleece adhesive, applied only to the wall. It is important to use the correct adhesive — an inappropriate one may not provide adequate adhesion.
Border cutting — if the wall length exceeds the roll length, joints are required. Joints are planned in the least noticeable places — in corners, behind furniture, in areas typically not in direct view. If the border has a pattern, the pattern must align at the joints, requiring extra material.
Adhesive application — paper and vinyl borders are coated on the back with adhesive, folded in half with the adhesive side inward, and left for 3–5 minutes to soak. Fleece borders are not coated — adhesive is applied only to the wall. Wooden and polyurethane borders are attached with special mounting adhesive, applied to the back of the border in a zigzag pattern.
Gluing — the border is applied to the wall according to the marking, gently smoothed from the center to the edges with a clean cloth or plastic putty knife. It is important to remove all air bubbles, ensuring tight contact along the entire length, especially at the edges. Excess adhesive protruding at the edges is immediately wiped away with a damp sponge.
Corners — the most challenging part of installation. When gluing borders around the room, at corners, the border is either cut at a 45-degree angle and joined, or one border overlaps slightly onto another. The first method is more aesthetic but requires precision. The second is simpler but less neat. For wooden and polyurethane borders, only 45-degree joints are used.
Final finishing
After gluing the border, allow the adhesive to fully dry — usually 24 hours. During this time, do not open windows, create drafts, or turn on heaters — all of these can cause the border to peel off.
If the border edges are offset from the wall, they can be additionally adhered by carefully applying a small amount of adhesive with a syringe or brush to the edge and pressing it down. Small bubbles can be punctured with a fine needle, air released, and smoothed out.
Wooden and MDF borders are spackled at joints and mounting points, sanded, primed, and painted. This requires additional time and skill, but the result is solid and long-lasting. Painting is usually done in two to three layers with intermediate sanding.
Polyurethane borders are also spackled at joints, primed, and painted. Quality painting makes polyurethane visually indistinguishable from plaster or wood. Acrylic paints are used, creating a smooth matte or semi-matte finish.
Errors in Selection and Installation
Even experienced designers and craftsmen sometimes make mistakes when working with borders. Knowing typical errors helps avoid them and achieve an ideal result.
Errors in Selection
Mismatch with interior style - a classic border with an ornate pattern in strict minimalism or, conversely, a simple monochromatic border in an opulent classical interior looks inappropriate. The border must match the overall style, support it, and not conflict with it.
Incorrect border width - a too-wide border in a small room with low ceilings visually presses down, making the room appear even smaller. A too-narrow border in a spacious room disappears, failing to create the desired effect. The width must match the room's scale.
Material conflict - a paper border on vinyl wallpaper may differ in texture and gloss, creating disharmony. It is better to choose a border made of the same material as the wallpaper, or at least one with similar characteristics. Manufacturers often offer ready-made wallpaper sets with matching borders.
Color mismatch - the border should either match one of the wallpaper colors or be contrasting yet harmonious. A random color not related to the interior's color scheme looks like a foreign element. A color wheel can be used to select harmonious combinations.
Ignoring the pattern - if the wallpaper has a large, active pattern, a border with another large pattern will create a visual conflict. For patterned wallpaper, it is better to choose a solid or geometric border. For solid wallpaper, a patterned border can be selected to enliven the monochromatic wall.
Errors in Placement
Too low placement of horizontal border - if the border is placed below 60 centimeters from the floor, it visually cuts the wall in half or even below the midpoint, creating disproportion. The room appears low-ceilinged, and the ceiling appears lower than it actually is.
Too high placement - a border placed above 150 centimeters in a standard room creates a very narrow upper strip that looks random and meaningless. Exception - placing it right under the ceiling to visually lower it.
Uneven height around the perimeter - if the floor or ceiling has unevenness, and the border is glued parallel to them, it will be at different heights on different walls. The border must be glued strictly horizontally at the level, regardless of floor or ceiling irregularities. Unevenness is compensated by skirting boards and cornices.
Asymmetric frames - if the border frame is not centered relative to the wall or is shifted without apparent reason, it looks random. Frames must be precisely calculated and symmetrically placed. Any asymmetry must be intentional and justified.
Installation errors
Gluing onto wet wallpaper - fresh wallpaper contains a lot of moisture, and adhesive does not adhere well. The border may peel off or pull the wallpaper with it. It is necessary to wait for the wallpaper to fully dry - at least one day in a warm, dry room.
Insufficient adhesive - if there is not enough adhesive, the border edges will not stick, start peeling off, or curl. The adhesive should cover the entire border surface with an even layer. When pressing down, it should slightly protrude at the edges - this is a sign of sufficient amount.
Poor smoothing - if air bubbles remain under the border, they are visible and spoil the appearance. The border must be carefully smoothed from the center to the edges, all bubbles expelled. Special attention to edges - they must fit tightly along the entire length.
Uneven joints - if the pattern at the joints does not align, the joint is placed in a visible location, and the edges are unevenly cut - this immediately stands out. Joints must be carefully fitted and, if possible, placed in inconspicuous locations. When a pattern is present, alignment is mandatory.
Adhesive on the front surface - adhesive on the visible part of the border and wallpaper creates stains, especially noticeable after drying. Any protruding adhesive must be immediately removed with a clean damp sponge. Work must be done carefully, avoiding spreading the adhesive.
Uneven line - if the border is glued without prior marking, relying on visual estimation, the line becomes wavy and uneven. This is especially noticeable on long straight wall sections. Precise marking with a level is mandatory before starting work.
Conclusion
Buy border for wallpaperSuitable for any interior project where completeness, structure, and uniqueness of space are important. This relatively small element can dramatically change the perception of a room, adjust its proportions, create functional zones, and unify various finishing elements into a single composition.
Borders influence the perception of interior space in multiple ways. They create visual division of space, making large walls more structured and proportionate to the human scale. They correct room proportions - visually lowering overly high ceilings or expanding narrow spaces. They create accent zones, focusing attention on specific wall areas. They serve as color and style connectors, unifying various interior elements.
The variety of border types and materials allows finding a solution for any style, budget, and usage requirements. Paper borders are accessible and diverse, suitable for dry rooms and temporary decoration. Vinyl and non-woven borders are durable and moisture-resistant, suitable for kitchens, bathrooms, and hallways. Wooden and MDF borders are solid and long-lasting, creating a volumetric relief, suitable for classic interiors. Polyurethane borders are lightweight and practical, moisture-resistant, and imitate plaster molding.
Correct border installation requires careful planning of placement, surface preparation, selection of appropriate adhesive, and careful application. Corners and joints require special attention - these are the areas that reveal the quality of work. Final finishing of wooden and polyurethane borders with painting completes the work, creating a professional appearance.
Knowing typical errors in selection and installation helps avoid them. Mismatch with style, incorrect width or placement, or poor installation can ruin even the most beautiful border and expensive renovation. Attention to every stage - from selection to final finishing - ensures an ideal result.
Company Stavros offers a wide range ofdecorative bordersmade from various materials - wood, MDF, polyurethane. These are volumetric profiled elements creating expressive relief and architectural significance. The quality of materials, precision of dimensions, and variety of profiles allow implementing any design ideas.
STAVROS products are manufactured in accordance with all quality standards. Wooden borders are made from premium-grade wood, MDF elements from environmentally safe E1 class material. Each item undergoes inspection prior to shipment, ensuring perfect geometry and surface quality.
Consultation support from STAVROS specialists helps you correctly choose the type, size, and profile of borders, calculate the required quantity, and get recommendations for installation and finishing. This is especially valuable for implementing complex design projects with non-standard solutions.
Choosing STAVROS borders gives you quality materials, professional support, and the opportunity to create a unique interior where every detail is thought out and contributes to overall harmony. Your home will gain completeness, structure, and individuality that create real comfort and aesthetic pleasure.
Frequently asked questions
At what height should the border be placed to create a panel?
To create a classic wall panel, the border is placed at a height of 80-120 centimeters from the floor. This is approximately the level of the back of a standard chair or slightly higher, historically associated with protecting walls from furniture damage. The optimal height depends on ceiling height — at standard 2.5-2.7 meters, the border is placed at 90-100 centimeters, creating a proportion of approximately 1:2 between the lower and upper parts. In rooms with higher ceilings, the border can be raised to 120-130 centimeters. The main rule — the border should not divide the wall exactly in half, as this creates disproportion.
Which border material is better to choose?
Material selection depends on usage conditions, interior style, and budget. For dry rooms, paper borders are suitable — they are affordable, diverse in design, easy to apply and replace. For humid areas, kitchens, and lower wall sections, choose vinyl or fabric borders — they are moisture-resistant, washable, and durable. For classic interiors, where volume and solidity are important, wooden or MDF moldings are suitable. For highly humid rooms, polyurethane moldings are ideal — they are completely water-resistant, lightweight, and mimic plaster molding. The border material should ideally match the wallpaper material.
Can you install the border yourself?
Applying paper, vinyl, and fabric borders is quite accessible for self-installation. It is no more complex than applying wallpaper, and the technology is identical. You will need the appropriate type of wallpaper adhesive, a level for marking, a roller or brush for applying adhesive, a clean cloth for smoothing, and a sharp knife for trimming. The main thing — accurate horizontal marking, careful application, and thorough smoothing. Difficulties may arise with corners and joints — they require precision. Wooden and polyurethane moldings are more difficult to install, require precise 45-degree trimming, and may require professional assistance.
How to choose the border color to match wallpaper?
There are several foolproof approaches. First — the border repeats one of the colors present on the wallpaper. If the wallpaper has a pattern with multiple colors, the border is chosen in one of those tones. Second — the border contrasts with the main wallpaper tone but harmonizes within the color circle. For example, with beige wallpaper — a brown border, with blue — blue or turquoise. Third — for monochromatic wallpaper, a border with a pattern containing the wallpaper color is selected. Many manufacturers offer ready-made wallpaper sets with matching borders, simplifying the choice. The main rule — the border should be sufficiently contrasting to not blend with the wallpaper, but harmonious in color.
When to install the border — before or after wallpaper?
In most cases, the border is installed after wallpaper, on top of it. This is technically simpler and allows for more precise positioning of the border. You must wait for the wallpaper to fully dry — at least 24 hours after completing the wallpapering work. Exception — if planned to align wallpaper seams along the border on thick relief wallpaper. In this case, wallpaper is first applied above the future border, then below, leaving a gap between them where the border is glued. This is more complex, requires precise marking, but results in a perfect finish without overlaps. Wooden and polyurethane moldings can be installed either before or after wallpaper, depending on the specific project.
How much does border for wallpaper cost?
The cost of borders varies widely depending on material, manufacturer, and design. Paper borders — the most affordable, from 100 to 500 rubles per 5-10 meter roll. Vinyl and fabric borders are more expensive — from 300 to 1500 rubles per roll. Designer borders from well-known manufacturers may cost 2000-5000 rubles per roll. Wooden moldings cost from 200 to 1000 rubles per linear meter depending on wood species and profile complexity. MDF moldings are cheaper — 100-400 rubles per meter. Polyurethane moldings — 150-600 rubles per meter. For a room with a perimeter of 20 meters, you will need 20-22 meters of border with allowance, costing from 500 to 10,000 rubles depending on the chosen type.
Can the border be used in humid rooms?
In bathrooms and kitchens, only moisture-resistant border types can be used. Vinyl borders withstand humidity well, can be washed, and do not peel off from condensation. Fabric borders are also sufficiently moisture-resistant. Polyurethane moldings are ideal for humid rooms — they are completely water-resistant, do not deform, and do not mold. Paper borders are not used in humid rooms — they quickly peel off, deform, and become stained. Wooden moldings can be used only if properly protected with moisture-resistant varnish or paint. MDF moldings require moisture-resistant material and quality painting.
How to fix a peeled border?
If the border has peeled off on a small section, it can be reapplied. Carefully lift the peeled section, clean the back side of the old adhesive with a dry cloth. Apply fresh adhesive in a thin layer using a brush or syringe. Press the border firmly against the wall, smooth thoroughly, and wipe away excess adhesive with a damp cloth. Hold for several minutes until the adhesive sets. You can secure it with painter’s tape until fully dry. If a large section has peeled off or the border is damaged, it is better to replace the entire strip. For wooden and polyurethane moldings, use special mounting adhesive or liquid nails. Prevention of peeling — proper surface preparation, sufficient adhesive amount, and careful pressing during installation.