Article Contents:
- What is a relief?
- Application of reliefs in interior design
- 1. Aesthetic enrichment
- 2. Application in various styles
- Examples of styles and applications of reliefs:
- 3. Ease of installation
- How to install reliefs?
- 4. Individual approach
- How to choose a relief design?
- 1. Material preparation
- 2. The creation process
- 3. Examples of reliefs by Stavros
- 4. Installation and painting
- How to paint a relief?


What is a relief?
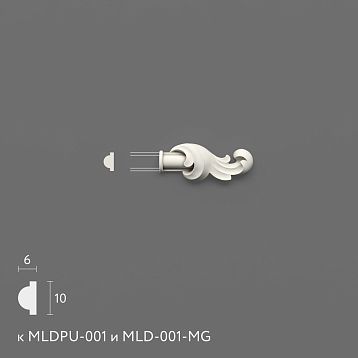
A relief is an artistic element that consists of a raised relief on a flat surface. This form of art is used in architecture and decoration to add depth and style to an interior. Reliefs can range from light textures to complex images and can be made from various materials such as plaster, polyurethane, and wood. They help create unique accents in a room, giving it a special charm and character.
Reliefs are widely used to decorate walls, ceilings, and furniture. With their help, you can depict various scenes — from classical ornaments to modern abstractions. Using reliefs in interior decoration allows you to create visual interest, adding texture and volume.


Application of reliefs in interior design
Reliefs are used in various interior styles, from classical to modern. They can be used in residential spaces, offices, restaurants, and even public areas. A well-chosen relief can become the highlight of your interior, drawing attention and creating an atmosphere.
Our factory also produces:


Reliefs in interior design: possibilities and advantages
Get Consultation
1. Aesthetic enrichment
Reliefs can significantly enrich the visual appearance of your interior. They add an artistic element that attracts attention and makes the space more lively. For example, using reliefs in a hall or living room creates an effect of luxury and elegance.
When choosing a relief for your room, consider what effect you want to achieve. If you want to create a cozy space, soft and smooth shapes will be suitable. For more formal interiors, geometric shapes or abstract elements are better.
2. Application in various styles
Reliefs easily fit into various interior styles. In classical interiors, you can use relief elements with floral patterns and complex ornaments. In modern interiors, minimalist and concise forms are preferred. This allows you not to overload the space, giving it lightness.
Examples of styles and applications of reliefs:
-
Classic style: In a classic interior, reliefs with flowers and monograms will help create an atmosphere of elegance. They can be used to decorate ceilings or as an accent on walls.
-
Modern style: Modern interiors use abstract forms that can be combined with other decorative elements such as glass and metal. Reliefs can be made in bright colors or neutral tones, allowing them to harmoniously fit into the interior.
-
Scandinavian style: For Scandinavian style, reliefs with simple geometric shapes are suitable. They will create a clean and minimalist look, highlighting natural materials.
3. Ease of installation
Using modern materials such as polyurethane, installing reliefs has become simple and accessible. Polyurethane reliefs are lightweight, easy to mount on walls or ceilings, and resistant to moisture, making them ideal for use in various rooms.
How to install reliefs?
-
Surface preparation: Ensure the surface is clean and dry. If necessary, treat the wall with primer for better adhesion.
-
Applying adhesive: For installing polyurethane reliefs, use a special polyurethane adhesive. Apply it to the back of the relief and to the wall.
-
Fixation: Press the relief against the wall and hold it for several minutes until the adhesive sets.
-
Finishing: After installation, you can paint the relief in your desired color or leave it in its natural state.
4. Individual approach
Creating reliefs yourself allows you to express creativity and individuality. You can choose images or patterns that reflect your style and preferences. This not only helps decorate your space but also makes it unique.
How to choose a relief design?
-
Personal style: Think about what you like. This could be abstraction, nature motifs, or geometric shapes. All of these can be used when creating a relief.
-
Theme: You can choose a theme that reflects your hobbies or interests. For example, if you love nature, a relief with trees or flowers will be an excellent solution.
-
Size and scale: Determine the size of the relief. Large elements can become a focal point in a room, while small ones are perfect for adding details.
How to create a relief yourself?
Creating a relief yourself is an engaging and interesting process. Here are the steps that will help you:
1. Material preparation
To create reliefs, you will need:
-
Shapes: You can use pre-made molds to create reliefs or make your own from plaster or silicone.
-
Material: Plaster or polyurethane — both materials are suitable for creating reliefs. Polyurethane is lighter and more moisture-resistant.
-
Tools: You will need brushes, trowels, painter’s tape, and possibly stencils for drawing.
2. Creation process
-
Design selection: Determine the pattern or image you want to create. You can draw it on paper or find inspiration online.
-
Base preparation: If you are using pre-made molds, ensure the surface onto which you will apply the relief is clean and dry.
-
Applying material: Prepare the plaster or polyurethane according to the manufacturer’s instructions. Apply it to the mold or wall, carefully smoothing it out. Use a trowel to create the desired texture.
-
Final finishing: After drying, you can paint the relief in your desired color or leave it in its natural state. Using a special varnish will help protect the surface.
3. Examples of reliefs from Stavros
STAVROS company offers a wide range of decorative elements made of polyurethaneincluding reliefs that can serve as an excellent solution for creating unique decor. These elements are easy to install and come in various designs, allowing you to easily find a suitable option for any interior style.
Reliefs from Stavros can be used for:
-
Decorating walls in bedrooms or living rooms.
-
Accent highlights on the ceiling, around fixtures or chandeliers.
-
Furnishing furniture by adding character and uniqueness to it.
4. Installation and Painting
After installing the relief, you can paint it any color that matches your interior. Choosing the right paint is also important, as it can highlight the details of the relief.
How to paint a relief?
-
Preparation: Ensure the surface is clean and dry.
-
Paint selection: Use acrylic paints suitable for polyurethane or plaster.
-
Painting: Apply paint with a brush, trying to reach all corners and uneven areas.
-
Final coating: After the paint dries, you can add a clear varnish for protection against damage.
Conclusion
Reliefs for interior decoration are a wonderful way to add an artistic element to your space, making it more stylish and cozy. Using Stavros products, you can easily realize your ideas and create an interior that will delight you and your loved ones.
With reliefs, you can decorate walls, ceilings, and even furniture, giving them individuality and style. Start creating unique decorative elements today and enjoy the process!