


Article Contents:
- Why MDF molding surpasses ready-made frames: arguments in favor of creativity
- Flexibility in choosing sizes and shapes
- Economic benefit without compromising quality
- Eco-friendliness and safety for the home
- Ability to realize any design ideas
- Tools and techniques: from profile selection to the perfect 45° angle
- Choosing the right molding profile
- Essential tools for working with molding
- 45-degree mitering technique: secrets to perfect corners
- Frame assembly: joining elements into a single whole
- Finishing options: from classic painting to artistic patination
- Surface preparation: the key to quality coating
- Classic painting: simplicity and elegance
- Patina: Effect of Noble Antiquity
- Gilding and silvering: the luxury of museum frames
- Decoupage and painting: custom design
- Composition ideas: from gallery walls to hallway mirrors
- Gallery wall: art in every home
- Hallway mirror: function plus beauty
- Mirror above the fireplace: classic luxury
- Collage of small frames: personal story on the wall
- Thematic compositions: when the frame tells a story
- Ready-made molding profiles from STAVROS: quality as the foundation of creativity
- Variety of profiles for any task
- MDF quality: density, stability, durability
- Precision profiling: the basis for perfect assembly
- Environmental safety: caring for health
- Practical tips: how to avoid mistakes and achieve perfect results
- First mistake: incorrect measurements
- Second mistake: rushing the miter cut
- Mistake three: insufficient preparation for painting
- Mistake four: using low-quality materials
- Mistake five: ignoring final protection
- Frequently asked questions: answering the main doubts
- How long does it take to make one frame?
- Is it possible to make a frame without special tools?
- What width of molding is suitable for different image sizes?
- How to care for MDF frames?
- Can MDF molding be used for large mirrors?
- Where to buy quality molding for creativity?
- What other decorative elements can be used together with frames?
- Conclusion: create with pleasure together with STAVROS

When you have a blank wall in your hands and a desire in your head to turn it into a gallery of memories or an art project, the question arises: how to make sure that each painting, each mirror doesn't just hang on the wall, but becomes part of a well-thought-out interior? The answer lies in the details — in the molding that you can create yourself, paint in the desired shade, and turn an ordinary frame into a work of art.MDF cornice for paintingopens up endless possibilities for those who are not afraid of creativity and want to bring a piece of their own soul into the home.
Imagine: you hold in your hands a profile made of high-quality material that is easy to cut, paints beautifully, and allows you to realize any idea — from classic gilded frames to minimalist white contours. This approach not only saves money but also gives complete freedom in choosing style, color, and shape. Why choose MDF molding for DIY frame making? Because it is a material that forgives beginners' mistakes and inspires professionals to experiment.


Why MDF molding surpasses ready-made frames: arguments in favor of creativity
Ready-made frames are convenient, quick, but often boring. They don't always fit the size, rarely match the interior's color scheme, and almost never reflect your individuality. MDF molding for painting becomes the perfect alternative for those who want to create something unique. This material has a number of advantages that make it indispensable in home creativity.


Flexibility in choosing sizes and shapes
Standard factory frames come in strictly defined sizes, and if your painting or mirror has non-standard proportions, you either have to adjust the image to the frame or order expensive custom manufacturing.MDF cornice for paintingsolves this problem radically — you choose the profile length yourself, cut it to the required sizes, and create a frame that will perfectly fit your artwork.
The ability to work with any shapes is another plus. Want a round frame for a mirror? No problem, MDF bends well with preliminary treatment. Need a frame of unusual geometric shape for a modern art object? MDF molding is easily sawn and joined at any angles. Such versatility turns the process of creating a frame into a real adventure, where the only limitation is your imagination.
Our factory also produces:


Economic benefit without compromising quality
Buying ready-made frames, especially high-quality wooden ones or with decorative finishes, can seriously hit your wallet. If we're talking about a gallery wall with a dozen paintings of different sizes, the amount becomes substantial. UsingMDF molding for paintingallows you to reduce costs several times over, while getting a result no worse, and often even better than factory counterparts.
The material itself is inexpensive, tools for working with it are accessible to everyone, and paints and decorative coatings can be chosen depending on the budget. At the same time, you get full control over the process: you can experiment, redo, improve. Savings here combine with creative freedom, making DIY frame making not only profitable but also an exciting activity.
Get Consultation
Eco-friendliness and safety for the home
MDF is a material made from fine wood particles, pressed under high pressure and temperature. Unlike some synthetic materials, high-quality MDF does not emit harmful substances and is safe for use in residential premises, including children's rooms. By choosing moldings from trusted manufacturers, you get a guarantee of the product's environmental purity.
When you create a frame from MDF molding and paint it with safe acrylic or water-based paints, you can be sure that the result is not only beautiful but also harmless to the health of all household members. This is especially important for families with children, where every element of the interior must meet strict safety standards.
Possibility of realizing any design ideas
A ready-made frame dictates its own terms: you are forced to fit your painting or mirror into someone else's aesthetic. With a paintable MDF molding, the opposite is true—you create the design from scratch, taking into account the features of the interior, the room's color palette, and your own preferences. Want the frame to be gold with patina, like in classic museums? No problem. Prefer a concise white color for a Scandinavian style? Easy. Dreaming of a black matte frame for graphic works? No problem.
Interior Decor PicturesIt becomes an extension of your personality when you choose every element yourself. Frames created with your own hands carry a special energy and create an atmosphere of coziness that cannot be bought in a store. They tell a story—the story of your creativity, your efforts, and your taste.
Tools and technique: from profile selection to the perfect 45° angle
Creating a frame from molding requires not only a creative approach but also technical precision. Even small errors in mitering the corners or joining the elements can ruin the entire appearance of the product. Let's take a detailed look at what tools will be needed for the work and how to master the basic techniques that will turn an amateur into a master.
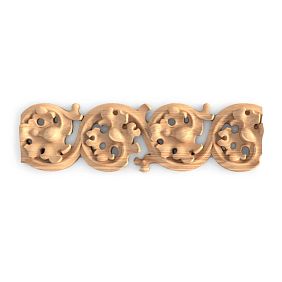
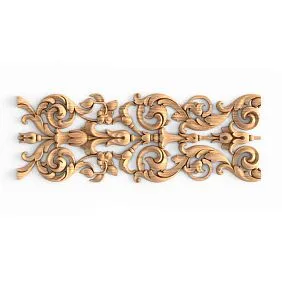
Choosing the right molding profile
Before starting work, you need to decide on the molding profile.MoldingsThey are available in a wide range—from narrow and concise to wide and decorative. For small paintings, profiles with a width of 20-40 mm are suitable; for large mirrors or large-scale canvases, it is better to choose molding with a width of 60-100 mm or more.
Pay attention to the profile relief. Simple smooth moldings are easier to work with and suitable for minimalist interiors. Moldings with pronounced relief, grooves, and decorative elements require greater care when mitering and painting but create a more expressive effect. When choosing a profile, consider not only aesthetics but also technical capabilities: complex shapes may require additional tools and skills.
It is also important to consider the depth of the rabbet—the inner groove where the glass, cardboard, or mirror is inserted. The rabbet depth should be sufficient to accommodate all layers: glass, image, cardboard backing, and fasteners. Usually, a depth of 10-15 mm is sufficient, but for thick canvases or voluminous compositions, a deeper profile may be required.
Necessary tools for working with molding
The quality of the finished frame directly depends on the tools used. For a professional result, you will need:
A miter box with the ability to cut at 45°—a key tool for creating perfect frame corners. A professional miter box allows you to fix the molding and make precise cuts at the desired angle. There are both simple plastic miter boxes for beginners and professional metal ones with angle adjustment.
A miter saw or fine-toothed saw—for neat cutting of the molding. A miter saw ensures a perfectly even cut and significantly speeds up the work, especially when making several frames. If you don't have such a saw, a regular fine-toothed saw will do, but it will require more patience and skill.
A square and tape measure—for precise measurements and checking angles. Even a small error of 1-2 degrees can cause the frame not to fit together or gaps to be visible in the corners.
A sander or sandpaper of different grits—for surface preparation before painting and sanding between coats of paint. MDF has a fairly smooth surface, but for a perfect result, additional processing is required.
Clamps or a special frame stapler—for fixing elements during assembly. Properly fixed parts ensure the strength of the joint and prevent shifting during gluing.
Wood glue and finishing nails—for reliable corner joints. High-quality wood glue creates a strong bond, and small finishing nails additionally secure the structure.
45-degree mitering technique: secrets to perfect corners
The most crucial moment in creating a frame is mitering the corners. A classic frame has four 45° angles that, when joined, form a perfect 90° right angle. Even the slightest inaccuracy will be noticeable, so it is important to master this technique to perfection.
The first step is proper marking. Measure the internal dimensions of the future frame (they should correspond to the size of the painting or mirror with a small margin). Add double the width of the molding to the obtained dimensions—these will be the external dimensions. Mark the cutting points on the molding, taking into account the direction of the cut.
Place the molding in the miter box with the front side up, pressing it tightly against the back wall of the miter box. Make sure the profile is securely fixed and will not shift during sawing. Start sawing with smooth movements, without excessive pressure. Haste here is the enemy of quality. It's better to spend an extra minute on a neat cut than to try to fix an uneven cut later.
After cutting all four pieces, test-fit them together without gluing. The corners should meet perfectly, without gaps or height differences. If mismatches are found, you can lightly sand the cuts with sandpaper secured to a flat surface. Work carefully, removing material little by little and constantly checking the fit.
Frame assembly: joining elements into a single whole
When all four pieces are perfectly fitted, proceed to assembly. Apply a thin, even layer of wood glue to both cuts of one corner. Join the pieces, ensuring they are strictly in the same plane and form a right angle. Secure the joint with a clamp or a special frame clamp.
For additional strength, you can use finishing nails. Drive them from the back of the frame at a slight angle so that they enter both pieces simultaneously and tighten the joint. Sink the nail heads into the material using a nail set—these spots can later be filled with putty and become invisible.
Repeat the procedure for all four corners. After assembly, place the frame on a flat surface and ensure it is not warped. Leave the product until the glue is completely dry—usually 6-12 hours depending on the type of glue and room conditions.
After drying, inspect the corners. If there are small gaps or unevenness, fill them with acrylic wood putty. After the putty dries, sand the repaired areas with fine sandpaper. Now the frame is ready for finishing.
Finishing options: from classic painting to artistic patination
Various finishing techniques help turn simple MDF molding into a work of art. The choice of method depends on the style of the interior, the nature of the image, and your personal preferences. Let's look at the most popular and effective ways to decorate frames.
Surface preparation: the key to a quality finish
Any finishing work begins with proper preparation. MDF has a fairly dense and smooth structure, but primer is necessary for an ideal result. Primer serves several functions: it improves paint adhesion to the surface, evens out the material's absorbency, and reduces paint consumption.
Before priming, lightly sand the entire frame surface with P220-P280 grit sandpaper. This creates micro-roughness for the primer to 'grip' onto. Remove dust after sanding with a damp cloth or tack cloth. Apply acrylic primer with a brush or roller in one or two coats with intermediate drying. After the primer dries, lightly sand the surface with fine P320-P400 grit sandpaper—this will provide a perfectly smooth base for the paint.
Classic painting: simplicity and elegance
The most common finishing method is painting with acrylic or alkyd paints.MDF cornice for paintingIt perfectly accepts all types of paints, allowing for both matte and glossy surfaces.
For the job, you'll need quality brushes of different sizes—wide ones for main surfaces, thin ones for detailing relief and recesses. You can also use a foam roller for smooth areas—it gives a more even coverage without brush marks.
Apply paint in thin layers, allowing each layer to dry completely before applying the next. Usually, 2-3 coats are needed to fully cover the primer and achieve a rich color. Between coats, you can do light sanding to remove possible drips and unevenness.
Choosing paint color is a separate topic for consideration. White is universal and suits most interiors; it visually expands space and doesn't distract attention from the image. Black creates a strict and elegant contrast, ideal for graphics and black-and-white photography. Natural wood tones, which can be imitated using special paints and glazing compounds, give the frame warmth and coziness.
Patina: effect of noble antiquity
Patina is an artificially created aging effect that gives an item a touch of noble antiquity. This technique is especially popular for classic interiors and vintage compositions.Interior Decor Pictureswith a patinated frame gains special expressiveness and depth.
For patination, first paint the frame in a base color—usually a white, beige, or gray shade. After it dries completely, apply the patinating compound—this can be a special patina, bitumen varnish, or simply a darker paint diluted to a semi-transparent consistency.
Apply the patina with a brush, filling all recesses and relief. Then, while the compound is still wet, partially remove it from the protruding parts of the profile with a soft cloth or sponge. As a result, the dark patina remains only in the recesses, creating an effect of accumulated time's dust and emphasizing the volume of the relief.
To enhance the effect, you can use several shades of patina—brown, green, blue. Each layer is applied and partially removed, creating a complex multi-layered texture. After all patina layers dry completely, the frame is coated with a matte or satin varnish to fix the result and protect it from damage.
Gilding and silvering: the luxury of museum frames
For creating truly ceremonial frames, the technique of gilding or silvering is used. Of course, we're not talking about using real gold leaf—for home creativity, there are more affordable alternatives: imitation gold leaf (composition leaf), metallic paints, and wax pastes with gold or silver pigment.
The simplest method is using acrylic metallic paints. They are applied just like regular paints but give a characteristic metallic sheen. To imitate real gilding, it's better to use composition leaf—thin sheets of metallic material that are glued on with special adhesive.
Working with composition leaf requires patience and care. On a prepared and primed frame, special composition leaf adhesive (size) is applied. When the adhesive reaches the right tack (usually after 15-30 minutes), sheets of composition leaf are carefully laid onto it. They are very thin and tear easily, so you need to work carefully, using a soft brush to press the sheets onto the surface.
After the adhesive dries, excess composition leaf is removed with a soft brush, and the surface is polished with a cotton pad to enhance the shine. To create an antique gold effect, you can use patination with bitumen varnish—it darkens the recesses and softens the brightness of the gold, making it more noble and muted.
Mirror decor for interiorin a gilded frame becomes a true pearl of the interior, attracting gazes and creating an atmosphere of luxury.
Decoupage and painting: custom design
For those who love exclusive items and aren't afraid to experiment, decoupage or hand-painting the frame is an excellent option. Decoupage is a technique for decorating objects using cut-out paper motifs that are glued onto the surface and coated with varnish.
For frame decoupage, you can use special decoupage cards, napkins with beautiful patterns, pages from old books or magazines. First, paint the frame in a base color that will harmonize with the chosen motifs. Then cut out or tear out the needed elements (torn edges create a more natural effect) and glue them onto the frame using special decoupage glue or diluted PVA.
After the glue dries, coat the entire surface with several layers of acrylic varnish with intermediate sanding. This creates an effect of a unified surface, as if the pattern is printed on the frame, not glued on top.
Hand painting opens even wider possibilities for creativity. With acrylic paints, you can draw anything—from simple geometric patterns to complex floral ornaments. For those unsure of their artistic abilities, there are stencils that help create an even and beautiful pattern.
Composition ideas: from a gallery wall to hallway mirrors
Creating frames is only half the job. It's important to place them correctly in the interior so they create a harmonious composition and contribute to the overall atmosphere of the room. Let's consider several popular options for using handmade frames.
Gallery wall: art in every home
A gallery wall is a composition of several paintings, photographs, or posters united by a common theme or style of design. This is one of the most spectacular ways to decorate an empty wall, turning an ordinary room into an artistic space.
The secret to a successful gallery wall is in thoughtful composition. You can use frames of the same size and arrange them in neat rows to create strict geometry. Conversely, you can combine frames of different sizes and shapes, creating a freer and more dynamic composition. The main thing is to maintain a visual connection between the elements.
The unifying factor can be a single frame style. For example, all frames are painted one color—white, black, or natural wood. Or all frames have the same molding profile but different sizes. Such uniformity creates a sense of composition integrity, even if the images in the frames are completely different.
When planning a gallery wall, it is recommended to first lay out all elements on the floor, selecting the optimal arrangement. You can photograph several options and choose the best one. Only after that transfer the composition to the wall, marking the mounting points using painter's tape or paper templates.
Pay special attention to the hanging height. The center of the composition should be at eye level, approximately 140-150 cm from the floor. If the gallery wall is placed above a sofa or dresser, leave a distance of 15-20 cm between the furniture and the bottom edge of the frames.
Mirror in the hallway: function plus beauty
A mirror in the hallway is not just a functional item, but also an important interior element that visually expands the space and makes the room brighter. A mirror frame, created by your own hands from MDF molding for painting, will give the hallway individuality and style.
For hallways, wide decorative frames are especially good, as they make the mirror more expressive and noticeable. You can use molding with rich relief and paint it in classic white for light interiors or in a noble dark shade for a more dramatic effect.
An interesting solution is creating a console composition. Under the framed mirror, a narrow console or shelf is placed, on which you can arrange decorative objects, keys, or small plants. The mirror frame and console are designed in a unified style, creating a complete functional zone.
For small hallways, full-length mirrors are especially effective. Making a frame for such a mirror will require more molding and more precise work, but the result is worth it. A full-length mirror is not only functional but also visually increases the height of the room, making it feel more spacious.
Mirror above the fireplace: classic luxury
A mirror above the fireplace is a classic interior element that came to us from English living rooms. Even if your home doesn't have a real fireplace, but has an electric or decorative one, a mirror above it will create a sense of traditional elegance.
For such placement, horizontal mirrors in wide decorative frames are suitable. Frames with gilding or patination look especially effective, echoing the classic interior. The width of the mirror usually corresponds to the width of the mantel shelf or is slightly smaller.
The composition can be complemented with symmetrical elements — candelabras, vases, or decorative objects placed on the sides of the mirror on the mantel shelf. Such classic symmetry creates a sense of order and harmony.
Collage of small frames: a personal story on the wall
A collage of small frames is an excellent way to place many photographs without overloading the interior. You can create a family tree by arranging photos of different generations in chronological order. You can assemble a collection of travel memories by placing photos from different countries.
For such a collage, it's better to use frames of the same size and style to maintain visual unity. All frames are painted in one color — this creates a calm foundation on which the photographs become the main characters.
An interesting technique is using mats of different colors with a unified frame color scheme. For example, all frames are white, but the mats inside them are multi-colored — blue, pink, yellow, green. This adds playfulness and dynamism to the composition, especially appropriate in a children's room or youth interior.
Thematic compositions: when the frame tells a story
Frames can be not only a border for images but also part of a thematic composition. For example, for a nautical style, frames can be decorated with shells, rope, and starfish. For a Provence style, decoupage techniques with lavender or pink motifs, patination in pastel tones will be appropriate.
In a children's room, frames can be turned into bright accents by painting them in different colors of the rainbow and placing the child's drawings or family photos. Such a gallery will grow with the child, filling with new works and memories.
For loft interiors, frames painted to look like metal — gray, graphite, black with a metallic sheen — are suitable. You can artificially age the frames, creating scuffs and scratches, as if they had been in an old industrial building for a long time.
Ready-made molding profiles from STAVROS: quality as the foundation of creativity
Any creativity begins with the choice of material. You can have excellent taste and golden hands, but without a quality foundation, the result will always be a compromise. MDF moldings from STAVROS is that very reliable foundation that allows you to focus on the creative process without worrying about material quality.
Variety of profiles for any task
The STAVROS company catalog includes dozens of different molding profiles — from minimalist narrow moldings to wide decorative profiles with rich relief. Each profile is thought out to the smallest detail: smooth lines, clear relief, perfect cross-sectional geometry.
Narrow profiles with a width of 20-35 mm are ideal for small photographs and watercolors. They do not draw attention to themselves, delicately emphasizing the image. Medium profiles with a width of 40-60 mm are universal — suitable for most tasks, from photographs to medium-sized paintings. Wide profiles from 70 mm and more create a powerful frame for large canvases, mirrors, posters.
Profiles with classic relief — grooves, protrusions, decorative elements — deserve special attention. After painting and patination, such profiles create the effect of expensive handmade wooden frames, while costing significantly less and being easier to process.
MDF quality: density, stability, durability
MDF quality directly affects the final result. Low-quality material may crumble when cut, have uneven density, and poorly accept paint. MDF from STAVROS is produced according to European standards from quality wood raw materials using safe binders.
High material density ensures clear relief detailing — all lines and details of the profile remain clear and expressive even after numerous layers of paint. Material stability guarantees that the frame will not warp from humidity or temperature fluctuations; it will maintain its geometry for many years.
The surface of high-quality MDF is perfectly prepared for painting—it is smooth, without chips or defects, with uniform absorbency. This means the paint will apply evenly, without stains or streaks, and its consumption will be minimal.
Profiling accuracy: the foundation for perfect assembly
Frame making requires high precision—any deviations in the profile geometry will lead to problems during assembly. STAVROS moldings are produced on high-precision equipment with minimal tolerances. This means all frame parts will be identical in size, corners will fit together without gaps, and joints will be strong and invisible.
Even ends, consistent width and height of the profile along the entire length, symmetrical relief—all this is the result of a professional approach to production. When the material does not require additional fitting or adjustment, the process of creating a frame becomes a pleasure, not a struggle with material flaws.
Environmental safety: care for health
Picture and mirror frames will be in your home permanently, so it is important that the material is absolutely safe. MDF from STAVROS meets all environmental standards, does not contain harmful formaldehyde in dangerous concentrations, and does not emit toxic substances.
This is especially important for children's rooms, bedrooms, kitchens—spaces where we spend a lot of time and where air quality directly affects our health and well-being. By choosing products from a trusted manufacturer, you get not only quality material for creativity but also a guarantee of safety for the whole family.
Practical tips: how to avoid mistakes and achieve perfect results
Even when using quality materials and following the technology, difficulties can arise. Let's look at typical mistakes made by beginner craftsmen and how to avoid them.
First mistake: incorrect measurements
The most common mistake is incorrect calculation of molding dimensions. Remember that when marking, you need to account not only for the image size but also for the depth of the rabbet, the thickness of the glass, and the cardboard. Always leave a small margin—it's better to trim a bit later than to find out the frame turned out too small.
When measuring, use precise tools—a metal tape measure or calipers. Do not rely on 'by eye'—even a 1-2 mm error can result in the glass not fitting into the frame or, conversely, being loose.
Second mistake: rushing when cutting
Haste during cutting is a direct path to ruined material. Uneven cuts, chips, deviation from a 45° angle—all are results of rushing. Always securely fix the molding in a miter box, use a sharp saw with fine teeth, and cut with smooth movements without excessive pressure.
If you are working with molding for the first time, practice on scrap pieces. Make a few test cuts, learn to hold the saw steady and get a feel for the material. Only then proceed to cut the parts for the frame.
Third mistake: insufficient preparation for painting
Many beginners skip the priming stage or do not sand the surface thoroughly enough before painting. As a result, the paint applies unevenly, brush marks are visible, and the color turns out inconsistent. Do not skimp on preparation time—it determines 80% of the final result's quality.
Always use primer, even if the MDF surface seems smooth enough. Primer creates a uniform base with consistent absorbency, which is critical for even coloring. Lightly sand between coats of paint—this removes drips and creates a base for the next layer.
Fourth mistake: using low-quality materials
Trying to save on paint, glue, or fasteners usually leads to disappointment. Cheap paint may apply unevenly, change color when drying, crack, or peel. Weak glue will not provide a strong joint at the corners, and the frame may fall apart at the worst possible moment.
Invest in quality materials—it's not as expensive as it seems, but the difference in results will be enormous. Good brand acrylic paints provide rich color from the first or second coat, apply easily, and dry quickly. Wood glue from well-known manufacturers creates a bond stronger than the wood itself.
Fifth mistake: ignoring final protection
After the frame is painted and dried, many consider the work finished. However, unprotected paint scratches easily, gets dirty, and fades over time. Always coat the finished frame with a protective varnish—matte, satin, or glossy depending on the desired effect.
Varnish not only protects the coating but also enhances the color, making it deeper and more saturated. For frames that will hang in high-humidity areas (bathroom, kitchen), use moisture-resistant varnishes. For children's rooms, choose safe acrylic varnishes with a water base.
Frequently asked questions: addressing main doubts
How long does it take to make one frame?
The time depends on the project's complexity and your experience. A simple frame without complex finishing can be made in 3-4 hours of pure work (not counting glue and paint drying time). A complex frame with patination, gilding, or decoupage may require several days, considering all drying and finishing stages.
For the first time, allocate more time—you will be learning the technique, and you may need to redo some steps. With experience, the process speeds up significantly, and you will be able to make several frames in a day.
Can a frame be made without special tools?
A minimal set of tools is still necessary. Without a miter box, achieving a perfect 45° angle is practically impossible, and uneven corners will ruin the entire work. A miter saw can be replaced with a regular handsaw, but the work will take more time and require greater care.
If you plan to make frames regularly, it makes sense to invest in a basic set of tools — they will pay for themselves after just a few frames, and the pleasure of working with good tools is incomparably greater.
What width of molding is suitable for different image sizes?
General rule: the larger the image, the wider the frame can be. For 10x15 cm photos, a molding width of 20-30 mm is sufficient. For A4 format paintings, a 30-50 mm molding is suitable. For large canvases 50x70 cm and above, a molding width from 60 mm is optimal.
However, these are not strict rules, but only recommendations. The final choice depends on the style of the image and the interior. A miniature watercolor can look wonderful in a wide, ceremonial frame, creating a contrast in scale. And a large minimalist-style poster can be framed in a thin, laconic frame.
How to care for MDF frames?
Painted and varnished MDF frames are low-maintenance. It is enough to regularly wipe them from dust with a soft, dry cloth. If necessary, you can use a slightly damp cloth, but avoid excess moisture.
If stains appear on the frame, they can be carefully removed with a soft sponge and a small amount of soapy water, then immediately wiped dry. Do not use abrasive cleaners or stiff brushes — they can damage the finish.
Can MDF molding be used for large mirrors?
Yes, it can, but for large and heavy mirrors, it is necessary to ensure additional structural strength. Use wide molding with a good width margin, reinforce the corners with metal brackets that can be hidden on the back of the frame. Make sure the wall mounting is also strong enough to support the weight of the mirror in the frame.
For full-length mirrors or those wider than 80 cm, consultation with a mounting specialist is recommended. Safety should always come first.
Where to buy quality molding for creative projects?
Choosing a material supplier is an important step on the path to the perfect result.MDF Moldingsmust meet high quality standards, have precise geometry, and be made from safe materials.
The company STAVROS has specialized in the production of decorative interior elements from solid wood and MDF since 2002. Over this time, extensive experience has been accumulated, technologies have been refined, and a quality control system has been established at all stages of production. Every product is checked before being shipped to the customer.
What other decorative elements can be used together with frames?
Frames combine perfectly with other decorative interior elements.Decorative Insertsmade of wood can be used to decorate the frames themselves, creating three-dimensional decor. Such overlays are glued onto the frame before painting and are painted together with it, creating a unified composition.
Cornices and moldings can also become part of the decorative composition, framing an area with paintings or creating decorative frames directly on the wall. This is especially relevant in classic interiors, where architectural decor plays an important role.
Conclusion: Create with pleasure together with STAVROS
Creating picture and mirror frames with your own hands is not only a way to save money, but also an opportunity to realize your own creative ideas, to create an interior that will be a reflection of your personality.MDF cornice for paintingbecomes that universal tool that allows you to bring any idea to life — from classic gilded frames to modern minimalist compositions.
The quality of the material determines the result. You can have excellent taste and golden hands, but without a reliable foundation, all efforts can go to waste. For over two decades, the company STAVROS has been creating materials for those who are not ready to compromise. Every molding profile, every molding, every decorative element is the result of a professional approach and a pursuit of perfection.
STAVROS's assortment includes dozens of different profiles for any task and style. Narrow, laconic moldings for modern interiors, wide decorative moldings for classic compositions, profiles with rich relief for creating luxurious frames — everyone will find what they need for their project.
The high quality of MDF ensures ease of processing and durability of the finished product. The material does not crumble when cut, accepts paint perfectly, and maintains its geometry for many years. The precision of profiling guarantees that all frame parts will fit together perfectly, without gaps or unevenness.
The environmental safety of STAVROS products is confirmed by relevant certificates. This means that frames made from this material can be safely placed in any room, including children's rooms. Caring for customers' health is an integral part of the company's philosophy.
Technical support and specialist consultations will help you understand the assortment, choose the optimal profile, and get recommendations for working with the material. The STAVROS team is always ready to share experience and help bring your ideas to life.
Start creating your unique interior today. Let every painting, every mirror, every photograph find a worthy frame created by your hands. Let the walls of your home tell the story of your family, your travels, your hobbies. And let this story be framed with taste, quality, and love.
STAVROS is more than just a material manufacturer. It is a partner for those who value quality, create beauty, and do not stop at what has been achieved. By choosing STAVROS products, you choose reliability tested by time, quality confirmed by thousands of completed projects, and possibilities limited only by your imagination.
Create with pleasure. Create interiors that inspire. Turn your home into a space where every detail matters. And let the frames created by your hands from quality STAVROS materials become that very detail that turns an ordinary room into a place where you want to live, create, and be happy.


