


Article Contents:
- The problem of high-traffic areas: a war of attrition
- Mechanics of destruction: how wall corners lose plaster
- Wall base contamination: splashes, dust, shoes
- Narrowness and tightness: psychology of confined space
- Wooden corner guards: practical corner protection
- Corner guard construction: geometry of protection
- Installation zones: where corner guards are critical
- Installing corner guards: fasteners and adhesive
- Finishing treatment: protection from moisture and wear
- Molding in the hallway: visually expanding narrow space
- Horizontal moldings: lines that make it wider
- Vertical molding frames: creating panels
- Ceiling cornice: upper boundary that raises the ceiling
- Molding color scheme: contrast or blending
- Lower level: wooden baseboard as the foundation of composition
- Tall baseboard: protection and classic style
- Baseboard material: oak vs MDF
- Baseboard installation: adhesive or clips
- Joints and corners: neatness solves everything
- Comprehensive solution: corner guards plus baseboard plus molding
- Project for an 8 m² hallway: from sketch to estimate
- Material Calculation
- DIY installation: work sequence
- Work cost: DIY or professional crew
- Frequently Asked Questions
- Conclusion: protection + beauty = durable interior

Corridor. Hallway. The most underrated spaces in the home. People pass through here with heavy suitcases, bring in furniture, ride children's bicycles, and bang vacuum cleaners against wall corners. Water drips from umbrellas here, dirt dries from shoes, and dust accumulates from outside. High traffic, aggressive environment, mechanical loads. And yet — the first impression of the home. Guests see the hallway before they see the luxurious living room or impeccable kitchen. If wall corners are scraped, plaster is chipped, baseboards are dirty and falling off — the impression is ruined.Wooden corner bracketon external wall corners takes the impact, protecting the plaster from destruction.and paint it to the desired shade — standard practice in modern design. It is important to use special wood finishes that allow the material to breathe.and installing it means protecting the base of walls from wet cleaning, from splashes, from shoe scratches.Decorative polyurethane wall moldingcreates a visual structure that transforms a narrow corridor into an architectural space with character. The comprehensive solution — corner guards plus baseboards plus molding — is practicality plus aesthetics, protection plus beauty. In this article, we will explore the problems of high-traffic zones, analyze technical solutions, show how to install protective elements yourself, and calculate a budget for a real hallway. Get ready for a deep dive into the world of practical decor.

The problem of high-traffic zones: a war of attrition


The mechanics of destruction: how wall corners lose their plaster
The external corner of a wall is an edge where two planes meet at a 90° angle. The plaster thickness at the edge is minimal (5-10 mm), while the mechanical load is maximal. A suitcase on wheels accidentally hitting the corner when being brought into the apartment creates a local load of 15-25 kg over an area of 2-3 cm². Plaster (even cement-sand, hard plaster) cannot withstand such pressure — a chip forms.
The first chip creates a weak spot. The edge of the chipped plaster protrudes and easily catches on the next impact. The second chip is larger than the first. The process progresses. After six months of active use, the corner becomes a ragged edge with exposed reinforcing mesh, peeling plaster, and visible brick or concrete substrate.
Repairing a corner is a labor-intensive process. You need to clean off the old plaster around the damage, install a perforated corner bead, apply new plaster in two or three layers with intermediate drying, sand, prime, and paint. The work takes 4-6 hours per corner, costing 3500-6000 rubles. And the problem will return in a year if protection is not installed.
Decorative corridor wall finishingusing protective corner guards solves the problem radically: the corner guard takes the impact, deforms or gets scratched (hardwood can withstand dozens of impacts without breaking), but the plaster remains intact. Even if the corner guard is damaged, replacing it takes 20-30 minutes and costs 800-1500 rubles (cost of a new corner guard plus labor).
Our factory also produces:


Contamination of the lower parts of walls: splashes, dust, shoes
The lower 30-50 cm of walls in a hallway are subject to intense contamination. Shoes brush against the wall when being put on or taken off, leaving marks of dirt, shoe polish, and street dust. A wet umbrella leans against the wall, water runs down, leaving streaks. Wet mopping with a floor rag creates splashes on the lower part of the wall. A vacuum cleaner scratches the wall with its brush.
A painted wall (even with washable paint) in the 0-50 cm zone from the floor loses its appearance after 3-6 months: stains, scuffs, and scratches appear. Attempts to wash off the dirt lead to paint abrasion. Wallpaper in the lower zone suffers even more: it tears, peels, and gets wet.
A baseboard 120-150 mm high made of solid oak or ash, coated with moisture-resistant oil or varnish, creates a barrier between the floor and the wall. All splashes, shoe impacts, and vacuum cleaner scratches are absorbed by the baseboard. Hardwood is scratch-resistant, and the moisture-resistant coating is not afraid of water. The baseboard can be easily wiped with a damp cloth, removing stains without a trace.
If a baseboard is insufficient (the contamination zone is above 15 cm), wooden panels or slats are used at a height of 80-100 cm from the floor. The panels create a protective cladding that takes all the contamination and mechanical impact upon itself. The wall above the panels remains clean.
Get Consultation
Narrowness and crampedness: the psychology of confined space
Typical corridors in panel and brick buildings are 90-120 cm wide. A narrow, dark corridor creates psychological discomfort: a feeling of constriction, lack of air, and confinement. Guests, entering such a corridor, subconsciously want to pass through it quickly and get to a more spacious room.
Architectural techniques for visually expanding space: horizontal lines (make the corridor appear wider), light colors (create airiness), textured wall finishes (create depth, distract from the narrowness).polyurethane wall molding for the living roomworks in the corridor too — molding frames on walls, ceiling cornices, decorative overlays create an architectural structure that transforms the corridor from a utilitarian passage into a space with character.
Paradox: adding volume (moldings protrude 10-20 mm from the wall) visually expands the space, even though it physically consumes a few millimeters of width. This works because the texture creates a play of light and shadow, which distracts from the narrowness and creates a sense of richness, complexity, and interestingness of the space.
Wooden corner guards: practical corner protection
Corner guard construction: the geometry of protection
A wooden corner element consists of two slats joined at a 90° angle (for straight wall corners) or at another angle (for obtuse and acute angles, if the architecture is non-standard). The width of each slat is 40-80 mm, thickness 15-25 mm. The length of the corner guard is 2.4-3.0 meters (standard room height), and it can be cut to the required length.
The corner guard profile can be simple (two flat slats without decoration) or profiled (with chamfers, beads, grooves). A simple profile is for modern minimalist interiors where function is more important than decoration. A profiled profile is for classic interiors where the corner guard is not just protection but also a decorative element.
The material of the corner guard is critical for durability. Pine is the most affordable option (280-420 rub/m), but it is soft, scratches easily, and wears out quickly under heavy use. Suitable for bedrooms, studies, where traffic is low. Oak is a hardwood (550-850 rub/m), resistant to impacts and scratches, ideal for corridors and hallways. Ash has hardness comparable to oak (480-720 rub/m), slightly lighter, a good alternative. Larch is moisture-resistant (420-650 rub/m), suitable for bathrooms, saunas, and rooms with high humidity.
Installation zones: where corner guards are critical
External wall corners in the hallway are the primary risk zone. Corners near the entrance door suffer when moving furniture, appliances, or large purchases. Corners in narrow corridors are hit by bags, backpacks, and strollers. All these corners should be protected with corner guards at a height of 1200-1800 mm from the floor (the zone of maximum risk).
Corners near doorways (between the corridor and rooms) are the second risk zone. When opening doors, people pass close to the corner, brushing it with their shoulders or bags. Protecting corners near doors at a height of 900-1200 mm is sufficient (below is the baseboard, above the risk is minimal).
Corners in furniture placement areas (wardrobes, shoe cabinets, coat racks) are subject to impacts during furniture rearrangement. If a built-in wardrobe is planned for the hallway, the wall corners it adjoins should be protected with corner guards before the wardrobe installation begins (after installation, access to the corners is difficult).
Installing corner guards: fasteners and adhesive
Two methods for attaching wooden corner guards: mechanical (with screws or nails) and chemical (with adhesive). A combined method (adhesive plus screws) provides maximum reliability.
Mechanical fastening: the corner guard is placed against the wall corner, aligned vertically (checked with a level), and temporarily fixed (with painter's tape or clamps). Every 40-60 cm, holes 3-4 mm in diameter are drilled through the corner guard into the wall. Dowels are inserted into the holes (if the wall is concrete or brick) or screws are driven directly (if the wall is drywall or wood). Screws are 40-50 mm long, 4-5 mm in diameter, with a countersunk head. The screw heads are recessed 2-3 mm below the wood surface, and the holes are filled with wood filler or covered with decorative plugs matching the wood color.
Chemical fastening: mounting adhesive (Moment Montazh, Titebond, liquid nails) is applied in a zigzag line to the inner sides of both slats of the corner guard. The corner guard is pressed against the wall corner, aligned, and firmly held for 2-3 minutes. The adhesive sets in 4-6 hours and fully cures in 24 hours. Advantage: no visible fasteners, the corner guard surface is smooth. Disadvantage: if the wall is uneven, the adhesive will not ensure tight contact, leaving gaps.
Combined method: adhesive ensures tight adhesion along the entire length, while screws (2-3 pieces for the full height of the corner) provide rigid fixation and prevent peeling from lateral impacts. This is the optimal method for high-traffic areas with heavy load.
Finishing treatment: protection against moisture and wear
A wooden corner installed without finishing treatment will darken from dirt within a few months, absorb moisture, and may become stained. Finishing treatment is mandatory.
Oil with wax (Osmo, Biofa) — applied in 2-3 coats with a brush or cloth, absorbs into the wood, creates a moisture-resistant layer, and highlights the wood grain. The surface is matte or satin, pleasant to the touch. Advantages: natural appearance, visible grain, easy to repair if damaged (local application of oil). Disadvantages: requires renewal every 2-3 years, does not protect against deep scratches.
Polyurethane varnish (Tikkurila, Belinka) — applied in 2-3 coats with a brush or spray gun, forms a hard glossy or matte film on the wood surface. Advantages: high protection against moisture, scratches, and wear, does not require renewal for 5-8 years. Disadvantages: if deeply damaged (varnish chip), complete re-varnishing is required (local repair is impossible), the surface feels colder to the touch.
Opaque enamel (acrylic, alkyd) — completely covers the wood grain, creating a smooth colored surface. Any color from the RAL catalog. Suitable for modern interiors where corners should blend with the walls (painted the same color as the walls) or contrast (white corners on colored walls, black on light walls). Advantages: maximum protection, any color, wear resistance. Disadvantages: wood grain is hidden, if chipped, the wood under the paint is visible.
Molding in the hallway: visual expansion of narrow space
Horizontal moldings: lines that make it wider
A narrow hallway 100 cm wide and 4-5 meters long is perceived as a tunnel. Horizontal moldings on the walls break up this vertical monotony, creating horizontal lines that visually expand the space.
Classic technique: a horizontal molding at a height of 90-100 cm from the floor divides the wall into two zones. The lower zone (from the floor to the molding) is painted a darker color (gray, beige, terracotta) or covered with wooden panels. The upper zone (from the molding to the ceiling) is painted a light color (white, cream, light gray). The molding, 60-80 mm wide, protrudes 12-18 mm from the wall and is painted white.
Effect: the dark lower zone visually weighs down the bottom, creating a sense of solidity and hiding dirt (dirt is less noticeable on a dark background). The light upper zone creates airiness and visually raises the ceiling. The horizontal line of the molding guides the eye along the hallway, creating a sense of width.
Variation: two horizontal moldings. The first at a height of 30 cm from the floor (separates the baseboard zone), the second at 100 cm (main division). Between the moldings — a middle zone that can be painted in an intermediate shade or covered with patterned wallpaper. This creates a three-level composition that adds visual complexity, distracting from the narrowness.
Vertical molding frames: creating panels
Vertical frames made of moldings on hallway walls create classic panels that structure the space and add architectural rhythm. On a 4-meter-long wall, three rectangular frames measuring 80×150 cm each (width × height) are marked, positioned 40 cm from the floor. Gaps of 50 cm are left between frames. A molding 50-70 mm wide is glued around the perimeter of each frame.
Inside the frames, the wall is painted a contrasting color (if the wall is light gray, dark gray inside the frames) or covered with patterned wallpaper (geometry, damask, floral pattern). The molding is painted white. Effect: the wall ceases to be a flat, smooth surface and becomes a multi-layered composition with relief, color accents, and rhythm.
Vertical frames are especially effective on long hallway walls (3-5 meters). They break up monotony, create stopping points for the eye, and make the hallway more interesting. The number of frames depends on the wall length: 2-3 frames for a 3-4 meter wall, 3-5 frames for a 5-6 meter wall.
Ceiling cornice: the upper boundary that raises the ceiling
Ceiling cornice — a molding 100-140 mm wide, installed at the junction of the wall and ceiling around the perimeter of the hallway — creates an upper frame for the space, completing the composition from above. The cornice is painted white (classic solution) or the same color as the ceiling (the cornice blends with the ceiling, creating a smooth transition).
A cornice with a classic profile (cavetto, torus, dentils — small rectangular projections) creates a sense of height, solidity, and references classical architecture. Even in a narrow hallway with a 2.6-meter ceiling, the cornice creates the impression that the ceiling is higher because the eye perceives the cornice as the beginning of the ceiling zone.
For hallways with low ceilings (2.4-2.5 meters), narrower cornices of 80-100 mm are used to avoid overwhelming the space. For hallways with high ceilings (2.8-3.0 meters), wide cornices of 120-150 mm are suitable, emphasizing the height.
Color scheme for molding: contrast or blending
White molding on colored walls — a classic contrast that always works. Hallway walls are painted gray-beige, all moldings (horizontal, vertical frames, ceiling cornice) are white. The whiteness of the moldings creates clear graphics, and the relief is read as clearly as possible.
Molding in the wall color — blending, where moldings create relief but no color contrast. Walls and moldings are painted the same color (light gray). The relief is read only through the shadows created by the protruding moldings. The effect is more restrained, elegant, suitable for minimalist interiors.
Molding in a contrasting dark color — a modern solution for eclectic interiors. Walls are light gray, moldings are dark gray or black. The relief is emphasized not by shadows (which are light on white molding) but by the color itself. The effect is modern, graphic, unexpected.
Lower level: wooden baseboard as the foundation of the composition
High baseboard: protection and classic style
Baseboard height determines the visual weight of the lower zone and the degree of wall protection. Low baseboard 60-80 mm — a minimalist solution where the baseboard is barely noticeable, protecting only the very bottom of the wall. Medium baseboard 100-120 mm — a balanced solution for most interiors, sufficient protection, classic proportions. High baseboard 140-180 mm — a luxurious solution where the baseboard becomes a significant architectural element, creating an impression of solidity.
For hallways and entryways, a high baseboard of 140-160 mm is optimal. It protects the wall from splashes during wet cleaning (the mop doesn't touch the wall), from shoe impacts (the area up to 16 cm from the floor is completely covered), and from vacuum cleaner scratches. Visually, a high baseboard creates a classic character, solidity, and a connection to tradition.
Baseboard profile influences style. Simple profile (rectangular cross-section with one rounding) — for modern interiors. Classic profile (cavetto, torus, straight shelf) — for neoclassical, classic interiors. Carved profile (ornament on the surface) — for luxurious eclectic interiors.
Baseboard material: oak vs. MDF
Solid wood skirting board made of oak, ash, or larch — a natural material with texture, durability, and the possibility of restoration. A 140 mm oak skirting board costs 850-1400 rub/m depending on the profile. Service life is 20-30 years. If damaged, it can be sanded and re-coated with oil or varnish — the skirting board will be like new.
MDF skirting board for painting — an artificial material, cheaper (350-650 rub/m), lighter, not afraid of humidity (if coated with high-quality enamel). But less durable (service life 10-15 years), deep damage (chip down to the base) cannot be repaired, replacement is required.
For high-traffic areas with heavy load, wooden skirting board is preferable: it withstands impacts, scratches, moisture, and lasts for decades. MDF skirting board is suitable for bedrooms, offices, where the load is low.
Skirting board mounting: glue or clips
Traditional method of mounting skirting board — with glue (liquid nails, mounting adhesive). Glue is applied to the back of the skirting board in a zigzag line, the skirting board is pressed against the wall, fixed with weight or temporary supports during drying (4-6 hours). Advantages: reliable fastening, the skirting board won't come off. Disadvantages: during removal (if the skirting board needs to be replaced) it tears off with part of the plaster, the wall gets damaged.
Modern method — mounting on hidden clips. Metal or plastic clips are attached to the wall with a spacing of 40-60 cm (screws into dowels). Corresponding parts of the clips are installed on the back of the skirting board. The skirting board snaps onto the clips. Advantages: during removal, the skirting board is taken off without damaging the wall, can be reinstalled. Disadvantages: clips cost 80-150 rub/piece, 15-25 clips are needed for a room, additional cost 1200-3750 rubles.
For hallways, where skirting boards are installed for a long time, glue mounting is sufficient. For rooms where re-planning, repairs are possible, clips are better.
Joints and corners: neatness is everything
Corner joints of skirting boards (external and internal corners) — the most noticeable places where work precision is visible. Internal corner (two walls meet at 90° inward into the room): skirting boards are cut at 45° with a miter saw, joined. If the angle is not perfectly 90° (in reality often 88-92°), the joint will have a gap. Solution: after joining, the gap is filled with acrylic sealant matching the skirting board color, smoothed out, becomes invisible.
External corner (two walls meet at 90° outward from the room): skirting boards are also cut at 45°, joined. The external corner is more visible than the internal one, so cutting precision is critical. Tool: miter saw with laser marking (accuracy up to 0.5°) or hand saw with miter box (accuracy up to 2-3°, adjustment required).
Connectors and corner elements (ready-made plastic or wooden overlays that cover joints) simplify installation, but are visible and not always aesthetic. For high-quality finishing, it's better to cut skirting boards at an angle and join them without connectors.
Comprehensive solution: corner pieces plus skirting board plus molding
Project for an 8 m² hallway: from sketch to estimate
Typical hallway: 3.5 meters long, 2.3 meters wide, ceiling height 2.6 meters. Floor area 8 m², wall perimeter 11.6 meters. Two external corners (near the entrance door and near the passage to the living room). Floor — dark oak laminate. Walls — smooth plaster, prepared for painting.
Finishing plan: lower level — 140 mm oak wooden skirting board around the perimeter. Corner protection — 50×50 mm oak wooden corner pieces on two external corners, each 1500 mm high. Middle level — 70 mm polyurethane horizontal molding at a height of 100 cm around the perimeter. Upper level — 120 mm polyurethane ceiling cornice around the perimeter. Color scheme: skirting board and corner pieces — natural oak under oil, lower wall zone (from floor to horizontal molding) — gray-beige, upper wall zone — light beige, moldings and cornice — white.
Material Calculation
140 mm oak skirting board: perimeter 11.6 meters minus width of two door openings 1.8 meters = 9.8 meters. 10% allowance for trimming = 10.8 meters. Skirting board is sold in 2.4-meter pieces, 5 pieces needed = 12.0 meters. Cost 1050 rub/m × 12.0 = 12600 rub.
50×50 mm oak corner pieces: two corners of 1.5 meters each = 3.0 meters. 5% allowance = 3.15 meters. Cost 680 rub/m × 3.15 = 2142 rub.
70 mm polyurethane horizontal molding: perimeter 11.6 meters minus door openings 1.8 = 9.8 meters. 5% allowance = 10.3 meters. Molding is sold in 2.4-meter pieces, 5 pieces needed = 12.0 meters. Cost 680 rub/m × 12.0 = 8160 rub.
120 mm polyurethane ceiling cornice: perimeter 11.6 meters. 5% allowance = 12.2 meters. 6 pieces of 2.4 meters needed = 14.4 meters. Cost 880 rub/m × 14.4 = 12672 rub.
Mounting materials: skirting board glue 2 tubes × 280 = 560 rub, corner piece glue 1 tube = 280 rub, polyurethane glue for molding 3 tubes × 420 = 1260 rub, acrylic sealant 2 tubes × 180 = 360 rub, screws, dowels = 450 rub. Total mounting materials 2910 rub.
Wall paint: wall area 30 m², paint consumption 0.12 l/m² × 30 = 3.6 liters × 2 coats = 7.2 liters. Paint 850 rub/l × 8 liters (with allowance) = 6800 rub. Molding paint (white acrylic) 2 liters × 850 = 1700 rub.
Oil for skirting board and corner pieces: coverage area 2 m², consumption 1 liter per 10-12 m², 0.5 liters × 3 coats = 1.5 liters needed. Cost 1200 rub/l × 2 liters (with allowance) = 2400 rub.
Total materials: 12600 + 2142 + 8160 + 12672 + 2910 + 6800 + 1700 + 2400 = 49384 rub.
DIY installation: work sequence
Day 1: painting walls with base color (light beige entire perimeter in two coats). Work time 6-8 hours, drying 12 hours.
Day 2: marking horizontal molding at a height of 100 cm around the perimeter (laser level or water level + chalk line). Painting lower wall zone (from floor to molding line) in gray-beige in two coats. Work time 4-6 hours, drying 12 hours.
Day 3: installation of wooden skirting board. Cutting skirting boards to size, cutting corners at 45°, gluing to the wall, fixing with weight. Work time 4-5 hours, glue drying 24 hours.
Day 4: installation of wooden corner pieces on external corners. Cutting corner pieces to height 1.5 meters, applying glue, pressing to the corner, fixing with screws (2-3 pieces per height), countersinking screw heads, filling holes with putty. Work time 2-3 hours, drying 24 hours.
Day 5: installation of horizontal molding around the perimeter. Cutting moldings, cutting corners, gluing with polyurethane glue, temporary fixing with painter's tape. Work time 3-4 hours, drying 24 hours.
Day 6: installation of ceiling cornice around the perimeter. Cutting, cutting corners, gluing, fixing. Sealing all joints of moldings and cornice with acrylic sealant. Work time 4-5 hours, drying 12 hours.
Day 7: oil painting of baseboards and corner guards (first coat). Painting of moldings and cornice with white paint (first coat). Work time 3-4 hours, drying time 12 hours.
Day 8: oil painting of baseboards and corner guards (second coat). Painting of decorative molding (second coat). Light sanding with fine sandpaper between coats. Work time 3-4 hours, drying time 12 hours.
Day 9: painting of baseboards and corner guards (third, finishing oil coat). Inspection, touch-up of missed spots. Cleanup. Work time 2-3 hours.
Total: 9 days of work, 3-6 hours per day = 35-45 hours of pure working time for one person. If working with two people, the timeframe reduces to 5-6 days.
Cost of work: DIY or hiring a crew
If installation is DIY: cost of materials only 49,384 rubles. Tools (if you don't have your own): miter saw rental 800 rubles/day × 2 days = 1,600 rubles, laser level rental 500 rubles/day × 1 day = 500 rubles, paint sprayer rental (optional) 700 rubles/day × 2 days = 1,400 rubles. Total 49,384 + 3,500 tools = 52,884 rubles.
If hiring a crew: baseboard installation 350 rubles/m × 10.8 = 3,780 rubles, corner guard installation 450 rubles/m × 3.15 = 1,418 rubles, decorative molding installation 800 rubles/m × 22.3 (horizontal molding + cornice) = 17,840 rubles, wall painting 180 rubles/m² × 30 = 5,400 rubles, decorative molding painting 300 rubles/m × 22.3 = 6,690 rubles, baseboard and corner guard painting 200 rubles/m × 13.95 = 2,790 rubles. Total labor 37,918 rubles.
Total with a crew: 49,384 materials + 37,918 labor = 87,302 rubles.
Savings with DIY installation: 87,302 − 52,884 = 34,418 rubles, or 39% of the budget.
Frequently asked questions
Is it mandatory to install corner guards on all external wall corners?
Not mandatory, but advisable for corners in high-traffic areas: near the entrance door, near room doors, in narrow hallways. Corners in the depths of the hallway, where people rarely go, can do without corner guards.
Can plastic corner guards be used instead of wooden ones?
Yes, but plastic is less aesthetically pleasing (looks cheap), less durable (scratches easier than wood), and pairs worse with wooden baseboards. Plastic corner guards cost 120-280 rubles/m compared to 550-850 rubles/m for oak wooden ones; there is savings, but the appearance suffers.
What height should the baseboard be in the hallway?
Optimally 120-160 mm. Below 100 mm — insufficient wall protection from splashes and impacts. Above 180 mm — visual overload, the baseboard looks bulky, eats up the visual height of the wall.
Can decorative molding be installed on uneven walls?
Yes, but the walls should be leveled at least locally in the areas where the moldings will be glued. If the wall has bumps and dips of 5-10 mm, the molding will follow the unevenness, leaving gaps.installation guide for polyurethane molding recommends leveling walls with plaster or drywall before installation.
How to protect wooden baseboards from water in the hallway?
Coat with moisture-resistant oil with wax (Osmo, Biofa) in 3 coats or polyurethane varnish in 2-3 coats. Impregnate the baseboard ends (the most vulnerable spots) especially thoroughly. Leave a ventilation gap of 2-3 mm between the baseboard and the floor for air circulation.
Is a ceiling cornice needed in a low hallway with a height of 2.4 meters?
Yes, but a narrow one (80-100 mm), so as not to overwhelm the space. A cornice visually raises the ceiling, creates completeness. In a low hallway without a cornice, the ceiling appears even lower.
Conclusion: protection + beauty = a durable interior
High-traffic zones — hallways, corridors — are subjected to maximum loads. Protecting critical areas (wall corners, wall bases) with wooden corner guards and baseboards prevents damage, saves money on repairs, and preserves appearance for years. Decorative wall finishing with polyurethane molding transforms a utilitarian space into an architectural composition that creates the first impression of a home.
A comprehensive solution — corner guards plus baseboards plus decorative molding — is not just the sum of elements, but a system where each detail works for practicality and aesthetics. Wooden corner guards protect corners from impacts, taking damage upon themselves. Wooden baseboards protect wall bases from moisture, dirt, scratches, creating a classic base for the composition. Polyurethane moldings structure walls, creating horizontal and vertical lines that visually expand narrow spaces. The ceiling cornice completes the composition from above, linking walls with the ceiling.
The cost of comprehensive hallway finishing for 8 m² is 50,000-87,000 rubles depending on whether you do the installation yourself or hire a crew. This is 10-15% of the hallway renovation budget, but the effect is disproportionate to the cost: the hallway gains character, protection, and durability.
Company STAVROS offers a full range of materials for finishing high-traffic zones. Wooden corner guards made of solid oak, ash, larch — cross-section from 30×30 to 80×80 mm, length 2.4-3.0 meters. Simple and profiled profiles. Corner guards are planed, sanded, moisture content 8-12%, ready for installation and finishing. Cost 480-850 rubles/m depending on wood species and cross-section.
Wooden baseboards made of solid oak, ash, beech, larch — height from 60 to 180 mm, length 2.0-2.5 meters. Over 30 profiles from simple to carved. Straight and flexible baseboards (for radius walls). Possibility of painting, tinting to any color. Cost 550-1,400 rubles/m depending on wood species, height, profile.
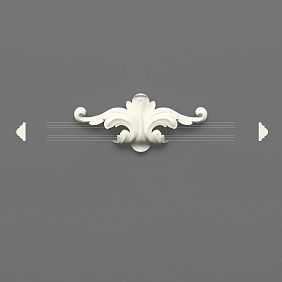
Polyurethane decorative molding over 700 items — moldings width from 20 to 150 mm, ceiling cornices, ceiling baseboards, rosettes, decorative overlays, corner elements. All products made of dense polyurethane (density 250-300 kg/m³), primed with white primer, ready for painting. Moisture-resistant, lightweight (7-10 times lighter than plaster), easy to cut and glue. Cost 350-1,400 rubles/m depending on width and profile complexity.
Design studio STAVROS develops comprehensive hallway and corridor finishing projects with 3D visualization. You see how corner guards, baseboards, moldings combine, how colors work, where to place horizontal and vertical elements. The project includes layout of all elements, material calculation accurate to the meter, estimate, installation instructions.
When ordering a set of materials (corner guards + baseboards + molding) for hallway finishing worth over 35,000 rubles, STAVROS provides a 7% discount on decorative elements. For orders over 60,000 rubles — a 9% discount plus free delivery within Moscow and the Moscow region. For orders over 100,000 rubles — an 11% discount plus free delivery across Russia. Savings of 3,500-14,000 rubles.
STAVROS installation teams are specialists in finishing high-traffic areas. Wall leveling if needed, installation of corner guards with adhesive and screw fastening, baseboard installation with precise corner cutting, mounting of moldings and cornices with joint sealing, painting of all elements. Services in Moscow, St. Petersburg, travel to regions, 3-year installation warranty.
Choosing STAVROS means gaining a partner in creating durable interiors where practicality and beauty are inseparable. Where corner protection doesn't spoil aesthetics but enhances it. Where baseboards aren't just strips but the foundation of composition. Where molding transforms narrow corridors into spaces with character. Protect your home properly. Decorate with taste. With STAVROS, it's accessible, reliable, beautiful.


