Article Contents:
- What is decorative molding
- Definition and functions
- History of moldings in interior design
- Types of moldings by purpose
- Molding in Various Interior Styles
- Application on walls and furniture
- Decorating walls with moldings
- Ceiling decoration
- Moldings in furniture
- Zoning and visual correction
- How to choose material and profile
- Molding materials
- Choosing molding profile
- Calculating quantity and planning
- Installation and maintenance
- Preparation for Installation
- Installation technique
- Painting and final finishing
- Care for moldings
- Conclusion
- Frequently Asked Questions

An interior thoughtfully designed down to the smallest details differs from an ordinary one by the presence of those very details that create the completeness and character of the space. One such detail isdecorative molding- an element capable of radically changing the perception of a room, adding it volume, structure, and individuality. This is not just a strip on the wall or ceiling - it is an instrument of architectural expressiveness that, when properly applied, transforms an ordinary space into a work of designer art.
The history of molding use traces back to ancient architecture, where each element carried not only decorative but also deep symbolic meaning. Classical orders - Doric, Ionic, Corinthian - included numerous profiled elements, each with its own name and purpose. These traditions have survived millennia and continue to inspire modern designers, although today moldings are used much more freely and diversely.
The modern approach to decorative moldings combines respect for tradition with experimentation. Moldings are actively used not only in classical but also in contemporary interiors - minimalism, Scandinavian style, even in lofts and industrial spaces. The secret to their universality lies in the variety of shapes, sizes, and materials, allowing one to find a solution for any style and any budget.
The demand for moldings in modern design is linked not only to their aesthetic qualities but also to their practical functionality. They can solve specific tasks - hiding wall defects, masking joints between different materials, creating visual correction of room proportions, zoning space. This makes moldings not a luxury, but a sensible investment in the quality and beauty of the interior.


What is decorative molding
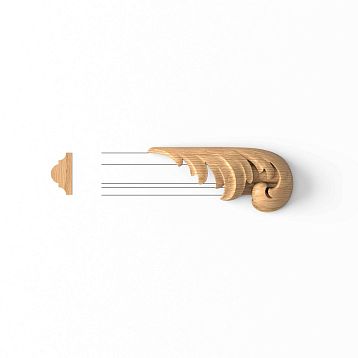
Decorative molding is a profiled strip that is mounted on walls, ceilings, furniture, or other surfaces to create a three-dimensional relief and architectural expressiveness. Unlike simple flat overlays, molding has a shaped cross-section - a combination of convexities, concavities, and planes, creating a play of light and shadow that brings the surface to life and gives it depth.


Definition and functions
The term 'molding' comes from the English 'molding,' which literally means shaping or casting. Historically, moldings were indeed cast from plaster or carved from wood, replicating canonical forms of classical architecture. Today, production technologies have expanded, but the essence remains the same - creating a three-dimensional decorative element with a distinctive profile.
The main aesthetic function of molding is to structure space. Flat, smooth walls and ceilings can appear dull and lifeless. Moldings create visual boundaries, divide surfaces into zones, establish rhythm, and form composition. Even a simple ceiling cornice radically changes the perception of a room, making it more complete and thoughtfully designed.
The practical function of moldings is equally important. They can hide joints between different materials - wallpaper and paint, wall and ceiling, two types of wallpaper. Moldings mask minor finishing defects - unevenness, cracks, traces of old repairs. Special moldings with cable channels allow concealing electrical wiring, eliminating the need for wall grooving.
The architectural function of moldings lies in creating visual logic of construction. Cornices visually support the ceiling, pilasters strengthen corners, door and window casings frame openings, creating the impression of portals. Even if these elements are not structurally necessary, visual tectonics are important for the correct perception of space as an architectural environment.
The psychological function of moldings is related to their ability to influence the perception of scale and proportions. Properly selected moldings make low ceilings appear higher, narrow spaces wider, and overly spacious areas cozier. Horizontal lines calm and expand, vertical lines add dynamism and increase height, while complex compositions create richness and depth.
Our factory also produces:


History of moldings in interior design
Ancient Greek and Roman architecture created a classical molding system that remains relevant over two thousand years. Each element of the order system — architrave, frieze, cornice, column base — consisted of a set of profiled elements with established names: cyma, ovolo, ogee, astragal. These forms were not random — they were based on mathematical proportions and created harmonious combinations.
The Middle Ages simplified the classical system but added its own elements — pointed profiles, more complex vegetal ornamentation. Gothic moldings were more vertical and dynamic, reflecting medieval architecture’s aspiration toward heaven. Romanesque moldings, in contrast, were massive and solid, emphasizing the fortress-like character of architecture.
The Renaissance returned to ancient models but reinterpreted them with new precision and scientific approach. Renaissance architects carefully studied Roman ruins, measured proportions, and created theoretical treatises. Moldings became more detailed, their combinations — more diverse. New profile types emerged, adapted to new architectural tasks.
Baroque pushed the complexity of moldings to virtuosity. Curvilinear profiles, abundance of ornamentation, gilding, multi-layered compositions created a stunning effect of luxury and dynamism. Baroque moldings were true sculptural works, requiring the highest level of craftsmanship.
Neoclassicism and Empire returned to strictness and clarity of forms, but retained richness of details. Moldings became more organized, their application — more systematic. Strict rules for using moldings emerged depending on the significance and function of the room.
Modernism of the twentieth century attempted to abandon moldings as a relic of the past. The slogan 'form follows function' implied rejection of decoration for decoration’s sake. However, practice showed that completely smooth walls and ceilings create an uncomfortable, inhuman environment. Postmodernism brought moldings back into architecture, albeit in a freer, ironic interpretation.
The modern era is characterized by an eclectic approach to moldings. They are used in all styles — from neoclassicism to minimalism, from country to high-tech. The key is understanding what effect you want to create, and choosing appropriate forms, sizes, and materials.
Get Consultation
Types of moldings by purpose
Ceiling cornices — the most common type of moldings, installed at the junction of wall and ceiling. They create a visual closure of the wall, make the transition to the ceiling smoother and more architectural. Cornices vary from simple narrow strips to wide, complex-profiled elements with rich decoration. Special cornices with hidden niches allow installing LED lighting, creating a floating ceiling effect.
Wall moldings are used to create decorative panels and frames on walls. This is a classic technique allowing to structure large flat surfaces, dividing them into proportional fragments. Contrasting colors, patterned wallpaper, decorative plaster can be used inside frames, creating rich compositions. Wall moldings are also used to create horizontal bands dividing the wall into upper and lower parts.
Baseboards are technically also moldings — profiled strips creating a transition between wall and floor. They perform an important protective function, shielding the lower part of the wall from mechanical damage, and hiding the gap between wall and floor covering. Baseboards vary from minimalist low strips to high, complex-profiled elements characteristic of classical interiors.
Door and window casings — moldings framing openings. They hide the junction between wall and frame, create architectural detailing, draw attention to the opening or, conversely, make it less noticeable depending on width and contrast. Casings can be simple rectangular strips or complex compositions with capitals and bases imitating columns.
Corner moldings protect and decorate exterior and interior corners of a room. Exterior corners are especially prone to damage, and surface-mounted moldings take the impact. Decorative corner elements can be simple functional details or richly ornamented accents drawing attention to corners as important architectural points.
Furniture moldings are used to decorate fronts of cabinets, chests, kitchen sets. Surface-mounted profiled strips transform simple flat doors into classical furniture elements with panels and frames.Decorative Molding for Furniturecan be straight or flexible for decorating curved surfaces.
Moldings in various interior styles
Classic interiors are unthinkable without moldings. Here they are used in full measure — ceiling cornices with dentils or modillions, wall panels with frames, high baseboards, richly profiled casings. Classic moldings usually have complex profiles including cyma, ovolo, ogee. Color is traditionally white or cream, rarely with gilding on protruding elements.
Neoclassical interiors use moldings more restrainedly. The overall structure is preserved — cornices, panels, casings — but profiles are simplified, decoration becomes less abundant. This creates a calmer, more elegant image, preserving classical features but adapted to modern aesthetics. Colors are neutral — white, gray, beige.
Minimalist interiors allow moldings, but only the simplest in shape. Rectangular or square profiles without curves, narrow, painted in wall color. Such moldings create a delicate structure, noticeable only under certain lighting due to light play on relief. They organize space without drawing attention.
Scandinavian interiors traditionally used wooden moldings in natural light tones. Profiles are simple but expressive, emphasizing constructive logic. Modern Scandinavian style often paints moldings white, creating bright, airy spaces with delicate architectural detailing.
Loft and industrial styles usually avoid traditional moldings, but may use specific elements — metal angles, rough wooden strips imitating beams or structural elements. If classical moldings are used in lofts, they are typically contrasted with brick walls or concrete surfaces, creating an eclectic effect.
Provence and country styles love wooden moldings with patina and artificial aging effect. Profiles are moderately complex, colors pastel or natural wood tones. Moldings in these styles create a sense of cozy provincial simplicity, connection to traditions and history.
Art Deco uses moldings actively, but in a specific style. Profiles are geometric, stepped, with sharp edges. Popular are contrasting combinations — black and gold, dark wood and light walls. Moldings in Art Deco create graphic effect, emphasize geometry, contribute to the overall glamour and luxury aesthetic of the 1920s.
Application in walls and furniture
The versatility of decorative moldings is demonstrated by their wide range of applications.decorative wall moldingsThey are capable of completely changing the character of a room, transforming a bland box into an architectural space with character and individuality. Applying moldings to furniture allows creating elements that appear significantly more expensive than their actual cost.
Decorating walls with moldings
Creating wall panels — a classic use of moldings. The wall is divided into rectangular or square sections using moldings forming frames. The same finish may be used inside sections as outside, but the relief of moldings creates volume and structure. A more complex option — using contrasting materials inside frames: patterned wallpaper on painted walls, decorative plaster, or different paint colors.
Size and proportions of panels are critically important for a harmonious result. Too large panels on a small wall look disproportionate, too small ones create excessive fragmentation. The classical rule states: panel height should relate to width as 3:2 or close to the golden ratio. The distance from wall edge to first panel should be less than the distance between panels.
Accent wall with moldings becomes the compositional center of the room. One wall, usually behind the bed, sofa, or in the dining area, is decorated especially richly — with large panels, complex compositions, contrasting colors. The other walls remain more neutral, creating hierarchy and focusing attention on the main element.
Horizontal division of the wall with molding into two parts — a technique borrowed from classical architecture. Traditionally, the lower part (dado or panel) occupies about one-third of the wall height and is painted in a darker color or finished with more durable materials. The upper part is lighter and more delicate. The boundary between the parts is emphasized by a profiled molding, which also protects the wall from wear caused by chair backs.
Vertical moldings on walls create the effect of a colonnade, visually increasing the height of the room. Vertical strips are installed from floor to ceiling or from baseboard to cornice with a specific spacing. They can be uniform across the entire wall or vary — wider at key points, narrower between them. This solution is characteristic of neoclassical and empire interiors.
Framing art objects with moldings — an effective way to integrate paintings, mirrors, or panels into the interior. Instead of standard picture frames, moldings are mounted directly on the wall around the object. This creates the impression that the painting or mirror is an integral part of the room’s architecture. This solution is especially effective in galleries and collections, where multiple objects are unified by a single framing style.
Ceiling Decor
Ceiling cornices — a basic decorative element that should be present in almost any interior aspiring to completeness. Even a simple cornice 5–7 centimeters wide dramatically changes the perception of the room. It creates a clear boundary between wall and ceiling, completes the composition, and makes the space more architectural. Wide cornices of 10 centimeters and more become a noticeable decorative element, especially if they have a complex profile.
Coffered ceilings are created using intersecting moldings that form a grid of square or rectangular recesses. Each recess can be further decorated with a rosette, painted in a contrasting color, or illuminated. A coffered ceiling is the pinnacle of ceiling decoration, transforming an ordinary room into a grand hall. This solution requires sufficient ceiling height — at least 3 meters.
Ceiling rosettes frame the mounting point of a chandelier, creating a compositional center on the ceiling. The size of the rosette should match the size of the light fixture — the diameter of the rosette is usually equal to or slightly smaller than the diameter of the chandelier. Simple rosettes consist of concentric profiles. Complex ones include radial elements and plant ornaments, creating a rich decorative motif.
Ceiling beams or their imitation using applied moldings create a structure, especially relevant in rooms with high ceilings. Beams divide the ceiling plane into zones, create rhythm, and can visually lower an overly high ceiling, making the space more cozy. In modern interiors, contrast beams are often used — dark on a light ceiling or vice versa.
Hidden lighting behind the ceiling cornice — a modern functional application of moldings. A special cornice with a setback from the ceiling creates a niche where an LED strip is installed. The light is directed upward, creating soft diffused lighting and the effect of a floating ceiling. This visually increases the height of the room and creates a special atmosphere, especially effective in the evening.
Moldings in furniture
Decorative Molding for Furnitureallows transforming simple furniture facades into elements of classical furniture. Applied moldings on cabinet, chest, or bedside table doors create relief, imitate latticework, and add visual value. After painting in the same color as the base, moldings create an elegant play of light and shadow.
Kitchen facades especially benefit from using moldings. Simple smooth MDF facades can be transformed into classic ones using applied molding frames. This is significantly cheaper than ordering milled latticework facades, but the visual result is comparable. Kitchen moldings must be moisture-resistant and coated with a durable paint or varnish that withstands frequent cleaning.
Decorating the headboard of a bed with moldings creates the effect of a substantial architectural element. On the wall behind the bed, moldings create a panel or frame, within which contrasting finishes — wallpaper, fabric, decorative plaster — can be applied. This visually highlights the bedroom zone, creates a focal point, and makes a simple bed more impressive.
Framing open shelves with moldings transforms simple boards into architectural elements. Moldings can frame shelves along the perimeter, creating frames, or be mounted under shelves, imitating consoles. This is especially effective in libraries, living rooms with collections, and kitchens with open shelves.
Decorating legs and supports of furniture with thin moldings adds detail. Simple square or round legs of tables, chairs, and armchairs are enriched with profiled applied pieces, imitating turned or carved elements. This is a relatively simple way to make furniture more refined without completely replacing it.
Zoning and visual correction
Moldings as a zoning tool work by creating visual boundaries without physically dividing space. In studios and open-plan layouts, moldings on walls can separate the living area from the sleeping area, the dining area from the kitchen. Different zoning treatments with moldings while maintaining a consistent color palette create structure, leaving space open.
Visual height increase in low rooms is achieved through several molding techniques. Vertical moldings direct the gaze upward, creating an illusion of height. A ceiling cornice installed slightly below the wall-ceiling junction, with the space between it and the ceiling painted the same color as the ceiling, visually raises the ceiling. Narrow, tall panels on walls also elongate the space.
Visual expansion of narrow rooms occurs through horizontal moldings. A horizontal molding dividing the wall into two parts, especially if the lower part is darker than the upper, visually expands a narrow space. Horizontal panels on walls create a sense of width. Ceiling beams running perpendicular to the long side of the room also visually expand the space.
Creating coziness in overly spacious rooms is achieved by breaking up large surfaces with moldings. Multiple panels on walls, coffered ceilings, and abundant use of vertical and horizontal moldings divide large spaces into more human-scale fragments. This makes a huge room less overwhelming and more comfortable.
Masking defects and poor proportions — a practical function of moldings. Uneven walls are concealed under molding panels, where frames are attached to a frame that does not require a perfectly straight wall. Poorly placed doors or windows can be visually balanced by creating symmetrical panels or molding elements on the opposite side of the wall.
Choosing the right material and profile for moldings is critically important for a harmonious result. The material determines the operational characteristics, installation complexity, durability, and cost. The profile determines the style, visual impact, and compatibility with the overall interior concept.
The correct choice of molding material and profile is critically important for a harmonious result. The material determines operational characteristics, installation complexity, durability, and cost. The profile determines the style, visual impact, and alignment with the overall interior concept.
Molding materials
Wooden moldings — a classic choice with several undeniable advantages. Natural wood is eco-friendly, has a pleasant texture, feels warm to the touch, and creates a unique atmosphere. Wooden moldings can be repainted multiple times, restored, and serve for decades. Oak, beech, and ash provide maximum strength and prestige. Coniferous species — pine, spruce — are more affordable but require careful treatment with protective compounds.
Drawbacks of wood — high cost of quality material, potential deformation from humidity fluctuations, need for regular maintenance. Wood is not suitable for high-humidity rooms without special treatment. Installing wooden moldings requires precision and experience, as the material does not forgive mistakes.
MDF moldings combine many advantages of wood with greater stability and accessibility. MDF — fine wood particles — does not deform from humidity, has a perfectly smooth surface without knots or defects, and is easy to process. MDF moldings are significantly cheaper than solid wood, but after painting, they are visually indistinguishable.
Drawbacks of MDF — less prestige compared to solid wood, inability to use in humid rooms without special moisture-resistant treatment. MDF is heavier than polymers, which complicates installation on ceilings. However, for most applications, MDF is the optimal choice in terms of price, quality, and aesthetics.
Polyurethane moldings — a modern material that has gained popularity due to practicality. Polyurethane is lightweight, resistant to moisture, does not deform, and is easy to install. Polyurethane moldings can have very complex profiles, imitating plaster moldings or wooden carving. After painting, quality polyurethane is visually indistinguishable from plaster or wood.
Drawbacks of polyurethane — artificial origin, less noble surface before painting, potential to emit odors when heated. Cheap polyurethane may yellow or sag over time. However, quality polyurethane from reputable manufacturers lacks these drawbacks and is an excellent choice for humid rooms and ceiling decoration.
Gypsum moldings are a traditional material for high-end molding. Gypsum is eco-friendly, non-combustible, has a noble matte surface, and allows creating complex shapes with fine detailing. Gypsum moldings are prestigious, durable with proper use, and can be restored.
Disadvantages of gypsum: heavy weight, brittleness, fear of moisture, complex installation, high cost. Gypsum moldings require professional installation and are not suitable for humid rooms. They are primarily used in exclusive interiors where authenticity and prestige of the material are important.
Plastic moldings are the most budget-friendly option, suitable for temporary decoration or projects with strict budget constraints. Plastic is lightweight, moisture-resistant, and easy to install. However, plastic moldings look cheap, have a characteristic gloss, are poorly painted, and may deform under heat. They are suitable for technical rooms but not for living rooms in quality interiors.
Molding profile selection
Molding width - the first selection parameter, determining visual impact. Narrow moldings 2-5 cm wide create delicate lines, suitable for small rooms and minimalist interiors. Medium moldings 7-12 cm are a universal choice for most applications. Wide moldings 15 cm and above create a powerful architectural effect, suitable for spacious rooms with high ceilings.
Profile height - the distance the molding protrudes from the wall - affects relief depth and shadow play. Flat moldings 5-10 mm high create a delicate relief, almost graphic effect. Medium moldings 15-25 mm provide noticeable light and shadow play. Three-dimensional moldings 30-50 mm and above create a sculptural, three-dimensional effect.
Profile complexity determines the molding's stylistic affiliation. Simple profiles with one or two elements - a straight ledge and rounded corner - are characteristic of modern styles. Classical profiles include several elements - coves, rolls, scrolls, ledges - creating rich form play. Complex profiles with ornaments - dentils, Ionic motifs, plant motifs - are characteristic of historical styles.
Profile symmetry affects application possibilities. Symmetrical profiles look identical from any side and can be used universally. Asymmetrical profiles have a specific orientation - top-bottom, left-right - and must be installed accordingly. Some moldings are specifically designed for certain applications - ceiling cornices, door casings, baseboards.
Stylistic compatibility of the profile with the interior is critically important. Minimalist rectangular moldings are inappropriate in classical interiors, while ornate Baroque profiles are unsuitable in minimalist interiors. Moldings must match the overall style or create a deliberate contrast if part of a designer concept.
Quantity calculation and planning
Measuring the room - the first step in planning. Accurately measure the length of all walls, room height, and opening sizes. For wall paneling, plan the size and placement of panels and create a layout. This will allow calculating the required molding quantity, accounting for cutting and waste.
Allowance for waste - mandatory rule. Add 10-15% to the calculated quantity for trimming, possible defects, and installation errors. It is better to have a small material reserve than to discover a shortage during installation and attempt to purchase an identical profile, which may become unavailable.
Element length selection depends on specific application. Moldings are usually sold in standard lengths - 2, 2.4, or 3 meters. For long spans without joints, choose the maximum length. For paneling, shorter elements may be more convenient. Plan joint placement to ensure they are in the least noticeable areas.
Fittings and accessories - corner elements, end caps, connectors - simplify installation and improve results. Ready-made corner elements eliminate the need for precise 45-degree cuts. End caps neatly finish moldings where they do not continue. Center inserts and sockets add variety to long molding runs.
Element compatibility - if moldings of different profiles are used, they must harmonize with each other. Profile heights, plank widths, and decoration complexity must be comparable. It is best to choose elements from one manufacturer's collection, where all profiles are designed for joint use.
Installation and Maintenance
Quality installation of moldings requires careful preparation, precision, and adherence to technology. Proper installation ensures longevity, aesthetics, and functionality of the decoration. Maintenance of installed moldings is simple, but regularity and correctness of procedures extend service life and preserve the original appearance.
Preparation for Installation
Surface condition assessment - the first step in preparation. Walls and ceilings must be relatively flat. Moldings can hide minor defects, but significant irregularities must be corrected, as the molding will replicate all base contours. Checking corner verticality and wall-ceiling joint levelness helps plan for deviations.
Cleaning surfaces from dust, dirt, and peeling coatings is essential for good adhesive bond. Loose old coatings must be removed or strengthened with deep-penetration primer. Oil stains and nicotine marks must be removed with special cleaners, as they prevent adhesion.
Surface priming improves adhesion and reduces glue absorption. Universal acrylic primers or specialized compositions for specific surfaces are used. Primer is applied with a roller or brush and dried according to manufacturer instructions.
Marking - a critically important stage determining geometric accuracy. For ceiling cornices, a horizontal line is marked around the room at a specific height from the ceiling. A laser level or water level and chalk line are used. For wall panels, positions of all elements are marked considering symmetry and proportions.
Material acclimatization - moldings must rest in the room for at least 48 hours before installation. This is especially important for wooden and MDF moldings, which must adapt to room temperature and humidity. This prevents subsequent deformation and delamination.
Installation technique
Molding cutting requires precision, especially for corner trimming. Straight cuts are made with a fine-tooth hacksaw, electric jigsaw, or circular saw. Use a sharp tool to avoid chipping and splintering edges, especially on MDF and wood.
Corner trimming - the most complex operation. For 90-degree angle connections, a 45-degree bevel is used. A miter box for manual cutting or a circular saw with angle setting is applied. For complex profiles, a contour cutting method may be required, where one molding is trimmed to the profile of another.
Adhesive selection depends on molding material and substrate. For wooden and MDF moldings on plaster or drywall, liquid nails or special mounting adhesive are suitable. For polyurethane moldings, polymer adhesives are used. Gypsum moldings are often mounted on gypsum mortar.
Adhesive application - adhesive is applied to the back of the molding in dots, zigzag, or strips depending on element size. Do not apply too much adhesive - it will squeeze out at edges upon pressing. For heavy moldings, adhesive is also applied to the wall.
Element installation - the molding is placed on the marked location and pressed. It is important not to shift the element after pressing to avoid damaging the adhesive layer. The molding is held by hand or supported until initial adhesive bond forms - usually several minutes. Excess adhesive is immediately wiped off with a damp cloth.
Mechanical fastening - for heavy wooden moldings and large ceiling cornices, additional fastening with screws or nails may be required. Fasteners are driven into the material, holes are filled with putty. After painting, fastener locations become inconspicuous.
Joint sealing - all joints between elements, corner connections, and fastener locations are sealed with acrylic putty or sealant. A compound similar in properties to the molding material is used. After drying, the sealant is sanded with fine abrasive to achieve perfect smoothness.
Painting and final finishing
Priming before painting - mandatory step for unprimed moldings. Primer creates an even surface, improves paint adhesion, and reduces paint consumption. For wood and MDF, acrylic or alkyd primers are used. Primer is applied with a brush, carefully covering all profile recesses.
Paint selection depends on usage conditions and desired effect. For living rooms, water-based acrylic paints are optimal - they have no odor, dry quickly, and form a durable coating. For humid rooms, latex or silicone paints are used. For high loads, alkyd enamels are suitable.
The gloss level of paint determines the appearance of moldings. Matte paints create a noble surface, hide minor defects, and do not produce glare. Glossy paints provide a bright sheen, accentuate relief, but reveal all imperfections. Semi-gloss paints are the ideal middle ground for most applications.
Painting technique - moldings with relief profiles are painted with a brush that fills all recesses. For smooth profiles, a short-pile roller can be used. Spray painting provides an ideal uniform coating, but requires protection of surrounding surfaces from overspray.
The number of paint layers is usually two to three. The first layer may be uneven and reveal defects in preparation - this is normal. After the first layer dries, the surface is lightly sanded with fine abrasive, dust is removed, and the second layer is applied. The third layer ensures perfect coverage and color saturation.
Decorative effects - patina, gold leafing, artificial aging - create a special atmosphere. Patina is applied to recesses of the profile, emphasizing relief. Gold leafing can cover the entire surface or only protruding parts. Artificial aging is created by combining paints of different tones and mechanical processing.
Molding Care
Regular dry cleaning - the foundation of molding care. Dust is removed with a soft cloth, a brush with natural bristles, or a vacuum cleaner with a soft attachment. Special attention is paid to recesses of the profile, where dust accumulates more. Regularity of cleaning - once a week or twice - prevents the accumulation of dirt.
Wet cleaning is performed as needed with slightly damp cloth or fabric. Do not use excessive water, especially for wooden and MDF moldings. To remove dirt, a mild soap solution or specialized cleaners for painted surfaces can be used.
Prohibited substances - abrasive sponges and powders, aggressive chemical solvents, stiff brushes damage the paint and molding surfaces. Their use results in scratches, loss of gloss, and destruction of the coating. For any dirt, first try gentle cleaners and methods.
Repair of damage - small chips and scratches are filled with wood putty or acrylic sealant, then sanded and touched up after drying. Serious damage requires replacing the damaged molding section. Detached sections are re-adhered after cleaning old glue.
Periodic coating renewal - painted moldings are recommended to be repainted every 5-7 years to refresh their appearance. This is especially relevant for moldings in high-traffic areas or exposed to dirt. Repainting restores the original freshness and allows changing the interior color scheme.
Protection during repair - if work is being done in the room, moldings must be protected with painter's tape and plastic sheeting. Construction dust, paint splashes, and plaster can damage the coating. Protection is simpler and cheaper than subsequent cleaning or repair.
Conclusion
decorative molding- a universal tool for creating expressive interiors, combining aesthetic appeal with practical functionality. From modest ceiling cornices to complex wall panel compositions, from simple baseboards to rich furniture trim - moldings can completely transform a space, filling it with character and individuality.
The correct choice of molding material determines their durability, aesthetics, and suitability for operating conditions. Natural wood remains a premium choice for those who value eco-friendliness and prestige. MDF offers the optimal price-to-quality ratio for most applications. Polyurethane is indispensable for humid areas and complex ceiling structures. Gypsum retains its place in exclusive interiors, where material authenticity is important.
Applicationdecorative moldings for walls- opens up boundless possibilities for design creativity. Creating panels structures large flat surfaces, making them proportional to the human scale. Accent walls become compositional centers of rooms. Zoning with moldings creates visual boundaries without physical division of space. All these techniques have been tested by centuries of architectural practice and continue to work in modern interiors.
Usedecorative molding for furniture- significantly enhances the visual value of simple furniture facades. Applied moldings transform smooth doors into classic furniture elements with panels. Framing shelves, decorating headboards, finishing kitchen facades - all these are accessible ways to improve furniture without complete replacement.
Quality installation is critically important for the result. Careful surface preparation, precise marking, correct choice of adhesive and installation technique ensure durability and aesthetics. Filling joints and professional painting complete the work, making moldings an integral part of the room's architecture.
Molding care is simple and reduces to regular cleaning, protection from damage, and periodic coating renewal. With proper care, quality moldings serve for decades, maintaining their original appearance and continuing to delight with their beauty.
STAVROS Company offers a wide range of decorative moldings from various materials - natural wood, MDF, polyurethane. The variety of profiles - from minimalist to classic complex - allows finding a solution for any interior style. High-quality materials, precise dimensions, and ideal surface finishing ensure a professional result.
STAVROS products are manufactured in accordance with all quality and environmental safety standards. Use of selected wood, E1 class MDF, modern polymers guarantees durability and safety for health. Each item undergoes quality control before being shipped to the customer.
Professional consultation support from STAVROS specialists helps correctly calculate material quantities, select optimal profiles and sizes, and obtain installation and finishing recommendations. This is especially valuable for those who are new to moldings or implementing a complex design project.
Choosing STAVROS moldings is an investment in the quality, beauty, and longevity of your interior. Your home will receive a finished, professionally designed look that will delight you for years and become a source of pride.
Frequently asked questions
Which molding material is best for living rooms?
For living rooms with normal humidity, wooden or MDF moldings are optimal. Natural wood - a premium choice, eco-friendly, prestigious, with beautiful texture. Oak, beech, ash provide maximum durability. MDF moldings are cheaper, but after painting, visually indistinguishable from wood. They do not deform from humidity changes and have a perfectly smooth surface. Polyurethane moldings are also suitable, especially for ceiling decoration due to their lightness. The choice depends on budget and personal preferences - for premium interiors, wood; for optimal price-to-quality ratio - MDF.
Can moldings be installed by oneself?
Installation of simple moldings - ceiling cornices, wall strips - is quite accessible for self-installation with basic skills and tools. Required: miter saw or miter box for precise cutting of angles, level for controlling horizontal and vertical alignment, adhesive for mounting, putty for filling joints. Simple straight sections are easy to install. Difficulties arise with corner joints - they require precision. For complex projects - wall panels, coffered ceilings, furniture trim - it is recommended to involve professionals. Incorrect installation can damage even quality moldings, so if unsure, it is better to consult specialists.
How to calculate the amount of moldings for a room?
Calculation begins with measuring the perimeter of the room for ceiling cornices and baseboards - the sum of lengths of all walls. For window and door trim, the perimeter of each opening is measured. For wall panels, a scheme with dimensions of all frames must be created and the total length of moldings calculated. To the obtained result, 10-15 percent must be added for cutting, trimming corners, and possible defects. Moldings are sold in standard-length segments - usually 2-3 meters. It is necessary to calculate how many such segments are required. For example, for a room with a 20-meter perimeter, at least 7 three-meter moldings are needed, plus a reserve - totaling 8-9 pieces.
In which interior styles are moldings appropriate?
Moldings are universal and can be used in almost any style with the right profile selection and application. Classic styles - Baroque, Rococo, Classicism, Empire, Neoclassicism - are unthinkable without moldings. Here, complex profiles, rich decoration, and abundant use are appropriate. Modern styles - minimalism, Scandinavian, contemporary - also allow moldings, but of simple geometric shapes, painted in wall colors. Loft can use moldings in contrast with industrial elements. Provence and country styles prefer wooden moldings with patina. Art Deco actively uses moldings of geometric shapes. The only styles where moldings are inappropriate - high-tech and techno, which lean towards smooth surfaces and industrial materials.
How do moldings affect the perception of space?
Moldings strongly influence the visual perception of a room. Vertical moldings visually increase height by directing the gaze upward. Horizontal moldings expand the space, making it appear more stable. A ceiling cornice installed below the paint joint, painted in the ceiling color, visually raises the ceiling. A dark lower wall section separated by molding and a light upper section create an impression of greater height. Wall panels structure the space, making large rooms feel cozier. Moldings conceal defects, divert attention from poor proportions, and create focal points. Proper use of moldings allows visually correcting almost any space shortcomings.
Should moldings be painted?
What mistakes are most commonly made when using moldings?
Most common mistakes: mismatch of molding scale to room size — too large in small rooms overwhelm, too small in large rooms disappear. Over-decorating — attempting to use moldings everywhere, overloading the interior. Stylistic mismatch — baroque moldings in minimalism or vice versa. Incorrect panel proportions on walls — too elongated or too low. Poor installation — gaps at joints, crooked lines, poorly finished corners. Incorrect painting — drips, undercoating, color mismatch with overall scheme. Lack of planning — purchasing moldings without prior calculation and layout plan. Cutting corners on materials — cheap plastic moldings spoil the impression of expensive finishes. All these mistakes can be avoided with proper planning, consultation with professionals, and adherence to basic design principles.
Common mistakes: mismatch of molding scale to room size — overly large moldings in small rooms overwhelm, while overly small ones in large rooms fade into the background. Excessive decoration — attempting to use moldings everywhere, overloading the interior. Stylistic mismatch — baroque moldings in minimalism or vice versa. Incorrect panel proportions on walls — overly elongated or low-profile panels. Poor installation — gaps at joints, crooked lines, poorly finished corners. Incorrect painting — drips, undercoating, color mismatch with the overall scheme. Lack of planning — purchasing moldings without prior calculation and placement layout. Cutting corners on materials — cheap plastic moldings spoil the impression of expensive finishes. All these errors can be avoided with proper planning, consultation with professionals, and adherence to basic design principles.
How much does it cost to decorate a room with moldings?
Decorative molding: an expressive detail for interior | Company Stavros