Article Contents:
- Understanding profiles: how to choose molding for the task
- Classification by cross-section and purpose
- Sizes and proportions: coordinating with room scale
- Style compatibility with interior
- Installation without errors: reliable mounting technology
- Wall surface preparation
- Marking: planning composition
- Adhesive compositions and gluing technology
- Corner joints: mastery of perfect connections
- 45° trimming: tools and technique
- Joint fitting: eliminating gaps
- Longitudinal joints: invisible connections
- Molding painting: final finishing
- Preparation for painting: priming and spackling
- Paint selection and application technique
- Decorative techniques: patination and gilding
- Common Mistakes and How to Avoid Them
- Errors in selection and planning
- Errors in installation
- Errors in painting
- Care and longevity of polyurethane moldings
- Regular Cleaning
- Repair of damage
- Practical tips and final recommendations

Walls without decoration are simply vertical planes dividing space. But add moldings, and the room transforms — architectural depth, rhythm, character appear.Moldings for walls to buyToday, anyone who wants to turn a typical apartment into a thoughtfully designed interior with individuality can use polyurethane moldings. Polyurethane moldings have revolutionized the decoration market — they are lightweight, inexpensive, easy to install, yet visually indistinguishable from classic plaster moldings that have adorned palaces and mansions for centuries.
But between the desire to decorate walls with moldings and a flawless result lies a path full of nuances. How to choose the right profile from hundreds of options? How to join moldings in corners without gaps or steps? How to paint so that there are no drips, underpainting, or visible joints? In this article, we will systematically cover the entire process — from the moment you decidedto buy wall moldingsto the final result you can be proud of. This is a practical guide written with an understanding of real problems faced by those who are installing moldings for the first time or want to avoid past mistakes.


Understanding Profiles: How to Choose Molding for the Task


Classification by Cross-Section and Purpose
Flat moldings with rectangular cross-section — the simplest type, a universal tool for wall zoning. Width 20–100 mm, thickness 8–15 mm, smooth or slightly textured front surface. Used to create framed panels on walls — rectangles framing contrasting-colored wallpaper, decorative plaster, photo wallpapers. A horizontal strip of flat molding at 90–100 cm from the floor separates lower wall panels from upper wallpaper — a classic technique adding structural depth to the interior.decorative moldingsflat type — base for most compositions.
Profiled moldings have complex cross-sections with scrolls, ridges, and ledges, creating play of light and shadow. Classic profiles repeat forms developed over centuries of architectural practice — astragals, coves, ogee curves, quarter-rounds. Each profile element has a function — a scroll creates a soft shadow, a ridge casts a sharp light boundary, a ledge provides a horizontal accent. Profiled moldings suit classical and neoclassical interiors where detail and refined forms are important. Width 30-150 mm, relief protrudes 5-20 mm from the base plane.
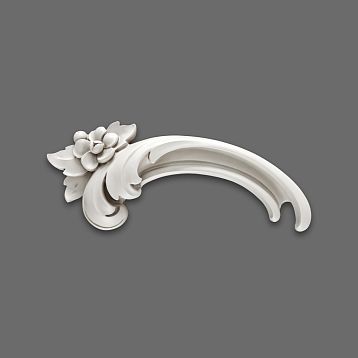
Ornamented moldings are decorated with repeating relief patterns — plant, geometric, narrative. Acanthus leaves, laurel wreaths, grapevines, roses — classic plant ornamentation. Meanders, braids, diamonds, zigzags — geometric patterns. Ornamented moldings are accent elements used sparingly. A horizontal band under the ceiling, fireplace trim, mirror frames, decorative panels — places where ornament is appropriate. Around the entire room, such moldings create excess, overload the interior.Buy polyurethane moldingsornamented are suitable for accents.
Corner elements — special details for finishing corners where two moldings meet. Internal corners round the joint, creating a smooth transition instead of a sharp angle. External corners protect protruding wall corners from damage while simultaneously decorating them. Corner rosettes — decorative overlays on the junction of two moldings, hiding gaps that are difficult to patch perfectly. Using corner elements simplifies installation — no need for precise 45° trimming; details simply fit onto the corner element between them.
Our factory also produces:


Dimensions and proportions: coordination with room scale
Ceiling height — the first factor determining molding width. In rooms with ceilings 2.4–2.5 m, use moldings 30–60 mm wide — wider moldings visually lower already low ceilings, creating a sense of confinement. For ceilings 2.7–3.0 m, moldings 60–100 mm are optimal — they are visible, create an accent, but do not dominate. In rooms with high ceilings 3.2 m and above, wide moldings 100–150 mm and more can be used — they match the room’s scale and do not disappear against high walls.
The proportions of framed panels made from moldings follow the golden ratio rule. A rectangle with side ratio 1:1.618 is perceived by the eye as the most harmonious. For a wall 2.7 m high and 4 m wide, optimal panels are 1.2 m high and about 2 m wide (ratio close to golden). Too elongated or flattened rectangles appear disharmonious. Place panels considering furniture — sofas, beds, chests should fit into the composition, not partially cover moldings.
Lasts for decades on prepared walls.
Get Consultation
Stylistic harmony with the interior
Choose moldings that match the historical era of your style.Buy wall moldingswhich correspond to the historical era of your style.
Modern interiors prefer simple forms. Minimalism — flat, smooth moldings without ornamentation, minimal width, white or wall-colored, task — structure the wall without drawing attention to the moldings themselves. Scandinavian style — simple profiles with slight relief, exclusively white, creating cozy structure without decorative excess. Contemporary classicism (neoclassicism) — a compromise, allowing profiled moldings, but restrained, without ornate decoration.
Eclectic interiors freely mix styles. Ornamented moldings on one wall may combine with smooth ones on another. Contrasting colors — black moldings on white walls, gold on blue — create a dramatic effect. Non-standard panel shapes — overlapping frames, diagonal lines, curved contours from flexible moldings — express individuality. Eclecticism requires confident taste; otherwise, it easily turns into chaos. If uncertain, choose classicism — it has been tested over time.
Installation without errors: reliable mounting technology
Wall surface preparation
Cleanliness and strength of the base are critical for the longevity of installation. Moldings are glued to walls with polymer adhesive, which requires a strong base. Loose, crumbling plaster, peeling paint, dusty surfaces prevent adhesion — moldings will detach within weeks or months. Check by tapping — tap the wall with your knuckles; a dull sound indicates plaster detachment. Such areas are sanded, resurfaced, and primed.
Wall flatness affects molding adhesion. Waves, bumps, and hollows will prevent moldings from lying flat along their entire length — gaps form, which are difficult to patch with spackle. Check with a straightedge or long level — press against the wall, shine a flashlight from behind; gaps will reveal unevenness. Local unevenness is leveled with spackle; significant discrepancies require resurfacing or drywall installation. Perfectly flat walls — a luxury rarely achieved. But striving for minimal deviations (±2–3 mm over 2 meters) is necessary.
on prepared walls last for decades.Moldings for wallsLasts for decades on prepared walls.
Marking: planning composition
Sketch on paper or in graphic editor — first step in planning. Draw the wall to scale, mark molding positions, assess proportions. What do you want to create — framed panels, horizontal wall division, door or window trim? How many panels will fit, what size, how far apart? Symmetry is preferred — paired panels on both sides of the room’s axis, doors, fireplaces. Asymmetric compositions are more complex and require developed sense of balance.
Trying moldings on the wall before gluing allows you to evaluate the result and adjust. Place the molding along the marked line, secure with painter’s tape, step back, assess proportions and positioning. Is the molding too wide for this wall? Is the height correct? Are the panels symmetrical? It’s easier to adjust the marking at this stage than to re-glue after installation. If everything is satisfactory — you can glue. If uncertain — take a break, consult, review the marking the next day with fresh eyes.
Decorative Wall Moldings
Adhesive compositions and mounting technology
Polymer mounting adhesives of the "liquid nails" type — universal choice for polyurethane moldings. Composition based on synthetic resins, neoprene rubber, solvents — quickly sets, creates strong bond. Important: for polyurethane, use adhesive without aggressive solvents that may degrade the material. Packaging must indicate "suitable for polyurethane, polystyrene, PVC". Adhesive color — white is preferable; transparent adhesive may show through thin polyurethane.buy moldingsand immediately glue — optimal.
Specialized plastering adhesives — professional choice. Formulations developed specifically for mounting polyurethane and polystyrene moldings, provide maximum adhesion, fast setting, white color, no shrinkage. Available in cans or buckets, applied with trowel or notched trowel. Advantage — can apply thick layer that fills wall irregularities, ensuring tight molding fit. Disadvantage — more expensive than universal "liquid nails", require application skill.
Adhesive application technique: for moldings up to 80 mm wide, adhesive is applied in one strip centered on the back of the molding. For wide moldings — two parallel strips or zigzag. Amount of adhesive — sufficient for full contact, but not excessive to avoid squeezing out upon pressing. If adhesive oozes — immediately wipe with a damp cloth. Dried adhesive is harder to remove, scratches the molding. After applying adhesive, wait 1–2 minutes for initial setting (as indicated on packaging), then press against the wall.
Pressing and Fixing: Apply the molding to the marked line, press firmly along the entire length, hold for 30–60 seconds. The adhesive must set to prevent the molding from detaching after release. For long moldings, secure with painter’s tape or temporary brads (for drywall) until the adhesive fully dries — 12–24 hours. Tape the molding and wall adjacent to it, do not stretch tightly to avoid displacing the molding. Drive brads into inconspicuous areas, remove after adhesive dries, and fill holes with putty.
Corner Joints: The Art of Perfect Connection
45° Beveling: Tools and Technique
A miter box is the simplest tool for precise 45° beveling of moldings. A wooden or plastic box with slots for 45° and 90° angles guides the saw, ensuring accurate cuts. Place the molding in the miter box, insert a fine-toothed hacksaw into the 45° slot, and cut smoothly without heavy pressure. Critical: correct orientation of the molding in the miter box — face up, back pressed against the base. Incorrect orientation results in an incorrect joint angle.
A miter saw is a professional tool for precise beveling. An electric saw on a swivel base allows setting any cutting angle with precision to 0.1°. The molding is secured to the saw’s table, the blade descends, and the cut is completed in seconds. The cut is perfectly straight, without chips or burrs typical of hand saws. If planning a large-scale project with dozens of meters of molding, renting or purchasing a miter saw will pay off in time and quality of results.
Hand beveling without a miter box — an option for experienced users. The 45° angle is marked on the molding with a protractor, and the cut is made with a hacksaw along the mark. Requires steady hands and good judgment — even the slightest deviation from the line will result in a gap at the joint. For internal corners where walls meet at angles not exactly 90° (common in older homes), the cutting angle is adjusted by trial. Cut, fit, see a gap — cut a little more, try again. An iterative process requiring patience.Polyurethane moldingsCut with a regular hacksaw.
Joint Fitting: Sealing Gaps
Non-ideal wall angles — a reality in most rooms. Walls meet at angles other than 90°, such as 89° or 91°. Standard 45° beveling results in gaps. Solution — measure the actual angle with a protractor, calculate cutting angles (sum must equal measured angle), and bevel accordingly. For an 89° angle, cut one molding at 44.5°, the other also at 44.5°. For a 91° angle — both at 45.5°. Even half a degree results in a noticeable gap along the molding length.
On-site beveling — technique for complex cases. Attach the first molding suitable for the corner. Take the second molding, place it over the first (without gluing), and trace the contour of the first molding onto the second with a pencil — this is the cut line. Cut along the line, obtaining a profile that perfectly matches the first molding’s profile. The joint will be tight regardless of wall angle. This method is called "profile beveling" and requires a sharp knife or jigsaw, skill, but delivers an ideal result.
Filling gaps with acrylic caulk — final joint finishing. Even perfectly beveled moldings may have micro-gaps due to wall irregularities or thermal deformation. White acrylic caulk fills gaps, after drying it is sanded with fine-grit sandpaper and painted together with moldings. Application: extrude caulk in a thin bead into the gap, smooth with a wet finger or rubber putty knife, forming a seamless transition. Wipe away excess immediately with a damp cloth. After drying (24 hours), sand with 220-grit sandpaper.
Lengthwise Joints: Invisible Connections
Moldings of standard lengths 2 or 2.4 meters are often insufficient for long walls. Lengthwise joints of multiple moldings are required. The joint must be minimally visible — gaps, steps, profile misalignment are unacceptable. Ends of moldings to be joined are cut at 90° using a miter saw or in a miter box — the cut must be perfectly perpendicular, without bevels. A non-perpendicular cut will result in a gap on one side and overlap on the other.
Profile alignment is critical for joints. Even moldings from the same batch may slightly differ in width or relief height due to manufacturing characteristics. Before gluing, press ends together and check alignment. If a step is present — select another molding or trim one with a plane or knife to level it. A difference of 0.5–1 mm is noticeable to the eye, especially under side lighting. An ideal joint — moldings form a single continuous line.
Adhesive on the joint: Apply adhesive to the end of one molding, join with the second, press firmly for 30–60 seconds. The adhesive will bond the ends, and after drying, the joint will be strong. Remove any excess adhesive. Fill any micro-gap in the joint with acrylic caulk and smooth it. After painting, the joint will be almost invisible — a single seamless surface without visible edges. Place joints along the length in less noticeable areas — behind furniture, curtains, away from windows where primary light falls.
Painting Moldings: Final Finishing
Preparation for Painting: Priming and Spackling
Spackling joints — first stage of preparation. All molding joints — corner and lengthwise — must be spackled with acrylic spackle. Apply a thin layer with a putty knife, filling gaps and smoothing irregularities. After drying (2–4 hours), sand with 180–220 grit sandpaper, forming a smooth transition from molding to spackle. Goal — make joints visually invisible. Run your finger over — no steps, only a smooth surface.
Priming moldings improves paint adhesion, equalizes absorption, reduces paint consumption. Acrylic primer is applied with a brush or roller in one coat, dries in 2–4 hours. Polyurethane without primer absorbs paint unevenly — porous structure varies in different areas. This causes mottling visible under side lighting. A primed surface absorbs paint evenly, resulting in smooth, uniform paint application. For white moldings painted with white paint, primer is not mandatory but recommended for coating longevity.Wall moldingsMoldings are primed before painting.
Protect adjacent surfaces — walls, ceiling, furniture — from paint splatter. Apply painter’s tape along the molding on the wall, leaving a 1–2 mm gap from the molding edge. Tape must adhere tightly to prevent paint from seeping underneath. Floors and furniture are covered with polyethylene sheeting or heavy paper. Even careful work cannot eliminate accidental splatters or drips — better to prevent them than clean up later. After painting and drying, remove tape — the molding-to-wall edge will be clean and straight.
Paint Selection and Application Technique
Water-based acrylic paints — optimal choice for polyurethane moldings. Contain no aggressive solvents, safe for polyurethane, dry quickly (2–4 hours until tack-free), and have no strong odor. Glossy, semi-gloss, and matte finishes allow choosing desired effect. Gloss highlights relief, reflects light, creates a luxurious look — suitable for classic interiors. Matte paint provides a calm, velvety surface — appropriate for modern interiors. Semi-gloss — a compromise, combining light sheen with practicality.
Latex paints — premium option, more elastic and durable than basic acrylics. Form a washable surface resistant to abrasion, does not yellow over time. More expensive by 30–50%, but longer-lasting. For moldings in areas of potential contact — hallways, corridors, children’s rooms — latex paints are preferred. In bedrooms and living rooms, where moldings are under ceilings and rarely touched, standard acrylics suffice.
Brush painting technique: Use a brush half the width of the molding — for an 80 mm molding, use a 40 mm brush. Synthetic bristle brush for water-based paints, natural bristle for oil-based (though oil-based paints are not recommended for polyurethane). Dip brush lightly, wipe off excess at the can’s edge. Apply paint along the molding with long strokes, without heavy pressure. Fill relief grooves by running the brush’s edge along them. First coat — primer, diluted paint. Second coat after 4–6 hours — finish coat, undiluted paint for dense coverage.
Roller painting is possible for smooth moldings without relief. A small velvet roller 50–100 mm wide is rolled along the molding, applying paint evenly. Faster than brush, gives smooth finish without brush marks. But for relief moldings, roller is unsuitable — won’t paint grooves, leaving unpainted areas. Combination of roller for flat areas + brush for relief speeds up work while maintaining quality.
Decorative Techniques: Patina and Gold Leafing
Patina creates an effect of noble antiquity, emphasizing relief. Base layer — light paint (white, beige, light gray). After drying, apply patina — dark paint (brown, black, dark green) diluted or as a glaze. Patina is applied with a brush into relief grooves, immediately blended with a sponge or cloth, leaving dark shading in grooves and light base on raised areas. Effect — molding appears antique, with aged patina, relief emphasized by contrast. Suitable for Provence, country, vintage, and classic interiors.
Gold leafing transforms moldings into luxurious decor. Options: gold leaf — ultra-thin gold sheets glued onto adhesive base (complex technique requiring skill); patina — imitation gold from copper-zinc alloy (simpler than gold leaf, cheaper, but darkens over time); acrylic gold paint or spray (simplest option, accessible for DIY). Full gold leafing — for opulent interiors. Partial gold leafing on raised relief areas over white or colored base — more restrained option, highlighting details.Decorative Wall MoldingsGold trim creates palace-like luxury.
Painting in wall color or contrasting — a strategic choice. Wall-colored moldings blend into the background, emphasizing frame shapes but not the moldings themselves — effect is soft and subtle. Contrasting moldings — white on dark walls, black on light walls, colored — become an active decorative element, drawing attention and creating graphic impact. Choice depends on desired effect. Want to accent moldings — choose contrasting. Want subtle elegance — paint in wall color with slight tone difference.
Typical mistakes and how to avoid them
Errors in selection and planning
Mismatch of moldings to room scale — a common mistake among beginners. Wide, heavy moldings in a small room create a cramped feeling, visually reducing space. Narrow, modest moldings in a spacious living room disappear, failing to achieve desired effect. Rule: molding width should be proportional to ceiling height and wall area. For low rooms — modest profiles; for high rooms — expressive ones. Before purchase, measure the room, estimate proportions, consult a designer if needed.
Ignoring interior style leads to dissonance. Ornate moldings in a minimalist interior look out of place, disrupting the style concept. Strict geometric profiles in a baroque living room fade against lavish decor, not supporting overall style. Moldings must match interior language — classical for classical, modern for modern, ornate for historical styles. Doubt? Choose neutral profiled moldings — they are universal.
Insufficient material — an embarrassing error leading to delays. Calculate needs with 10-15% reserve for trim waste, cutting errors, possible defects. Moldings are cut at angles — scraps remain and cannot be reused. Mistake in angle trimming — need a new piece. Damaged packaging during transport — need replacement. Set aside reserve to avoid running to store for missing meters, risking inability to find the same batch (shade may differ).
Mounting errors
Adhering to unprepared surface — guarantee that moldings will peel off. Dust, peeling paint, loose plaster prevent adhesive bond. Adhesive holds molding to surface layer — if weak, it peels off with molding. Clean, prime, and if needed, re-plaster. Spend time on preparation — save on redoing.
Incorrect corner trimming — gaps at joints visible to naked eye. Molding cut not at 45°, but at 43° or 47° — joint won't align. Molding reversed in miter — angle becomes mirrored. Walls meet not at 90° — standard cut leaves gap. Solutions: use precise tools — miter saw, circular saw. Check molding orientation in miter before cutting. Measure actual wall angle, adjust cut angles. Try fit before adhering, adjust on site.
Excess glue squeezed out during pressing stains molding face and walls. Dried glue is hard to remove, visible under paint. Apply glue moderately — enough for full contact, but not excessive. If glue extrudes — immediately wipe with damp cloth before drying. Work with cloth and water nearby, periodically wipe hands — dirty hands in glue stain everything touched.
Painting errors
Painting without priming and spackling joints reveals all installation defects under paint. Gaps, steps, unevenness — paint doesn’t hide, but emphasizes these defects, especially with glossy finish and side lighting. Must spackle joints, sand, prime. Only then paint. Ideal preparation — foundation for ideal result.
Too thick paint layer in one pass causes drips, runs, slow drying, possible peeling. First layer must be thin, primer. Second layer after 4-6 hours — finish, also not thick, even. Two thin layers better than one thick — stronger, smoother, faster drying. Don’t rush to cover in one go — leave gaps between layers, let paint dry.
Painting over un-dried glue or spackle causes bubbles, peeling, stains. Glue dries 12-24 hours, spackle 2-4 hours, primer 2-4 hours. Don’t rush — let each layer fully dry. Check by touch — if wet or sticky — not dry. Paint only fully dry surfaces. Patience during preparation pays off in quality finish.
Care and longevity of polyurethane moldings
Regular cleaning
Dust settles on moldings, especially in relief grooves. Regular dry cleaning with soft brush, microfiber, or vacuum with soft attachment removes dust without damaging painted surface. Frequency — once every 1-2 months in living areas, more often in dusty (near road, construction outside window). White moldings show less dust than colored — practical choice for those who dislike frequent cleaning.
Wet cleaning as needed — 2-3 times per year sufficient for normal conditions. Use well-wrung soft cloth, dampened with water and small amount of mild detergent, wipe moldings. Do not use abrasive cleaners, solvents, alcohol — they damage paint and polyurethane. After wet cleaning, wipe dry. Acrylic and latex paint withstands wet cleaning without damage if paint is quality and fully dry (minimum one week after painting).
Local cleaning of stains — fingerprints, stains — with soft eraser or melamine sponge. Wipe stains with light movements, not pressing hard. Melamine sponge works as fine abrasive, removing thin layer of dirt without damaging paint. Do not use on glossy surfaces — leaves matte spot. For gloss — only damp cloth with detergent.
Repair of damage
Scratches and chips on painted moldings are touched up with paint of same color. If paint residue remains after painting — use it. If not — select closest shade, mix paint at hardware store, test shade on white surface under daylight. Paint can samples on packaging — compare with molding. Later, under side lighting, shade differences may be visible, but under frontal lighting, not noticeable. Use fine brush, touching up only damaged area — paint dries, additional layers blend into single mask covering scratch.
Chips and dents require shape restoration. Chipped area is sanded, dirt removed, loose polyurethane pieces cleaned. Acrylic or polyurethane-specific spackle fills chip cavity, leveled with putty knife to molding surface level. After drying (2-4 hours), sanded with fine sandpaper (grit 220), forming smooth transition from spackle to molding. Primed and painted. Result — chip is invisible, surface intact.Moldings for walls to buyQuality ones withstand maintenance for years.
Molding detachment from wall occurs due to weak base, improper mounting, house settling, vibrations. By touch — molding bends, makes hollow sound, squeaks under pressure. Remove detached fragment, clean old glue from wall and back of molding, clean, prime. Apply fresh glue more generously than initial mounting, press, secure with tape for 24 hours. If base damaged, re-plaster, prime before re-mounting.
Cracks in joints occur due to material expansion/contraction from temperature changes, house settling, incorrect corner trimming. Expand crack with knife 3-5 mm, remove dust, fill with acrylic sealant or spackle, smooth with wet finger. After drying, sand and touch up. If crack deep — use special polyurethane repair compound, more flexible and durable than regular spackle.Polyurethane moldingsRequire proper repair for longevity.
Yellowing of white moldings from UV — inevitable process, slowed by paint quality. Paints with UV protection retain whiteness 5-7 years, cheap ones yellow in 2-3 years on sunny side. Corrected by repainting with quality paint with UV filter. Before repainting, wash moldings, degrease, lightly sand with sandpaper for adhesion. One-two layers of paint restore whiteness.
Practical tips and final recommendations
Work under favorable conditions — room temperature 18-25°C, humidity 40-60%. Below 10°C, glue and paint dry slowly, poorly bond. Above 80% humidity, paint takes long to dry, may condense. In cold season, use space heater or humidifier as needed.
Don’t rush. Quality molding installation — patience, attention to detail, following technology. Rushing leads to errors that take longer to fix than to do correctly from the start. Allocate 2-3 weekend days for project — sufficient for medium-sized room.
CompanySTAVROSOffers full assortmentof polyurethane moldingsFor any interiors — from strict minimalist profiles to ornate classical forms. European manufacturing quality, precise geometry, durable material, reasonable prices make STAVROS products optimal choice.buy moldingsAvailable with delivery across Russia; technical support helps select the right profile and calculate material requirements.
Interior Transformationwall moldingsA project accessible to everyone. The result will exceed expectations — flat, dull walls will gain architectural depth, coziness, and individuality. A typical apartment will transform into an interior that delights the eye and inspires pride. Moldings combine classical art with modern technology, turning a home into a space of beauty and comfort.