


Article Contents:
- What is English paneling - wall moldings as decorative frames
- Where did this technique come from
- What English paneling creates in a space
- Styles where English paneling works flawlessly
- Wooden baseboard + wall moldings - a unified decorative system
- How the baseboard becomes part of the paneling system
- Material unity: why wood species matters
- Profile unity: the geometry of connection
- How to mark and position wall moldings - spacing and height
- Divider line height - where paneling begins
- Number of frames on the wall - rhythm and proportion
- Indents from corners and from the baseboard
- Step-by-step marking
- Wooden molding vs polyurethane - what to glue on the wall
- Polyurethane molding: lightness and drawbacks
- Solid wood molding: investment and character
- Which profile to choose
- How to hide power cables in wooden trim
- Installing corner blocks at molding intersections
- Two ways to organize corner joints
- Installing corner blocks: step by step
- Which adhesive to use
- Painting English paneling in two colors - lower and upper wall
- Logic of two-tone solutions
- Practice of choosing tone combinations
- Painting order
- Wooden moldings without paint - a separate story
- Installing English paneling from wooden moldings - complete sequence
- Wall Preparation
- Tools
- Materials
- Installation sequence
- Decorative elements inside frames - how to enhance the effect
- Carved overlays as accents
- Wallpaper or paint inside the frame
- Mirrors and panels inside frames
- FAQ - answers to popular questions
- About the Company STAVROS

There is a word in interior design — 'feeling'. Not a description, not technical parameters, but precisely the living sensation of a space that arises at first glance. A room can be absolutely correct in proportions, with fresh finishes, good furniture — and yet remain empty in character. Something is off. And in another room, with the same square footage and a similar budget, the walls literally speak to you — they have rhythm, depth, history. The secret often lies in two things:Wooden baseboardand moldings that create a classic English panel on the walls.
The English panel is not the luxury of palace halls nor a relic of the Victorian era. It is a wall decoration technique accessible today to anyone willing to spend a few days on thoughtful work. And the result — a space with architectural character that cannot be achieved with paint or wallpaper alone.
In this article — everything: what an English panel is, how to mark moldings, which profile to choose, how to coordinatewooden moldingwith the baseboard, how to properly organize corner joints, and why to paint the bottom and top of the wall in different tones. This is a practical guide for those who want to do it truly beautifully — and once and for all.


What is an English panel — moldings on the wall as decorative frames
The name 'English panel' has taken root in the Russian-speaking design community, although the technique itself comes from classical European architecture. Its essence is simple: the wall is divided into two tiers by a horizontal line (typically at a height of 90–110 cm from the floor), and the lower and upper parts are decorated with moldings — wooden strips forming rectangular frame-like panels.
The lower part of the wall, enclosed in moldings — is the 'field' of the panel, the plinth zone. The upper part remains either free or is also decorated, but differently — with ornament, strips, a neutral background. The boundary between them is emphasized either by a wide horizontal strip or by the same molding laid horizontally.


Where did this technique come from
The roots are in the tradition of boiserie: wooden wall paneling used in French castles and English mansions of the 17th–18th centuries. True boiserie is expensive: solid wood, hand carving, years of work by cabinetmakers. The English panel made of moldings is its democratic interpretation. Instead of solid wood paneling — frames made ofwooden molding, glued onto a painted wall. The effect — comparable. The cost — many times less.
Our factory also produces:


What the English panel creates in a space
— Visual depth: molding frames create a play of light and shadow, the wall ceases to be flat.
— Architectural structure: the room acquires a 'skeleton', becomes clearly organized.
— Scale and proportion: frames divide the wall into readable modules, the space ceases to be amorphous.
— A sense of completeness: when the baseboard and moldings are of the same material and in the same tone — the interior appears professionally designed.
Get Consultation
Styles in which the English panel works flawlessly
| Style | Molding character | Color solution |
|---|---|---|
| Neoclassical | Profile with bevel, 50–70 mm | White molding + gray-beige field |
| Scandinavian | Thin rectangular, 20–30 mm | All white, monochrome |
| Modern Classic | Medium profile, 40–60 mm | Gray molding + darker field |
| Loft | Coarse rectangular, 30–40 mm | Dark oak + industrial tones |
| Provence | Rounded profile | Cream + dusty rose color |
Wooden baseboard + wall moldings — a unified decorative system
The most common mistake when creating an English panel is treating moldings andFloor wooden skirtingas two independent elements. They are purchased separately, installed without coordination, painted at different times. The result — two correct elements that don't communicate with each other.
Meanwhile, it is precisely the interconnection of the baseboard and moldings that creates a unified architectural system. The baseboard is the foundation from which the system 'grows' upward. Moldings are the continuation of its logic on the vertical plane of the wall. When they are made from the same wood species, in the same tone, with coordinated profiles — the wall and floor are perceived as a single whole.
How the baseboard becomes part of the panel system
Technically, the lower horizontal moldings of English panel frames are mounted flush with the top edge of the baseboard or with a small offset of 10–15 mm. The first option — a tight joint: the molding seems to grow directly from the baseboard, the system looks monolithic. The second option creates a thin dark shadow between the baseboard and the lower molding of the frame — an exquisite detail, noticeable only upon close inspection.
In both cases, the baseboard should be taller than the width of the molding. Ifwooden moldinghas a width of 40 mm, the baseboard should be no less than 70–80 mm. This provides a visual 'foundation' for the system — the lower tier is more substantial than the upper one.
Unity of material: why wood species matters
Wooden trimfor a unified system — baseboard, moldings, horizontal divider — must be from the same wood species. Oak with oak, ash with ash. The reason is not only aesthetic: different species, even of the same tone, behave differently under changes in humidity, meaning they can create different gaps at joints during seasonal changes.
Practically: order the baseboard and moldings from the same manufacturer, from the same batch. Then the tone will match perfectly, without 'almost the same' discrepancies.
Unity of profile: the geometry of connection
The profiles of the baseboard and molding should echo each other — not necessarily identical, but share a common 'language'. Baseboard with a bevel + molding with a bevel: both speak the language of right angles and cuts. Baseboard with a rounded top edge + molding with a rounding: both are soft, organic.
Mixing geometric principles — right angles on the baseboard and a rounded molding profile — creates a stylistic contradiction that, on a sensory level, reads as 'something is off,' even if the buyer can't articulate exactly what.
How to mark and position moldings on the wall — spacing and height
Marking is the most intellectually intensive stage. There is no single correct answer here, but there are principles whose violation is immediately noticeable.
Height of the dividing line — where the panel begins
Traditionally, the horizontal line dividing the lower panel zone and the upper part of the wall is at one-third of the wall height from the floor. For a room height of 2.7 m — that's approximately 90 cm. For 3.0 m — 100 cm. This is not a random number: it corresponds to the height of a standard sofa back and the height of an adult's palm. Visually, the panel 'protects' the lower part of the wall — the part touched by hands, moved by furniture — and leaves the upper part light and open.
You can lower the dividing line to 75–80 cm — resulting in a 'lower,' more squat panel that works well in rooms with low ceilings. You can raise it to 120 cm — then the panel occupies almost half the wall and takes on a more monumental character.
Number of frames on the wall — rhythm and proportion
The number of frames is determined by the width of the wall and the principle of proportions. The optimal width for one frame is 40–70 cm. A long wall of 4.5 m yields 5 to 7 frames. Wider frames look heavier and clumsier, narrower ones look fussier.
Frames should not be square: a rectangle with a width-to-height ratio of approximately 2:3 (width less than height) is the optimal proportion for the lower panel zone. This visually 'elongates' the frame, adding lightness to the wall.
Indents from corners and from the baseboard
The distance from the outermost frames to the internal corners of the room should be at least 8–12 cm. A frame 'stuck' flush to a corner looks cramped. The distance from the lower molding of the frame to the top edge of the baseboard — 0 (flush) or 10–15 mm (thin gap). The distance between frames (intercolumniation) should be the same for all frames on the wall.
Marking step by step
-
Mark a horizontal line at the height of the divider (laser level or water level).
-
Divide the length of the wall into equal sections, taking into account indents from corners.
-
Determine the width of each frame and the distance between frames.
-
Mark the internal dimensions of each frame (not the external ones — the internal ones, where the 'field' will be).
-
Draw all lines with a pencil, check the symmetry.
-
Cut a template of one frame from cardboard and apply it to the wall — assess the proportion in real life.
Wooden molding vs polyurethane molding — what to glue on the wall
This is the most frequently asked question. The market offers two fundamentally different solutions:wooden moldingsolid wood (oak, ash, beech) and polyurethane molding. Each has its own advantages and limitations. Let's break it down honestly.
Polyurethane molding: lightness and drawbacks
Polyurethane is lightweight, can be cut with a knife, and adheres without extensive surface preparation. It costs significantly less than solid wood. A wide selection of profiles — from smooth to richly decorated. At first glance — the perfect choice.
The drawbacks become apparent upon closer inspection and during use. Under direct light (sunlight or directional lighting), polyurethane 'glows' differently than wood — its surface is plastic and lacks depth. Upon mechanical contact (bumping, hitting), polyurethane dents, crumbles, and cannot be repaired. Painting is the only finishing option; wood staining doesn't work: polyurethane does not absorb stain.
Conclusion: polyurethane is suitable where cost savings are needed and painting in white or a light tone is planned, without claims to durability.
Solid wood molding: investment and character
wooden moldingmade of oak, ash, or beech — this is a different level. The living wood grain is visible under any lighting. A surface that accepts oil, varnish, and stain — complete freedom in finishing. In case of mechanical damage — it can be repaired by sanding. Service life — decades.
Wooden molding is heavier than polyurethane: it requires more thorough surface preparation and reliable adhesive (polyurethane or epoxy mounting adhesive). But the result is molding that won't budge in a year or even twenty years.
Comparison by key parameters:
| Parameter | Wooden Molding | Polyurethane Molding |
|---|---|---|
| Appearance | Living texture | Plastic surface |
| Repair | Sanding, touch-up painting | Practically impossible |
| Finishing options | Oil, varnish, stain, paint | Paint only |
| Durability | 30–50 years | 10–15 years |
| Weight | Medium | Lightweight |
| Installation | Requires preparation | Simpler |
| Cost | Higher | Below |
Which profile to choose
For English paneling in a modern interior, three types of profiles are optimal:
Flat rectangular (20–30 mm width, 8–12 mm thickness) — minimalism, Scandinavian style, loft. Clean geometry without embellishments. Works only with perfectly straight walls.
Profile with one bevel (30–50 mm) — modern classic. The bevel creates a play of shadow without excessive decorativeness. A universal choice.
Profile with a reverse slope (50–70 mm) — neoclassical. A more complex shadow, expressive plasticity. Requires a ceiling height of at least 2.8 m.
STAVROS company offers over 40 profiles of wooden moldings — from the concise rectangular MLD-001 starting at 210 rubles per linear meter to complex architectural profiles MLD-060 with rich plasticity, allowing you to find a solution for any style and budget.
How to hide a power cable in wooden molding
A parallel topic that cannot be overlooked. When installing English paneling in a living room or bedroom, the question of wiring inevitably arises—for lighting moldings, for floor outlets, for wall sconces.
Wooden trimWith a cable channel—a baseboard or horizontal molding with a groove on the back side—allows hiding the power cable so that it is completely invisible from the outside. The groove is made along the entire length of the baseboard with a router—either at the factory (when ordering) or independently.
Standard groove: 15×15 mm or 20×20 mm. It accommodates a cable with a cross-section of up to 3×2.5 mm². This is sufficient for an outlet or light fixture.
When creating English paneling with lighting—an LED strip is placed in the groove of the horizontal divider molding, which simultaneously serves as both a decorative element and a cable channel. The wire from the controller runs down the vertical frame molding and is hidden in the baseboard. No visible wires—only smooth, soft light along the dividing line.
Installation of corner blocks at molding intersections
This is one of the most technically demanding moments. The intersection of horizontal and vertical molding is a joint that can make or break the entire appearance of English paneling. An imprecise joint here is noticeable at first glance.
Two ways to organize a corner joint
Method 1—45° miter joint. Both moldings are cut at a 45° angle on the end, tightly fitting together at the frame corner. Looks elegant but requires perfect cutting precision (tolerance ±0.1°) and absolutely straight walls. On uneven walls, a gap in the corner joint is inevitable.
Method 2—corner block. A decorative corner block—a square overlay—is installed at molding intersections, into which the horizontal and vertical strips butt. The moldings have straight ends, significantly simplifying cutting. The corner block conceals all misalignments. This method is used in English mansions—where the technique's name originates.
Corner blocks are made from the same wood species as the moldings. Block size: slightly larger than the molding width on each side—if the molding is 40 mm, the block should be 50×50 mm or 55×55 mm. This creates a 'lug'—a protrusion that accents the corner and visually emphasizes the frame structure.
Installation of corner blocks: step-by-step
-
First, all corner blocks are mounted at marked positions.
-
Then, horizontal moldings are mounted between the blocks—with straight ends, precisely sized between the inner edges of the blocks.
-
Vertical moldings are mounted last—similarly, between the top and bottom blocks.
-
All joints are sealed with acrylic caulk matching the finish paint color.
-
After drying—final sanding of joints with fine P320 sandpaper.
Which adhesive to use
Forwooden moldingOn painted or plastered walls—polyurethane construction adhesive (Moment Montage, Titebond, Soudal). It supports the weight of wood, is flexible (compensates for minor movement due to humidity changes), and does not damage the substrate.
Additional fastening with finish nails 1.2×40 mm every 40–50 cm—mandatory for moldings wider than 40 mm and for corner blocks. Nail heads are countersunk with a nail set and filled with putty.
Painting English paneling in two colors—bottom and top of the wall
Two-tone wall painting—the final touch that transforms good English paneling into flawless. This is not just a decorative technique: a well-chosen combination of tones creates a spatial effect unattainable with single-color painting.
Logic of the two-tone solution
Lower zone (paneling, 'field' of frames)—darker, richer tone. Upper zone (above the dividing line)—lighter, neutral tone. This is an archetypal principle rooted in nature: the sky is lighter than the earth, the ceiling is lighter than the floor. An interior following this logic feels stable and harmonious.
Moldings and baseboard in two-tone painting can be:
—In the tone of the upper zone (light): moldings stand out from the dark lower background as relief, maximum expressiveness.
—In a tone between upper and lower (medium tone): moldings unite both tiers, transition becomes smooth.
—White or cream: a classic that works with any combination of tones.
—In natural wood color (stain without paint): wood as an independent material accent on a painted background.
Practice of selecting tone combinations
The difference between upper and lower tones should not be too great. The lower tone is 2–3 steps darker than the upper tone on a fan deck catalog (NCS, RAL, Farrow & Ball). If the difference is greater—the wall becomes 'two-layered,' creating a sense of separation between tiers.
Several working combinations:
| Lower tone (panel) | Upper tone (background) | Moldings | Style |
|---|---|---|---|
| Farrow & Ball Purbeck Stone | Farrow & Ball White Tie | White | Modern Classic |
| RAL 7044 (silk gray) | RAL 9010 (white) | Natural oak | Scandinavian |
| RAL 7006 (beige-gray) | White | Bleached oak | Minimalism |
| Dark blue (Navy) | Light gray | White | Neoclassical |
| Dusty rose color | White | Cream | Provence |
Painting order
Professional order matters — it affects the accuracy of the color boundary:
-
First, the upper zone is painted — completely, without masking.
-
After drying (minimum 24 hours), the dividing line and moldings are masked with painter's tape.
-
The lower zone is painted — 2 coats.
-
The tape is removed immediately after the second coat, while the paint is still wet — this ensures a clean boundary.
-
Moldings are painted last — with a thin brush, carefully.
Error: painting moldings before the final wall painting. In this case, a step of different tones inevitably appears at the junction of the molding and the wall.
Unpainted wooden moldings — a separate story
Ifwooden moldingIf oak or ash moldings are planned to be left in their natural tone — without painting, only with oil or varnish — then the two-tone wall painting takes on a different character. The molding becomes a third "tone" — warm wood, between the two painted zones. This is a more complex solution, requiring precise matching of paint tones to the wood tone, but the result is an interior with tangible materiality, where the wood resonates to its full potential.
Installation of English paneling from wooden moldings — complete sequence
Let's systematize everything described above into a single step-by-step algorithm.
Wall Preparation
Walls must be puttied, sanded, and primed. Wooden molding is mounted on a surface with roughness not exceeding Ra 3.2 — otherwise, the adhesive will apply unevenly. Permissible deviation of the wall from vertical and horizontal — no more than 3 mm per 2 m. With greater deviation, thin wedges are placed under the molding or compensated by the thickness of the adhesive.
Tools
-
Laser level with linear projector (not point)
-
Miter saw with 45° angle cutting function
-
Notched trowel for applying adhesive
-
Finish nail gun (brad nailer) or hammer with nail set
-
Painter's tape Tesa or equivalent 30+ mm
-
Caulking gun
Materials
-
Wooden moldingsRequired profiles + 10% reserve
-
Corner blocks (when choosing this joining method)
-
Polyurethane construction adhesive
-
Finish nails 1.2×40 mm
-
Acrylic sealant in the color of the finish paint
-
Wood filler for sealing nail heads
Installation sequence
-
Marking: laser level, pencil, all measurements from 'zero' (top edge of the baseboard).
-
Installation of corner blocks — using adhesive + 2 nails.
-
Installation of horizontal dividing molding around the entire perimeter of the panel zone.
-
Installation of lower horizontal frame moldings (adjacent to the baseboard or aligned with its top edge).
-
Installation of vertical frame moldings.
-
Installation of upper horizontal frame moldings.
-
Geometry check — all angles 90°, all horizontals strictly level.
-
Sealing of all joints with cleaning.
-
Sanding and finish painting.
Decorative elements inside frames — how to enhance the effect
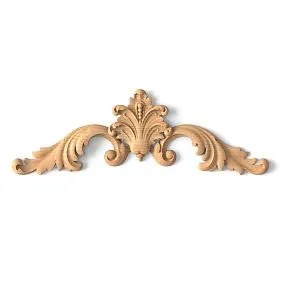
English panel with empty frame 'field' — basic option. A more complex approach — filling the inner field with additionaldecorative elementswooden ones.
Carved overlays as accents
Carved wooden rosettes, diamonds, cartouches are mounted in the center of each frame or at its corners. They create accent points within the geometric structure. With monochrome painting (all white), such overlays work only through relief — shadow and light reveal their shape. With wood tinting, they act as warm wooden accents against a painted background.
STAVROS offers a wide range of decorative carved wooden overlays andwooden picture framesfor decorating the inner field of frames — made of oak, beech, with profiles for framing paintings, mirrors, and decorative panels.
Wallpaper or paint inside the frame
The frame field can be covered with wallpaper or decorative fabric — while the rest of the wall is painted. This creates a textural contrast: smooth paint outside the frame and a structured surface inside. In this case, the molding literally acts as a frame — it delimits and accentuates the 'canvas' inside.
Mirrors and panels inside frames
In a bedroom or living room, a mirror fitted to the size of an English panel frame is a strong design technique. The molding becomes the mirror's frame, the baseboard — its lower base. Several mirrors in the rhythm of frames across the entire wall — a powerful spatial effect.
FAQ — answers to popular questions
Can English paneling be installed in a rental apartment?
Yes, if using high-load double-sided mounting tape (3M Command) instead of adhesive and nails. When moving out, the moldings can be removed without damaging the walls. Downside: such installation is less reliable, suitable only for lightweight moldings (polyurethane or thin wooden slats up to 15×25 mm).
Do I need to remove the baseboard before installing moldings?
No. Moldings are installed over the existing baseboard. The lower horizontal frame moldings adhere to the top edge of the baseboard. The only case when the baseboard needs to be removed is if it is plastic and planned to be replaced with a wooden one as part of a unified project.
How much molding is needed for a 15 sq. m room?
Room 3×5 m, ceiling height 2.7 m. Perimeter — 16 linear m (baseboard). Paneling on two long walls (5 m each) with 4 frames on each: one frame 50 cm × 80 cm requires 260 cm of molding. 8 frames × 260 cm = 20.8 linear m + horizontal divider 2×500 = 10 linear m. Total molding: about 31 linear m + 10% reserve = 34 linear m.
Do you need a professional to install English paneling?
Layout and installation require care and a good eye, but no special skills. Critical tools: a miter saw (rental costs 500–800 rubles/day) and a laser level. Without these tools, it's practically impossible to do a quality job. With the tools, it's a 1–2 day job for a 15–20 sq. m room.
How to care for wooden moldings after installation?
Dry cleaning with a soft brush. Damp wiping with a well-wrung cloth — without excessive wetting. Every 5–7 years with intensive use — renew the finish. Local scratches are sanded with P320 and restored by spot application of oil or varnish.
What is better — Wooden molding for wall frames or molding?
Functionally — the same thing, the difference is only in the profile. Picture rail molding is a term from frame production (for pictures and mirrors), usually a thinner and more elegant profile. Molding is a term from architectural finishing, can be more massive and complex in shape. For English paneling, both are suitable — the choice depends on scale and style.
Can English paneling be done on drywall?
Yes. Drywall is a good base: flat, even, holds adhesive well. For moldings weighing up to 1 kg/linear meter, mounting adhesive is sufficient. Moldings heavier than 1 kg/linear meter are additionally secured with 6×50 mm toggle bolts.
About the company STAVROS
Wooden English paneling is a system where every element must be coordinated with the others. Baseboard, moldings, corner blocks, decorative overlays — all from the same wood species, same tone, same collection. This is exactly the approach implemented by the company STAVROS.
STAVROS — a Russian manufacturer of the full range wooden trim from solid oak, ash, and beech. In the catalog — over 40 profiles of wooden moldings, a wide selection of floor baseboards of different heights, ceiling cornices, door casings, corner blocks, and carved decorative overlays for decorating the inner field of frames. All products are manufactured on modern equipment with a tolerance of ±0.1 mm, from certified raw materials with a moisture content of 8–12%.
STAVROS fulfills complete orders for a specific room: specialists calculate the required quantity of each item according to the plan, select profiles in a unified stylistic key, organize delivery from a single batch of wood — to guarantee absolute tonal unity.
Create English paneling that will last for decades — with wooden moldings STAVROS, made honestly and conscientiously.


