Article Contents:
- What is a beam ceiling?
- Advantages of a beam ceiling
- 1. Aesthetics and style
- 2. Moisture resistance
- 3. Ease of installation
- 4. Ability to hide utilities
- 5. Sound insulation
- 1. Selection and choice of materials
- 2. Required tools
- 3. Room layout
- Step 1: Installing a frame from beams
- Step 2: Installing guide angles
- Step 3: Installing beams
- Step 4: Installing baseboards
- 1. Natural style with wooden elements
- 2. Geometric accents using moldings
- 3. Decorative framing with cornices and baseboards
- 4. Contrasting paint for accent creation
- 5. Lighting to enhance the effect
- 1. Decorating the ceiling using moldings
- 2. Finishing and structuring the ceiling with cornices
- 3. Supporting the structure and style using wooden angles
- 4. Natural wooden beams and beams: texture and color for a unique design
- 5. Finishing the ceiling design with ceiling trim


What is a suspended ceiling?
A suspended ceiling is a popular system of suspended ceilings consisting of long, narrow strips that are attached to a frame and arranged parallel to each other. This type of ceiling became well-known due to the combination of functionality and aesthetics, and it excels at concealing imperfections and hiding various utilities such as wires and pipes. Suspended ceilings can be made from various materials, including wood, aluminum, and PVC, allowing them to be adapted to different interior styles.
In the company Stavros, you will find high-quality Wooden planks, strips, corners, and also Baseboards, suitable for creating a suspended ceiling of any shape and style. Thanks to these elements, you can easily assemble a ceiling structure that will become a stylish accent in the interior.


Advantages of a suspended ceiling
Our factory also produces:


1. Aesthetics and style
Suspended ceilings give a room a modern and neat appearance. The variety of finishes and color options allows them to be easily adapted to any interior. Light wooden strips create a sense of spaciousness and airiness, while darker tones add coziness and warmth. You can also combine strips and Moldings to create a unique design that highlights the room's individual style.
Get Consultation
2. Moisture resistance
For bathrooms and kitchens, aluminum and plastic suspended ceiling options are especially suitable, as they are resistant to moisture. However, with the use of baseboards and proper treatment of wooden strips, you can achieve excellent results even in rooms with high humidity.
3. Ease of installation
Suspended ceilings can be easily installed by yourself. Stavros products — including strips, strips, corners, and trim — are designed for convenient installation, allowing you to perform the installation without hiring specialists. This process does not require special skills or specialized equipment, so even without much experience in construction work, you can do the installation.
4. Ability to hide utilities
A suspended ceiling allows you to neatly hide utilities such as wires and pipes, maintaining the cleanliness and neatness of the interior. The space between the suspended ceiling and the main ceiling can be used to run ventilation or electrical systems. Thus, installing a suspended ceiling is a universal solution for residential and commercial spaces where it is important to create a unified style without visible technical elements.
5. Sound insulation
Some wooden strips and ceiling trim have sound-insulating properties, making them an excellent choice for living rooms. They will help reduce noise levels, creating a more comfortable and quiet space, which is especially important for family homes and apartments in multi-unit buildings.
Preparing for installing a suspended ceiling yourself
Now that we have considered the main advantages, you can proceed to prepare for installing a suspended ceiling. Using Stavros materials — such as wooden strips, strips, corners, and trim — you will be able to create a stylish and functional ceiling that will delight you and your guests.
Preparing for installing a suspended ceiling yourself
Before beginning the installation of a suspended ceiling, it is necessary to conduct thorough preparation to ensure the installation process goes smoothly. Proper selection of materials, tools, and planning of work stages will allow you to create a durable and aesthetically pleasing ceiling.
1. Selection and choice of materials
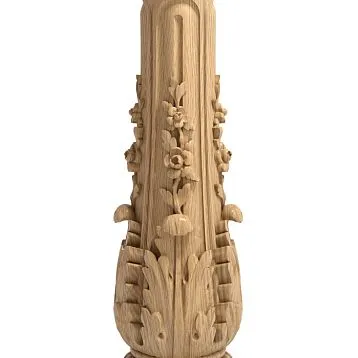
. These components help create a stable structure and decorate the interior. Wooden planks, strips, corners и BaseboardsWooden strips are suitable for creating a classic and cozy look. They can be made in natural tones or painted in the desired color. Wood gives the interior warmth and naturalness.
-
Wooden planks are suitable for creating a classic and cozy look. They can be left in natural tones or painted in the desired color. Wood adds warmth and naturalness to the interior.
-
Strips serve as the base for installing strips. They are mounted on walls and ceilings, forming a frame to which strips are attached.
-
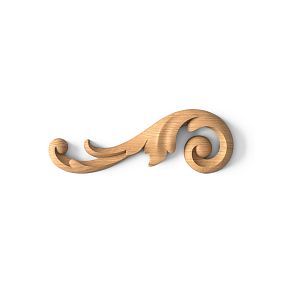
Corners provide secure attachment of strips to the frame and allow for creating various shapes. They help properly connect strips, ensuring the longevity of the structure.
-
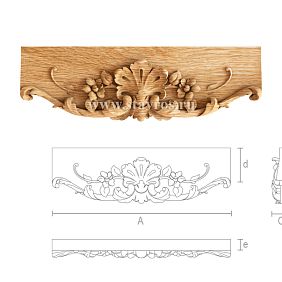
Ceiling trim is used to conceal joints between the ceiling and walls, giving a finished look. Stavros ceiling trim will perfectly complete the composition and add neatness to the interior.
2. Required tools
To install a board ceiling, you will need the following tools:
-
Tape measure and level: help make accurate measurements and install the ceiling evenly.
-
Drill and screwdriver: needed to fasten the frame to walls and ceiling.
-
Jigsaw or handsaw: for cutting boards and beams to the required size.
-
Pencil and marker: for marking.
3. Room marking
Before beginning installation, it is important to mark the room. This will help determine the height at which the board ceiling will be installed and allow for accurate calculation of materials. Start by determining the level of the future ceiling using a level, and draw a horizontal line around the perimeter of the walls. This line will serve as a reference for installing corner brackets and beams that will support the entire structure.
Step-by-step guide to installing a board ceiling yourself
Step 1: Installing beam frame
-
Start with beams, which will serve as the base for attaching boards. Secure the beams around the ceiling perimeter along the marking, using screws and anchors.
-
Ensure the beams are installed evenly, using the level as a guide. This is important to ensure the ceiling is installed without misalignment and looks neat.
Step 2: Installing guide brackets
Next, install brackets around the entire perimeter of the room. They will serve as guides for the boards and allow for tight panel-to-panel fitting.
-
Start with one corner and continue installing brackets around the ceiling perimeter. Secure the brackets with screws, maintaining the required level.
-
If needed to connect two brackets, cut them at a 45-degree angle to ensure a neat and inconspicuous joint.
Step 3: Installing boards
Now you can proceed to install wooden boards, which will give the ceiling an attractive look. Start laying boards from one edge, inserting them into guide brackets and securing them to beams.
-
Insert the first board into the bracket and secure it to the frame using screws.
-
Continue laying subsequent boards, fitting them tightly together to avoid gaps.
-
If necessary, trim the boards to fit perfectly into the space.
Step 4: Installing ceiling trim
To achieve a finished look, install ceiling trim along the junctions between ceiling and walls. This will help conceal joints and give the ceiling a neat, finished appearance.
-
Attach the trim around the entire ceiling perimeter using adhesive or small nails.
-
If desired, you can paint the trim or leave it natural to match the color of the boards.
Final interior look
Creating a board ceiling yourself using Stavros products allows you to achieve an aesthetic and functional result. Thanks to high-quality materials such as wooden boards, beams, brackets, and ceiling trim, your ceiling will be durable and stylish, harmoniously blending into the interior.
Board ceiling DIY: Design options and decorative possibilities
After completing the main installation of the plank ceiling, you have the opportunity to showcase creativity and give the room a unique style by using various decorative elements. Thanks to the wide range of products from Stavros — including wooden planks, beams, corners, moldings, and ceiling skirting — you can create an original ceiling that matches any interior design.
1. Natural style with wooden elements
If you are drawn to an ecological and natural style, use wooden planks and beams in natural tones that will highlight the natural texture of wood and create a cozy atmosphere. The natural style is especially suitable for country houses and rooms decorated in Scandinavian or rustic styles. To enhance the effect, you can use corners made of natural woodwhich will create a harmonious look.
-
Idea: Use wooden planks of different widths and shades to create a dynamic yet harmonious pattern on the ceiling. This approach will add depth and layering to the interior, especially if the planks and beams vary in color and texture.
2. Geometric accents using moldings
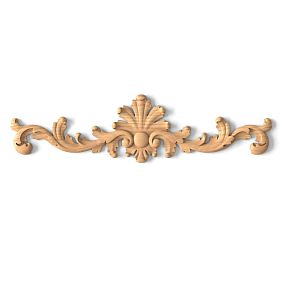
Geometric shapes on the ceiling become a striking accent in modern interiors. Moldings from Stavros are ideal for creating such compositions, especially when combined with wooden elements. Moldings can be placed parallel to the planks or form unique geometric patterns, highlighting specific areas on the ceiling. You can place moldings around light fixtures to create a kind of 'frame' and emphasize the lighting fixtures.
-
Idea: Try creating a diamond or checkered pattern by alternating moldings with wooden planks. This will add volume to the room and emphasize modern lines, which will look especially good in minimalist and contemporary interiors.
3. Decorative framing with cornices and skirting
Cornices and ceiling skirting will help give your ceiling a finished look and make the transition between walls and ceiling smoother. Cornices and skirting can be used as standalone elements or combined with planks and moldings to create decorative frames. Ceiling cornices will add elegance and coziness, especially if you choose models with classic patterns or simple, clean lines for more modern styles.
-
Idea: Place cornices and skirting along the entire perimeter of the ceiling to give the room structure. This will create a layered effect and add an architectural accent, which will work well for rooms in neoclassical or modern styles.
4. Contrast painting to create accents
Painting the plank ceiling in contrasting colors is an excellent way to add expressiveness to the interior. Wooden planks can be painted in light or dark colors that contrast with the overall room tone. Painting individual planks or alternating them will allow you to create a unique design while preserving the wood texture and stylish appearance.
-
Idea: Choose a shade that complements the main color of the walls or floor, and paint several planks to create a striped or block effect on the ceiling. This will make the interior more dynamic and add individuality. For example, light planks against dark walls will create a modern atmosphere, while dark planks will add depth and create a cozy feeling.
5. Lighting to enhance the effect
Using built-in lighting is one of the popular methods of decorating a plank ceiling, adding soft, diffused lighting to the room and highlighting the wood texture. Lighting options include recessed spotlights installed in the space between planks or LED strips running along the edges of the plank ceiling. Lighting also allows you to highlight specific areas, drawing attention to the central part of the room or, conversely, to its perimeter.
-
Idea: Place LED strips along the edges of the ceiling and complement the composition with recessed spotlights positioned between the planks. This will create a floating ceiling effect and make the interior feel more airy and light.
Decorating a plank ceiling with Stavros products: create a unique style
Stavros products offer unlimited possibilities not only for creating a strong and quality plank ceiling but also for its refined decoration. The company’s range includes elements that will help transform a standard ceiling into a work of art and adapt it to any interior style, from minimalism to classic. Let’s examine in detail how you can give your ceiling individuality using Stavros products, such as moldings, cornices, corners, wooden planks, beams, and ceiling skirting.
1. Decorating the ceiling using moldings
Moldings from Stavros are ideal decorative elements for creating stylish accents on the ceiling. They can be used to decorate various ceiling zones, both central and perimeter. Moldings help add depth and structure, especially when used in combination with planks to create complex geometric or linear patterns.
-
Applying moldings in a classic style: Moldings can be placed along the planks or combined with cornices, which will emphasize the elegance and luxury of a classic interior.
-
Moldings in minimalism and Scandinavian style: For modern interiors, moldings can also be used to create clean lines that highlight the simplicity and style of the interior, adding a visual accent to the ceiling.
2. Finishing and structuring the ceiling with cornices
Cornices play a key role in the decorative finish of the ceiling, making it harmonious and complete. Cornices by Stavros Add elegance to the ceiling and help conceal joints, giving the structure a smooth transition to the walls. Cornices come in various shapes and designs, from strict and minimalist to elegant and detailed, allowing their use in different styles.
-
Cornices for modern interiors: Straight and minimalist cornices create a clean, uncluttered look, especially in loft or high-tech styles.
-
Cornices for neoclassicism: Cornices with decorative elements highlight the elegance and structure of the ceiling, creating an impressive effect when looking upward.
3. Maintaining structure and style using wooden corner brackets
corners These are not only structural elements but also an opportunity to give the ceiling an interesting shape and stylish appearance. Stavros corner brackets allow joining planks at different angles, creating original transitions and accents. They can serve as decorative elements, emphasizing the uniqueness of the ceiling.
-
Corner brackets for transitions between zones: In rooms with different functional zones, corner brackets help smoothly divide or connect them without disrupting the design integrity.
-
Decorative corner treatment: In interiors with beams, corner brackets can be used as support or decorative elements, creating a more enriched appearance.
4. Natural wooden planks and beams: texture and color for a unique design
Wooden planks и strips Stavros planks allow giving the plank ceiling a unique texture and color. They can be painted or coated with protective lacquer, which will emphasize the natural wood texture and add warmth to the room. Using planks of different widths or alternating light and dark shades helps create interesting patterns and dynamic accents on the ceiling.
-
Planks and beams for creating a multi-layered effect: Using wooden elements of different widths, you can create multi-layered structures that add depth to the ceiling.
-
Alternating textures and colors: Combining light and dark planks or different textures adds individuality to the ceiling and makes it a central element of the interior.
5. Completing ceiling design with ceiling skirting boards
To give the ceiling a finished look, use ceiling trimThey are ideal for concealing joints between the ceiling and walls, adding neatness to the room and emphasizing its stylistic direction. Skirting boards can have various shapes, allowing them to be combined with other decorative elements such as cornices and moldings.
-
Skirting boards for ceiling accent: Choose contrasting skirting board shades to highlight the ceiling's shape or, conversely, make them inconspicuous to create a sense of space.
-
Skirting boards for different styles: Straight and smooth skirting boards suit minimalism, while decorative variants suit classic and neoclassical styles.