Article Contents:
- When the ceiling should become part of the design
- Three situations where the ceiling must speak
- Which panels are suitable for ceiling application
- Wood as the primary material for slatted ceilings
- Formats and layouts
- Polyurethane ceiling cornices
- Ceiling Rosettes
- Moldings and coffered systems
- How to combine the linearity of slats and relief decor
- Zoning principle
- Principle of material contrast
- Principle of Stylistic Unity
- Color solution
- Lighting scenarios, height and proportions
- How slatted ceilings work with light
- Built-in lighting in slatted ceilings
- How molding works with light
- Height and proportions: what works and what doesn't
- Mistakes when overloading ceilings
- First mistake: too much ornamentation
- Second mistake: mismatch of slat and molding styles
- Third mistake: incorrect scaling
- Error four: ignoring the step of slats
- Error five: ignoring connection details
- Interior styles and suitable combinations
- Modern classic and neoclassic
- Scandinavian style and minimalism
- Loft and Industrial Style
- Modern art deco
- Technical aspects of installation: what is important to know before starting work
- Load-bearing structure for a slatted ceiling
- Installation of polyurethane cornices and moldings
- Installation sequence
- Care and durability: wood and polyurethane in operation
- Care for Wooden Planks
- Care for polyurethane decor
- Examples of implemented solutions: from living room to hallway
- Living room 25 sq. m, height 2.85 m
- Corridor 2 × 8 m, height 2.65 m
- Office 18 sq. m, height 3.2 m
- FAQ: Answers to Popular Questions
- About the Company STAVROS

The ceiling is not just an overhead covering. It is the fifth wall, which most homeowners stubbornly ignore, limiting themselves to white paint or a stretch fabric without a single detail. Meanwhile, it is the upper plane that sets the tone for the entire space: it determines the scale of the room, controls the light, creates a sense of height or coziness. WhenBatten panels for ceilingsmeets with exquisitepolyurethane ceiling decor, a completely different aesthetic is born — architectural, deep, expensive-looking even on a moderate budget.
This article is not an installation guide. It is a conversation about how to think about the ceiling differently: not as a technical element, but as a full-fledged design plane capable of becoming the main accent of the interior.


When the ceiling should become part of the design
There are apartments where everything is thought out to the millimeter: expensive furniture, proper lighting, live plants, textiles with character — and yet the ceiling is simply white. Not bad, not good. Just nothing. And it is precisely this that nullifies all the designer's efforts, turning a well-thought-out interior into an ordinary living room without individuality.
The ceiling begins to work for the design when it is perceived as an architectural object, not a background. This is a fundamental shift in thinking. French mansions, Italian palazzos, English club interiors — everywhere the ceiling carries a decorative load. Coffers, stucco cornices, painted plafonds, wooden beams — all of this is not an excess, but a necessary element of the spatial composition.
In modern interiors, two tools have taken on the role of decorative ceilings: linear wooden structures and relief polyurethane decor. Each is self-sufficient. Together, they create an effect that cannot be achieved with either a stretch ceiling or plaster for painting.


Three situations where the ceiling must speak
High ceilings. Rooms with a height of 2.9 meters and above require vertical and horizontal elaboration. Without decor, a high ceiling feels like an emptiness that presses from above with its unfilledness. Linear battens, run along or across the room, structure this space, giving it rhythm and scale.
Transition zones. Corridors, halls, stairwells — places where a person moves, not stops. It is here that the ceiling most often comes into view. A properly designed transition with moldings and wooden elements turns a transit zone into an architectural route.
Formal rooms. Living room, dining room, study — spaces where representation takes place. Here, the ceiling must match the level of the interior. It is in these rooms that ceiling batten panels in combination withpolyurethane ceiling decorgive the maximum visual effect.
Our factory also produces:


Which panels are suitable for ceiling application
Not every material suitable for walls works equally well on the ceiling. Gravity here is not a metaphor — it literally dictates requirements for weight, mounting method, and durability.
Get Consultation
Wood as the main material for batten ceilings
Wood on the ceiling is a material with history. It was present in interiors long before modern finishing technologies emerged. Beam ceilings, coffered ceilings, wooden paneling — all are variations of one idea: a warm, natural, living ceiling.
ModernBatten panels for ceilingsSolid wood elements are processed, precisely calibrated components with smooth ends, prepared surfaces, and stable geometric parameters. Unlike old paneling, they don't carry Soviet-era aesthetics. Their profile can be laconic, almost minimalist — making them perfect for modern Scandinavian or Japanese interiors. Or pronounced, with chamfers and relief — then they work in classical or neoclassical contexts.
For ceiling applications, the following characteristics are important:
-
Moisture resistance of the wood species. For kitchens, bathrooms, and toilets, preference is given to species with high density and low hygroscopicity — larch, ash, oak. They react less to humidity fluctuations and don't deform when exposed to steam.
-
Geometric stability. The slats must be kiln-dried to a moisture content of 8–12%. Under-dried wood will behave unpredictably: twisting, warping, creating gaps between elements.
-
Weight per linear meter. Ceiling structures bear loads in the opposite direction from the usual. The lighter the slat, the fewer requirements for the mounting system. Thin slats 60–80 mm wide and 16–20 mm thick are the optimal format for most ceiling scenarios.
Formats and layouts
A solid wood slatted ceiling can be installed in several ways, each creating a fundamentally different visual impression.
Closed layout — slats are laid tightly together, forming a continuous wooden plane. The effect is monolithic, warm, similar to a wooden ceiling in an old house. Suitable for bedrooms, libraries, studies.
Open layout with gaps — 10–30 mm gaps are left between slats, behind which a painted surface or integrated lighting is hidden. The effect is rhythmic, dynamic, modern. LED strips can be integrated into the gaps — then the ceiling begins to glow from within, creating a floating plane effect.
Crosswise and diagonal layout — a non-standard installation direction changes the perception of space. Diagonal slats visually expand narrow rooms; crosswise layout in an elongated room makes it more square.
Multi-level structure — slats are mounted at different heights, creating a three-dimensional relief. This is already a sculptural solution requiring experience and precise planning, but the result can transform the ceiling into an architectural object. Ceiling decor made of polyurethane: cornices, rosettes, moldings
Polyurethane ceiling decor is a relatively recent phenomenon in historical terms, but it has already proven its worth. Its main argument is simple: it provides the relief characteristic of plaster and stucco, with incomparably less weight, cost, and installation complexity.
Polyurethane ceiling decoration— these are cornices, moldings, rosettes, coffers, corner elements, and baseboards, cast from foamed polyurethane with a high degree of surface detail. They reproduce the texture of historical stucco with an accuracy of up to 0.5 mm, while weighing 8–12 times less than their plaster counterpart.
Polyurethane ceiling cornices
Cornice is the transition between the wall and the ceiling. Seemingly a technical element. But it is precisely this that determines whether the ceiling is perceived as a separate architectural plane or merges with the wall into a single dull whole.
Cornice creates shadow. Shadow creates depth. Depth creates a sense of volume and scale. Without a cornice, even a beautiful ceiling loses half of its expressiveness.
Polyurethane Ceiling Moldings in the form of cornices is produced in a wide range of profiles — from a thin minimalist molding 30 mm wide to a massive profile cornice with a projection of 150 mm and a height of up to 200 mm. The latter can completely change the proportions of a room, visually raising the ceiling and giving the space the solemnity of a classic interior.
Installation of a polyurethane cornice does not require special tools: it is cut with a regular hacksaw for metal, glued with acrylic adhesive or liquid nails, and if necessary, bent on warm sections to navigate curved surfaces.
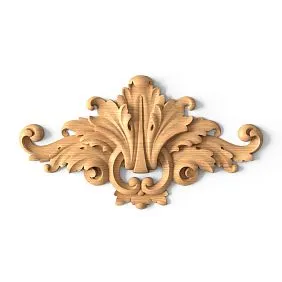
Ceiling Rosettes
Rosette is the central decorative element of the ceiling, historically placed above the chandelier. In a modern interior, its role is broader: it is a focal point around which the entire ceiling composition is built.
Polyurethane rosettes with a diameter from 200 to 700 mm are produced in styles ranging from strict geometric to lush Baroque. Their surface can reproduce acanthus leaves, meanders, laurel wreaths, geometric patterns — everything characteristic of historical stucco.
In a modern interior, a ceiling medallion doesn't necessarily have to match the chandelier. It can be an independent decorative accent, painted to match the ceiling color or, conversely, in a contrasting color—matching the walls or furniture.
Moldings and Coffered Systems
Moldings are linear relief elements that can divide the ceiling plane into sections, frame rectangular or square areas, creating the effect of a coffered ceiling without an expensive drywall frame.
A coffered ceiling made of polyurethane moldings is one of the most effective solutions for classic and neoclassical interiors. Moldings are glued onto a pre-marked grid, forming rectangular cells. Inside each cell, you can place a decorative insert, apply a different paint, or leave it neutral—depending on the desired effect.
How to Combine the Linearity of Slats and Relief Decor
This is the key question that determines whether you'll end up with an expressive ceiling or an overloaded mishmash of disparate elements. Wooden slats and polyurethane decor are two different languages. One speaks through rhythm and repetition, the other through relief and plasticity. For them to sound like a duet, not a cacophony, a clear system is needed.
The Zoning Principle
The most reliable way to combine slats and polyurethane decor is to divide the ceiling into zones. The central zone is smooth, framed by moldings, with or without a medallion. The perimeter zone is slatted, installed along the walls. The cornice connects the slatted plane to the wall and creates a unified perimeter contour.
This solution is found in classic and neoclassical interiors: wooden slats frame the central field of the ceiling, and moldings mark the boundary between zones. The result is a clear hierarchy of elements: the slats work as background and texture, the molding as an accent and framing.
The Principle of Material Contrast
Wood and polyurethane differ in texture and nature—organic versus synthetic, warm versus neutral. This contrast can be used intentionally: matte dark-toned wooden slats contrast with a snow-white relief cornice, creating a clear visual accent at the transition. Or vice versa: light ash slats combined with white molding form a nuanced, almost monochromatic solution, where textural differences are only noticeable upon close inspection.
Principle of stylistic unity
Ceiling batten panelsThose with a clean, laconic profile pair well with geometric moldings without complex ornamentation. Slats with bevels and pronounced profile relief require moldings with richer decoration—floral or historical. Mixing minimalist slats with a Baroque rosette creates stylistic dissonance that will irritate even someone without specialized training.
Color solution
The most common and reliable scheme is slats in natural or stained wood color, with all polyurethane elements in white or the color of the ceiling plane. This allows the wood texture to read as a warm accent, while the molding dissolves into the plane, working solely through relief and shadow, not color contrast.
Colored molding is a bolder solution. Moldings and cornices in the color of the walls or furniture, in metallic finishes, or in dark tones—all are acceptable provided the interior's color scheme is thoughtfully conceived as a whole, not assembled from disparate solutions.
Lighting scenarios, height, and proportions
Ceiling and light are an inseparable pair. Any decorative solution for the ceiling plane alters the behavior of light in the room. And this must be understood before installation begins, not after.
How a slatted ceiling works with light
Wooden slats with gaps between them create diffused light if light sources are placed behind them. This is one of the most aesthetically perfect lighting effects in a modern residential interior: the ceiling appears to glow from within, softly and evenly, without visible sources or shadows from lampshades.
For this, it is necessary:
-
maintain a gap between the slats of at least 15 mm;
-
Paint the load-bearing plane behind the slats white or a light neutral color;
-
Use LED strip with a diffuser, not point sources;
-
Ensure the strip is evenly placed—without visible brightness clusters.
A closed slat layout does not transmit light but receives it excellently. Dark wood absorbs direct light, creating a cozy semi-darkness. Light wood reflects it softly, without glare.
Built-in lighting in a slatted ceiling
Spotlights can be integrated into the slatted ceiling structure—not in the slats themselves, but in the space between them. Narrow track lights or cylindrical spots in the gaps create accent lighting that does not compete with the wooden texture but emphasizes it.
Important: spotlights in the gaps of a slatted ceiling should be miniature, with a housing diameter up to 30–40 mm. Massive shades protrude from the slat row, disrupting the linear rhythm of the structure.
How stucco works with light
The relief of polyurethane decor is a system of protrusions and depressions that reacts to directed light by forming shadows. It is the shadows that give stucco its expressiveness. Without proper lighting, even a meticulously detailed cornice looks flat and unexpressive.
To accentuate the relief, side-directed light is necessary. Track lights directed along the cornice or molding at a 30–45 degree angle create clear shadows in the depressions of the ornament—and the entire plasticity of the stucco becomes three-dimensional.
Frontal lighting kills relief: shadows don't form, surfaces appear flat. This is one of the most common reasons why quality ceiling decor looks cheap—simply because the lighting is poorly designed.
Height and proportions: what works and what doesn't
Slatted ceiling panels reduce the perceived height of a room—this is a physical fact. The structure is mounted below the main ceiling, occupying 80–150 mm in height. Plus the thickness of the slats themselves. In rooms with a height of less than 2.7 meters, a slatted ceiling can create a feeling of pressure.
How to compensate for the loss of height:
-
Use narrow slats (40–60 mm) with minimal mounting spacing
-
Orient the slats along the long side of the room—this visually elongates the space
-
Choose light wood species or light finishes—they reflect light and don't weigh down the ceiling
-
Integrate lighting behind the slats—the floating ceiling effect compensates for the reduced height
For rooms with a height of 3 meters or more, ceiling slats work perfectly: they structure the excessive vertical volume, make it proportionate to a person, and create coziness in a space that without decor feels like a warehouse.
Mistakes when overloading a ceiling
When a person discovers the possibilities of ceiling decor, there is a temptation to use everything at once. Recessed panels? Yes. A ceiling medallion? Yes. A cornice? Absolutely. Molding? Three types. A chandelier with shades? Of course. Recessed lighting? Let's add that too. And the result is a ceiling that looks like a cake with seven layers of cream: technically done, but scary to look at.
Overloading the ceiling is one of the most common mistakes in amateur interior design. Let's break it down specifically.
First mistake: too much ornamentation
A ceiling medallion in the center is excellent. A medallion plus moldings framing four panels is acceptable. A medallion, moldings, another inset medallion in each of the four panels, plus corner elements is already overkill. Ornament works only when there is empty space around it. Without 'air,' the relief stops being readable, turning into visual noise.
Rule: one large accent and no more than two supporting elements. The medallion is the main accent. The cornice around the perimeter is supporting. Moldings dividing the field are the third level. Beyond that, stop.
Second mistake: mismatch between slat and molding styles
Slatted ceiling panelsmade of dark oak with a wide profile—this is a brutal, masculine aesthetic. Pairing them with an exquisite Baroque rosette with acanthus leaves is like wearing a tuxedo with sneakers. Formally possible, but in reality—it's jarring to the eye.
Stylistic unity is not an option but a necessity. If the slats are modern and minimalist, the molding should be geometric or abstract. If the slats are profiled with historical references, the molding can be classical. Combining incompatible styles creates a sense of randomness and cheapness—exactly what we want to avoid.
Third mistake: incorrect scaling
Small room—small elements. A large rosette with a diameter of 600 mm in a 12-square-meter room will look like a plate on a small table. A wide cornice with a 150 mm projection in a low room will eat up another 200 mm of visible height.
The scale of the decor must match the scale of the room. For small rooms—thin moldings, compact rosettes, cornices with minimal projection. For large rooms—you can afford more expressive profiles.
Fourth mistake: ignoring slat spacing
Too frequent slat spacing with minimal gaps in a small room creates a claustrophobic effect. Too sparse spacing with wide gaps looks sloppy and unfinished. The optimal ratio of slat width to gap is from 1:0.5 to 1:1. That is, for an 80 mm slat, the gap should be 40–80 mm. This is a visually balanced rhythm that doesn't feel oppressive or empty.
Fifth mistake: ignoring connection details
Corner elements, cornice joints, transitions between wooden and polyurethane zones—all these details define the impression of the finished work. A carelessly trimmed cornice with a gap in the joint, a batten with visible fasteners, molding with glue marks on the front side—each such detail diminishes the overall impression of the work.
A quality ceiling is quality in the details.Polyurethane ceiling decorrequires precise 45-degree cuts at external and internal corners, thorough joint puttying, and a finish paint that conceals all connection lines. Only then does the molding look monolithic and expensive.
Interior styles and suitable combinations
The same technical solution—battens plus polyurethane decor—can look completely different depending on the stylistic context. Let's explore several key directions.
Modern Classicism and Neoclassicism
This is the most favorable context for combining wooden battens and polyurethane molding. Here, the following are appropriate:
-
Battens made of light oak or ash with a soft matte finish
-
White cornice with a moderate profile—meander, Greek ornament, simple smooth cove
-
Coffered layout with moldings in the central ceiling zone
-
Round or oval rosette with geometric ornament above the main light fixture
Result: restrained luxury, a readable historical reference, no cheap effects.
Scandinavian style and minimalism
Here the decor is minimal, but the ceiling structure must be calibrated to the millimeter.
-
Battens made of birch, pine, or ash in a natural light tone
-
A thin white molding around the perimeter — solely to mask the wall/ceiling transition, without ornament
-
No rosettes, no coffers
-
Built-in lighting in the gaps between the battens
Result: purity, the warmth of wood, soft diffused light — everything valued in the Nordic style.
Loft and industrial style
Dark wood, metal, concrete textures — this is the context in which a batten ceiling works especially expressively.
-
Battens made of dark oak or thermowood without varnish, with a brushed surface
-
No classical stucco — geometric moldings in dark metallic or entirely without decor
-
Track lighting system along or across rails
-
Open gaps with a black-painted supporting plane
Result: a rigid, expressive, masculine aesthetic that works great in studios, offices, and men's living rooms.
Modern Art Deco
One of the most rewarding contexts for bold combinations.
-
Rails in a dark tone with metallic finish or tinting
-
Geometric moldings with broken lines, hexagonal or octagonal coffers
-
Brass or gold accents in lighting fixtures
-
Large geometric rosette in the 1930s style
Result: richness without pomp, geometry as the main language of decor.
Technical aspects of installation: what is important to know before starting work
Even if you do not plan to install the ceiling yourself, understanding the technical nuances will help you correctly set tasks for the craftsmen and assess the quality of the work performed.
Load-bearing structure for a slatted ceiling
Wooden slats are mounted on a metal frame made of CD profiles or wooden beams, which are attached to the ceiling via direct hangers. The distance between the profiles is 40–60 cm depending on the weight of the slats and their length. Longer slats require a more frequent spacing of the load-bearing profiles to avoid sagging.
Before installation, the slats must be brought into the room and kept for 5–7 days for acclimatization. The wood must absorb the humidity of the environment—only then will it not deform after installation.
Installation of polyurethane cornices and moldings
Polyurethane Ceiling Moldingsis glued with acrylic adhesive or liquid nails. The surface before gluing must be clean, degreased, free of dust and traces of paint. In the corners, the cornice is cut at a 45-degree angle using a miter box or an electric miter saw. The joints are filled with acrylic putty and sanded after drying.
Painting polyurethane decor—only with water-based paints. Nitro enamels and solvents can damage the polyurethane surface. Optimal: one coat of deep penetration primer, two coats of finishing paint with intermediate sanding.
Installation sequence
The correct sequence of work is one-third of the success:
-
Ceiling marking: axis of symmetry, lines of load-bearing profiles, position of sockets and fixtures
-
Frame installation
-
Electrical wiring installation before mounting battens
-
Mounting battens with gaps (if lighting is needed — tape is laid simultaneously)
-
Mounting cornices around the perimeter
-
Installation of moldings on the ceiling plane
-
Mounting sockets
-
Finishing work: joint puttying, molding painting
-
Installation of lighting fixtures
A gross mistake — mounting molding before battens. In this case, the cornice cannot be properly joined to the wooden surface, and the transition boundary will look sloppy.
Care and durability: wood and polyurethane in operation
Care for wooden battens
Wooden battens on the ceiling practically require no care with proper initial coating. Oil or varnish creates a protective layer that:
-
prevents dust from being absorbed into wood pores
-
protects against local contamination
-
stabilizes wood moisture
Every 5–7 years, it is recommended to refresh a wooden ceiling: sand the surface with fine-grit sandpaper and apply a new coat of oil or varnish. This will restore the original appearance and provide several more years of service without additional work.
For kitchens and high-humidity areas — use only waterproof coatings and high-density wood species.
Care for polyurethane decor
Polyurethane is an inert material that does not absorb moisture and does not react to most household chemical agents. Dust is removed with a soft brush or a slightly damp cloth. Every few years, if necessary, the paint can be refreshed — the surface is sanded with fine sandpaper and repainted without dismantling.
Polyurethane decor does not crack, crumble, or deform under normal operating temperatures (from -30 to +70 degrees). In residential spaces, it lasts for decades without any changes.
Examples of implemented solutions: from living room to hallway
Living room 25 sq. m, height 2.85 m
Task: create an expressive ceiling without a sense of reduced height.
Solution: ash wood slatted ceiling in a light tone, layout with a 20 mm gap, slat width 70 mm. Perimeter: white cornice with a moderate profile, projection 80 mm. Central area: geometric rosette with a diameter of 350 mm for a chandelier. Lighting in the gaps with neutral white light, 3000K. The supporting plane behind the slats is white.
Result: the ceiling feels light and airy, the slats add warmth and texture, the cornice frames the plane, the rosette focuses the gaze. The height does not feel subjectively reduced.
Corridor 2 × 8 m, height 2.65 m
Task: make the corridor feel less tunnel-like and more expressive.
Solution: larch wood slatted ceiling panels, layout across the corridor (perpendicular to movement). Slat spacing 100 mm, gap 30 mm. Thin molding along the perimeter matching the wall color. Recessed spotlights in the gaps every 80 cm.
Result: the transverse layout visually widened the corridor. The spotlights created rhythmic lighting, making the route interesting. The molding defined the boundary of the planes without overloading.
Study 18 sq. m, height 3.2 m
Task: create an interior in the style of an English club study.
Solution: closed layout of dark oak slats without gaps, oil finish with a dark tinting component. Perimeter: classic cornice with egg-and-dart ornament, height 140 mm. Coffered division with moldings into 6 rectangular fields. In each field: a small inset rosette with a diameter of 180 mm. All polyurethane elements in ivory color.
Result: a completely cohesive interior with a pronounced historical reference. The ceiling is perceived as the main architectural element of the room.
FAQ: Answers to popular questions
Can a wooden slatted ceiling be installed in a bathroom?
Yes, when using high-density wood species (larch, teak, thermowood) and high-quality moisture-resistant coating (oil with wax or exterior varnish). Good room ventilation is also necessary. Material acclimatization before installation is mandatory.
How difficult is it to install a polyurethane cornice yourself?
Not difficult if you have basic tool skills. The main thing is precise corner cutting and proper surface preparation. A miter box with a rotating platform makes the job easier. Joints are puttied and painted—most cutting imperfections are hidden at the final stage.
Can polyurethane decor be repainted after installation?
Yes. It is enough to lightly sand the surface with fine sandpaper (P150–P180) and apply a new layer of water-based paint. Dismantling is not required.
What is the minimum distance between slats needed for built-in lighting?
For LED strip with diffuser—from 15 mm. For recessed spotlights up to 30 mm in diameter—from 35 mm. For larger fixtures—calculated individually for the specific model.
How to choose the width of a slat for a low ceiling?
The lower the ceiling, the narrower the slat should be. For a height of 2.5–2.7 m, the optimal slat width is 40–60 mm. Wide slats (100 mm and more) visually lower the ceiling and create a feeling of pressure.
Do planks need treatment before installation?
Yes. Minimum - priming with antiseptic composition on both sides. The finish coating (oil or varnish) is applied either before installation or after - depending on the ceiling design and surface accessibility.
Do polyurethane cornices combine with wooden slats in loft style?
Classical profile cornices - no. Geometric moldings without ornament, possibly with metallic coating - yes, if the overall stylistic concept allows it. In loft style, the absence of traditional stucco with replacement by simple corner moldings works better.
How to correctly calculate the number of slats for a ceiling?
Divide the ceiling area by the width of the slat plus the width of the gap. The resulting value is the number of rows. Multiply by the length of the slat (or the length of the room). Add 10-15% to the result for cutting and defects.
About the company STAVROS
Ceiling finishing is a task that requires quality materials, not compromise. That's why choosing the right supplier is important.
Company STAVROS specializes in the production and supply of products made from natural wood and polyurethane for architectural decor. The assortment includes -Batten panels for ceilings - from solid wood of various species: oak, ash, larch, pine, birch. Each batch undergoes chamber drying, geometric control, and finish processing on professional equipment.
In parallel, STAVROS offers a complete rangeceiling decoration made of polyurethane: cornices of all styles and profiles, moldings, rosettes, corner elements, coffered systems. Precise geometry, detailed relief, readiness for painting without additional priming - all this makes STAVROS products the choice of professional designers and demanding customers.
STAVROS is not just a materials supplier. It's a partner that understands architectural tasks and offers solutions that work in real interiors: from urban apartments to country houses, from minimalist studios to classic living rooms with high ceilings.
The ceiling stops being just a covering when the right materials are used for its design. And the right materials are STAVROS.