Article Contents:
- What is a Wooden Casing — The Function of Doorway Trim
- Structural Function: Covering the Installation Gap
- Decorative Function: A Frame for the Doorway
- Soundproofing and Thermal Insulation Function
- Wooden Doorway Trim — System Unity
- Types of Wooden Casings: Flat, Profiled, Telescopic, Carved
- Flat Wooden Casing
- Profiled Casing from Solid Wood
- Telescopic Wooden Casing
- Carved Casing
- Sizes of Wooden Casings: Width 50–100 mm, Thickness — How to Choose
- Casing Width: From 50 to 100 mm
- Casing Thickness: Density of Wall Contact
- Standard Casing Cross-Sections in the Catalog
- Length: Standard and Trimming
- Casing Fastening: Nails, Liquid Nails, Hidden Fasteners
- Fastening with Finish Nails
- Liquid Nails (Construction Adhesive)
- Fastening with Hidden Fasteners
- Combined Method: Adhesive + Nails
- Corner Joining: 45° Miter Cut or T-Joint
- 45° Miter Cut: The Classic and Its Requirements
- T-Joint with a Rosette
- Tools for Miter Cutting: What You Need
- How to Coordinate the Casing with the Baseboard and Cornice
- Casing and Baseboard: Solving the Joint
- Casing and Cornice: The Upper Tier
- Unity of Material and Tone
- Painting and varnishing wooden door casing
- Surface Preparation
- Enamel for door casing: white color
- Painting with brush or spray gun
- Toning to natural wood shade
- Color coordination with door leaf
- DIY installation of wooden door casing: step-by-step algorithm
- Tools and Materials
- Step one: measurement and marking
- Step two: cutting horizontal casing
- Step three: cutting vertical posts
- Step four: "fitting" without fastening
- Step five: fixation
- Step six: concealing fastening points
- Gap when installing casing: what is acceptable
- FAQ - answers to popular questions
- About the Company STAVROS

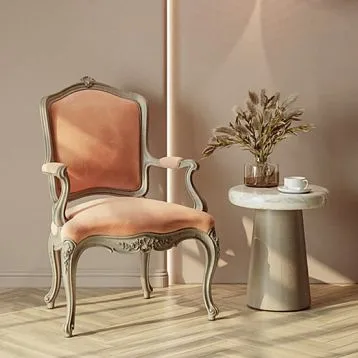
A door opening without casing is an unfinished thought. The leaf is installed, the frame is secured, the slopes are plastered - yet the feeling of incompleteness remains. The gap between the frame and wall, the raw edge of plaster, the junction of two materials that no one bothered to conceal.wooden casing solves this task with one motion - literally covering what shouldn't be visible and revealing what should please the eye.
But casing isn't just about "covering a gap." It's a frame, an accent, an architectural element that visually frames the entrance to each room. In classic interiors, wooden casing with profiled sections transforms an ordinary door opening into a portal-like arch with character. In Scandinavian style - flat oak casing in white makes walls graphically crisp. In loft style - dark solid wood casing with visible texture emphasizes material honesty.
This article is a complete professional guide to wooden door casing: types, dimensions, fastening, corner joining, coordination with baseboards, painting. Everything - genuinely, without filler and generic words.


What is wooden door casing - the function of door opening trim
Before choosing shape and size - you need to precisely understand what casing does and why it can't be ignored.


Structural function: covering technological gap
When installing door frames, a 10-20 mm gap remains between the frame and wall opening on each side. This gap is technologically necessary: it compensates for opening irregularities and is filled with mounting foam. Foam isn't decorative material. It needs covering.Wooden door casing covers this gap, creating a neat transition from frame to wall.
Casing width is chosen based on gap width: if the gap is 15 mm, casing should cover it with margin - minimum 20-25 mm overlap on frame and 20-25 mm overlap on wall. Total working width - 40-50 mm minimum. Hence standard dimensions: casing width 50-100 mm.
Our factory also produces:


Decorative function: frame for door opening
Casing is a frame. Just as a picture frame distinguishes an image from surrounding space, casing distinguishes a door opening from the wall plane. It sets the entrance scale, emphasizes the door's vertical axis, creates rhythm in room enfilades.
In spaces with multiple doors, casing creates visual rhythm: repeating frame profiles "rhyme" the space, connecting different rooms into a unified stylistic system. This is why it's important for casing throughout the space to have uniform profile and tone.
Get Consultation
Soundproofing and thermal protection function
Wooden casing pressed tightly against the wall additionally seals the connection between frame and slope - reduces gaps through which sound and cold air pass from inter-room spaces. This isn't the primary function, but a real bonus of properly installed casing.
Wooden door opening trim - system unity
A wooden door casing set consists of two vertical side pieces and one horizontal crosspiece (impost). For a standard door height of 2,000 mm: two side pieces of 2,100–2,150 mm and one crosspiece of 800–900 mm. That's three elements per opening.
If doors are installed on both sides of the wall — casings are needed on both sides. Double-sided framing doubles material consumption.
Types of wooden casings: flat, profiled, telescopic, carved
The market offers a variety of forms — but all this variety falls into four basic types. Understanding the typology is the first step to making the right choice.
Flat wooden casing
A flat casing is a rectangular strip with straight edges, minimal relief, or no relief at all. Cross-section: rectangle 70×12 mm, 80×12 mm, 100×14 mm.
This is the most universal type: it works in Scandinavian style, minimalism, loft, modern classic — where a decorative profile is not needed, but a clear geometric line is. A white flat beech casing on a white wall is almost invisible, creating a feeling of the door being 'built-in' to the wall. A flat dark oak casing on a light wall is a contrasting accent, a graphic frame.
Flat casing is the simplest to install: there are no complex profile joints, and corner joining is minimally critical to cutting precision.
Profiled solid wood casing
A profiled casing is a strip with a milled decorative profile on its front surface. The profile can be:
-
Rounded — a smooth cove (concave arc) along one or both edges
-
Semi-oval — a convex semi-rounded relief in the center of the strip
-
Multi-profile — a combination of coves, fillets, and chamfers, creating a complex architectural relief
-
With a bead — a thin concave groove separating the planes of the casing
Profiled casing is the choice for classic, neoclassical, and Provence styles. The more complex the profile — the 'weightier' the classic character. A simple rounded profile is soft modern classic. A multi-profile cross-section with fillets is Empire style, a formal interior.
Profiled casing is more complex to install: miter cuts at 45° angles require precision — mismatched profiles at the joint are immediately noticeable. This is a separate topic, which is covered in a dedicated section below.
Telescopic wooden casing
A telescopic casing is structurally different from a regular one. It consists of two parts: a main strip and a telescopic element (sliding insert) that allows adjusting the wall grip depth. This is a solution for non-standard situations: a wall with drywall cladding, a wall with varying jamb thickness, a door frame with a non-standard projection.
A regular casing is attached to the frame and simply covers the gap — it does not 'take up' the difference in jamb depth. A telescopic wooden casing fits tightly against a jamb of any depth due to the sliding element. This eliminates gaps between the casing and the jamb.
Telescopic wooden casing is especially relevant in houses with thick walls (640 mm brick, 400 mm block) — where the jamb depth is significant and a regular casing does not cover it completely.
Carved casing
Carved casing is the highest decorative class. Three-dimensional carving across the entire plane: floral ornaments, geometric weaves, grapevines, acanthus leaves. Produced on CNC milling centers with 3–5-axis machining.
Carved casing is for formal interiors, country houses in Russian style, classic interiors with rich decor. In combination withdecorative overlays on furniture frontsof the same ornament — it forms a unified decorative system for the house.
Installing carved casing is more complex: due to the three-dimensional relief, mitering at 45° is not always possible. A T-joint with a decorative corner block ('rosette') is used, which conceals the connection.
Sizes of wooden casings: width 50–100 mm, thickness — how to choose
Two parameters determine the size of a casing: width (cross-section) and thickness (depth of the strip). Length is always cut to size.
Casing width: from 50 to 100 mm
50 mm is the minimum width for a living space. With a 15 mm gap between the frame and the wall, such a casing covers the gap with a 17–18 mm overlap on each side — sufficient, but without a margin. Used in narrow niches, when installing adjacent doors.
70 mm (wooden architrave 70 mm) — standard for most living spaces. Covers the gap well, creates a moderate decorative accent, doesn't dominate the interior. Optimal choice for apartments with ceilings 2,400–2,700 mm.
80 mm — wide architrave for high rooms (ceiling 2,800–3,200 mm). With greater ceiling height, a more pronounced vertical accent is needed — a wider architrave sets the appropriate scale.
100 mm (wooden architrave 100 mm) — for formal rooms, country houses, high ceilings from 3,000 mm. A wide architrave creates a monumental frame, emphasizing the significance of each entrance.
Proportion rule: architrave width × 30–40 = room height in millimeters. Ceiling 2,700 mm: architrave 2,700/35 = 77 mm, round to 70–80 mm. Ceiling 3,200 mm: 3,200/35 = 91 mm, round to 100 mm.
Architrave thickness: tightness of fit to the wall
Standard thickness of a wooden architrave is 10–16 mm. The choice depends on two factors:
Door frame projection from the wall. The frame should protrude from the wall plane by an amount equal to or slightly less than the architrave thickness. If the frame protrudes 12 mm — a 12–14 mm architrave will sit flush. If the frame is recessed — a thinner architrave is needed.
Evenness of the reveal. On uneven reveals, a thin architrave (8–10 mm) 'plays' — bends, resting on convex points of the reveal, and pulls away in depressions. A thicker architrave (14–16 mm) is stiffer, reacts less to local unevenness.
Standard architrave profiles in the catalog
| Width | Thickness | Application |
|---|---|---|
| 50 мм | 10 мм | Narrow openings, niches, door junctions |
| 70 мм | 12 мм | Standard apartments, ceiling 2,400–2,700 |
| 80 мм | 14 мм | High rooms, country houses |
| 100 мм | 14–16 mm | Formal interiors, ceiling from 3,000 |
Length: standard and cutting
Standard architrave length is 2,100 mm and 2,200 mm. For a standard door jamb (2,000 mm) — sufficient with allowance for mitering. The crosspiece (horizontal architrave) requires a length of 900–1,000 mm for a door width of 800–900 mm.
When ordering per opening calculate: 2 jambs × 2.1 m + 1 crosspiece × 1 m = 5.2 linear meters per opening on one side. Double for two-sided framing.
Architrave fastening: nails, liquid nails, hidden fasteners
The architrave fastening method determines both the strength of the connection and the appearance: with visible fastening points or without.
Fastening with finish nails
Classic method — finish (small-head) nails diameter 1.6–1.8 mm length 40–50 mm. The nail is driven at a slight angle through the architrave into the wood of the frame or into wooden inserts in the reveal.
The nail head is countersunk with a nail set 1–1.5 mm below the surface — and filled with wood putty for painting or masked with a wax pencil of a matching tone. Distance between nails — 300–400 mm.
Disadvantage of the method: on an uneven reveal, the nail won't pull the architrave tight — preliminary surface preparation or use of adhesive is needed.
Liquid nails (construction adhesive)
Construction adhesive 'liquid nails' — ideal method for experienced craftsmen. The architrave is mounted without visible fastening points: adhesive is applied in a zigzag pattern to the back of the architrave, the architrave is pressed against the wall and fixed with painter's tape until the adhesive cures (12–24 hours).
Adhesive choice: for wooden architraves on drywall or plastered reveals — construction adhesive on acrylic or polyurethane base. Avoid solvent-based adhesives — they can damage the architrave's paint/varnish finish.
Critically important: the reveal surface must be clean, dry, free of dust and flaking plaster. Adhesive doesn't hold on loose surfaces.
For reliability on lower sections (where the architrave may pull away from the wall due to its own weight while the adhesive dries) — temporary fixation with painter's tape + spacer wedges under the architrave.
Fastening with hidden hardware
Hidden hardware for architraves — a system of metal clips or wooden dowels, allowing the architrave to be removed and installed without damaging surfaces. Relevant when periodic access to utilities behind the architrave is needed (cables, pipes, space in a log house).
System: the clamp attaches to the frame with a screw, a groove is milled in the casing — the clamp enters the groove, and the casing is held without nails or glue. Removal — by lightly pressing the lower edge with slight force.
Hidden fastener mounting for casings is particularly in demand in wooden houses — where periodic adjustment of the casing fit is required due to structural settling.
Combined method: glue + nails
A professional installer never chooses 'either glue or nails' — they use both in the system. Glue provides uniform, tight adhesion along the entire length. Nails — immediate fixation without waiting for polymerization. The result — the casing is rigid immediately, without tape and spacers, and fits perfectly.
Corner joining: 45° miter or T-joint
The corner connection of vertical and horizontal casing — the point where the entire installation fails if precision is insufficient. This is where the level of skill shows.
45° miter: classic and its requirements
45° miter — a standard corner joint where the end of the vertical post and the end of the horizontal rail are cut at a 45° angle and joined 'at a miter'. When executed precisely — the joint is invisible, the profile continues seamlessly from vertical to horizontal.
Precision requirements: angle strictly 45° (±0.5° — already a noticeable gap on a profiled casing). Ends must be perpendicular to the casing plane. Saw — miter saw (pendulum), manual 45° miter without a miter saw gives ±2–3° deviation, which is unacceptable for profiled casing.
Nuance with profiled casings: when mitering a profiled casing at 45°, the profiles of the vertical and horizontal strips must join 'mirror-like'. This is only possible with a symmetrical profile. If the profile is asymmetrical — a 45° miter will cause relief misalignment at the joint.
Nuance with wall plane: when the angle between horizontal and vertical walls is not perpendicular (common in real construction) — the miter angle is not exactly 45°, but 45° ± half the deviation from a right angle. For precision work, the angle is measured with a protractor directly on site.
T-joint with rosette
An alternative to a 45° miter — T-joint. The horizontal rail rests its end on the vertical post from above, the joint is covered by a decorative corner overlay — a rosette. Rosette — a square or rectangular wooden element with decorative relief, hiding the connection point.
T-joint with rosette:
-
Easier to install — does not require precise miter angle
-
Allows for room corner geometry errors
-
Creates an additional decorative accent
-
Mandatory when installing carved casing — where 45° miter is impossible due to three-dimensional relief
Rosettes for wooden casings are produced in sizes matching the casing width: for 70 mm casing — 70×70 mm rosette, for 80 mm — 80×80 mm, for 100 mm — 100×100 mm.
Tools for mitering: what's needed
-
Miter saw with rotating table — essential tool for precise mitering. Angle is set by scale, cut is clean and perpendicular.
-
Miter box — budget alternative. A wooden or plastic guiding 'box' with slots at 45° and 90° angles. For thin flat casings — gives acceptable results. For thick profiled ones — insufficiently rigid fixation.
-
Sharp backsaw with fine teeth — for manual mitering. Minimum tooth pitch 1–1.5 mm, blade tensioned rigidly. Requires experience.
How to coordinate casing with baseboard and cornice
Casing, baseboard, and cornice — three horizontal-vertical decorative elements forming a unified architectural system of the room. If uncoordinated — the interior 'falls apart' into random fragments. If coordinated — they work as a single whole.
Casing and baseboard: solving the junction
At the lower point of the vertical casing, a complex junction arises: casing meets floor and baseboard. Three ways to solve this junction:
First method: baseboard butts into casing. Baseboard approaches casing and butts its end against its side edge. Casing and baseboard are not cut at an angle — simply butted. Simple method, but requires a flat wall at the casing.
Second method: baseboard cut at 45°. End of baseboard cut at 45° and 'disappears' into floor at casing foot. Neat solution, hiding baseboard end. Requires a small miter cut.
Third method: plinth block (foot block). A small wooden block — 'foot block' or 'plinth block' — installed at the lower point of the casing, connecting it to the baseboard. Used in classic interiors with profiledwooden skirting boardsand profiled casings — creates a complete architectural unit.
Casing and cornice: the upper tier
At the top point of the horizontal casing, a similar question arises: how does the casing relate toceiling corniceormolding.
In high-ceilinged rooms with profiled ceiling cornices (crown molding), the horizontal casing visually 'picks up' the cornice theme and continues it vertically along the door frame. The width and profile of the cornice and casing should be proportionate: a 120 mm cornice and 70 mm casing — harmony. A 60 mm cornice and 100 mm casing — imbalance.
In modern interiors without ceiling cornices (stretch ceilings, plain white surfaces) — the casing should not 'compete' with the ceiling plane. A flat or minimally profiled casing is more organic here than an elaborate classical profile.
Unity of material and tone
The principle of material unity: casings, baseboards, and cornices — from the same wood species, same tone. An oak casing in 'walnut' tone and a pine baseboard in 'natural pine' tone — these are different materials with different tones. For interior integrity — one wood species, one manufacturer, one batch.
STAVROS moldings and cornicesare made from the same wood species as the casings — oak and beech. When ordered from the same catalog, matching tone and material density are guaranteed.
Painting and varnishing wooden casings
Wooden door casings are supplied in three variants: with 'custom' finish, unfinished (sanded), with factory finish. Let's consider the scenario of self-painting.
Surface preparation
A sanded casing before painting requires:
-
Dust removal with compressed air or a slightly damp cloth
-
Sanding with P240 to remove fine fibers raised during dust removal
-
Application of a sealer primer (for oak — a shellac-based primer is mandatory to prevent tannins from bleeding through white paint)
Without a sealer primer, white enamel on an oak casing will yellow within 2–4 months in areas with concentrated tannic acids — primarily on end grains and areas with curly grain.
Enamel for casings: white color
White wooden casings — the most popular option for apartments with white door frames. Enamel choice:
Acrylic water-based enamel — fast drying (2–3 hours between coats), odorless, good whiteness. For living spaces — the optimal choice. Applied in 2–3 coats with intermediate sanding using P320.
Alkyd enamel — a harder and more wear-resistant coating, longer drying time (12–24 hours between coats), has a characteristic odor. Slightly yellows over time. For hallways and high-traffic areas — alkyd is more reliable.
Polyurethane two-component enamel — a professional option. Maximum hardness, excellent adhesion, does not yellow. Requires a compressor for application — not convenient for DIY brush painting.
Painting with a brush or spray gun
Brush — for DIY painting. A flat brush 40–50 mm wide. Strokes strictly along the grain. Thin coats without drips. If 'brush marks' remain on a profiled casing — let dry, sand with P320, and apply a final coat.
Spray gun — for even, thin-layer coverage without brush marks. Especially important for profiled casings with complex relief — a brush leaves buildup in the profile recesses.
Toning to a natural wood tone
To preserve the natural wood color: water-based stain of the desired tone, applied with a brush along the grain, excess wiped off after 3–5 minutes. After drying (4–6 hours) — final varnish in 1–2 coats.
Tip: before toning the main piece, always test the tone on the end grain of a cut-off piece — wood on end grain absorbs stain more intensely than side surfaces and turns darker. Either apply a more diluted stain to end grains, or account for this difference when selecting the stain concentration.
Coordinating tone with the door leaf
Principle: casing and door leaf — in the same tone or in deliberate contrast. White casings on white doors — unity. Dark casings on dark doors — unity. Dark casings on white doors — contrast, creating a 'picture frame'. White casings on dark doors — rarely used, but sometimes an interesting designer move.
Avoid 'accidental' mismatch: a casing that's 'almost white' and a frame that's 'slightly creamy' — this is not design, it's a mistake.
Installing Wooden Architraves Yourself: Step-by-Step Algorithm
Theory mastered — moving on to practice. Step-by-step algorithm for self-installation.
Tools and materials
-
Miter saw or miter box with a handsaw
-
Laser level or plumb bob
-
Finish nails 1.6×40 mm + nail set
-
Mounting adhesive (acrylic or polyurethane)
-
Tape measure, pencil, square
-
Wood putty or tinted wax filler
Step one: measurement and marking
Measure the height of the vertical architrave: from the floor (or from the top of the baseboard) to the top point of the door frame plus 5–10 mm overlap for the horizontal architrave. Check verticality with a laser level: the architrave must be strictly vertical, not following the curvature of the frame if it is installed with a deviation.
Step two: cutting the horizontal architrave
Start with the horizontal crosspiece. Cut both ends at a 45° angle, focusing on the internal dimension — the distance between the inner edges of the frame. Place the crosspiece at the installation location, ensure the cuts are symmetrical. The length of the crosspiece along the outer edges = width of the frame + 2 × width of the architrave.
Step three: cutting the vertical posts
The top end of each vertical post is cut at a 45° angle — 'towards' the crosspiece. The bottom end — at 90° (straight cut), height — from the floor to the top cut.
Step four: 'dry fit' without fastening
Place all three elements against the opening without adhesive and nails. Check:
-
Tightness of fit to the wall and frame
-
Alignment of profiles at the 45° cut corners
-
Symmetry of architrave placement relative to the frame (equal offset from the inner edge of the frame on both sides)
-
Verticality of posts using a laser
Only with a perfect dry fit — proceed to fixing.
Step five: fixation
Apply mounting adhesive in a zigzag pattern to the back of the architrave. Press against the wall. Several finish nails for immediate fixation — spaced 200–250 mm apart. Sink the heads with a nail set.
Fixing order: first the horizontal crosspiece, then the vertical posts from bottom to top. The posts are fitted to the already fixed crosspiece — if necessary, trim the top cut by tenths of a degree.
Step six: filling the fastening points
Wood filler matching the architrave tone — into the nail points. After drying (1–2 hours) — sand flush with P320. Apply a final coat of varnish or enamel over the filled area.
Gap when installing architraves: what is acceptable
A gap between the back of a wooden architrave and the wall is allowed no more than 1–2 mm on local unevenness. A wider gap — fill with acrylic sealant, matched to the coating tone.
A gap between the architrave and the door frame — is not acceptable. There must be a tight fit here.
FAQ — answers to popular questions
Can wooden architraves be installed in a bathroom?
With a caveat: only with good ventilation and with a coating of waterproof polyurethane varnish in 3–4 layers. In rooms without ventilation with constant humidity, wood will deform and crack regardless of the coating.
How to remove the gap between the architrave and the wall after installation?
Acrylic sealant matching the wall tone (not the architrave). Apply with a gun, smooth with a wet finger, remove excess with a damp cloth. After drying — touch up if necessary.
Do you need to remove architraves when replacing a door?
Depends on the installation method. On adhesive — will need to be carefully removed with a putty knife, with risk of damage. On concealed clips — come off easily without damage. On nails — removed with slight effort using a flexible putty knife.
Which casing is better — with or without a finish?
Without a finish (sanded) — if you need an exact tone for a specific coating. With a finish — if there is no opportunity or desire to paint yourself, and a standard white, black, or 'wood-like' finish is suitable.
How many linear meters of casing are needed for a two-room apartment?
Standard two-room apartment: 4–5 doorways, framed on both sides of each. For one doorway (one side): ≈5.2 linear meters. For the apartment: 5 doorways × 2 sides × 5.2 m = 52 linear meters. Plus 10–15% extra for waste during mitering = 57–60 linear meters. Round up when ordering.
What is the difference between casing, glazing bead, and telescopic door frame?
Casing — an overlay strip that covers the gap from the outside. Glazing bead — a thin strip that seals the glass in a frame. Telescopic door frame — a type of door frame with a sliding element that compensates for wall thickness. Casing is installed in addition to any type of frame.
About the company STAVROS
Casing can be modest or grand, simple or richly decorated — but it must always be precise. The dimensions, profile, wood moisture content, milling angle, and sanding quality must be precise. Because any inaccuracy will show immediately — in the gap, in mismatched profiles, in deformation after six months.
STAVROS — a Russian manufacturer of wooden products for architectural interior finishing.Wooden door casingIn the catalog: flat, profiled, telescopic — width 50, 70, 80, 100 mm, length 2,100–2,200 mm. Species — oak and beech, moisture content 8–10%, surface sanded to P320 for any finish.
In the same catalog — a complete system of wooden decor:Ceiling cornices and moldings, Solid wood skirting boards, decorative overlays for furniture fronts, Furniture legsandWooden handles. A unified system from one manufacturer — for those who build an interior as a single whole, not assemble it from random parts.
Buy wooden casings with delivery across Russia — in the STAVROS catalog. Orders from 1 piece. Professional consultation on selecting profile, width, and tone — upon request.