


Article Contents:
- What Is an Interior Design Mockup?
- Why Is an Interior Design Mockup Needed?
- 1. Visualization
- 2. Time and Cost Savings
- 3. Improved Communication with the Client
- Stage 1. Gathering Information and Defining the Task
- Stage 2. 3D Modeling
- Stage 3. Texturing and Lighting Setup
- Stage 4. Rendering and Post-Processing
- Example 1. Apartment Renovation
- Example 2. Office Space
- Example 3. Restaurant or Café
- Conclusion
In today’s world, interior design goes beyond simply choosing wall colors or furniture. Today, designers use special digital tools to visualize future spaces even before real work begins. One such powerful tool is interior design mockup. In this article, we will explore what it is, why mockups are so important in modern work, provide examples of their application, and give useful tips for those who want to use this tool to bring their ideas to life.


What Is an Interior Design Mockup?
First, let’s clarify terminology. The word “mockup” comes from the English “mockup,” which can be translated as “mockup” or “prototype.” In the context of interior design, a mockup is a photorealistic image or digital model of a future interior, created using 3D modeling and rendering software. This is not just a drawing or sketch, but a detailed image that takes into account all nuances: material textures, lighting, furniture placement, decorative elements, and even the atmosphere of the space.
Example:
Imagine you’ve decided to renovate your apartment. Instead of relying on imagination and standard catalog solutions, you can order an interior design mockup. As a result, you’ll receive an image showing how your living room will look with selected wall colors, furniture, and accessories. You’ll be able to assess how well the chosen materials harmonize, and make adjustments if needed before starting the renovation.


Why Is an Interior Design Mockup Needed?
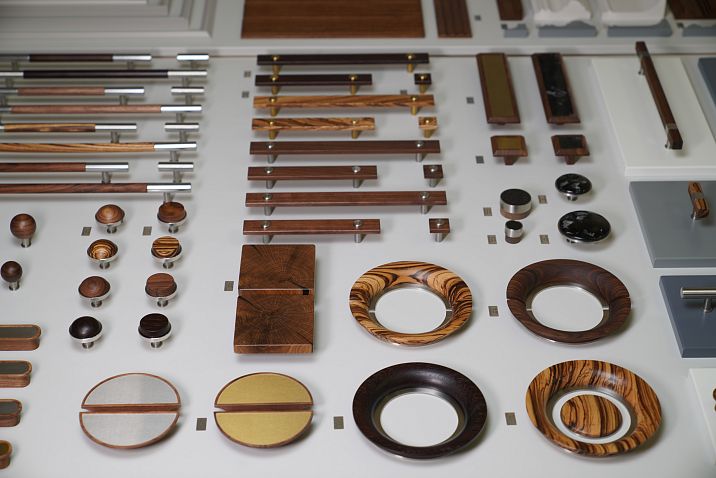
Our factory also produces:


1. Visualization
One of the main tasks of a mockup is visualization. Sometimes it’s hard to imagine how an abstract idea will translate into real space. A mockup allows you to see the future room in all its details—from overall composition to small decorative elements. This is especially important for clients who lack design experience and need a clear representation of the final result.
Example:
The client wants to update the office space but is unsure how to arrange workstations so that the space remains functional and stylish. A mockup allows the designer to show different furniture arrangements, select optimal lighting, and even demonstrate how different color schemes affect the perception of space.
Get Consultation
2. Time and Cost Savings
Creating a mockup early in the project helps avoid costly mistakes that may arise later. Instead of redoing already completed finishing work after starting, you can test several options in advance and choose the optimal one.
Example:
When designing a kitchen, you can experiment in the mockup with different materials for countertops, cabinet facades, and flooring. This will not only help find the best combination but also ensure that the chosen materials are suitable in terms of functionality and durability. As a result, the project is approved on the first try, and the risk of rework is minimized.
3. Improved Communication with the Client
Mockups serve as an excellent tool for communication between the designer and the client. When the client sees a specific image of the future interior, they better understand the project’s concept. This allows for faster alignment of all details, necessary changes, and achieving a final result that fully meets expectations.
Example:
During the mockup presentation, the designer explains why a particular color scheme was chosen or why specific decorative elements are placed. The client, seeing the finished image, can immediately make suggestions or ask questions, which helps avoid misunderstandings and saves time on clarifying details.
How Is an Interior Design Mockup Created?
Stage 1. Gathering Information and Defining the Task
Before starting work, the designer gathers all necessary information about the space: dimensions, floor plan, photos of the current state, as well as the client's wishes. At this stage, it is important to understand which style the client prefers, what materials they like, and what tasks the interior should fulfill.
Tip:
Record all ideas and client preferences, conduct interviews or meetings to precisely understand their vision. This will help avoid misunderstandings in later stages of the work.
Stage 2. 3D Modeling
At this stage, the designer creates a basic 3D model of the room. Programs such as Autodesk 3ds Max, Blender, SketchUp, or other tools that allow creating an accurate model taking into account all architectural features are used.
Example:
To create a living room mockup, the designer creates a room model with precise dimensions, places windows, doors, niche elements, and even adds furniture models that are planned to be used in the interior.
Stage 3. Texture and Lighting Setup
This is one of the key stages when the model comes to life. The designer applies real textures to the surfaces of walls, floor, ceiling, and furniture. Lighting setup is also crucial: properly chosen natural and artificial lighting makes the image realistic and helps show how materials will look under different lighting conditions.
Tip:
Experiment with lighting settings to achieve an effect as close to reality as possible. Using HDRI maps and advanced rendering engines (such as V-Ray or Corona Renderer) helps create an immersive effect.
Stage 4. Rendering and Post-Processing
After completing the modeling and texture setup, the rendering stage follows — transforming the 3D model into a high-quality image. Then, the designer refines the image in graphic editors such as Adobe Photoshop, adjusting colors, adding final touches, enhancing details, and creating a sense of depth.
Tip:
Do not be afraid to spend time on post-processing. This helps give the image a finished and professional look, making the mockup more convincing for the client.
Examples of Using Mockups in Interior Design
Example 1. Apartment Renovation
One family planned to update their apartment. The designer created a mockup showing how the living room, kitchen, and bedroom would look after renovation. The client could see how new materials and furniture would fit into the overall home style and also suggest adjustments. As a result, the project was refined even before work began, avoiding unexpected surprises and budget overruns.
Example 2. Office Space
A company ordered a redesign of its office. The interior design mockup allowed developing several furniture layout options, lounge areas, and workstations. Clients and employees evaluated the proposals, selected the optimal solution, and the company saved time and money on experimenting with different variants.
Example 3. Restaurant or Café
In the hospitality industry, it is especially important to create an atmosphere that attracts guests. Mockups allow demonstrating how the establishment will look with different lighting, table arrangements, and decorative elements. The restaurant that used a mockup design received high praise for its original approach to creating a unique atmosphere.
Practical Tips for Working with Mockups
- Plan in advance. Clearly define the goals and tasks of the project so that the mockup accurately reflects the intended interior.
- Use quality software. Choosing the right software for 3D modeling and rendering directly affects the final image quality.
- Pay attention to details. Small nuances, such as fabric texture or light reflection on glass, can significantly improve the realism of the mockup.
- Get feedback. Show intermediate mockup variants to the client, collect comments, and adjust the project. This will help avoid misunderstandings and increase satisfaction levels.
- Experiment. Do not be afraid to try new ideas and methods. Sometimes even small changes can completely transform the perception of the interior.
Ideas for inspiration
● Interactive presentations. Develop the ability for the client to independently change mockup parameters (color, texture, furniture placement) using an interactive interface.
● Use of VR/AR technologies. Immersion in virtual reality will help the client better feel the atmosphere of the future interior.
● Mixing styles. Experiment with combining classic and modern elements. For example, combine retro furniture with modern finishing materials to create a unique look.
Conclusion
Interior design mockups are a powerful tool that helps turn dreams into reality even before renovation or construction begins. They make the development process more transparent, save time and money, and improve communication between the designer and client. Thanks to modern digital technologies, mockups have become an essential part of the creative process, allowing experimentation, testing ideas, and creating spaces that delight the eye and inspire.
Today, mockups are used not only in apartment or office design but also in creating unique projects for restaurants, stores, exhibition spaces, and even public buildings. Photorealistic images help visualize how future interiors will look and participate in final decision-making, making the project more predictable and successful.
In the era of digital technology and rapid visualization development, leading companies demonstrate advanced approaches to interior design. One such company is STAVROS. STAVROS successfully implements innovative mockup design methods, offering clients unique solutions that combine technological precision, creativity, and practicality. Choosing STAVROS means investing in the future, where every detail of the interior is thought out to the smallest extent, and the creation process becomes an exciting journey from idea to reality.


