Article Contents:
- Living room zoning: TV area and sofa group
- TV area as a compositional center
- Extended TV area composition
- Sofa group: backdrop for conversation
- Zone connection through rhythm
- Panel and molding combination: wall geometry
- Moldings: types and profiles
- Creating panels: sizes and proportions
- Repetition rhythm
- Internal panel filling
- Lighting and highlights: play of light
- Hidden lighting behind moldings
- Accent lights: directional lighting
- Natural light and relief
- Highlights on glossy surfaces
- Connection with ceiling and baseboard: vertical logic
- Ceiling cornice as compositional starting point
- Baseboard as foundation
- Interfloor cornice: wall division
- Corner elements: hiding joints
- Installation practice: from project to implementation
- Wall Preparation
- Marking: drawing on the wall
- Cutting moldings
- Adhesion: adhesive and fixation
- Joint filling
- Painting moldings
- Style solutions: from classic to modern
- Classic living room: symmetry and ornament
- Neoclassic: Reserved Elegance
- Modern style: minimalism with character
- Eclecticism: freedom of combinations
- FAQ: Frequently Asked Questions
- Conclusion

After renovation, enter your friends' living room. A luxurious sofa, a 75-inch TV, parquet flooring, a ceiling with lighting. Everything is correct, everything is high quality. But somehow it feels empty. There’s nothing for the eye to latch onto. Walls are simply painted flat surfaces, smooth and featureless. The TV hangs like a black rectangle against a white background. The sofa group stands against the wall, but is disconnected from it. There’s no structure, no architecture, no depth that transforms a room into an interior.
Now imagine the same living room, but with a different solution. Behind the TV — a wall dividedpolyurethane moldings— into rectangular panels. The central panel is highlighted with a dark color, and the TV is recessed into it — it has become part of the architectural composition. On either side of the TV zone — vertical pilasters with hidden lighting, creating soft glares. Above the sofa — horizontal moldings forming frames, within which paintings or mirrors are placed. The entire system is connected to the ceiling cornice and baseboard through repetition of profiles and rhythms. The living room comes alive. Scale, structure, play of light and shadow appear.
Polyurethane molding on wallsLiving room zoning: TV zone and sofa group


TV zone as a compositional center


TV in a modern living room is inevitable. A large black screen dominates the wall, drawing the gaze. Attempts to camouflage it, hiding it behind sliding panels, rarely succeed — it remains visible most of the time. The right strategy is not to hide, but to integrate the TV into the architectural composition of the wall.
A TV in a modern living room is inevitable. A large black screen dominates the wall, drawing attention. Attempts to camouflage it or hide it behind sliding panels rarely succeed — it remains visible for most of the time. The right strategy is not to hide, but to integrate the TV into the architectural composition of the wall.
Basic solution: create a frame around the TV usingpolyurethane wall moldingsMoldings for the frame should be of medium width — 8–12 cm. Narrow (4–6 cm) will disappear against the large screen. Wide (15–20 cm) will overload the composition. The molding profile can be classical (with beads, grooves) for traditional interiors or minimalist geometric for modern ones.
Choose moldings for the frame of medium width — 8–12 centimeters. Narrow ones (4–6 cm) will disappear against the backdrop of a large screen. Wide ones (15–20 cm) will overload the composition. The molding profile can be classic (with beads or grooves) for traditional interiors or minimalist geometric for modern ones.
Inside the frame, you can create additional volume — a recessed niche where the TV is placed. The niche is formed by a gypsum board structure 5–10 cm deep, painted in a contrasting color to the main wall. For example, if the main wall is light gray, the niche is dark gray or black. The TV on a dark background looks natural, and the screen blends with the background when turned off.
Our factory also produces:


Extended TV zone composition
A single frame around the TV is good, but you can complicate the composition, making it more interesting. Add side panels on either side of the central TV frame.
— in the form of overlays, outlets.with molded decorationSuch a three-part composition creates rhythm, symmetry, balance. The TV remains the center, but it is no longer alone — it is part of a larger architectural structure. The wall is no longer a background; it has become an active element of the interior.
Side panel dimensions are chosen based on wall width. For a 3.5–4 meter wall, a three-part composition will occupy approximately 3–3.2 meters, leaving neutral zones of 20–40 cm on either side. For a 5-meter wall, you can make the side panels wider — 70–80 cm — creating a more substantial composition.
The sizes of side panels are chosen based on the width of the wall. For a 3.5–4 meter wall, a three-part composition will occupy approximately 3–3.2 meters, leaving neutral zones of 20–40 centimeters on both sides. For a 5-meter wall, you can make the side panels wider — 70–80 centimeters — creating a more monumental composition.
Get Consultation
Sofa group: background for conversation
The sofa zone — where the family gathers, where guests are received, where one reads and relaxes. Unlike the TV zone, where the gaze is focused on the screen, in the sofa zone, the gaze is scattered, gliding across the space. Here, the wall should be interesting, but not overpowering.
Classic solution for the wall behind the sofa — horizontal panels created by moldings. Moldings form 2–3 rectangular frames arranged in a row at a height of 60–100 cm from the floor (above the back of the sofa). The width of each frame — 80–120 cm, height — 60–90 cm. Inside the frames — a surface painted in another shade (1–2 tones darker or lighter than the main wall) or wallpaper with a delicate pattern.
Alternative — vertical panels behind the sofa. Three to five vertical rectangles created by moldings, from floor to ceiling or from the level of the sofa back to the ceiling cornice. Verticals visually raise the ceiling, creating dynamism. Within the vertical panels, you can place paintings, mirrors, wall-mounted lights.
Important: panels behind the sofa should not compete with the TV zone. If the TV zone is bright, contrasting, with deep relief, the sofa zone should be calmer — more delicate moldings, less contrasting colors. Conversely: if the TV zone is minimalist (just a frame around the TV), behind the sofa you can allow a more complex composition.
Linking zones through rhythm
The TV zone and sofa zone should not be isolated compositions. They need to be linked through repetition of elements, rhythms, proportions.
If vertical panels of a certain width (e.g., 50 cm) are used in the TV zone, behind the sofa you can repeat this width in horizontal frames. If the TV zone moldings are 10 cm wide with a classical profile, the sofa zone moldings should also be 10 cm wide with the same profile.
Color coordination: if the niche behind the TV is dark gray, one of the panels behind the sofa should also be dark gray. Repeating the color creates a visual rhyme, linking different parts of the room.
Symmetry or asymmetry: if the TV zone is symmetrical (central panel with TV, identical side panels), the sofa zone can be asymmetrical for variety. Or vice versa. The key is balance: if there’s symmetry in one area, asymmetry in another, the interior won’t become dull or chaotic.
Combination of panels and moldings: geometry of walls
Moldings: types and profiles
polyurethane wall moldingsAvailable in an enormous variety of profiles and sizes. The choice depends on the interior style and desired visual effect.
Flat moldings — rectangular cross-section, with or without bevel. Width from 2 to 10 centimeters. This is a minimalist option, suitable for modern interiors. They create clear graphics without overloading the space.
Profiled moldings — with convexities (beads), concavities (ovals), steps. Width from 5 to 15 centimeters. Classic option for neoclassical and traditional interiors. They create play of light and shadow, adding depth.
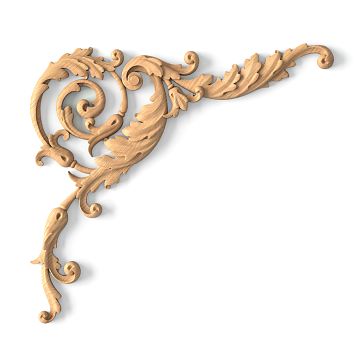
Carved moldings — with ornaments, floral motifs, geometric patterns. Width from 8 to 20 centimeters. Suitable for luxurious interiors in Baroque, Rococo, or Empire styles. Require caution — easy to overdo and end up looking gaudy.
For a medium-sized living room (20–30 square meters), profiled moldings 8–12 centimeters wide are optimal. They are noticeable enough to structure the wall, but do not overload it. For larger living rooms (40+ square meters), wider moldings — 12–18 centimeters — can be used.
Panel Creation: Sizes and Proportions
A panel is a rectangular area on the wall framed by moldings. Panel proportions are critically important for the perception of the interior.
Classic proportions: height-to-width ratio as 3:2 or 4:3. For example, a panel 90 centimeters wide should have a height of 60 centimeters (ratio 3:2) or 67 centimeters (ratio 4:3). Such proportions are perceived as harmonious and visually pleasing.
Vertical panels: height-to-width ratio as 2:1 or 3:1. For example, a panel 60 centimeters wide and 120–180 centimeters high. Vertical panels visually raise the ceiling, creating an upward movement.
Square panels: height equals width. For example, 80x80 centimeters. A square is a static, balanced shape. A row of square panels creates a calm, orderly rhythm.
Avoid random proportions — panels with arbitrary aspect ratios (e.g., 73x94 cm) look sloppy, as if made by eye. Stick to mathematically precise ratios.
Rhythm of Repetition
When there are multiple panels on a wall, the rhythm of their placement is important. Uniform rhythm — panels of the same size placed at equal distances from each other. Creates calmness and order. Suitable for symmetrical compositions.
Complex rhythm — alternating panels of different sizes. For example, a large central panel with two smaller side panels. Or a row of five panels, where the central one is larger than the four side ones. Creates dynamism and focuses attention on the center.
The intervals between panels should relate to the size of the panels themselves. If panels are 80 centimeters wide, the interval between them should be 15–25 centimeters. Too small an interval (5–10 cm) — panels merge. Too large (40–50 cm) — the connection between them is lost.
Internal Panel Filling
An empty panel — simply moldings on a painted wall — is a basic solution. But it can be enhanced by adding additional elements inside the panels.
Contrasting color: the interior surface of the panel is painted 2–3 tones darker or lighter than the main wall. For example, a beige wall with dark beige panels inside. This creates depth, volume, and highlights the panels.
Wallpaper: wallpaper with a pattern — damask, stripes, geometry — is applied inside the panels. The main wall remains painted. Wallpaper within molding frames — a classic technique, adding texture and richness.
Fabric: fabric — velvet, jacquard, leather — is mounted on the wall inside the panels. An expensive, luxurious solution, creating tactile sensation and coziness. Fabric can be with a buttoned trim (diamonds with buttons) — this enhances volume.
Surface-mounted decor: placed inside the panelsPolyurethane appliqués— outlets, corner elements, ornaments. They are mounted on top of the painted surface, creating additional relief.
Functional elements: inside the panels — mirrors, paintings, TV, shelves. The panel becomes a functional zone, not purely decorative.
It is important not to overload: if there are many panels (5–7 on one wall), not all should be filled. Some with contrasting color, some empty. The rhythm of filled and empty panels creates breathing space and variety.
Lighting and highlights: play of light
Hidden backlighting behind moldings
One of the most effective techniques — hidden LED backlighting located behind vertical or horizontal moldings. Light coming from behind the molding creates soft illumination, highlighting the wall’s architecture.
Construction: the molding is mounted to the wall so that a 2–3 centimeter gap remains between its back and the wall. The LED strip is placed into this gap. Light from the strip radiates upward and downward (if the molding is vertical) or left and right (if horizontal), creating a light band on the wall.
To create the gap, mounting strips or spacers made of wood or plywood are attached to the wall, and then the molding is glued to them. The LED strip is glued to the wall behind the molding, and wires are concealed within the structure or in a cable channel.
Light color: for classic interiors - warm white (2700-3000 Kelvin), creating coziness. For modern interiors - neutral white (4000K) or even cool (5000K), creating a technological feel. For accents, colored RGB lighting can be used, but with caution - it easily turns into a disco style.
Where to place: lighting is especially effective in the TV zone - vertical moldings with lighting on both sides of the TV create soft glow, reducing contrast between the bright screen and dark room (useful for eyes during viewing). Lighting also works well in niches, arches, and behind accent panels.
Accent fixtures: directional light
Wall-mounted fixtures (chandeliers, spotlights) can be used for accent lightingof wall decorationLight directed at a textured surface at an angle creates deep shadows, emphasizing volume.
Spotlights (adjustable directional lights) are mounted above or beside panels. The light direction is adjusted so it glides along the panel surface, highlighting the molding relief. This creates a dramatic effect - moldings cast shadows, and every profile detail is visible in three dimensions.
Classic chandeliers with shades are placed within panels - one fixture centered in each panel or symmetrically on both sides. The soft, diffused light from chandeliers creates intimacy and coziness in the sofa area.
The color temperature of accent fixtures should match the general room lighting. If the main light (chandelier, recessed lights) is warm white, the chandeliers should also be warm. Mixing warm and cool light in one room creates discomfort.
Natural light and relief
Daylight from windows interacts with reliefpolyurethane molding on the wallthroughout the day, creating changing light effects.
In the morning, when the sun is low, light falls at a sharp angle - shadows from moldings are long and contrasting, relief is most pronounced. At noon, the sun is at its zenith, light is diffused - shadows are short, relief is softer to read. In the evening, as the sun sets, sharp side lighting returns - shadows stretch in the opposite direction compared to morning.
When planning the composition of moldings, consider window placement. If windows are on the eastern wall and moldings on the western wall, moldings will be in shadow in the morning and illuminated by sunlight in the evening. Conversely: windows on the western wall, moldings on the eastern wall - illuminated in the morning, in shadow in the evening.
For maximum effect, place relief moldings on walls perpendicular to windows - side light from windows emphasizes relief. On walls with windows or opposite windows, relief is less visible - light falls frontally, shadows are minimal.
Highlights on glossy surfaces
IfPolyurethane molding on wallsIf painted with glossy paint, it reflects light, creating highlights. This effect can be used to enhance expressiveness.
Glossy moldings on matte walls - classic technique. Main wall is painted matte (absorbs light, appears calm). Moldings are painted glossy paint of the same color (reflects light, appears brighter). As lighting changes, moldings change brightness, remaining noticeable even in dim light.
Gilded or silver moldings - maximum reflection. Moldings are painted with gold or silver paint (or patina - partial gilding of protruding parts). Any light source creates highlights on them. This technique suits luxurious classic interiors where grandeur is appropriate.
It's important not to overdo gloss - if the entire room is glossy (walls, moldings, furniture), it results in excessive highlights, visual noise. Gloss should be an accent, not a background.
Connection with ceiling and baseboard: vertical logic
Ceiling cornice as composition start
Polyurethane molding on wallsIn the living room, wall moldings should be connected to the ceiling cornice. Connection is created through repetition of profiles, widths, and styles.
If the ceiling cornice is 15 cm wide with a classic profile (modillions, dentils), wall moldings can be 10-12 cm with a simplified version of the same profile. The eye perceives this as a system - ceiling and walls speak the same language.
Color coordination: if the cornice is white, wall moldings should also be white (even if walls are colored). White ceiling and white wall frames create a unified graphic, structuring the space.
Vertical moldings on walls can reach the ceiling cornice or stop 10-20 cm below. If they reach the cornice, it creates the impression of columns supporting the ceiling, architectural logic. If they stop short, it is less monumental but leaves breathing space between wall and ceiling.
Baseboard as foundation
Wall panels and moldings at the bottom should coordinate with the baseboard. If the baseboard is tall (12-20 cm), the lower edge of panels can rest on the top edge of the baseboard - panels appear to stand on a plinth.
If the baseboard is standard (7-10 cm), panels usually start higher - at 30-50 cm from the floor. This creates a lower free wall zone, visually lightening the composition.
Material coordination: if the baseboard is wooden, use wooden moldings of the same shade for the lower part of wall panels (lower horizontal frame rail). Upper and side frame rails - white polyurethane. This creates a material combination where wood provides solidity at the bottom, polyurethane adds lightness at the top.
Interfloor cornice: dividing the wall
In rooms with high ceilings (3.5-4 meters), the interfloor cornice technique is used — a horizontal molding running at a height of 2.2-2.5 meters around the entire perimeter of the room. It divides the wall into a lower tier (from floor to cornice) and an upper tier (from cornice to ceiling).
The lower tier is finished with panels, as described above. The upper tier remains either smooth and painted, or also subdivided into smaller panels. The interfloor cornice visually reduces the ceiling height (which is beneficial for overly high rooms), creating scale and proportions.
The profile of the interfloor cornice can be the same as the ceiling cornice, but smaller in size. Or contrasting — if the ceiling cornice is ornate and carved, the interfloor cornice may be a simple geometric design.
Corner elements: hiding joints
At room corners, where moldings from two walls meet, corner elements — precast, cast parts that imitate a 45-degree joint between two strips — are used. They simplify installation (no need for intricate cutting) and enhance decoration — corner elements often feature additional ornamentation or a rosette at the joint.
Corner elements come in two types: internal (for room corners) and external (for protruding angles or columns). Choose elements that match the profile of your moldings — they must fit together without gaps or steps.
Installation practice: from project to implementation
Wall Preparation
Before installationpolyurethane molding on the wallWalls must be prepared: leveled, primed, and painted in the base color. Moldings are installed on already finished surfaces.
Wall requirements: flatness — deviations no more than 3-5 millimeters per meter of length. If the wall is curved, the molding won’t adhere tightly, creating gaps. Cleanliness — walls must be dust-free, without greasy stains. Dryness — humidity no more than 8-10 percent; fresh plaster must be fully dry.
Wall painting: the base color is applied before installing moldings. After installation, only the inner parts of panels (if contrasting colors) are touched up. Moldings are painted after installation, once all gaps are filled with putty.
Marking: drawing on the wall
Accurate marking — half the success. On the wall, lines for moldings are marked with a pencil or painter’s string. Each panel is fully outlined — all four sides.
Use a level to check the horizontal and vertical alignment of lines. Even a 1-2 degree deviation over a 2-meter length will cause visible misalignment — the panel will appear slanted.
Check symmetry: if creating a symmetrical composition (panels identical left and right of center), measure distances from the central axis to each element — they must match precisely to the millimeter.
Marking takes into account the molding’s thickness. If the molding is 10 cm wide and the panel should be 80x100 cm (internal size), the molding frame will occupy 100x120 cm (adding 10 cm on each side).
Cutting moldings
polyurethane wall moldingsCut with a fine-toothed hacksaw, a miter saw, or even a utility knife (for thin moldings). Polyurethane is soft and cuts easily.
90-degree angles (straight joints) are cut perpendicular to the molding’s axis. 45-degree angles (for frames) are cut at this angle, as when cutting baseboards. Use a miter box or miter saw for accuracy.
Rule: measure seven times, cut once. Especially critical for corner joints — an error of 1-2 degrees will result in a gap at the joint.
Edge finishing: after cutting, run a fine-grit sandpaper (180-220 grit) over the edge to remove burrs. Check the cut’s squareness with a square — the edge must be strictly perpendicular (or exactly 45 degrees for corner joints).
Adhesion: glue and fixation
Polyurethane moldings are glued with special mounting adhesive (liquid nails, polymer glue). Glue is applied to the back of the molding in a zigzag or dot pattern, spaced 10-15 cm apart.
Gluing technique: apply glue, press molding onto wall along marking lines, hold firmly for 10 seconds, then lift. Glue remains on both molding and wall. Wait 1-2 minutes — glue dries and becomes tacky. Reapply molding exactly to same marks, press firmly. Hold 20-30 seconds — glue sets. Molding holds.
This method (press, lift, repress) yields a stronger bond than direct gluing. Glue partially polymerizes in air, becoming tackier.
For heavy, wide moldings (15-20 cm), additional screws or finish nails are used — every 40-50 cm. After glue sets (24 hours), screws can be removed, holes filled with putty. Or leave — for safety.
Joint puttying
Joints between moldings (in frame corners, room corners) always have micro-gaps of 0.5-1 mm — this is normal. They are filled with acrylic putty.
Putty is applied with a narrow putty knife or finger in a rubber glove, pressed into the gap. Excess is wiped away with a damp sponge. After drying (4-6 hours), sand with fine-grit sandpaper. The joint should become invisible — as if the molding is continuous.
Also, holes from screws (if used) and minor surface defects on moldings (scratches, transport marks) are filled with putty. Goal — perfectly smooth surface before painting.
After installation and puttying, moldings are painted. Usually, they are sold primed with white primer, but for ideal results, a finish coat is required.
Painting Moldings
Painting: after installation and puttying, moldings are painted. Usually, they are sold primed with white primer, but for ideal results, a finish coat is required.
Paint: interior acrylic or latex, matte or satin. Glossy - for special effects (shiny highlights). Color - most often white (moldings like graphics on a colored wall) or matching the walls (monochromatic solution).
Technique: small velvet roller for smooth areas, brush for textured and hard-to-reach spots. Apply two thin layers with intermediate drying time of 4-6 hours. Two thin layers are better than one thick layer - fewer drips, smoother finish.
Wall protection: before painting moldings, apply painter's tape along them to the walls - this prevents paint from getting on the wall. After the paint dries, remove the tape.
Style solutions: from classic to modern
Classic living room: symmetry and ornament
Classic - symmetry, proportions, ornament. TV zone: central panel with TV, framed by wide carved moldings (12-15 cm) with floral ornament. On both sides - two identical panels with inset outlets in the center. All painted in cream with a light gold patina.
Behind the sofa: three horizontal panels, inside which are damask-patterned wallpapers. Moldings are the same as in the TV zone. In the center of each panel - a classic wall sconce with fabric shade.
Ceiling cornice: wide (18-20 cm) with modillions and dentils, cream with gold trim. Floor skirting: wooden, 15 cm high, matching floor color (natural oak).
Result: a grand living room where every detail is thought out, where the connection to historical interiors is visible, yet functionality is modern (large TV, hidden wires, convenient outlets).
Neoclassicism: Reserved Elegance
Neoclassicism - classic proportions, but simplified forms, restrained colors. TV zone: rectangular frame of minimalist moldings (10 cm, simple profile) around the TV. Inside the frame, the wall is dark gray, and the TV on the dark background almost blends in.
Beside the TV: vertical moldings from floor to ceiling, behind which is hidden LED backlighting. Soft glow in the evening creates intimacy.
Behind the sofa: five vertical panels of equal width (60 cm), three painted in a tone darker than the walls, two in matching tone. Rhythm of dark and light panels. Inside the central dark panel - a large round mirror.
Ceiling cornice: medium width (12 cm), simple geometric profile, white. Floor skirting: white painted, 10 cm.
Color solution: walls light gray, moldings white, accents (dark TV niche, dark panels) dark gray. Furniture white and gray. Monochromatic elegance.
Modern style: minimalism with character
Modern style - minimal decoration, but maximum expressiveness. TV zone: TV mounted on a gypsum board panel recessed into the wall by 10 cm. Panel painted matte black. No moldings - only clear geometry of a black rectangle on a light gray background.
Beside the TV: narrow vertical slots (5 cm wide), behind which is hidden LED backlighting. Light spills from the slots upward and downward, creating light columns on the wall.
Behind the sofa: three wide horizontal stripes made of thin (3-4 cm) flat black moldings. Stripes at heights of 60, 90, and 120 cm from the floor, each 2.5 meters long. Between stripes - light gray wall. Nothing else - black lines on a gray background.
Ceiling cornice: absent. Ceiling white transitions into light gray wall without framing. Or narrow shadow cove (4 cm), creating a subtle shadow at the transition point.
Floor skirting: minimal (7 cm), black, level with wall (hidden mounting).
Result: brutal minimalism, where decoration is reduced to a minimum, yet every line and accent works. Black and gray, light and shadow - nothing extra.
Eclecticism: freedom of combinations
Eclecticism - mixing styles, freedom of choice. TV zone: modern black panel with TV, but framed by classic white moldings with carved ornament. Contrast between modern technological (TV) and classic decorative (moldings).
Behind the sofa: asymmetrical composition. Left - large vertical panel with mirror in a classic frame. Right - three small square panels with modern posters. Moldings are identical white, but internal fill is different - classic and modern.
Ceiling cornice: classic carved, white with gold patina. Floor skirting: dark wooden, wide (15 cm). Furniture: modern gray sofa with classic velvet armchairs.
Result: a lively, dynamic interior where classic and modern do not conflict but complement each other. For those who do not want to confine themselves to one style.
FAQ: Frequently Asked Questions
Question: Can moldings be mounted on wallpaper?
Answer: Yes, but not recommended. Moldings are heavier than wallpaper and may over time peel wallpaper off the wall and fall off with it. Better to mount on painted or plastered wall. If wallpaper is already applied, moldings can be glued and additionally secured with screws.
Question: How long does it take to install moldings in a 25 sq. m. living room?
Answer: For an experienced craftsman - 1-2 days (marking, installation, spackling, painting). For a beginner - 3-5 days. Most of the time is spent on marking and precise fitting of corners.
Question: Is it necessary to paint the moldings after installation?
Answer: Not necessary if they are primed by the manufacturer and white color suits you. But final painting improves appearance — hides joints, spackled areas, creates uniform tone.
Question: How to calculate the amount of moldings?
Answer: Draw a wall sketch with panels to scale. Calculate total length of all lines (perimeters of all frames). Add 10-15% for cuts and errors. Divide by length of one molding piece (usually 2 meters). Get the number of pieces.
Question: Can polyurethane moldings be combined with wooden ones?
Answer: Yes, this creates an interesting material contrast. For example, lower horizontal frame pieces — wood (solidity), side and upper pieces — polyurethane (lightness). It’s important to match them in width and color.
Question: How to care for molding?
Answer: Wipe with dry or slightly damp soft cloth once every 1-2 months to remove dust. Do not use abrasives, stiff brushes, or aggressive chemicals. If paint fades after 5-7 years — repaint.
Question: Will polyurethane withstand impact?
Answer: Polyurethane is softer than wood; a strong impact may leave a dent. But in the living room, wall moldings rarely experience mechanical stress (unlike baseboards). With careful use, they last for decades.
Conclusion
Polyurethane molding on wallsIn the living room — it’s not just decoration. It’s a zoning tool, creating architecture where there were merely flat painted surfaces. A properly designed panel and molding system transforms the living room into a thoughtfully structured space, where each zone has its own treatment, and the eye has something to focus on.
Working with light — hidden lighting, accent fixtures, using natural light — enhances the molding effect multiple times. Relief barely noticeable under frontal lighting becomes a play of deep shadows and bright highlights under side lighting. The living room comes alive, breathes, changes throughout the day.
Linking wall decor with ceiling cornice and baseboard creates vertical interior logic. All elements — from floor to ceiling — are coordinated, speaking the same architectural language. This is the hallmark of professional interior design: not a collection of beautiful items, but a system where every detail connects with the rest.
Company STAVROS offers a full range ofpolyurethane molding on the wallFor living rooms of any style and size.Moldings for wallsAll sizes — from thin minimalist (3-4 cm) to wide luxurious (18-20 cm), with profiles ranging from simple geometric to intricate carved designs.applied decor— outlets, corner elements, ornaments — for creating accents within panels.
All STAVROS products are made of high-quality polyurethane with density 300-400 kg/m³, primed with white primer, ready for installation and painting. Precise geometry, clear relief, flawless mating surfaces — installation proceeds without issues, joints become tight.
STAVROS consultants will help select elements for your living room, create a composition sketch, calculate material quantity, recommend installation and painting methods. Because the living room — it’s the face of the home, the place where family and guests gather. And this face must be beautiful — with structure, depth, play of light and shadow, architecture that turns a simple room into a space worthy of life.