Article Contents:
- Choosing a Profile for LED Strip: Construction and Materials
- Profile Construction Features
- Materials: From Budget to Premium
- Sizes: How to Choose for a Specific Room
- Color and Surface Texture
- Lighting Scenarios: How to Control Spatial Perception
- Floating Ceiling Effect: Genre Classic
- Space Zoning with Light Lines
- Accent Lighting for Architectural Elements
- Imitating Natural Lighting
- Decorative Color Scenarios
- Installation on Straight and Curved Sections
- Preparation: Marking and Material Calculation
- Installation on Straight Sections: Walls and Drywall Structures
- Installation on Curved Sections: Arches and Bay Windows
- Corner Finishing: Internal and External
- Electrical Wiring Installation
- Joints Connecting to Tensioned Ceiling
- Work Sequence: Before or After Tensioning?
- Mounting the Profile: Only to the Wall
- Gap Size: Its Impact on Lighting Character
- Fabric Type: Its Impact on Lighting Brightness
- Fabric Protection from Heating
- Final Finishing: From Installation to Aesthetics
- Surface Preparation
- When to Paint: Before or After LED Strip Installation?
- Choosing Paint and Color
- Painting technique
- Installing LED Strips After Painting
- Conclusion: Architecture Created by Light
The ceiling is painted perfectly. The smooth white surface reflects the light from the central chandelier. Functionally, everything is correct — the lighting works, the ceiling height is standard at 2.7 m. But the room appears flat, one-dimensional, lacking architectural interest. The ceiling simply exists — it hangs overhead, not drawing attention, not creating an impression.
Now imagine: a thin light line runs along the perimeter of the ceiling. The soft glow separates the ceiling from the walls, creating an effect of a floating plane. The room visually becomes higher, more spacious, and more voluminous. The light emanates not from a point — a chandelier or fixture — but from the architecture itself, as if it were built into the structure from the start.
Cornice for backlighting Transforms this fantasy into reality. A special profile with an integrated shelf for LED strips is installed around the room, offset from the ceiling. The LED strip directs light upward, which reflects off the ceiling and disperses into space. No visible fixtures — only the result of their work — clean light lines that alter the perception of architecture. Let’s figure out how to choose the right cornice, implement different lighting scenarios, mount it on any surfaces, and achieve a flawless result.


Choosing a cornice for the strip: construction and materials
Not every ceiling cornice is suitable for integrating LED backlighting. A special construction with a shelf for placing the LED strip is required.


Constructive features of the profile
Ceiling lighting cornice Has an L-shaped or П-shaped cross-section. The vertical part adheres to the wall, the horizontal shelf serves as the base for the LED strip. The front part hides the LEDs from direct view, directing light upward.
The shelf width determines which strip can be installed. A narrow shelf of 20-30 mm is suitable for decorative strips of 5-7 W/m, 60 LEDs per meter. A medium shelf of 30-40 mm accommodates functional strips of 10-14 W/m, 120 LEDs. A wide shelf of 40-50 mm is intended for powerful strips of 14-18 W/m or two-row configurations.
The profile height affects visual expressiveness and the size of the gap between the ceiling and the top edge of the cornice. Low cornices of 50-70 mm create a thin light line, a delicate effect. Medium ones of 80-120 mm are universal for most interiors. High ones of 150-250 mm provide a wide light band, architectural expressiveness.
The lip on the front part of the profile determines whether the light source is visible from below. A high lip completely hides the LED strip, only the reflected light from the ceiling is visible. A low lip or its absence allows direct viewing of the strip’s glow — brighter effect, but less refined.
Our factory also produces:


Materials: from budget to premium
Polystyrene — the most affordable material, price 200-600 rubles/m. Density 25-35 kg/m³, minimal weight. A two-meter cornice 100 mm high weighs 150-300 grams. Easily cut, glued, painted with water-based paints.
Advantages: low price, easy installation (sticks to glue without additional fasteners), wide range of profiles. Disadvantages: brittleness, low heat resistance (up to 80°C), tendency to yellow under UV exposure near large windows, may sag on sections over 3-4 meters.
For decorative backlighting of low power in standard apartments, polystyrene is optimal. Significant savings without critical loss of quality.
Duroplastic — high-density polystyrene 350-420 kg/m³, price 600-1200 rubles/m. Ten times denser than regular polystyrene, accordingly stronger, more heat-resistant (up to 90-110°C), stiffer. Does not sag on sections of 5-7 meters, maintains ideal geometry.
Advantages: strength, shape stability, heat resistance (can use powerful strips), lifespan of 25-30 years, smooth reflective surface. Disadvantages: price 2-4 times higher than polystyrene, greater weight requires mechanical fastening.
For powerful backlighting, wide cornices of 150-250 mm, premium interiors, commercial spaces — duroplastic is mandatory. Quality justifies the price difference.
Polyurethane — elastic material, density 200-350 kg/m³, price 800-1500 rubles/m. Has flexibility, can be bent for curved surfaces. Absolute moisture resistance, heat resistance up to 110-130°C.
Advantages: flexibility for arches, bay windows, curved walls, maximum moisture resistance for humid spaces. Disadvantages: high price, overkill for straight sections.
For standard straight sections, polyurethane is overkill without necessity. For curved surfaces — the only solution.
Fitoplastic — composite material with natural additives, density 280-350 kg/m³, price 500-900 rubles/m. 20-30% lighter than duroplastic, 6-8 times stronger than polystyrene. More eco-friendly than synthetic materials due to up to 30% plant fiber content.
Advantages: balanced price and quality, lower weight with good strength, eco-friendliness. Disadvantages: slightly less heat-resistant than duroplastic (up to 85-95°C).
Optimal for residential spaces where reasonable price and good quality and eco-friendly materials are important.
Get Consultation
Dimensions: how to choose for a specific room
For standard apartments with ceilings 2.5-2.7 m, cornices 70-100 mm high are optimal. They create a moderate gap of 5-8 cm between the ceiling and the top edge of the profile. This is sufficient for even light distribution without excessive brightness.
For rooms with ceilings 2.8-3.2 m, cornices 100-150 mm are suitable. Proportions are maintained — a higher room requires a more expressive cornice. The gap increases to 8-12 cm, and the light becomes softer, more diffused.
For high rooms 3.5 m and above — Stalin-era buildings, private homes, public buildings — cornices 150-250 mm are used. These are architectural elements matching the scale of the space. A gap of 12-20 cm creates very soft, delicate lighting.
The standard plank length is 2 or 2.4 meters. This is optimal for transportation and minimizing joints. For a room with a 20-meter perimeter, you will need 9-10 planks 2.4 meters long or 10-11 planks 2 meters long.
Color and surface texture
White color for painting — universal solution. The cornice is delivered white and painted after installation in any color. This provides maximum flexibility — matching the ceiling color for visual blending, wall color for vertical continuity, or contrasting color for expressiveness.
Smooth surface without relief is suitable for modern minimalist interiors. Clean geometry, concise form, works as a lighting tool without decorative excess.
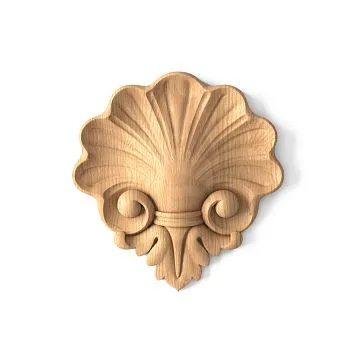
Relief surface with classic ornaments for historical styles, neoclassicism, traditional interiors. The cornice not only serves as a base for backlighting but also as a standalone decorative element.
The reflective ability of the surface affects the efficiency of backlighting. A smooth dense surface of duro-polymer or phyto-polymer reflects light better than porous polystyrene. More light is directed toward the ceiling, less is absorbed by the material.
Lighting scenarios: how to control the perception of space
Cornice for concealed ceiling backlighting — not just a light source, but an architectural modeling tool.
Floating ceiling effect: classic genre
A light strip along the perimeter of the ceiling visually separates it from the walls. The ceiling is perceived as a separate plane, floating above the space. The room appears 20-30 cm higher, more voluminous, and airier.
LED strip power of 7-10 W/m with a white ceiling creates sufficiently bright backlighting suitable for use as ambient evening lighting. You can turn off the chandelier and leave only the contour backlighting — comfortable for relaxation, movie viewing, romantic atmosphere.
For dark ceilings, power is increased to 14-18 W/m. A dark surface absorbs most of the light, requiring a more powerful source for a noticeable effect. Either paint the ceiling in light tones, or use powerful strips.
The color temperature of light affects perception. Warm white 2700-3000K creates a cozy atmosphere, visually lowers the ceiling — the light is warm and enveloping. Cool 6000-6500K visually raises the ceiling, expands the space — the light is light and airy. Neutral 4000-4500K is universal and comfortable for everyday use.
Zoning space with light lines
In studios and open-plan apartments, light lines define functional zones without physical partitions. A cornice with backlighting over the living room zone, another over the dining area, a third over the sleeping zone — each zone receives its own lighting design.
Different backlight intensity in different zones enhances zoning. Bright backlighting in work zones — kitchen, office. Medium in the living room and dining area. Dimmed in the relaxation and sleeping zones. Light controls attention, creating spatial hierarchy.
Independent control of each zone via separate dimmers provides flexibility. Turn on all zones — the room is bathed in light, bright social atmosphere. Leave only the relaxation zone — intimate, intimate space. The system adapts to the usage scenario.
Accent lighting of architectural elements
Multi-level ceilings, niches, ventilation boxes — architectural elements that backlighting makes more expressive.
LED strip ceiling trim Along the perimeter of each level, it reveals volume, creating a three-dimensional light composition.
The lower level is brighter, the upper level more delicate — creating a light perspective, depth. Or vice versa — the upper level is bright, the lower level dimmed — attention is directed upward, the ceiling visually rises.
Niche in the ceiling for curtains, ventilation boxes, decorative structures — all of this is backlit with contour lighting. An element perceived as a technical necessity during the day becomes a light accent in the evening.
Imitating natural lighting
Programmable RGB+W systems (RGB for color plus white channel for brightness) imitate the change of natural lighting throughout the day. In the morning — warm orange light, mimicking sunrise. During the day — bright neutral white. In the evening — warm yellowish sunset. At night — dimmed bluish moonlight.
Circadian lighting is synchronized with human biological rhythms. In the morning, cool bright light stimulates awakening and activity. In the evening, warm dim light prepares for sleep. The system helps the body maintain natural rhythms in urban environments.
Decorative color scenarios
RGB strips allow changing the backlight color according to mood, event, season. In winter — cool blue tones, creating a feeling of freshness and ice. In summer — warm greens, reminiscent of nature. On holidays — bright saturated colors.
Dynamic programs automatically change color. Smooth transitions from one color to another, pulsation in sync with music, imitation of northern lights, fire, water. The interior transforms, becoming interactive and responsive to events.
For everyday use, most prefer white light — it is more natural, more comfortable for the eyes, and less tiring. Colored backlighting is effective episodically — for parties, romantic evenings, holidays.
Installation on straight and curved sections
Correct installation — guarantee of system longevity and quality of lighting effect.
Preparation: marking and material calculation
Measure the room's perimeter at the height of the valance installation. Usually, this is 5-15 cm below the ceiling level. Subtract the width of door and window openings where the valance is not installed. Add 10% allowance for trimming and possible errors.
Laser leveling is critical for result quality. Draw a strictly horizontal line around the entire perimeter. Even a millimeter deviation from horizontal is noticeable with the backlighting on — the light stripe will repeat the slope, revealing the error.
The height of valance installation from the ceiling determines the type of backlighting. A setback of 5-7 cm — bright, concentrated stripe. A setback of 10-12 cm — soft, diffused glow. The optimal gap of 8-10 cm provides a balance of brightness and uniformity.
Installation on straight sections: walls and gypsum board structures
The base must be flat, clean, dry, and strong. Remove peeling finishes, wash away dust, humidity no more than 10%. Level irregularities over 5 mm with putty — the valance will replicate wall waves.
For lightweight polystyrene valances, adhesive is sufficient. Apply polymer adhesive or acrylic sealant to the vertical surface of the valance in a zigzag pattern with 10-15 cm spacing. Attach to the wall according to the marking, press down, hold for 30-60 seconds. Wipe off excess adhesive with a damp cloth.
For heavy duroplastic valances, mechanical fastening is required. Use adhesive plus self-tapping screws spaced 40-50 cm apart on straight sections, 30 cm in corners. Drill a hole through the valance into the wall, insert a wall anchor, and tighten the screw. Sink the screw head 2-3 mm, and fill the hole with putty.
On gypsum board structures, use special anchors for gypsum board — butterfly or molly anchors. They spread behind the sheet, creating a secure fastening. Standard plastic anchors in gypsum board hold poorly, and the valance may detach.
Installation on curved sections: arches and bay windows
For curved surfaces, a standard rigid valance is unsuitable — it doesn't bend. Use either a flexible polyurethane profile or special equipment for installing rigid profiles on curved surfaces.
Flexible polyurethane valances can be manually bent to the required radius. The minimum bending radius depends on the profile size — typically 50 cm for narrow profiles to 100-150 cm for wide ones. Attach to the wall, fix with adhesive and frequent self-tapping screws (every 20-30 cm), and the profile will take the shape of the surface.
Rigid profiles on curves are installed in segments. Cut the valance into short pieces 20-40 cm long. Attach and fasten each segment separately, positioning along the curve. Fill gaps between segments with putty and sand them smooth. After painting, the segmentation is almost invisible.
For smooth curves with large radius (over 2 meters), you can score the back surface of a rigid valance every 5-10 cm to half its thickness. The cuts will allow the profile to slightly bend. However, this is a risky technique — easily break the profile.
Corner finishing: internal and external
Cut internal corners at 45 degrees using a circular saw. For valances with backlighting, precision is critical — the gap is not only visually noticeable but also lets light pass. Place both profiles against the corner, check the joint tightness from all sides.
Fill micro-gaps up to 0.5 mm with white acrylic sealant. Extrude a thin bead, smooth with a damp finger, and wipe off excess. After painting, the joint is invisible, and light does not leak through.
External corners require special precision — they are more exposed than internal ones. Cut precisely at 45 degrees, check on scraps, and fit on-site. Additionally, secure the corner with a self-tapping screw — external corners are prone to impacts.
Pre-fabricated corner elements simplify installation. Insert profiles into the corner element — and the corner is finished without precise trimming. After painting, the corner element blends with the main profiles.
Electrical wiring installation
Run the wiring from the power supply block to the start of the LED strip BEFORE installing the valances. Lay 1.5-2.5 mm² wire along the wall or base ceiling, secure with brackets, and lead it to the start of the strip.
Place the power supply in an accessible location — in a niche behind the valance, in a technical cabinet, or on a loft. It must be ventilated — overheating shortens its lifespan. The power supply's capacity should be 20-30% greater than the total LED strip power.
Observe polarity when connecting. Connect the positive terminal of the block to the positive terminal of the strip, and the negative to the negative. If you connect it incorrectly — the strip won't light up, but won't burn out. Simply reconnect it correctly. The strip usually has markings: + and −, red and black wires.
Connection nodes to tensioned ceilings
Valance with backlighting for tensioned ceilings requires a special approach to installation.
Work sequence: before or after tensioning?
Install the valance BEFORE tensioning the ceiling fabric. Standard sequence: wall leveling → valance installation → mounting of tensioned ceiling trim → fabric tensioning → LED strip installation → connection → testing → valance painting.
Why before tensioning? Installing the valance requires drilling, adhesive, and possible contamination. A tensioned fabric is easily damaged by tools or stained. All dirty work is performed before the final tensioning stage.
Install LED strips AFTER tensioning the fabric, when the exact gap between the fabric and the valance shelf is visible. If you install the strip before tensioning, you won't know how it will light — ceiling installers may adjust the fabric height during the process.
Valance mounting: only to the wall
The cornice is mounted exclusively to the wall, without contact with the tensioned fabric. The fabric is under tension; any pressure on it will cause deformations, wrinkles, sagging. Special cornices for tensioned ceilings have a construction ensuring attachment only to vertical surfaces.
The wall mounting width should be sufficient for secure fastening. Ideally 30-50 mm — this ensures contact area for adhesive and allows screw installation without risking profile cracking.
For lightweight polystyrene cornices, adhesive is sufficient. For heavy duroplastic cornices, mechanical fixation with screws is mandatory. Don't risk it — a cornice that detaches after a year will damage the tensioned fabric upon falling.
Gap size: effect on lighting character
The distance between the top edge of the cornice and the tensioned fabric determines the lighting effect. A narrow gap of 3-5 cm creates a bright strip where individual LED points are visible. The effect is discrete and technological.
A medium gap of 7-10 cm is optimal for most cases. Light diffuses, individual LEDs merge into a continuous line. Brightness is sufficient for functional lighting and comfortable for the eyes.
A wide gap of 12-15 cm creates very soft, delicate lighting. LED points are completely indistinguishable. The backlighting acts as an architectural accent, visually lifting the ceiling without straining the eyes.
The gap is adjusted by the distance between the cornice installation and the base ceiling level. If the tensioned ceiling valance is mounted 5 cm from the base ceiling, and the cornice is installed 15 cm below the base ceiling level, the gap will be approximately 10 cm.
Fabric type: effect on backlight brightness
Glossy PVC fabric reflects 80-90% of light, creating maximum backlight brightness. The floating ceiling effect is most pronounced. However, gloss reveals all irregularities of the base ceiling in reflection.
Matte fabric reflects 60-70% of light, creating soft, natural lighting without glare. For comparable brightness, LED strip power must be increased by 30-50%. The effect is more delicate, but many prefer matte finish for its natural appearance.
Satin fabric is a middle option with a slight silk-like sheen. Reflects 70-80% of light, providing soft lighting without harsh gloss. Ideal for classic and neoclassical interiors.
Colored fabric changes the backlight color. Beige warms neutral white light, blue cools it. Dark fabric absorbs most of the light — backlighting works more as an outline than as illumination.
Fabric protection from heating
LED strips heat during operation. Low-power strips (5-7 W/m) heat up to 40°C, high-power strips (14-18 W/m) up to 60°C. PVC fabric begins to soften at 60-70°C, which is critical with small gaps.
With a 7-10 cm gap, the fabric temperature does not exceed 30-35°C even with high-power strips. This is safe. Heat dissipates and does not reach critical levels. Do not install the cornice closer than 5 cm to the fabric — risk of overheating.
For high-power strips (18+ W/m), use aluminum profiles instead of polymer ones. Aluminum dissipates heat more effectively, LEDs operate in a more comfortable temperature range, and lifespan increases.
Final finishing: from installation to aesthetics
Painting the cornice — the final stage, determining the visual impression of the entire system.
Surface preparation
After installing all cornices around the perimeter, fill joints with acrylic spackle. Smooth with a wet putty knife, let dry 2-4 hours. Sand with fine sandpaper (180-220 grit) until smooth.
Areas where screws are installed are also spackled. Screw heads should be recessed 2-3 mm below the surface. Fill holes, smooth, let dry, sand. After painting, fasteners are not visible.
Remove dust after sanding with a dry cloth or vacuum cleaner with a soft attachment. Wipe with a damp cloth, let dry. Even the smallest dust under paint creates roughness and ruins the final finish.
Priming is not necessary for duroplastic and phytoplastic — the surface is dense and paint adheres well. For polystyrene, it is desirable — primer seals pores, equalizes absorption, improves final color.
When to paint: before or after installing LED strips?
It is optimal to paint BEFORE installing LED strips. Cornices are installed, joints are spackled, surface is prepared — now is the time to paint. After paint dries, carefully lay the strip without scratching the coating.
Alternative — paint AFTER installing and connecting the strips, when everything is working and tested. In this case, protect the strip with painter’s tape or polyethylene film. Paint on LEDs reduces brightness and changes color.
Most installers paint before installing the strips — more convenient, no need to protect electrical components. The strip adheres to painted surfaces without problems — the adhesive layer holds on paint just as well as on bare material.
Choosing paint and color
For polystyrene, ONLY water-based paints — emulsion, acrylic, latex. Organic solvents will damage the material. For duroplastic and phytoplastic, any paint can be used, but water-based is more convenient.
Gloss level: matte paints hide minor defects and prevent glare on the ceiling from backlighting. Semi-gloss creates a slight silk-like sheen. Glossy paints require perfect preparation and cause glare — undesirable for cornices with backlighting.
White color is universal, reflecting maximum light from LED strips onto the ceiling. Ceiling color makes the cornice visually part of the ceiling plane. Wall color continues the vertical upward. Contrasting color emphasizes the cornice as an architectural element.
Painting Technique
First layer — primer, thin. Dilute paint with water 10% for better penetration. Apply with a 40-50 mm brush or small roller along the profile with long strokes. Let dry 2-4 hours.
The second layer is the main one. Do not dilute the paint; apply it evenly in a thin layer. Work quickly and do not repaint already dried areas — this will cause streaks and uneven patches. After 2-4 hours, assess the result.
Third layer if necessary. If the base is still visible after the second layer, apply another one. Three thin layers yield better results than two thick ones — the coverage is smoother, stronger, and more durable.
Protect adjacent surfaces with painter's tape. Apply tightly to the ceiling and wall edges. Remove the tape while the paint is still wet — this will result in a clean, crisp edge without smudged borders.
LED Strip Installation After Painting
Wait for the paint to dry completely — usually 24 hours at 20°C. Check by touch — the surface should be dry and not sticky. Installing the strip prematurely will damage the fresh paint.
Clean the crown molding surface with a dry cloth. The LED strip has an adhesive layer, but for added security, apply transparent silicone sealant in dots every 20-30 cm. This will prevent peeling over time.
Install the strip without tension or bends. Cut only at marked locations — usually every 5-10 cm there are scissors marks and contact pads. Join segments using soldering or connectors.
Direct the LEDs upward toward the ceiling. The strip should lie on the crown molding so that the light reflects off the surface. Check the direction before final fixation.
Conclusion: Architecture Created by Light
Ceiling lighting cornice Transforms lighting from a utilitarian function into an architectural tool. Light no longer serves merely as a means to see in the dark — it shapes space, controls perception of height, volume, and atmosphere.
Cornice for concealed ceiling backlighting Creates the effect of a floating plane. The light strip along the perimeter visually separates the ceiling from the walls, making the room appear higher, more spacious, and airy. Especially effective with stretch ceilings, where the smooth surface evenly reflects light.
Material selection depends on budget and requirements. Polystyrene is economical for standard projects. Duro-polymer is mandatory for powerful lighting and premium interiors. Fitopolymer offers the best price-to-quality balance. Polyurethane is essential for curved surfaces.
Proper installation guarantees longevity and visual impact. Mount only to the wall, avoiding contact with the stretch ceiling. Maintain a 7-10 cm gap for optimal light distribution. Ensure high-quality sealing of joints for clean light lines. Final painting for visual perfection.
Valance with backlighting for tensioned ceilings Integrates lighting into architecture. Light becomes part of the structure, influencing spatial perception, creating atmosphere, and altering mood.
Company STAVROS offers a full range of Crown moldings for LED stripsProfiles of various sizes, materials, and configurations. From budget polystyrene to premium duro-polymer. Smooth minimalist and textured classic profiles — suitable for any style.
Professional consultations will help design a lighting system tailored to your needs. Calculate LED strip power, select optimal crown molding sizes, choose electrical components, and receive installation recommendations — get expert support at every stage.