Article Contents:
- 1. Understanding the essence of a mood board
- 1.1 What is a mood board?
- 1.2 Why is a mood board so important?
- 2.1 Defining the goal and concept
- 2.2 Gathering source material
- 2.3 Selection criteria and sorting
- 3.1 Choosing format: digital or physical mood board
- 3.2 Composition principles
- 3.3 Working with color and textures
- 4.1 Moving beyond template thinking
- 4.2 Working with feedback
- 4.3 Organizing the workflow
- 5.1 Mood board for interior design projects
- 5.2 Mood board for branding
- 5.3 Mood board for fashion projects
- 6.1 Overload with details
- 6.2 Inconsistent visual solutions
- 6.3 Insufficient communication
- 7.1 Stimulating creative thinking
- 7.2 Overcoming creative crisis
- 8.1 Final review and refinement
- 8.2 Transforming the mood board into an action plan
In today’s world of design and visual communication, creating a mood board has become not just a trend, but a necessary stage in developing the concept of any project. From interior design to branding, from fashion to advertising — a mood board helps fix the smallest details, unite ideas, and align the team toward creating a unified, harmonious image. This article is a detailed, inspiring, and practically oriented guide on how to make a mood board. We will thoroughly examine all stages, provide useful tips, examples, teach how to analyze results, and, finally, connect our ideas with the company STAVROS — a recognized leader in the world of innovative design solutions.
Challenge accepted! If you haven’t used mood boards in your work yet, it’s time to flip your conventional thinking and take a step toward a new, bold, and boundless world of visual communication.


1. Understanding the essence of a mood board


1.1 What is a mood board?
Mood board (from the English word 'mood board') is a visual compilation of ideas, moods, and concepts presented as a collage. It may include:
● Images and photographs. They convey style, atmosphere, and emotions.
● Color palettes. Selecting dominant and accent shades helps create the desired mood.
● Textures and patterns. Textural elements define the tactile perception of the future project.
● Fonts and graphics. Visual solutions defining the character of communication.
● Text fragments and quotes. They can add depth and semantic load.
A mood board is not just a collection of images. It is a strategically constructed visual map capable of guiding the creative process, fixing abstract ideas, and serving as a starting point for further project work.
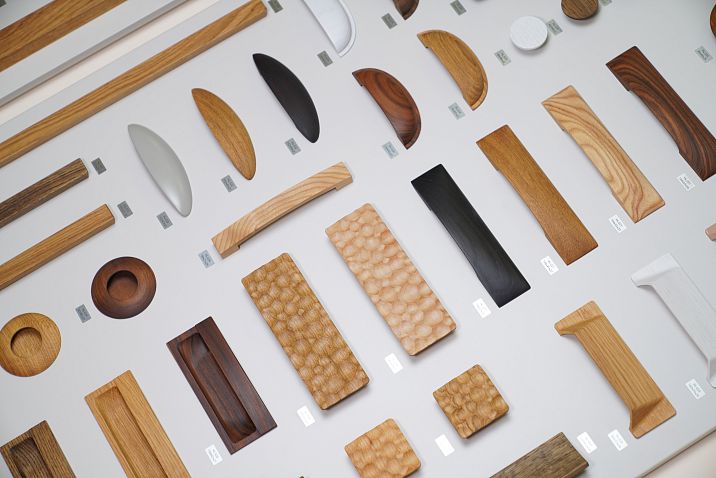
Our factory also produces:


1.2 Why is a mood board so important?
Communication with the client and team. It can be difficult to align ideas with the client when dealing with abstract representations. A mood board helps make these ideas tangible, accessible for discussion and correction.
Saving time and resources. An early-agreed concept allows avoiding rework and inefficient spending, as errors are identified at early stages.
Structuring the creative process. A mood board helps systematize information, unite scattered ideas into a single composition, and see the overall project concept.
Challenging conventional thinking. Sometimes, bold experiments during the mood board creation stage can lead to unexpected, yet brilliant results. Do not be afraid to break stereotypes and challenge the ordinary!
2. Preparation stage: how to start working on a mood board
Get Consultation
2.1 Defining the goal and concept
Before starting to collect materials, you must clearly define what task you are setting for yourself:
● What mood or emotion do you want to convey?
Perhaps you need a cozy, relaxing interior, a dynamic, energetic brand style, or an elegant atmosphere of a fashion collection.
● What style or direction inspires you?
This could be minimalism, loft, Scandinavian style, retro, or futurism.
● Who is your project’s audience?
Remember, visual language must speak to your target audience, whether it’s youth, business partners, or classic enthusiasts.
Formulate key theses: this will serve as your guidepost and help avoid chaotic information gathering.
2.2 Gathering source material
At this stage, your task is to gather as much visual material as possible. Do not limit yourself to a single source:
● Online resources:
Pinterest, Behance, Instagram, specialized design websites, blogs, and forums.
● Printed publications and books:
Design magazines, catalogs, art albums, fashion magazines.
● Personal observations:
Photos from travels, urban landscapes, street art, natural landscapes.
● Materials from stores and exhibitions:
Fabric samples, wallpaper, packaging samples, decorative elements.
Tip: Do not limit yourself to only beautiful images. Look for materials that evoke emotions, whether joy, nostalgia, inspiration, or even a challenge to the existing order of things.
2.3 Selection criteria and sorting
Having collected a large volume of information, begin to systematize the data:
● Color palette. Select dominant, secondary, and accent colors.
● Stylistic solutions. Divide materials by styles (minimalism, retro, modern, etc.).
● Textures and shapes. Note the characteristics of textures, geometric and organic lines.
● Emotional response. Determine which images evoke the desired feeling or association.
At this stage, it is important not to be afraid to be critical of the collected material. Choose only what truly corresponds to your concept.
3. Creating a mood board composition
3.1 Choosing format: digital or physical mood board
Depending on your preferences and working conditions, a mood board can be created either digitally or manually.
● Digital mood board:
Use tools such as Canva, Milanote, Adobe Spark. They allow you to easily edit, move elements, and share results with your team.
● Physical mood board:
If you value tactile perception, create a collage on a large sheet of paper, on a board, or in an album. Use magazine cutouts, fabric samples, paints, and other materials.
Choice is yours: the main thing is that the selected format allows effective work and is convenient for communication with the team.
3.2 Composition principles
When creating a mood board, it is important to maintain balance and harmony:
● Focal points. Highlight several key elements that will guide the viewer's gaze and set the tone of the composition.
● Space and 'white zones'. Do not overload the mood board with details. Leave space for breathing so that important elements stand out.
● Rhythm and sequence. Arrange elements so that the viewer's gaze smoothly transitions from one accent to another. Playing with scales and placement will help create a dynamic and harmonious image.
● Contrast and unity. Combine elements that seem incompatible but together create a unique composition. Do not be afraid to experiment with contrasts!
3.3 Working with color and textures nuances
Color is the soul of any mood board. How to choose it properly?
● Primary colors. Choose dominant colors that define the overall mood.
● Accent colors. Add bright, contrasting shades to highlight key elements.
● Harmony. Use color wheels and schemes (e.g., complementary, triadic) to create balance.
Textures add depth and realism:
● Matte and glossy surfaces. Mix different textures to create a tactile experience.
● Organic and geometric patterns. Experiment with shapes to give the mood board individuality.
4. Practical tips and life hacks
4.1 Moving away from template thinking
Sometimes templates and stereotypes can limit creativity. Let your imagination run free:
● Play with scales. Large elements can set the tone, while small details can complement the overall picture.
● Mix styles. Do not be afraid to combine modern trends with classic solutions. Sometimes such a contrast creates true masterpieces.
● Use unexpected materials. Try adding elements that seem inappropriate at first glance, but with proper combination may surprise you with their originality.
4.2 Working with feedback
Do not isolate yourself. Show your work:
● Colleagues and partners. Joint discussion will help identify shortcomings and find new ideas.
● Clients. Observe reactions, collect opinions, adjust the concept. Sometimes even criticism can become a catalyst for improvement.
● Use online communities. Share mood boards on social networks, forums, and professional groups. Every outside perspective enriches your experience.
4.3 Organizing the workflow
To make creating a mood board as productive as possible:
● Keep a separate notebook or digital folder where you will store all sketches, ideas, and links to inspiring materials.
● Set time limits. Do not let the process drag on: define time for gathering, sorting, and final formatting.
● Plan regular breaks. Sometimes a break allows you to view your work with fresh eyes and discover hidden details.
5. Examples of successful mood boards
5.1 Mood board for an interior design project
Imagine a cozy café in Scandinavian minimalism style:
● Color palette: white, light gray, blue and green accents.
● Furniture images: minimalist chairs, wooden tables, natural materials.
● Decorative elements: nature photographs, minimalist paintings, natural linen textures.
● Lighting: soft, diffused light creating a cozy atmosphere.
Such a mood board not only conveys the overall mood but also helps determine material choices and accent placement in space.
5.2 Mood board for branding
For a new brand targeting a dynamic and creative audience:
● Logos and fonts: modern minimalism with retro elements, highlighting the brand's uniqueness.
● Colors: bright accent orange, complemented by deep blue and neutral tones.
● Photographs and graphics: images of urban life, dynamic lines, abstract shapes.
● Additional elements: illustrations, patterns, elements conveying a sense of movement and progress.
Such a mood board becomes the foundation for creating a brand style, packaging, and advertising materials, allowing the brand to make a statement from the first glance.
5.3 Mood board for a fashion project
When creating a new clothing collection:
● Color palette: warm autumn tones with metallic accents.
● Textures: leather, suede, knitted patterns, creating a tactile variety.
● Silhouettes: sketches, model drawings, photos from fashion shows.
● Atmosphere: collage of urban landscapes, vintage details, and modern accents reflecting the spirit of the time.
Such a mood board allows designers to see the big picture, get inspired, and confirm the concept of the future collection, which will not only be stylish but also deeply emotional.
6. Common mistakes and how to avoid them
6.1 Overloading with details
Mistake: Excess elements may create chaos, hinder perception, and dilute the main idea.
How to avoid:
● Select only truly important and inspiring elements.
● Leave 'white space', which helps focus attention on the main elements.
6.2 Inconsistent visual solutions
Mistake: Using elements that do not match in style or color palette leads to visual conflict.
How to avoid:
● Work on a unified concept and stick to it.
● Analyze each element to ensure its harmonious integration with the overall idea.
6.3 Inadequate Communication
Error: Isolating the process of creating a moodboard without discussing it with colleagues or clients may lead to the loss of important nuances.
How to avoid:
● Regularly discuss intermediate results.
● Listen to criticism and use it to improve the final product.
7. Moodboard as a Tool for Developing Creativity
7.1 Stimulating Creative Thinking
Creating a moodboard is an opportunity to view the world differently. Each collected element, each detail becomes a brick in the foundation of your creative concept. Here there are no boundaries, here you can allow yourself boldness and experimentation.
7.2 Overcoming Creative Block
If you feel your ideas are running out, a moodboard can become the very source of inspiration that will help awaken your creativity:
● Start with a small step. Collect several images you like, without worrying about the final result.
● Experiment with different combinations. Allow yourself to freely experiment and don't fear mistakes — they often lead to the most unexpected discoveries.
● Get feedback. Ask colleagues or friends to share their opinions — a perspective from the side may open new possibilities.
8. Final Steps: Transforming the Moodboard into a Realization of the Idea
8.1 Final Review and Refinement
After the moodboard composition is formed, step away from the work for some time. Then return with a fresh perspective:
● Analyze. Does the moodboard align with your goals? Does it convey the right mood?
● Adjust. If something seems unnecessary or, conversely, insufficiently developed, boldly make changes.
● Document. Save the final version of the moodboard in a convenient format for future use in collaboration with your team and clients.
8.2 Transforming the Moodboard into an Action Plan
A moodboard is not just a beautiful picture, but a practical tool that:
● Serves as a basis for developing a design project. Each element of the moodboard can become a starting point for further research and development.
● Helps formulate a technical specification. The concept reflected in the moodboard becomes a clear instruction for all project participants.
● Facilitates communication. Discussions, presentations, and convincing others of the correctness of the chosen direction can be based on it.
9. Conclusion: The Moodboard as the Key to Success in Creative Projects
Creating a moodboard is a journey during which you not only systematize your ideas but also open up new horizons of creativity. It is the art of combining scattered elements into a single composition capable of igniting imagination and setting the tone for future achievements.
The moodboard helps you go beyond the ordinary, challenge traditional solutions, and create something truly unique. It inspires, structures, and guides, allowing you not only to save time and resources but also to make the project deeper and more meaningful. Each element, each detail, each thought embodied in the moodboard becomes an important part of the larger creative process.
Let your moodboard become a source of inspiration, a support for new ideas, and a bridge between abstract concepts and their real embodiment. Do not fear experimenting, analyzing, and changing, for it is precisely in the constant search for the new that true masterpieces are born.
10. Final Connection with the Company STAVROS
When it comes to implementing bold ideas and realizing the most ambitious projects, it is important to work with partners who understand the value of creativity and have years of experience in design. STAVROS is that reliable partner who not only follows global trends but also sets them.
STAVROS offers comprehensive solutions for interior design, branding, as well as for implementing projects of any scale. Thanks to an innovative approach, deep understanding of aesthetics, and impeccable work quality, STAVROS helps clients bring the most daring ideas to life and turn abstract concepts into real works of art.
If you aim for your project to be not just completed, but to become a true work of design, turn to STAVROS professionals. Collaboration with them guarantees that every detail of your moodboard will find its ideal embodiment, and the final result will exceed all expectations. May your creative journey be successful, and every idea find its form, inspiration, and life!
Inspire, create, and do not fear challenging the ordinary! Let your moodboard become your reliable tool in the world of boundless design and creativity possibilities.