Article Contents:
- Diagnosis and planning: the foundation of a successful project
- Creating a technical specification
- Materials science: choosing paints for home use
- Special paints for special effects
- Home handyman's toolkit
- Modern application technologies
- Preparation work: the basis of quality results
- Priming as a guarantee of adhesion
- Application techniques: from classic to modern
- Decorative painting techniques
- Color theory in the practice of a home handyman
- Creating color samples
- Multi-layer coating technology
- Inter-layer treatment
- Protective coatings and their application
- Special protective systems
- Defect removal and finish coating
- Polishing and final finishing
- Ecological and safety aspects
- Organizing a safe work area
- Economic aspects of home repainting
- Increasing the value of furniture
Home is a reflection of our soul, and every item in it tells its own story. But what to do when a beloved chest has lost its former appeal, and a wooden table is covered with scratches from time? How to repaint furniture at home — a question that not only saves family budget, but also opens up endless opportunities for creative self-expression. In the era of conscious consumption and ecological responsibility, furniture restoration becomes not just a hobby, but a philosophy of life, where every item gets a second chance to shine in new colors.
Repainting furniture at home is an art that combines practicality and aesthetics, traditional techniques and modern materials. Every brushstroke becomes a step toward creating a unique interior, where standard items transform into exclusive design pieces.
Modern paints and tools make the repainting process accessible even for beginners, but the depth of the result depends on understanding materials, techniques, and master secrets. This journey from concept to realization, where every detail matters—from choosing primer to the final protective layer.


Diagnosis and planning: the foundation of a successful project
Any repainting project begins with a thorough diagnosis of the furniture's condition. This is not just a quick inspection, but a detailed study of every surface, every defect, every material characteristic. An experienced craftsman knows: the quality of diagnosis determines the choice of restoration strategy, type of paint, and volume of preparatory work.
Determining the type of coating becomes the top priority. Lacquered surfaces require a special approach to preparation, oil-based paints need special primers, wax coatings create problems with adhesion of new layers. A simple test with a drop of solvent or sandpaper will help determine the type of existing coating and choose the correct removal technology.
Assessing the structural condition of the furniture is no less important than analyzing the coating. Loose joints, cracked parts, damaged hardware—all these defects are better addressed before beginning painting. Sometimes preliminary repairs take more time than the repainting itself, but the result justifies the effort.
Planning a color scheme requires consideration not only of personal preferences but also of the room's characteristics, existing interior, and the functional purpose of the furniture. Dark colors hide minor defects but emphasize dust; light colors visually enlarge objects but require flawless surface preparation.


Creating a technical specification
A professional approach to repainting furniture involves creating a detailed technical specification. This document will serve as a project roadmap, help avoid mistakes, calculate required materials and time.
Photodocumentation of the initial state creates a visual history of the project. Photos of the overall view, close-ups of defects, details of hardware — all of this will assist during the work process and serve as a basis for comparing results. Modern technologies allow creating interactive photo panoramas, where you can mark problem areas and planned changes.
Preparing a material estimate includes not only paints and brushes, but also consumables — sandpaper, painter's tape, protective film, solvents. Experienced professionals recommend allocating a 15-20% reserve of main materials — better to have excess than to stop work due to lack of paint.
Temporary planning takes into account not only active work time, but also drying periods, which may extend the project over several days. Each type of paint has its own drying characteristics: water-emulsion paints dry quickly but may require multiple layers; alkyd enamels take longer to dry but create a more durable finish.
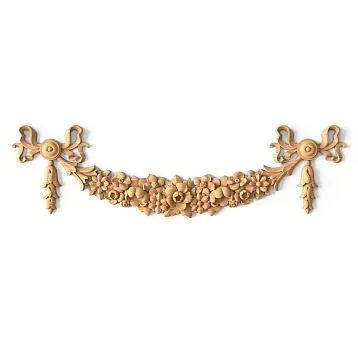
Our factory also produces:


Materials science: choosing paints for home use
The modern market of paints and coatings offers numerous options, each with its own features, advantages, and limitations. The correct choice of paint determines not only the appearance of the finished product, but also the durability of the coating, safety of use, and ease of the painting process.
Water-emulsion paints have become a popular choice for home craftsmen due to their eco-friendliness and ease of use. The absence of strong odor allows working in living spaces, rapid drying accelerates the process, and a wide color range opens up limitless creative possibilities. Modern water-emulsion paints match traditional alkyd paints in coating quality.
Acrylic enamels combine the advantages of water-based and alkyd compositions. They form a durable film resistant to mechanical impacts, while maintaining eco-friendliness and ease of application. Glossy acrylic enamels create a mirror-smooth surface, while matte finishes provide a noble texture without glare.
Alkyd paints provide maximum durability and color depth. These compositions are ideal for furniture subjected to intensive use — kitchen tables, children's chairs, hallway furniture. The need to use solvents and longer drying times are compensated by the exceptional wear resistance of the coating.
Get Consultation
Special paints for special effects
Creative repainting of furniture is not limited to traditional enamels. Special paints allow creating unique decorative effects, transforming ordinary furniture into works of art.
Chalk paints have gained popularity among lovers of vintage style. Their unique matte texture creates a sense of noble antiquity, and their ability to be applied practically on any surface without prior preparation makes them ideal for beginner craftsmen. Chalk paints are easily adaptable to artificial aging techniques — from light brushing to deep patination.
Metallic paints contain metallic pigments that create effects of gilding, silvering, or bronzing. Modern water-based compositions are safe to use and provide realistic imitation of precious metals. Proper application of metallic paints requires special techniques — even strokes, absence of layering, and quality surface preparation.
Crackle-effect paints create an imitation of a surface cracked over time. There are one-step and two-step crackle systems, each producing its own characteristic pattern of cracks. The size and frequency of cracks depend on the thickness of application, drying temperature, and air humidity.
Home craftsman's tools
The quality of the result largely depends on the properly selected tools. Good brushes, rollers, and putty knives not only simplify the work but also affect the appearance of the final coating. Saving money on tools often results in additional time and material costs.
Brushes remain the primary tool for precise work and processing complex surfaces. Natural bristles are ideal for alkyd paints — they hold the material well and ensure even application. Synthetic brushes are designed for water-based compositions — they do not absorb moisture, are easy to clean, and retain their shape after repeated use.
Rollers speed up the processing of large flat surfaces. Velvet rollers create a smooth finish without texture, while hair rollers produce a light textured surface. Foam rollers are suitable for applying varnishes and primers, but may leave small air bubbles in the paint.
Painter's tape and protective films ensure clean edges of paint and protect surrounding surfaces. High-quality painter's tape does not leave adhesive residue and easily removes after paint drying. Special tapes for delicate surfaces prevent damage to existing coatings.
Modern application technologies
Electric spray guns open new possibilities for home craftsmen. Even paint distribution ensures a perfectly smooth surface without brush or roller marks. Modern HVLP (High Volume Low Pressure) systems minimize material loss and reduce mist formation.
Aerosol paints offer ready-to-use compositions in convenient packaging. A wide color range, including special effects, makes aerosols a popular choice for small projects. Proper spray technique — continuous motion, optimal distance, even coverage — ensures professional-quality coating.
Stencils and stamps allow creating repeating patterns and ornaments without artistic skills. Self-adhesive stencils provide clean edges, while reusable plastic stencils offer cost-effectiveness. Combining different stencils creates complex multi-level compositions.
Preparation work: the foundation of quality result
Professional surface preparation is the guarantee of durability and beauty of the new coating. This stage requires patience and care, as any imperfections will become visible after painting and may ruin the entire result.
Mechanical cleaning removes old coatings, levels the surface, and creates optimal roughness for new paint adhesion. Start with coarse abrasives (P80-P120) to remove the main layer, gradually moving to finer grits (P220-P320) for final preparation. Electric sanders significantly speed up the process, but require caution — easily over-sanding the surface or creating unevenness.
Chemical cleaning is effective for complex coatings that are difficult to remove mechanically. Special strippers soften old paint, allowing removal with a putty knife. Working with chemical compounds requires safety measures — good ventilation, protective clothing, avoiding skin contact.
Filling defects restores surface integrity. Automotive putties provide strength and easy sanding, while acrylic compounds are universal and easy to apply. Large defects are filled in multiple stages — each layer must fully dry before applying the next.
Priming as a guarantee of adhesion
Primer creates a bonding layer between the substrate and the topcoat, equalizes the surface's absorbency, and prevents stain penetration. Skipping primer is one of the most common mistakes among novice painters.
Universal primers are suitable for most surfaces and types of paint. Modern formulations have good adhesion to various materials — wood, metal, old coatings. Fast drying and ease of application make universal primers a popular choice for home use.
Specialized primers solve specific problems: adhesion primers for difficult surfaces, isolating primers for stain blocking, anti-corrosion primers for metal parts. Choosing the right specialized primer can dramatically improve the painting result.
Colored primers are matched to the finish color, improving paint coverage and reducing material consumption. Dark primers for dark paints, light primers for light paints. Contrasting combinations can create interesting decorative effects.
Application techniques: from classic to modern
Painting skill develops from simple techniques to complex artistic methods. Each method has its own characteristics and area of application. Repainting furniture at home Quality can be achieved through various methods, but the chosen technique must match the goals and skills available.
Brush technique remains primary for detailed work and complex surfaces. Proper brush handling, optimal paint amount, and blending technique determine coating quality. Long, even strokes create a smooth surface, while short crosshatch strokes produce an interesting texture.
Roller technique is ideal for large flat surfaces. W-shaped application followed by smoothing ensures even paint distribution. The direction of the final pass determines the final surface texture — along wood grain for wood, in one direction for smooth surfaces.
Tamping with a sponge creates unique decorative effects. This technique allows imitation of various materials — stone, leather, suede. Multi-layer tamping with different shades creates deep, rich coatings with natural tonal transitions.
Decorative painting techniques
Decorative techniques transform simple repainting into the creation of art. These methods require practice, but the result can exceed even the most daring expectations.
Patination creates an effect of noble antiquity. The technique is based on imitating natural darkening of material in recesses and raised areas. Tinting compounds are applied to the base coating and partially removed, leaving characteristic traces of time.
Brushing highlights wood texture, creating a relief surface. Metal brushes remove soft fibers, leaving hard annual rings. Subsequent tinting with contrasting colors reveals the wood structure, creating an effect of long-term use.
Gradient transitions add dynamism to flat surfaces. The "wet-on-wet" technique allows creating smooth color transitions directly on the surface. Lacquering technique uses semi-transparent layers to create deep color effects.
Color theory in the practice of a home painter
Choosing a color scheme is one of the most creative and responsible stages of repainting. Color affects not only the aesthetic perception of furniture but also the psychological atmosphere of the entire room.
Color wheel theory helps create harmonious combinations. Monochromatic schemes use various shades of one color, creating calm, restrained compositions. Analogous colors — neighbors on the spectrum — provide soft, natural transitions. Complementary colors — opposites — create dynamic, energetic combinations.
Color psychology considers the emotional impact of different shades. Warm colors — red, orange, yellow — create a sense of coziness and energy, but may cause fatigue with prolonged exposure. Cool colors — blue, green, purple — calm, create a sense of space, and promote concentration.
The influence of lighting on color perception is critically important for selecting the right shades. Natural northern light makes colors appear cooler, southern light emphasizes warm tones. Artificial lighting also affects color perception — warm incandescent light enhances yellow tones, cool LED light — blue tones.
Creating color samples
Color testing on samples prevents costly mistakes. Small test patches on hidden areas of furniture or individual boards allow evaluating the actual color under specific lighting conditions.
Multi-layer testing simulates the final coating system. Primer, base paint layers, and topcoat — all stages must be reproduced in the test sample. Each layer may affect the final color.
Lightfastness is tested by exposing samples to various light sources. Some pigments are sensitive to ultraviolet radiation and may change shade over time. Lightfastness testing is especially important for furniture placed near windows.
Technology of multi-layer coating
Professional coating quality is achieved by applying several thin paint layers, not one thick layer. Each layer performs a specific function within the overall coating system.
The first layer — the base — determines the overall tone and coverage of the coating. This layer must ensure even primer coverage, mask its color, and create a base for subsequent layers. Diluting the first layer by 5-10% improves its penetration ability.
Intermediate layers increase coating thickness, enhance color, and conceal minor defects. The number of intermediate layers depends on paint coverage, desired color intensity, and surface preparation quality. Each layer must be fully dry before applying the next.
The final layer determines the final appearance of the coating. This layer is applied particularly carefully, as it will be visible in the finished product. The application technique for the final layer must ensure uniformity, absence of tool marks, and correct surface texture.
Interlayer Processing
Sanding between layers improves adhesion of subsequent coatings, eliminates minor defects, and creates an optimal surface for paint application. Fine-grit abrasives (P320-P400) are used, which create a light texture without deep scratches.
Dust removal after sanding is critically important for coating quality. Microscopic dust can create roughness, affect gloss, and reduce adhesion. Sticky cloths effectively remove dust without solvents.
Defect control at each stage allows timely correction of errors. Light at a sharp angle reveals microscopic irregularities, inclusions, and tool marks. Detected defects are easier to correct at intermediate stages than after applying the final coating.
Protective Coatings and Their Application
Finish protective coatings extend the service life of painted furniture, improve its operational characteristics, and affect its appearance. The choice of protective coating type depends on usage conditions, desired aesthetic effect, and compatibility with the base paint.
Polyurethane varnishes provide maximum protection against mechanical damage, moisture, and chemical exposure. Two-component formulations surpass single-component ones in strength but require precise mixing ratios. Various gloss levels — from deep matte to mirror gloss — allow selection of the optimal appearance.
Wax coatings create a natural matte surface with pleasant tactile qualities. Natural waxes — carnauba and beeswax — highlight material texture and provide breathable protection. Synthetic waxes combine a natural appearance with improved performance.
Shellac coatings create a warm, golden hue characteristic of antique furniture. This natural material is easy to apply, dries quickly, and is easily removable if needed. The French shellac polishing technique requires skill but yields a unique result.
Special Protective Systems
Fire-retardant coatings increase the safety of furniture use. Intumescent compounds form a protective layer upon heating, slowing fire spread. Such coatings are especially relevant for children's furniture and items placed near heat sources.
Antimicrobial coatings contain special additives that inhibit bacterial and fungal growth. These formulations are especially important for kitchen furniture, furniture in children's and medical facilities. Silver-containing additives provide long-term protection without toxic effects.
Self-healing coatings can repair minor scratches under the influence of heat or time. The technology is still in development but is already used in the automotive industry and may appear in the furniture industry.
Defect Correction and Finish Polishing
Even when all technological requirements are met, defects may appear on the coating that require correction. Understanding the causes of problems and mastering methods to resolve them is an essential part of craftsmanship.
Paint drips — the most common defect — occur when applying too thick a layer or working under unsuitable conditions. Fresh drips can be corrected by feathering, while dried drips require careful scraping with a blade followed by local touch-up.
Craters and pinholes may arise due to surface contamination with silicones or other substances that prevent paint from spreading. Local cleaning with a solvent and reapplication usually resolve the issue.
Uneven gloss appears as matte or glossy spots on the surface. Causes may include uneven surface preparation, varying absorbency, or improper application technique. Light sanding and an additional coating layer resolve the problem.
Polishing and Final Finishing
Final polishing gives the coating a finished appearance, removes minor defects, and achieves the desired gloss level. Polishing technique depends on the coating type and desired result.
Wet sanding with fine abrasives (P1000-P2000) creates an ideally smooth surface for subsequent polishing. Continuous wetting prevents coating overheating, removes grinding residue, and improves processing quality.
Polishing pastes of varying abrasiveness allow achieving any gloss level. Sequential application of pastes from coarse to fine ensures professional-grade polishing. Machine polishing speeds up the process but requires caution.
Protective compounds — polishes, waxes, ceramic coatings — extend the service life of polished surfaces and simplify surface maintenance. Regular application of protective compounds maintains the original appearance of furniture.
Ecological and Safety Aspects
Working with lacquers and paints requires adherence to safety and environmental responsibility measures. should be not only effective but also safe for family health and the environment. Choosing eco-friendly materials has become a priority for modern home craftsmen. Water-based paints with low volatile organic compound (VOC) content are safe for use in residential spaces. Natural pigments and binders create fully eco-friendly coatings.
Personal protective equipment is a mandatory part of the work outfit. Respirators protect the respiratory system from vapors and dust, gloves protect the hands from chemicals, and safety goggles protect the eyes from paint splashes. Quality protective gear pays for itself through health preservation.
Waste disposal must comply with environmental requirements. Paint residues, solvents, and contaminated materials are classified as hazardous waste. Many municipalities organize special collection points for such waste.
Waste disposal must comply with environmental requirements. Residual paints, solvents, and contaminated materials are classified as hazardous waste. Many municipalities organize special collection points for such waste.
Organizing a safe workplace
Ventilation of the workplace is critically important when working with any paint materials. Natural ventilation may be insufficient, especially when using solvent-based paints. Forced exhaust ensures safe working conditions.
Fire safety requires special attention when working with flammable materials. Removing ignition sources, having fire extinguishers available, and proper storage of materials are mandatory safety measures.
First aid for poisoning or chemical burns must be organized in advance. Knowledge of poisoning symptoms, availability of necessary medications, and emergency service numbers — all of this can save health and life.
Economic Aspects of Home Furniture Repainting
Repainting furniture at home can bring significant economic benefit with proper planning. The cost of materials constitutes only part of the price of new furniture, and the result often surpasses factory-made items in quality and uniqueness.
Calculating the cost of materials includes not only paints but also all consumables — primers, solvents, abrasives, protective coatings. Accurate calculation helps avoid unexpected expenses and plan the project budget.
Investments in quality tools pay off when completing several projects. Good brushes, rollers, and sanders serve for years with proper care. Cheap tools may ruin expensive materials and negate all efforts.
Time savings are achieved through proper process organization. Performing operations in parallel, using fast-drying materials, and planning with drying time in mind allow reducing the overall project duration.
Increasing the value of furniture
Quality repainting can significantly increase the value of furniture. Vintage items after restoration may cost several times more than their original price. Unique handmade pieces are valued by collectors and designers.
Documenting the restoration process adds value to the finished item. Photos before and after, descriptions of materials and techniques create a history for the item, enhancing its appeal to buyers.
Developing restoration skills can become a source of additional income. Demand for well-restored furniture is constantly growing, especially among lovers of vintage style and eco-friendly lifestyles.
The art of repainting furniture at home combines practicality and creativity, tradition and innovation. Each project is an opportunity not only to refresh the interior but also to express individuality, create a unique item filled with personal energy and care.
Modern materials and technologies make this process accessible to anyone willing to invest time and effort into learning the basics of craftsmanship. The result is not just updated furniture items, but true works of applied art capable of serving as home decor for many years.
Patience, neatness, attention to detail — qualities that distinguish masters from amateurs. Every mistake becomes a lesson, every success a stimulus for new creative experiments. This continuous process of improvement is the true value of home craftsmanship.
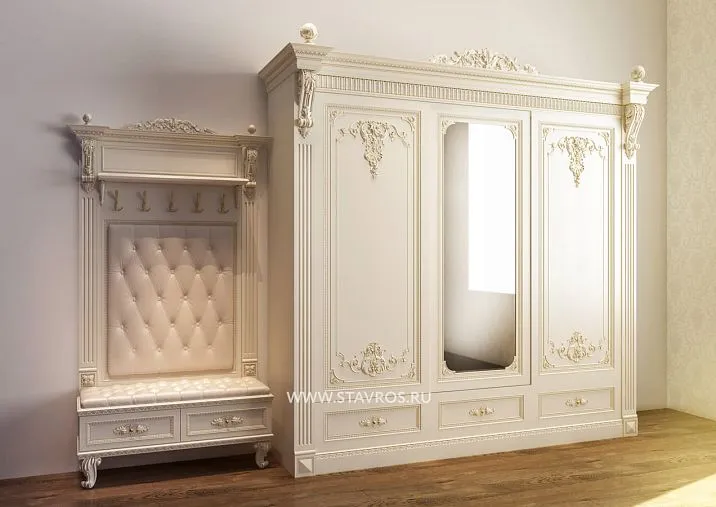
STAVROS company has supported home craftsmen for many years, offering high-quality paints and coatings, professional tools, and expert consultations on all aspects of furniture refinishing. A wide range of paints, primers, and protective coatings enables the realization of the most ambitious creative projects. Technical support from STAVROS specialists helps avoid mistakes and achieve professional-level results in every home refinishing project.