Article Contents:
- How to attach wooden panels: basic installation methods
- What determines the attachment method
- Panel material
- Panel size and weight
- Base type
- Wall evenness
- Room and application area
- Is construct disassembly needed
- What to use for attaching wooden panels
- Adhesive Compounds
- Screws and mechanical fasteners
- Clips and hidden elements
- Rails and framework
- How to prepare the wall before installation
- Surface Levelness Assessment
- Base Cleaning and Preparation
- Wall marking
- Preliminary Panel Layout
- What to Consider Before Installation
- How to Attach Wooden Panels with Adhesive
- How to Attach Wooden Panels to a Frame
- How to Attach Slatted Wooden Panels
- How to Attach Panels in Complex Areas
- Corners
- Sockets and Switches
- Niches
- Columns
- Partitions
- Joints with floor and ceiling
- How to join wooden panels
- Common mistakes when installing wooden panels
- What to choose: adhesive or framing
- How to choose panels considering future installation
- Installing panels in interiors: key practical tips
- Conclusion: the correct installation algorithm
- FAQ: Answers to Popular Questions
- About the Company STAVROS

Ask any experienced installer or interior designer: most problems with wooden panels arise not during operation, but in the first hours after installation begins. Uneven layout, a detached corner, a 'wandering' slat rhythm, a crookedly cut panel near an outlet—all these are consequences of one thing: installation was started without understanding the technology. This article is written for those who want to understand how to properly install wooden panels even before opening the first package.
Installing wooden panels is not a difficult task, but it requires sequence. Here, precision is more important than strength: the correctly chosen installation method, proper surface preparation, careful marking, and understanding of how the joints will look. If all this is thought out in advance—the installation will go smoothly and the result will be exactly as the designer envisioned.


How to install wooden panels: main installation methods
There are several fundamentally different approaches to securing wooden panels to a wall. Each has its own logic, advantages, and limitations.
Adhesive mounting is the fastest and least labor-intensive method. The panel is fixed directly to the wall surface using construction adhesive or liquid nails. Suitable for flat, well-prepared substrates. The result is neat, with no visible fasteners.
Frame mounting is an option for uneven walls, rooms with variations, and cases where you need to hide utilities or install sound-absorbing material behind the panels. A metal profile frame levels the plane and creates a reliable base for attachment.
Hidden fasteners — clips, groove systems, guides — allow panels to be fixed without a single visible screw hole. The panel simply snaps or slides into the groove. Especially relevant for premium installations where surface cleanliness is critical.
Combined method — adhesive plus mechanical fastening. The adhesive holds the panel in plane, while headless finish nails or hidden staples provide additional perimeter fixation. This is reliable, fast, and visually clean.


What Determines the Fastening Method
Before choosing a mounting method, you need to answer several questions. Each one affects the final result.
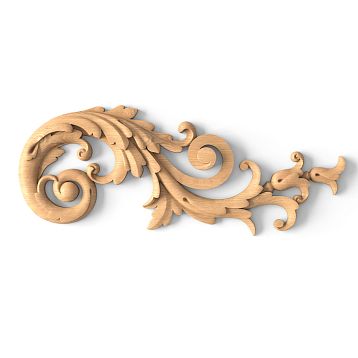
Our factory also produces:


Panel Material
Smooth MDF panels for painting adhere well with glue — they are lightweight, uniform, with a flat surface that provides good adhesion.slatted panels made of MDF and solid oakare slightly heavier and require either a reinforced adhesive layer or additional mechanical fixation. Solid wood panels are the heaviest: for them, frame mounting is preferable on any walls, even flat ones.
Get Consultation
Panel size and weight
Small panels up to 30 cm wide and 1200 mm long can be easily held with adhesive. Large-format modules—from 2700 mm in height—require an additional attachment point, especially at the top. The larger the panel area, the higher the load on the adhesive seam and the more important it is to evenly distribute the compound over the entire substrate surface.
Substrate type
Concrete, brick, drywall, OSB, plywood—each substrate has its own adhesion and preparation requirements. Drywall accepts adhesive well but requires preliminary priming. Concrete must be dedusted and primed before installation. Brickwork—leveled and primed. Crumbling plaster—completely unsuitable for adhesive installation.
Wall evenness
This is a key criterion. If the surface deviation does not exceed 5 mm over 2 m—adhesive installation is possible. If the variations are greater—only a frame. Checked with a 2 m straightedge or a spirit level.
Room and application area
For wet rooms—for example, an entryway with frequent contact with outdoor clothing or areas near heating appliances—frame installation with an air gap is preferable: it allows panels to 'breathe' during humidity fluctuations, preventing them from warping.
Is structural disassembly needed
If future access to utilities behind the panels is planned—either frame installation with removable sections or mounting on guides that allow individual panels to be removed without dismantling the entire system is needed.
How to fasten wooden panels
Adhesive compounds
For adhesive installation of wooden panels, the following are used:
-
Mounting adhesive such as 'liquid nails' is a universal option for MDF and lightweight slat panels. It is applied in a zigzag pattern or dots and sets in 10–30 minutes.
-
Polyurethane adhesive offers higher adhesion and is suitable for heavy solid wood panels. Slight expansion during polymerization helps fill micro-irregularities.
-
Acrylic adhesive works well on drywall. It contains no solvents and is safe for MDF surfaces.
Important: adhesive is applied to a dry, degreased, and primed surface. A cold base (below +10°C) drastically reduces adhesion—installation at low temperatures is not permissible.
Screws and mechanical fasteners
Headless finishing nails are a classic method for additional fixation of MDF panels. They are driven through the underlay at an angle, the head is countersunk and filled with putty for painting. Screws are used in frame installation—through the underlay or through a groove in the slat.
Clips and hidden elements
For expensive veneered and solid wood panels, hidden fastening systems are used: metal clips inserted into a groove on the panel end, or dovetail-type guides. The panel is inserted from above and fixed without a single through hole. This is the most labor-intensive installation method, but it yields impeccable results—no putty, no tool marks.
Guides and frame
The frame is assembled from metal profiles CD 60 or UD 27. The stud spacing is 400–600 mm depending on the size and weight of the panels. Wooden beams are used less frequently for framing: they require preliminary antiseptic treatment and drying. Panels are attached to the frame with self-tapping screws for metal through an underlay or with clips through a groove system.
How to prepare the wall before installation
Proper base preparation is half the success of installation. Skipping this step guarantees problems later.
Assessing surface levelness
Place a 2 m straightedge against the wall in different places: horizontally, vertically, diagonally. Record the maximum gap under the straightedge. If deviations do not exceed 5 mm — you can work with adhesive. 5–15 mm — adhesive with shims or a frame with adjustable dowels. More than 15 mm — only a frame.
Cleaning and preparing the base
Remove dust, crumbling fragments, traces of grease, and old adhesive compounds. Reinforce or knock off loose plaster. Treat the surface with deep-penetration primer — this improves adhesion and reduces the risk of adhesive peeling. The primer must dry completely before applying adhesive.
Wall marking
Marking is one of the most important stages. Strike a vertical zero line with a laser level or plumb bob. The first panel will start from it. Mark horizontal lines — the lower and upper boundaries of the panel zone — with painter's tape or a chalk line.
Pre-layout of panels
Before installation, lay out the panels on the floor in the sequence they will go on the wall. This allows you to check texture matching, slat rhythm, assess trimming of edge elements, and plan joint positions. Never install solid wood panels without letting them 'acclimatize' in the room for at least 48 hours.
What to consider before starting installation
Before installation, you need to know exactly:
-
where outlets, switches, pipes, and cables are located behind the wall;
-
how internal and external corners will be resolved;
-
what will cover the junction with the ceiling and floor;
-
whether the panel zone will continue on adjacent walls or partitions.
How to install wooden panels with adhesive
Adhesive installation is fast, neat, and with proper preparation, absolutely reliable. It is ideal for smooth walls made of drywall, plastered concrete, or plaster.
When this method is suitable:
-
smooth surface (deviation no more than 5 mm over 2 m);
-
well-prepared base;
-
panels weighing up to 8–10 kg/m²;
-
no need for subsequent access to the wall.
Installation sequence:
-
Apply adhesive to the back surface of the substrate in a zigzag or dots with a spacing of 15–20 cm. For flexible slatted panels — over the entire area in strips.
-
Allow 2–3 minutes for the adhesive to activate (depends on the composition — read the instructions).
-
Place the panel against the wall strictly according to the markings, press evenly over the entire surface.
-
Hold in the pressed position for 30–60 seconds. If necessary, secure with construction staples or painter's tape until fully set.
-
Check verticality with a level.
The first panel sets the geometry for all subsequent installation — it must be positioned perfectly accurately along the vertical zero line. Any deviation will accumulate and by the last panel will become a visible skew.
When adhesive method is undesirable: for heavy solid wood panels; when installing on a crumbling base; in rooms with high humidity without forced ventilation; if future access to utilities behind the wall is needed.
How to attach wooden panels to a frame
Frame mounting is a universal solution for complex cases. It is slightly more labor-intensive than adhesive mounting, but provides full control over the wall plane and allows solving a whole range of related tasks.
When a frame is unavoidable:
-
wall irregularities exceeding 5 mm over 2 m;
-
need to hide utilities (pipes, cables);
-
planning to install sound-absorbing or thermal insulation material behind the panels;
-
wall made of brick or blocks without leveling;
-
need the ability to dismantle individual sections.
How to install the guides:
-
Mark the UD guides on the floor and ceiling at the required distance from the wall (taking into account irregularities).
-
Secure UD profiles to the floor and ceiling with dowels spaced 50–60 cm apart.
-
Install vertical CD studs spaced 40–60 cm apart. Check the vertical alignment of each stud with a level.
-
If necessary, adjust the position of the studs using extended dowel hooks (brackets).
How to attach panels to the frame:
-
Through the underlayment with 3.5×25 screws into the stud — fast and reliable. The screw heads are countersunk and filled.
-
Through the groove in the batten — a hidden method, with no marks on the surface.
-
On clips — for systems requiring disassembly.
How to maintain a flat plane: after attaching each panel, check with a 2 m straightedge. Do not proceed to the next one until you are sure the plane is maintained.
How to attach wooden slat panels
Wooden slat panelshave installation features that distinguish them from working with smooth flat boards.
The main task when installing slatted panels is to maintain the continuity of the slat rhythm when transitioning from one module to the next. Even a slight shift in the pitch creates a visible disruption that ruins the entire effect of a smooth surface.
How to maintain rhythm: before installation, check the slat pitch on two adjacent panels by placing their ends together. If the pitch is perfect — mount them butt-jointed without a gap. If there is a slight discrepancy — compensate for it in the outermost slat by trimming it to the required size.
How to handle joints: rigid panels on an MDF substrate are butt-jointed without a visible seam. The substrates are in tight contact, and the slats continue the rhythm. Flexible panels on a fabric base — wrap around any surface and are joined seamlessly using the continuation principle: the fabric base overlaps behind the edge of the last slat of the previous module.
Transitions at corners and partitions: for an internal corner, the best solution is a 45° miter cut on both sides and careful joining. For an external corner — a metal or wooden corner profile that covers the end and completes the structure. On partitions — the same: ends are covered with an overlay profile or molding.
How to mount panels on complex sections
Complex sections are where most people lose confidence. In fact, they can be handled if thought through in advance.
Corners
Internal corners are solved in two ways: by miter-cutting panels at 45° from each side or by installing a plastic/metal corner profile. The first option is cleaner and more professional but requires precise cutting and tight fitting. The second is simpler and acceptable in less visible areas.
External corners are the most vulnerable spot. Here, a metal corner profile made of brass, aluminum, or steel works best. It covers the ends of both panels, protects the corner from mechanical damage, and provides a neat finish. In classic interiors, external corners are covered with wooden molding of the same wood species as the panels.
Sockets and switches
Cutouts for sockets and switches are made before installation, based on precise measurements. Order of actions:
-
Mark the position of the socket on the panel using a template or by transferring points from the actual location.
-
Make the cutout with a jigsaw or router — carefully, along the line, without play.
-
Mount the panel on the wall.
-
Install the socket frame, which overlaps the edge of the cutout by 5–10 mm.
Important: cutouts are made 2–3 mm larger than the actual back box size — this compensates for possible measurement errors.
Niche
A niche is one of the most advantageous zones for usingdecorative wall panels. The ends of the side walls of the niche are finished flush with the front plane. The back wall can be finished with the same panels or a contrasting material — this creates a depth effect.
Installation in a niche always starts from the back wall. The side walls are second. This allows covering the joints with the ends of the side panels.
Columns
For square and rectangular columns, rigid slatted panels are cut to the width of the faces and mounted on four planes. Joints at the corners are covered with a corner profile.
For round columns — only flexible fabric-based slatted panels. They bend precisely to the shape without deforming the slats, joining almost seamlessly.
Partitions
A partition made of panels is mounted on both sides. The slats on one side and the other should run in the same direction. The ends of the partition are covered with a wooden or metal profile. If the partition is partial — its top end also requires neat finishing.
Junctions with floor and ceiling
The junction with the floor is covered with a wooden baseboard, which overlaps the bottom end of the panel by 10–15 mm. The junction with the ceiling — with a ceiling baseboard or molding. If the panel runs full height, it is important to ensure beforehand that the ceiling is level: any slope will have to be compensated by trimming the top edge of each panel.
How to join wooden panels
Proper joining is what distinguishes professional installation from amateur work.
Vertical joining (modules run from bottom to top) is rarely used — mainly when the room height exceeds the standard panel length. The joint is made on a horizontal molding, which divides the height into two visual fields. This is not a mistake, but an architectural technique.
Horizontal joining (modules placed side by side along the wall width) is the primary scenario. The ends of the substrates meet butt-to-butt, and the battens continue the rhythm without interruption. Important: before final fixing each subsequent panel, check the alignment of the battens with the previous one.
Seamless visual layout is the ideal to strive for. Achieved by precise cutting of panels to width, correct alignment of the rhythm, and tight fitting of the ends.
How to prevent rhythm misalignment: if panels are purchased in different batches or cut on-site, always check the slat spacing before installation. A difference of even 1 mm at the joint of two panels will be visible under side lighting.
Common mistakes when installing wooden panels
Let's list typical mistakes — with an explanation of why they occur and what they lead to:
-
Not checking wall flatness before installation. Result — waves and distortions that cannot be fixed without complete dismantling.
-
Choosing adhesive without considering the material and weight of the panel. A light compound will not hold heavy solid wood panels — they will come loose after a few months.
-
Not doing a preliminary layout. As a result, the edge panels end up being 3 cm wide — this looks unprofessional.
-
Installing the first panel 'by eye'. The first one sets everything else. A 2 mm deviation towards the center of the wall turns into 10 mm at the edge.
-
Ignoring joints and ends. Unsealed ends and sloppy joints negate even the most beautiful solution.
-
Cutting out for sockets on-site, after installation. The risk of chipping, cracking, and uneven edges is almost guaranteed.
-
Using the same method for all types of panels. Smooth MDF panels can be glued—solid wood panels need to be mounted on a frame. One rule does not fit all.
-
Gluing panels onto an unprimed surface. The adhesive sticks to dust, not to the wall—the result is predictable.
-
Not checking geometry during installation. By the time the misalignment becomes obvious, half the wall is already installed.
-
Not planning transitions. How will the panel fit into the corner? What will be on the ceiling? Where the finish ends—this needs to be known before the first sheet, not after the last.
What is better to choose: adhesive or frame?
The answer depends on the specific situation.
| Situation | Recommended method |
|---|---|
| Even wall, drywall, MDF panels | Glue |
| Uneven wall, variations of 5–15 mm | Adhesive with backing or framework |
| Irregularities over 15 mm | Framework only |
| Heavy solid wood panels | Framework or combined installation |
| Concealing utilities | Frame |
| Disassembly required | Framework with clips |
| Flexible slatted panels for columns and arches | Glue |
| Quick installation, even base | Glue |
| Acoustic task | Frame with infill |
How to choose panels considering future installation
Choosing a panel is not just about appearance. How the panel is constructed directly affects installation convenience.
Which panels are easier to install: ready-made rigid modules on MDF backing are the most convenient option. Precise geometry, smooth edges, predictable slat spacing. Such panels install quickly and deliver stable results even without extensive experience.
Where ready-made panels are better and where individual slats are better: ready-made panels on backing are for standard straight walls, accent zones, TV walls, and headboard areas. Individual slats are for non-standard layouts, custom designs, transitions to the ceiling, and composite partitions.
Which panels are more convenient for an accent wall: any rigid modules of standard length. They install quickly, create an even rhythm, and are easily trimmed on-site. For non-standard heights, custom cutting is available.
Which are better for partitions and niches: flexible panels are for curved zones. Rigid ones are for straight partitions. For niches, rigid modules trimmed to the width and depth of the niche.
It's important to clarify the construction with the manufacturer in advance.Wall PanelsPanels from the same catalog can have different joining solutions, different mounting systems, and different substrate requirements — it's always better to know this before installation begins, not during the process.
Installing panels in interiors: key practical tips
A few things experienced installers know by default but are rarely written in instructions:
-
Side lighting is the main critic of installation. Any misalignment, any break in the rhythm of the slats, any unglued section — all of this will become visible under evening lighting from wall sconces or track spotlights. Check the work with a flashlight at an angle during the installation process.
-
Acclimatization of solid wood panels is mandatory. 48 hours in a room with working temperature and humidity will allow the wood to stabilize and avoid deformation after installation.
-
Cutting panels is done with a sharp tool — a jigsaw with fine teeth or a miter saw. A dull blade causes chips and tears, especially on veneer and solid wood.
-
Number the panels during layout. This will eliminate confusion with the direction of the grain and rhythm during actual installation.
-
For kitchen areas, hallways, and corridors — an additional coat of matte varnish on the panels after installation increases the surface's resistance to dirt and mechanical impact.
-
Don't rush with baseboards and moldings. Install them only after the complete installation of all panels — then they will lie flat and cover all joints without gaps.
Conclusion: the algorithm for proper installation
To achieve exactly the result you envisioned, follow this simple sequence:
-
Assess the substrate — flatness, type of material, presence of utilities
-
Choose the mounting method — adhesive, frame, hidden fasteners, or a combination
-
Prepare the surface — cleaning, priming, marking
-
Do a preliminary layout — on the floor, before installation
-
Start with the first perfectly aligned panel — this is the reference point for the entire wall
-
Plan complex junctions — corners, outlets, niches, adjacencies — even before starting installation
-
Check geometry as you go — don't wait until the work is finished
-
Finish with moldings and profiles — they give the installation a finished look
Installing wooden panels is a craft that respects preparation. The one who spends an hour on marking and layout saves a day on rework.
FAQ: Answers to popular questions
How to mount wooden panels on a wall?
Two methods are most common: adhesive — for even substrates, and frame — for uneven walls or when hiding utilities is needed. Hidden fasteners on clips and groove systems are also used.
What is better for attaching wooden panels: glue or on a frame?
Glue is suitable for even walls and lightweight panels. A frame is for complex substrates, heavy massive panels, and projects requiring disassembly. A combination of glue and finish nails provides a reliable and fast result on most standard projects.
Can wooden panels be attached to an uneven wall?
On walls with variations up to 5 mm — with glue using shims. More than 5 mm — only a frame made of metal profile, which levels the plane.
Which installation method is better for slatted panels?
Flexible slatted panels are attached with glue — they can even be mounted on curved surfaces. Rigid panels on MDF backing — glue plus finish nails or installation on a frame.
Can panels be attached without visible fasteners?
Yes. Hidden installation on clips, groove guides, or mounting adhesive without finish nails provides a surface without a single hole.
How to prepare the wall before installing panels?
Clean from dust and loose elements, treat with deep penetration primer, allow to dry completely. Check evenness with a 2 m straightedge.
How to attach panels near sockets and switches?
Cutouts are made before installation based on precise measurements. The cutout size is 2–3 mm larger than the mounting box. The socket frame should overlap the edge of the cutout by 5–10 mm.
How to join wooden panels on a large wall?
Panels are joined end-to-end. The rhythm of the slats must match. Before installing each subsequent panel — check alignment with the previous one.
Can panels be glued directly onto plaster?
Yes, if the plaster is strong, dry, crack-free, and primed. Crumbling or damp plaster is an unsuitable base for adhesive installation.
How to attach panels in a niche or on a column?
In a niche — installation starts from the back wall, then the sides. For columns with a circular cross-section — only flexible slatted panels on a fabric base.
What is better for interior finishing: a ready-made panel or individual slats?
A ready-made panel on a backing — for standard straight walls and quick installation. Individual slats — for non-standard solutions, custom layouts, and complex geometry.
What are the most common mistakes made when installing wooden panels?
Not checking wall evenness, not doing preliminary layout, placing the first panel inaccurately, ignoring joints and ends, gluing to an unprepared surface.
About the company STAVROS
If you're not just looking for information on how to install wooden panels, but also want to choose products that are convenient to install and pleasant to see every day — pay attention to STAVROS products.
STAVROS is a Russian manufacturer of wooden interior products:slatted panels made of MDF and solid oak, decorative wall panelsmoldings, cornices, baseboards, architraves, and carved decor. All products are manufactured with precise geometry, which is critical for installation: even ends, verified slat spacing, stable backing — this is not only aesthetics but also installation convenience.
STAVROS works with designers, architects, foremen, and direct clients — both in residential and commercial projects. Consultation on panel selection considering the installation method, base type, and interior goals is part of the company's standard service.