Article Contents:
- Why Wood is the Ideal Material for Home Crafting
- Ecological and natural properties
- Accessibility and Variety
- Tactile Comfort and Energy
- Basic Tools and Materials for Beginners
- Essential Minimum Tools
- Choosing Wood for First Projects
- Finish Materials for Protection and Decoration
- Simple Projects for Beginner Crafters
- Decorative Candle Holders from Logs and Branches
- Wall Panel from Wooden Logs
- Shelf from Unfinished Board
- Decorative Elements for Different Rooms in the House
- Cozy Accents for the Living Room
- Practical Solutions for the Kitchen
- Calm Elements for the Bedroom
- Woodworking Techniques for Creating Unique Items
- Pyrography: Designs and Patterns with Fire
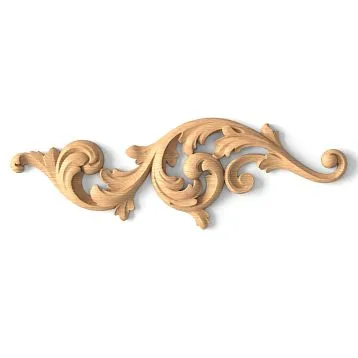
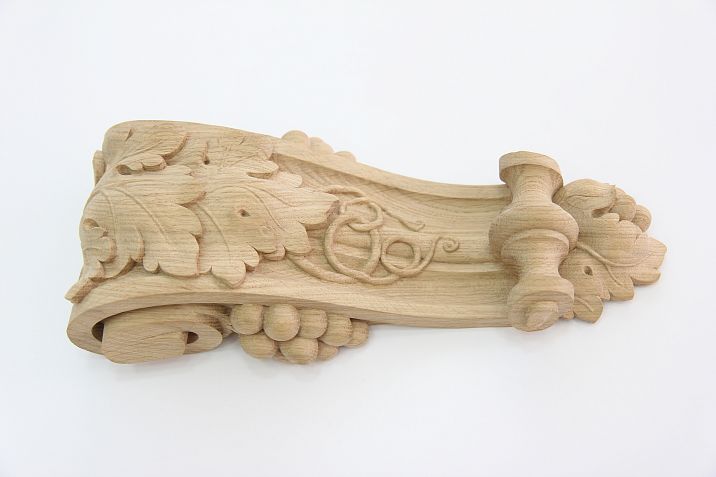
- Carving: 3D Patterns and Reliefs
- Brushing: Revealing Wood Texture
- Integrating Wooden Decor into Various Interior Styles
- Scandinavian Minimalism: Simplicity and Functionality
- Rustic Style: Rough Natural Beauty
- Modern Eco Style: Nature in an Urban Apartment
- Master Classes: Step-by-Step Instructions for Creating Unique Items
- Wall Panel 'Forest Geometry'
- Wooden Key Holder 'Home Coziness'
- Candle Holder 'Forest Lake' from Log and Epoxy Resin
- Professional Tips: How to Avoid Common Mistakes
- Correct material preparation
- Choosing and applying finishing coating
- Safety when working with wood
- Inspiration and ideas: from simple to complex
- Combining wood with other materials
- Seasonal decor: from spring motifs to holiday decorations
- Wooden toys and heartfelt gifts
- Conclusion: wood as a source of creativity and coziness
Imagine a room where every detail tells a story. Where warmth and comfort emanate not only from familiar sources, but also from the walls, interior items, and small accents created with love and care. This atmosphere can be created by Wooden decoration made by hand An element that does not merely decorate space, but fills it with special meaning and energy.
In a world where mass production makes our interiors look alike, handmade work becomes a true treasure. It allows you to express individuality, create something not found in stores, and, importantly, enjoy the creative process itself. Working with wood is not just a hobby—it is meditation, an opportunity to disconnect from the digital world and create something tangible, real, and alive.
Spring 2025 has brought a new wave of interest in natural materials and handcrafting. Wooden decor is experiencing a true renaissance, becoming a central element of modern interiors. Let’s together dive into this wonderful world and learn how to create unique items that will transform your home and become a source of pride.


Why wood is the ideal material for home creativity
Wood is one of the oldest materials used by humans. And for good reason: its natural beauty, tactile qualities, and versatility make it the ideal choice for creating decorative elements.


Ecological and natural properties
In the era of ecological awareness, choosing natural materials becomes not just an aesthetic but an ethical decision. Wooden items do not emit harmful substances, are safe for health, and, with proper handling of raw materials, do not harm the environment.
Working with wood, you literally touch nature, feel its texture, aroma, and energy. This creates a special connection between the craftsman and the material, which is transferred to the finished product and felt by everyone who interacts with it.
Our factory also produces:


Accessibility and variety
Surprisingly, you do not need to purchase expensive materials to create wooden decor. Nature generously shares its gifts: branches found during a walk in the forest, tree stumps left after gardening, even old furniture you were planning to discard—all of this can become the basis for unique decorative elements.
The variety of wood species allows you to choose a material with the required characteristics for each specific project. Lime is ideal for carving due to its softness, oak gives the item solidity and nobility, pine delights with a warm tone and expressive texture.
Get Consultation
Tactile comfort and energy
Wood is a material that literally 'breathes'. Unlike plastic or metal, it has a pleasant temperature and does not feel cold to the touch. Wooden items create a special atmosphere of coziness and warmth in the home, which cannot be achieved with synthetic materials.
Many note the special energy of wooden items. They seem to preserve a piece of nature, bringing its calmness and harmony into the home. That is why Wooden decoration made by hand it becomes not just an interior element, but a kind of talisman, creating an atmosphere of safety and comfort in the home.
Basic tools and materials for beginners
Before starting to create wooden masterpieces, it is important to prepare the necessary tools. Good news: you do not need a professional workshop to start—just a basic set of tools.
Minimum required tools
For starting work with wood, you will need:
- Saw — for beginners, a regular hand saw for wood will suffice; as skills develop, you can purchase a jigsaw or circular saw
- Sandpaper of various grits — for sanding surfaces
- Hammer and set of nails - for simple connections
- Screwdrivers and screws - for more secure fastenings
- Tape measure and pencil - for marking
- Brushes of different sizes - for applying stains, varnishes, and dyes
- Protective gear - gloves, safety glasses, respirator for safe work
If you plan to work on more complex projects, you can later expand your toolkit with an electric jigsaw, sander, drill with a set of bits and cutters.
Choosing wood for first projects
For beginners, softwoods are ideal as they are easy to work with:
- Pine - affordable, with a beautiful grain, though prone to resin exudation
- Linden - very soft, ideal for carving and detailed work
- Poplar - light-colored wood easy to process
- Ash - uniform structure, well-suited for staining
It's better to start with small blanks to get accustomed and understand the specifics of working with wood. Many hardware stores offer pre-prepared boards and beams that have undergone initial processing.
Finish materials for protection and decoration
To ensure your wooden items please the eye and last long, they must be properly protected and decorated:
- Stains - highlight the wood grain and provide the desired shade
- Acrylic paints - for colorful decoration, safe and quick-drying
- Wood oils - natural protection that enhances the beauty of wood
- Wax - creates a protective layer with a pleasant silky sheen
- Varnishes - provide long-term protection against moisture and dirt
The choice of finish depends on the item's purpose and desired effect. For items in contact with food, use special food-grade oils and waxes.
Simple projects for beginner craftsmen
It's better to start your journey into the world of wooden decor with simple projects that will help you master basic skills and achieve quick results. Here are a few ideas that even a beginner can handle.
Decorative candle holders from tree stumps and branches
Candle holders - an ideal first project, combining simplicity of execution with practical utility.
Materials:
- Tree stump with a diameter of 10-15 cm
- Drill bit slightly larger than the candle
- Sandpaper
- Oil or wax for final finishing
Process:
- Select a cross-section of appropriate thickness (3-5 cm)
- Sand the surface, especially the top part
- Drill a hole 1-2 cm deep for the candle
- Treat the item with oil or wax
- Insert the candle after drying
A variation of this project is a candle holder made from a branch. For this, take a branch with a diameter of about 5-7 cm, cut a piece 10-15 cm high, drill a hole at the top, and treat it similarly to the cross-section.
Wall panel made from wooden cross-sections
A panel made from cross-sections of different diameters creates an eye-catching accent on the wall and requires no complex skills.
Materials:
- Tree cross-sections of different diameters (from 3 to 15 cm)
- Fiberboard or plywood for the base
- Wood glue
- Sandpaper
- Protective coating (varnish or oil)
- Mounting hardware
Process:
- Prepare the base to the required size
- Sand the cross-sections and remove the bark (or leave it for a natural look)
- Arrange the cross-sections on the base, creating a composition
- Glue the cross-sections to the base
- After the glue dries, treat the surface with a protective finish
- Attach mounting hardware to the back side
Such a panel can have a geometric shape or irregular outlines. You can create an abstract composition or lay out a specific design—for example, a tree or animal silhouette.
Shelf made from untreated board
A simple yet striking shelf made from a single piece of wood will not only be a functional element but also a bright accent in the interior.
Materials:
- Board 3-5 cm thick, length to your choice
- Sandpaper
- Brackets for wall mounting
- Protective coating
Process:
- Choose a board with an interesting texture, possibly with an untreated edge
- Sand the surface, preserving the natural shape of the edges
- Treat with a protective finish
- After drying, attach the brackets and hang on the wall
Such a shelf looks especially good in loft, Scandinavian, or eco-style interiors. It can hold books, plants, and small decorative items.
Decorative elements for different rooms in the house
Wooden decoration made by hand Can be found in any room, from the hallway to the bedroom. Let's consider which elements are especially suitable for different rooms.
Cozy accents for the living room
The living room is a place where we spend time with family and guests, so it is especially important to create an atmosphere of warmth and comfort.
Decorative photo frames
Wooden frames give photos a special charm and become a standalone decorative element. You can create both classic rectangular frames and more creative shapes — for example, from branches or logs.
Coffee table from a tree stump
A heavy tree stump on legs or a stump will become an original coffee table. For this project, you will need a stump with a diameter of at least 50 cm, which must be carefully sanded and coated with a protective finish. The legs can be made from metal tubes or wooden planks.
Wall clocks from a tree stump
Clocks made from a wooden stump — a functional and aesthetic decorative element. To make them, you will need a stump with a diameter of 30–40 cm, a clock mechanism (available at craft stores), and numbers that can be cut from wood or drawn.
Practical solutions for the kitchen
The kitchen is a place where functionality is especially important, but there is also room for wooden decor.
Cutting boards with artistic finishing
A cutting board can be not only a practical item but also a decoration for the kitchen. Choose a board made of hardwood (oak, beech, maple), give it an interesting shape, carve a handle, and apply a pattern using burning or carving.
Hot item holders
A set of hot item holders made from tree stumps — a simple but useful project. Stumps with a diameter of 10–15 cm need to be sanded, treated with a food-safe protective finish, and optionally decorated — for example, by painting with acrylics or using decoupage.
Kitchen utensil holders
A wooden plank with hooks for hanging kitchen utensils — a practical and stylish solution. You can use an untreated board with bark or create a more refined version with carving or burning.
Calm elements for the bedroom
In the bedroom, wooden decor should promote relaxation and create an atmosphere of tranquility.
Bed headboard made of wooden planks
An original headboard can be made from wooden planks of different lengths, arranged vertically or in a geometric pattern. The planks are attached to a base made of plywood or directly to the wall.
Nightstand lamps with wooden bases
A lamp with a base made from an interesting piece of wood — a log, stump, or thick branch — will become a unique accent in the bedroom. For this project, you will need an electric socket, wire, plug, and lampshade.
Decorative shelves for books and small items
Small shelves with unusual shapes are not only functional but also decorative. You can create a tree-shaped shelf, a cloud-shaped shelf, or any other shape that fits your bedroom’s interior.
Woodworking techniques for creating unique items
To make your wooden items look professional and have a unique character, it is worth mastering several woodworking techniques.
Pyrography: drawings and patterns with fire
Pyrography is an accessible technique that allows you to create various patterns and images on wood.
Required tools:
- Wood burning tool (pyrography)
- Sandpaper
- Pencil for marking
- Protective coating
Basic techniques:
- Prepare the surface by sanding it smooth
- Draw the design with a pencil
- Set the engraver's temperature depending on the hardness of the wood
- Slowly move the tip along the lines of the design
- After finishing, remove pencil residue and apply a protective coating
Start with simple geometric patterns and gradually move to more complex designs. Light-colored woods with uniform grain are best for engraving — linden, birch, maple.
Carving: 3D patterns and relief
Wood carving is a more complex technique requiring special tools and skills, but the result is worth the effort.
Required tools:
- Set of carving gouges
- Mallet (wooden hammer)
- Sandpaper
- Protective coating
Basic techniques:
- Choose the appropriate wood species (for beginners, linden is best)
- Transfer the design onto the surface
- Begin by cutting out the main outlines
- Gradually deepen and detail the design
- Sand the finished piece and apply a protective coating
Start with simple geometric patterns or botanical motifs. With experience, you can create complex relief compositions and even 3D sculptures.
Brushing: revealing wood texture
Brushing is a technique that highlights the natural wood texture by removing soft fibers and leaving hard ones.
Required tools:
- Metal brush or drill attachment
- Sandpaper
- Stain or paint (optional)
- Protective coating
Process:
- Sand the wood surface
- Run the metal brush along the grain, removing soft parts
- Remove dust and sand the surface again
- If desired, apply stain or paint (it will absorb more intensely into grooves)
- After drying, apply a protective coating
Brushing looks especially effective on coniferous woods and oak, where the difference between soft and hard fibers is most pronounced.
Integrating wooden decor into various interior styles
Wooden elements are remarkably versatile and can harmoniously fit into almost any interior style, from classic to ultra-modern.
Scandinavian minimalism: simplicity and functionality
In Scandinavian style, wood plays a key role, creating an atmosphere of naturalness and coziness.
Characteristic features:
- Light wood species (birch, beech, pine)
- Minimal processing, preserving the natural look
- Simple, functional shapes
- Combination with white and pastel shades
Ideas for wooden decor:
- Simple shelves with unprocessed edges
- Minimalist photo frames
- Wooden geometric candle holders
- Wall hooks made from branches or unprocessed planks
Rustic style: rough beauty of nature
Rustic or country style emphasizes the natural beauty of wood, including its 'imperfections' - knots, cracks, unevenness.
Characteristic features:
- Massive elements made from unprocessed wood
- Preservation of bark, knots, and other natural features
- Rough texture, minimal sanding
- Natural tones or weathered surfaces
Ideas for wooden decor:
- Massive countertops from logs or planks
- Wall panels made from logs with bark
- Shelves and consoles made from logs and stumps
- Decorative staircases made from unprocessed branches
Modern eco-style: nature in an urban apartment
Eco-style combines modern lines with natural materials, creating a harmonious space.
Characteristic features:
- Combination of wood with other natural materials (stone, glass, metal)
- Clean lines and organic shapes
- Light or neutral tones
- Functionality and minimalism
Ideas for wooden decor:
- Geometric wall installations made from wooden elements
- Combined lighting fixtures (wood + metal)
- Decorative partitions made from vertical wooden slats
- Mirrors in wooden frames of unusual shapes
Master classes: step-by-step instructions for creating unique items
Theory is good, but practice is better. Let's consider several detailed masterclasses that will help you create impressive wooden decorative elements.
Wall Hanging 'Forest Geometry'
This striking panel combines the natural beauty of wood with modern geometric shapes.
Materials:
- 6-8 mm thick plywood for the base (size to your choice)
- Thin branch slices with a diameter of 2-5 cm
- Saw or secateurs
- Sandpaper
- Wood glue
- Ruler and pencil
- Protective coating (oil or varnish)
- Mounting hardware
Step-by-step instructions:
- Prepare the plywood base, sand edges and surface
- Draw a geometric shape on the base - triangle, hexagon, or more complex form
- Cut branch slices into pieces of equal length (about 1-2 cm)
- Begin placing the slices along the outline of the drawn shape, gluing each piece
- Gradually fill the entire shape, creating a mosaic from the slices
- After the glue dries, treat the surface with a protective finish
- Attach mounting hardware to the back side
Such a panel will be a stylish accent in any modern interior. You can experiment with shapes, creating several geometric figures or abstract compositions.
Wooden Key Holder 'Home Coziness'
A functional and decorative key holder in the shape of a house will help organize space in the hallway and become a cute accent.
Materials:
- Board 1-2 cm thick
- Jigsaw or handsaw
- Sandpaper
- Acrylic paints or wood stain
- Small hooks for keys
- Brushes
- Protective coating
- Mounting hardware
Step-by-step instructions:
- Draw the house outline on the board and cut it out with a jigsaw
- Sand all surfaces and edges
- Optional: apply decorative elements - windows, door, roof - using a wood burner or acrylic paints
- Stain or paint the item with the chosen color
- After drying, apply a protective coating
- Screw small hooks into the bottom of the house for hanging keys
- Attach mounting hardware to the back for hanging on the wall
Such a key holder not only helps organize key storage, but also becomes a cute accent in the hallway. You can create an entire 'village' by making several houses of different sizes and shapes.
Lamp 'Forest Lake' from branch slice and epoxy resin
This project combines natural wood with modern materials, creating an eye-catching decorative item.
Materials:
- Cut a piece of wood 3-5 cm thick
- Transparent epoxy resin
- Epoxy pigment (blue or turquoise)
- Sandpaper of various grits
- Wood drill bit
- Polishing paste
- Wood oil
Step-by-step instructions:
- Choose a cut with an interesting shape, perhaps with a natural indentation or crack
- Sand the surface but preserve natural irregularities
- If there is no natural indentation, create one using a chisel or router
- Prepare the epoxy resin according to instructions, add pigment to create a water effect
- Pour the resin into the indentation and leave until fully cured (usually 24-48 hours)
- After curing, sand the surface starting with coarse sandpaper and gradually moving to finer grits
- Polish the resin surface to a shine
- Drill a hole for the candle in the part of the cut not filled with resin
- Treat the wooden part with oil
- Insert the candle into the prepared hole
This candle holder will become a true work of art and a focal point in any interior. The play of candlelight on the surface of the 'lake' creates a magical effect.
Professional tips: how to avoid common mistakes
Even experienced craftsmen sometimes make mistakes when working with wood. Here are several tips to help you avoid typical problems and create quality items.
Correct material preparation
The quality of wood preparation directly affects the final result. Here are several important points:
- Wood drying - use well-dried wood with a moisture content of 8-12%. Wet wood may warp or crack after the item is made.
- Sanding - start with coarse sandpaper (grit 80-100) and gradually move to finer grits (up to 220-240). Sand along the grain to avoid scratches.
- Dust removal - after sanding, carefully remove dust from the surface using a damp cloth or a special adhesive wipe. Dust can ruin the finish.
Choosing and applying the finish
The finish protects the wood and enhances its beauty. Here’s what to consider:
- Compatibility - ensure the chosen finish is compatible with the wood species and any previous layers (if applicable).
- Testing - always test the stain or paint on a small, inconspicuous area or scrap of the same material.
- Application - apply thin coats, allowing each to dry completely. It’s better to apply several thin coats than one thick one.
- Conditions - follow the recommended temperature and humidity when applying the finish. Avoid dusty environments.
Safety should be a priority in any woodworking tasks:
Safety should be a priority in any woodworking tasks:
- Protective equipment - always wear safety goggles when using power tools, a respirator when sanding or working with chemicals, gloves when necessary.
- Ventilation - ensure good ventilation, especially when working with varnishes, paints, and other chemicals.
- Correct tool usage - read the instructions before using a new tool, pay attention to hand positioning when using cutting tools.
- Material storage - store varnishes, paints, and solvents according to instructions, away from heat sources and out of reach of children.
Inspiration and ideas: from simple to complex
Once basic skills are mastered, you can move on to more complex and creative projects. Here are some ideas for inspiration.
Combining wood with other materials
Combining wood with other materials opens new horizons for creativity:
- Wood and metal - create a shelf with a wooden surface and metal brackets, or a lamp with a wooden base and metal shade.
- Wood and glass - combine wooden frames with colored or frosted glass inserts to create decorative panels or partitions.
- Wood and textile - wooden frames with stretched fabric can become the basis for wall panels or headboards.
- Wood and leather - leather inserts in wooden items add textural contrast and tactile interest.
Seasonal decor: from spring motifs to holiday decorations
Wooden decoration made by hand can change with the seasons:
- Spring - create wooden plant stand holders, decorative butterflies or birds for interior decoration.
- Summer - wooden frames for mirrors with a nautical theme, drink holders for cold beverages, decorative fans.
- Autumn - panels made from wood slabs shaped like leaves, autumn-themed candle holders, wooden vases for dried flowers.
- Winter - holiday decorations (stars, snowflakes, Christmas trees), candle holders to create a cozy atmosphere during long winter evenings.
Wooden toys and heartfelt gifts
Wooden items become special gifts, infused with a piece of the soul:
- Educational toys for children - simple puzzles, construction sets, animal figurines.
- Personalized gifts - boxes with burned or cut initials, photo frames with memorable dates, phone stands with the owner's name.
- Kitchen accessories - cutting boards with unusual shapes, hot item holders, spice holders.
- Office accessories - pen holders, desk organizers, business card holders.
Conclusion: wood as a source of creativity and coziness
Wood - a remarkable material that literally comes alive in the hands of the craftsman. Creating wooden decorative elements by hand not only decorates your home, but also establishes a special connection with nature, craft traditions, and your own creative potential.
Start with simple projects, gradually mastering new techniques and tools. Don't be afraid to experiment, combine different materials, and find your own style. Remember, when working with wood, it's not only the result that matters, but also the process itself - meditative, calming, allowing you to detach from daily hustle and focus on creating something beautiful and lasting.
Let every Wooden decoration made by hand It will become more than just interior decor—it will reflect your individuality, your perspective on the world, your love for nature and beauty. In a world of mass production and disposable items, such pieces gain special value—they carry the warmth of human hands, the uniqueness of handcrafting, and the energy of living material.
Create, experiment, fill your home with unique items that will delight your eyes and soul for years to come. And remember: working with wood is not just a hobby—it’s a path to harmony with yourself and the world around you.