Article Contents:
- Balusters: Functionality and Aesthetics in One Element
- What Are Balusters and Their Role in Staircase Construction
- Types of Balusters by Material and Shape
- Requirements for Secure Mounting
- Preparatory Work: Guarantee of Successful Installation
- Required Tools and Materials
- Accurate Calculations and Marking: Foundation of Secure Mounting
- Preparing Balusters and Mounting Locations
- Main Methods of Mounting Balusters: Choosing the Optimal Option
- Mounting Balusters to Treads: Reliable Methods
- Through Mounting with Bolts
- Mounting with Dowels or Studs
- Mounting on Metal Bushings
- Attaching Balusters to the Stringer: Features and Nuances
- Mounting on Bolts
- Using a Baluster Support
- Mounting Balusters to Handrails: Final Installation Stage
- With the Use of a Handrail Support Board
- Hidden Mounting with Nails or Studs
- Specifics of Mounting Balusters Made of Different Materials
- Wooden Balusters: Classic, Requiring Attention
- Metallic balusters: strength and durability
- Glass and Composite Balusters: Modern Solutions
- Common Mistakes When Mounting Balusters and How to Avoid Them
- Insufficient Fastening Strength
- Incorrect Calculation of Distance Between Balusters
- Ignoring the Staircase's Angle of Inclination
- Insufficient Material Preparation
- Cutting Corners on Fastener Quality
- Professional Secrets for Mounting Balusters for an Ideal Result
- Using Guides for Accurate Drilling
- Pre-Assembly of Sections
- Combining Mounting Methods for Maximum Reliability
- Concealing Fasteners for an Aesthetic Appearance
- Accounting for Seasonal Changes in Wood
- Caring for balusters: extending service life
- Regular Inspection and Preventive Maintenance
- Care for wooden balusters
- Care for metal and glass balusters
- Conclusion: beauty and reliability in every detail
The staircase in a house is not just a functional element connecting floors. It is an architectural feature capable of becoming a true interior decoration. And the key role in its aesthetic and practical perfection belongs to balusters — vertical supports that hold the handrails. However, even the most exquisite balusters will lose their appeal if installed incorrectly. Wobbly, squeaky railings not only spoil the impression of the entire structure but also pose a real safety hazard.
The question of How to install balustersConcerns many homeowners and craftsmen. After all, the reliability of this mounting directly affects not only the longevity of the staircase but also the safety of those who will use it. In this article, we will reveal professional secrets of installing balusters, which will allow you to create a structure combining aesthetic perfection and engineering reliability.
Let's dive into the world of precise calculations, proven technologies, and workshop techniques that will turn the process of installing balusters from a complex task into an engaging creative endeavor. Are you ready to learn how to create a staircase that will become a source of pride for you for many years? Then continue reading!


Balusters: functionality and aesthetics in one element
Before diving into the technical aspects of mounting balusters, let's understand what these elements are and why their proper installation is so important.


What are balusters and their role in staircase construction
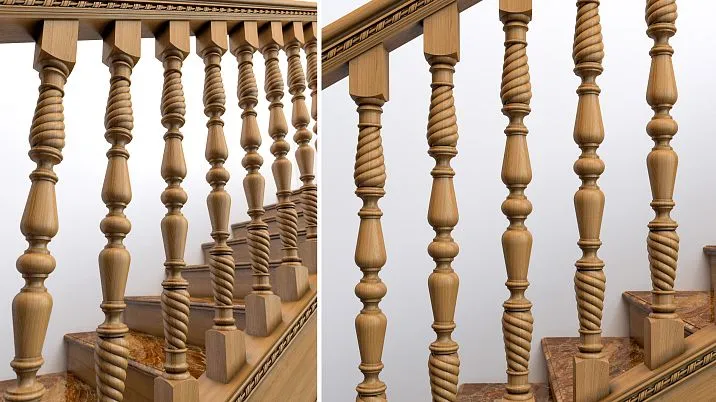
Balusters are vertical support elements that connect the steps or stringers of a staircase to the handrails. They serve a dual function: ensuring the structural integrity of the railing and creating a protective barrier that prevents falls from height. In addition, balusters are an important decorative element, defining the style of the entire staircase.
Historically, balusters appeared even in ancient times as an architectural element decorating palaces and temples. The word itself comes from the Italian "balaustro" — the name of a wild pomegranate flower, whose shape the first balusters resembled. Over time, their design evolved, but their main function remained unchanged — to ensure safety and provide the structure with aesthetic completeness.
Our factory also produces:


Types of balusters by material and shape
The modern market offers balusters made of various materials, each with its own installation characteristics:
Wooden balusters — a classic option combining natural beauty and relative ease of processing. They can be turned (with smooth curves), milled (with geometric ornamentation), or carved (with artistic carving). Wooden balusters require special attention to room humidity and protective treatment.
Metal balusters — strong and durable elements that can be made of steel, cast iron, or aluminum. They are characterized by high strength and a variety of design solutions — from strict geometric forms to complex forged patterns.
Glass balusters — a modern solution creating an effect of lightness and visually expanding space. They are made of tempered or triplex glass, ensuring the necessary strength.
Composite balusters — combine several materials, for example, wooden bases with metal inserts or glass panels in metal frames.
By shape, balusters can be:
- Round (classic variant)
- Square or rectangular (for modern interiors)
- Figurative (with various decorative elements)
- Flat (in the form of panels with or without cut-out patterns)
Get Consultation
Requirements for secure mounting
Regardless of material and design, baluster mounting must comply with strict safety requirements. According to building codes, staircase railings must withstand a horizontal load of at least 0.3 kN (about 30 kg) applied at any point.
It is especially important to ensure secure mounting in homes with children or elderly people. The distance between balusters should not exceed 15 cm to prevent slipping between them.
In addition, mounting must account for possible material changes due to temperature, humidity, and mechanical loads. This is especially true for wooden structures, which may expand or contract depending on operating conditions.
Preparation work: the key to successful installation
As with any serious task, success in installing balusters depends 80% on proper preparation. Let's consider the key steps that must be completed before actual installation.
Required Tools and Materials
For professional baluster mounting, you will need the following set of tools:
- Drill or impact driver with a set of drill bits of various diameters
- Miter saw for trimming balusters
- Measuring tape and pencil for marking
- Construction level (preferably laser)
- Square for checking right angles
- Rubber mallet (for wooden elements)
- Chisel (for fitting wooden parts)
- Sandpaper of various grits
- Screwdrivers or bits of various types
Materials and fasteners required:
- Wooden dowels (for wooden balusters)
- Metal screws with threads (for various types of fastening)
- Wood or metal screws (depending on material)
- Construction bolts with nuts and washers
- High-quality wood glue
- Wood glue or silicone (for additional fixation)
- Decorative caps for concealing fasteners
Precise calculations and marking: foundation of reliable fastening
Before starting installation, precise calculations and marking must be performed. This will allow even distribution of balusters and ensure an aesthetically pleasing appearance of the staircase.
- Determining baluster height. The standard height of balusters for staircases is 80-100 cm from the stair level to the top edge of the handrail. This height ensures safety for both adults and children using the staircase.
- Calculating the number and spacing of balusters. The optimal distance between centers of adjacent balusters is 15-20 cm. It is important that the gap between balusters does not exceed 15 cm (safety requirement for children).
- Marking installation locations. On the treads or stringers, mark the points for attaching balusters. To do this:
- Mark the attachment points for the first and last balusters on the flight
- Stretch a string or place a long board between them
- Evenly distribute intermediate attachment points
- Transfer the markings to the treads or stringers using a square
- Marking ends of balusters. On the ends of balusters, mark the centers for drilling holes for fasteners. To accurately determine the center, draw two diagonal lines — their intersection will be the desired point.
Preparing balusters and mounting locations
After completing calculations and marking, prepare the balusters and mounting locations:
- Sanding balusters. All wooden balusters must be carefully sanded. This ensures better adhesion with glue and protective coatings, and gives the finished product a polished appearance.
- Treating with protective coatings. Wooden elements should be treated with antiseptics and other protective coatings before installation. This will extend their service life and simplify future maintenance.
- Preparing holes. Depending on the chosen fastening method, drill holes in the treads, stringers, or balusters themselves. The hole diameter must match the fasteners being used, and the depth must ensure secure fixation.
- Trimming balusters (if necessary). If the staircase has a slope, the ends of balusters must be trimmed at the appropriate angle. This will ensure their vertical position after installation.
Main methods How to install balusters: choose the optimal option
There are several proven methods for attaching balusters, each with its own advantages and application specifics. The choice of a specific method depends on the staircase material, baluster type, expected loads, and aesthetic requirements.
Baluster Attachment to Steps: Reliable Methods
Through Bolt Attachment
This method is considered one of the most reliable and is suitable for most types of staircases. The principle of attachment is as follows:
- A through hole with a diameter of 5-6 mm is drilled into the step.
- The hole is expanded at the bottom to embed the bolt head.
- Wood glue is applied to the end of the baluster.
- The baluster is attached to the step from below using a construction screw or bolt with a diameter of at least 8 mm.
- The fastener head is covered with a decorative cap.
Advantages of this method:
- High connection reliability
- Possibility to tighten the connection if needed
- Relative ease of installation
Disadvantages:
- Need for access to the bottom part of the step
- Visible fastening elements (though covered by caps)
Attachment with dowels or bolts
This method provides hidden connection and is especially popular for high-end wooden staircases:
- Holes for dowel or bolt are drilled into the step and the baluster end.
- Glue is poured into the holes.
- The dowel or bolt is inserted into the hole in the step.
- The baluster is placed over the protruding part of the dowel or bolt.
To increase reliability, double attachment can be used — with a dowel in the center and additional bolts on the sides.
Advantages:
- Aesthetic appearance without visible fastening elements
- Even load distribution
- High strength when properly executed
Disadvantages:
- Difficulty of accurately drilling holes
- Inability to tighten the connection in the future
- Dependence on the quality of the glued joint
Mounting on metal bushings
A modern method combining reliability and aesthetics:
- A hole for the metal bushing is drilled into the step.
- The bushing is glued into the hole and left until the glue fully dries.
- A hole for the bolt is drilled into the baluster.
- Need for special bushings
Advantages:
- High-strength connection
- Even load distribution
- Ability to dismantle if necessary
Disadvantages:
- Higher cost compared to other methods
- Higher cost compared to other methods
Baluster mounting to the stringer: features and nuances
Attaching balusters to the handrail has its own features, the main one being the need to consider the staircase's slope. Before installation, the ends of the balusters must be cut at an angle corresponding to the slope of the staircase to ensure their vertical position.
Fastening with screws
One of the most common methods:
- Holes for the bolt are drilled into the handrail and the end of the baluster.
- The end of the baluster is cut at the angle of the handrail's slope.
- The bolt is screwed into the handrail (glue can be used for additional fixation).
- The baluster is screwed onto the bolt or slipped over it and secured with a nut.
Important: when attaching balusters to dowels, it is recommended to drill a hole in the end before trimming — this makes it easier to determine the center. After trimming, the hole is drilled to the required depth.
Use of a baluster rail
This method involves using a helper strip (baluster support), to which the balusters are attached:
- The position of the balusters is marked on the lower and upper baluster support rails at equal distances from each other.
- The ends of the balusters are cut at an angle according to the slope of the handrail.
- Glue is applied to the sanded ends of the balusters, and the elements are attached to the rails through self-tapping screws.
- The finished structure with balusters is mounted to the handrail using glue and self-tapping screws.
- Railings are installed on the top rail and secured from below with self-tapping screws.
Advantages:
- Possibility of pre-assembling the railing section
- Increased structural rigidity
- Simplification of installation on complex sections
Disadvantages:
- Additional material cost
- Increased visual massiveness of the structure
Attaching balusters to railings: final stage of installation
After installing the balusters on the steps or handrail, it is necessary to ensure their secure connection to the railings. There are several ways to achieve this:
Using a handrail support board
- A narrow rough board (handrail support) is nailed to the upper ends of the balusters.
- A groove is cut into the handrail in the shape of the handrail support.
- The handrail is placed on the handrail support and secured with glue and self-tapping screws.
This method ensures a secure connection and allows hiding the fastening elements.
Hidden fastening using dowels or bolts
A more complex but aesthetically perfect method:
- A bolt or dowel is screwed into the center of each baluster to sufficient depth.
- Balusters are aligned vertically and secured.
- The handrail is laid on top and contact points with bolts are marked.
- Holes for bolts are drilled at the marked points.
- Connection points are glued, and the handrail is installed in place.
To ensure tight contact between the handrail and balusters, a rubber mallet can be used, placing a protective board underneath.
Specifics of mounting balusters from different materials
The material from which the balusters are made largely determines the specifics of their installation. Let's consider the specifics of working with different types of balusters.
Wooden balusters: classic, requiring attention
Wooden balusters remain the most popular choice due to their natural beauty and relative ease of processing. However, when installing them, it is necessary to consider several important points:
- Wood moisture. Balusters must be well-dried (moisture content no more than 12%). Using raw wood will cause deformation of elements after installation.
- Protective treatment. Before installation, wooden balusters should be treated with antiseptics and other protective compounds. This will extend their service life and prevent damage from fungi or insects.
- Choice of adhesive. For wooden joints, use high-quality carpentry glue resistant to moisture and temperature fluctuations. The glue should retain elasticity after drying to compensate for natural wood movement.
- Consideration of wood species. Hardwoods (oak, beech, ash) require pre-drilling holes for fasteners to avoid cracking. For softwoods (pine, spruce), the hole diameter should be smaller than the fastener diameter to ensure secure fixation.
- Final finishing. After installation, wooden balusters should be coated with varnish or oil to protect against moisture and dirt. This also highlights the natural beauty of the wood.
Metal balusters: strength and durability
Metal balusters are characterized by high strength and durability, but have their own installation specifics:
- Choice of fasteners. For metal balusters, use special fasteners designed for metal. These may include bolts with nuts, special flanges, or welded connections.
- Corrosion protection. Connection points of metal elements should be treated with anti-corrosion compounds, especially if the staircase is located in a humid room or outdoors.
- Insulation from wood. When connecting metal balusters to wooden elements (treads, handrails), use insulating washers. This prevents squeaking and protects wood from darkening at contact points with metal.
- Consideration of thermal expansion. Metal expands and contracts more significantly with temperature changes than wood. Therefore, the structure must provide a small allowance to compensate for these movements.
Glass and composite balusters: modern solutions
Glass and composite balusters require a special approach to installation:
- Special fasteners. For glass balusters, use special clamps, point fasteners, or profiled systems. They must securely hold the glass without creating stress concentration points.
- Protective washers. At contact points between glass and other materials, use soft washers made of silicone or neoprene. This prevents glass damage and reduces noise during vibrations.
- Precision of installation. Glass elements do not allow adjustments after manufacturing, so all dimensions must be determined with maximum precision during the design phase.
- Safety. For staircases, use only tempered or triplex glass, which does not form sharp fragments upon breaking.
Typical errors in mounting balusters and how to avoid them
Even experienced craftsmen sometimes make mistakes when installing balusters. Knowing these typical problems will help you avoid them and achieve a flawless result.
Insufficient fastening strength
One of the most common and dangerous mistakes is insufficiently secure mounting of balusters. This can lead to structural loosening and create a safety hazard.
How to avoid:
- Use fasteners of appropriate diameter and length (for wooden structures - at least 8 mm)
- Apply double fastening for heavily loaded elements
- Supplement mechanical fastening with adhesive bonding
- Regularly inspect and tighten fasteners as needed
Incorrect calculation of the distance between balusters
Too large a distance between balusters not only violates aesthetics but also creates a danger for children who may slip between them.
How to avoid:
- Strictly adhere to regulations (distance between balusters no more than 15 cm)
- Perform precise marking before starting installation
- Use a template to ensure equal spacing between elements
Ignoring the staircase incline angle
When attaching balusters to the stringer, often the angle of the staircase slope is overlooked, resulting in incorrect baluster positioning — they will be tilted, not vertical.
How to avoid:
- Measure the exact angle of the staircase slope using a protractor
- Trim the ends of the balusters at the appropriate angle
- Use a plumb bob or level to check the verticality of each baluster
Insufficient material preparation
Using untreated wood or lack of protective coatings significantly shortens the service life of balusters and may lead to their premature failure.
How to avoid:
- Use only well-dried wood (moisture content no more than 12%)
- Treat all wooden elements with antiseptics before installation
- Apply protective coating (varnish, oil, wax) after installation
Saving on fastening quality
Using cheap, low-quality fasteners may lead to corrosion, weakening, or even failure.
How to avoid:
- Choose fasteners made from quality materials (stainless steel, brass)
- Consider compatibility of fastener and baluster materials
- Do not skimp on glue and sealants — they play an important role in ensuring the structural reliability
Professional secrets How to install balusters for an ideal result
After 50 years of work in staircase design and installation, I have accumulated many professional secrets that I want to share with you. These techniques will help you achieve a result worthy of pride.
Using guides for precise drilling
One of the main challenges when installing balusters is the need for precise drilling of holes. Even a small deviation may result in a misaligned baluster or weakened fastening.
Professional secret — using guides (templates) for drilling. These can be either purchased tools or homemade:
- For a simple guide, it is enough to take a wooden block and drill a hole of the required diameter in it.
- When drilling, the guide is placed against the end of the baluster or the tread, ensuring accurate drill direction.
- For serial drilling, you can make a more complex guide with fixation on the tread and the ability for quick movement.
This simple technique significantly improves work accuracy and saves time, especially when installing a large number of balusters.
Pre-assembly of sections
When installing complex railings with a large number of balusters, it is convenient to use the method of pre-assembling sections:
- Balusters are attached to the baluster seat and the handrail plank, forming a ready section.
- The section is checked for geometric accuracy and corrected if necessary.
- The ready section is installed on the staircase as a single unit.
This method allows performing most of the work in comfortable conditions (for example, in a workshop), while carrying out only the final installation on-site. In addition, it ensures high accuracy and aesthetic quality of the result.
Combining fastening methods for maximum reliability
For particularly critical structures or under high loads, it is recommended to combine different fastening methods:
- Primary fastening with a bolt or dowel in the center of the baluster.
- Additional fixation with screws at an angle through side surfaces.
- Using glue for all connections.
This approach ensures load distribution across multiple points and significantly increases the overall strength of the structure.
Masking fasteners for an aesthetic appearance
Visible fastener elements can spoil the impression even of the highest-quality staircase. Professionals use various methods to mask them:
- Wooden plugs. For concealed-head screws, wooden plugs can be made from the same wood species as the balusters. After installation and sanding, they become almost invisible.
- Wax pencils. To mask small defects and screw heads, wax pencils matching the wood color can be used.
- Decorative covers. For metal balusters, there are special decorative covers that hide fastening points and simultaneously serve as decoration.
- Structural solutions. Sometimes the best way to hide fasteners is to incorporate elements into the design that will cover them (for example, decorative rings on balusters).
Accounting for seasonal changes in wood
Wood is a living material that reacts to changes in humidity and temperature. Professionals take this into account when installing wooden balusters:
- Leave a small gap (1-2 mm) in joints to compensate for wood expansion.
- Use flexible adhesive compositions that do not crack when the wood moves.
- Perform final tightening of fasteners 2-3 weeks after installation, when the wood has adapted to the room conditions.
These simple techniques help avoid cracks and creaks during the staircase's operation.
Care for balusters: extending service life
Even the highest-quality baluster fastening does not guarantee the structure's longevity without proper care. Let's consider the main principles of maintaining balusters made from different materials.
Regular inspection and preventive maintenance
Regardless of the material from which the balusters are made, regular inspection is necessary:
- Check the reliability of fastening by tightening loose elements.
- Inspect balusters for cracks, chips, or other damage.
- Pay attention to the condition of protective coatings and promptly renew them.
Recommended inspection frequency - at least once a year, and for heavily used staircases - every six months.
Care of wooden balusters
Wooden balusters require special attention:
- Moisture protection. Avoid water contact with wooden elements. If this occurs, immediately wipe moisture with a dry cloth.
- Updating protective coatings. Depending on the type of coating and usage intensity, the protective layer (varnish, oil, wax) should be renewed every 3-5 years.
- Dust cleaning. Regularly remove dust with a soft cloth. For more thorough cleaning, use a slightly damp cloth soaked in a mild detergent solution.
- Maintaining optimal humidity. In rooms with wooden staircases, it is advisable to maintain relative air humidity within 40-60%. This prevents wood from drying out or swelling.
Care for metal and glass balusters
Metal balusters also require care:
- Corrosion protection. Regularly inspect metal elements for rust, especially at connection points. If corrosion is detected, sand the affected area and apply a protective coating.
- Cleaning. Metal balusters can be cleaned using specialized metal cleaning agents that not only remove dirt but also create a protective film.
Glass balusters require careful handling:
- Cleaning without abrasives. Use only soft cloths and glass-specific cleaners that do not contain abrasive particles.
- Checking fasteners. Regularly check the secure attachment of glass panels, as loosening can lead to dangerous stress in the glass.
Conclusion: beauty and reliability in every detail
Proper baluster mounting is an art requiring attention to detail, precision, and understanding of material properties. Following the recommendations in this article, you will be able to create a staircase that is not only a beautiful interior element but also a reliable structure serving for many years.
Remember that the quality of baluster mounting directly affects the safety of everyone using the staircase. Do not cut corners on materials or time dedicated to this crucial construction phase. It is better to invest slightly more resources now than to face the need for repairs or, worse, an accident in the future.
If you are unsure of your abilities or wish to achieve a guaranteed professional result, consult the specialists at STAVROS. Years of experience, modern equipment, and high-quality materials enable STAVROS masters to create staircases combining aesthetic perfection with engineering reliability. The company offers a full range of services — from design to installation — and provides warranties on all completed work.
A beautiful and reliable staircase with properly installed balusters will become a source of pride and bring joy to you and your loved ones for many years.