


Article Contents:
- Wooden Skirting Board on Tile: When Appropriate and When Not
- Hallway: Zone of Material Conflict
- Kitchen: Application Zones and Risk Zones
- Where Wooden Skirting Board Next to Tile Works Perfectly
- 30×30 and 40×40 mm Corner Profile: Skirting as Tile-to-Wall Transition
- What is a Corner Skirting Board and What It's Designed For
- 30×30 Wooden Skirting: Minimalist Corner Profile
- 40×40 mm Wooden Skirting: More Substantial Corner Profile
- Corner Profile Comparison: 30×30 vs 40×40
- Triangular Skirting in Bathroom and Hallway: Hygiene and Aesthetics
- What is a Triangular Skirting Board and Where It Came From
- Application of Triangular Skirting Board by Room
- Wooden Triangular Skirting Board Sizes
- Wooden Triangular Skirting: Profile and Appearance
- Moisture-Protective Impregnations for Wooden Skirting Board Next to Tile
- Why Regular Varnish is Not Enough
- Optimal Coatings for Wooden Skirting Board Next to Tile
- End Treatment: A Critically Important Point
- Comparative Table of Coatings for Skirting Board Next to Tile
- Attaching Wooden Skirting Board to Tiled Surface
- Main Limitation: Cannot Attach to Tile with a Dowel
- Liquid Nails: Technology and Adhesive Selection
- Liquid Nails Installation Technology: Step-by-Step
- Silicone Instead of Adhesive: When It's Better
- Alternatives: PVC or Stainless Steel vs Wooden Skirting Board
- Honest Comparison of Three Materials for Tile Zones
- PVC Corner Skirting Board Next to Tile
- Stainless Steel Skirting Board
- Final material selection matrix
- Special situations: different tile heights, joints, complex corners
- Beveled tile and wooden baseboard: gap at the base
- Uneven floor coverings: tile higher than adjacent flooring
- Non-standard corners: when walls are not 90 degrees
- FAQ: answers to popular questions about wooden baseboards next to tile
- About the Company STAVROS
Tile and wood are two materials that exist in different worlds in nature. Tile is cold, hard, moisture-resistant. Wood is warm, living, breathing. But it's precisely where they meet - at the base of the wall in the hallway, kitchen, technical areas - that one of the most interesting finishing questions arises: is awooden baseboard under tileneeded, and if so - what kind and how to install it correctly?
The answer is ambiguous. And it's precisely this ambiguity that makes the topic worth examining. Not 'wooden baseboards are good everywhere' and not 'only tile on tile'. Instead - specific scenarios, specific solutions, specific technical requirements.


Wooden baseboard on tile: when appropriate and when not


Hallway: material conflict zone
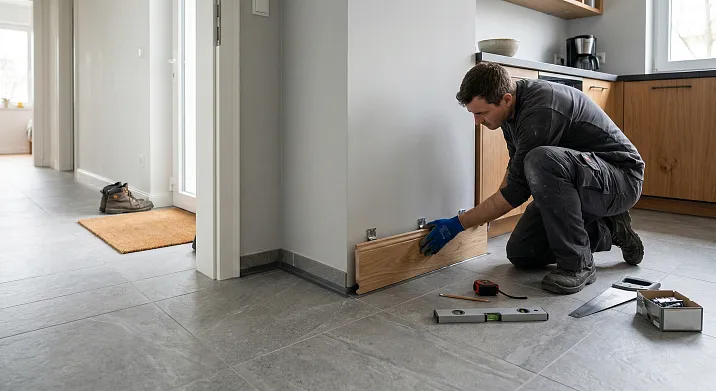
The hallway is the first room that greets you at home. This is where tile flooring and wooden wall or door elements most often meet. And this is where the question is most frequently asked: can you install awooden floor baseboardnext to tile - or is this a mistake?
The hallway is a high-traffic area. Moisture from outside (rain, snow, wet shoes), dirt, mechanical impacts from shoes and bags. On one hand - this is an argument against wood. On the other - a properly protected wooden baseboard with oil or alkyd varnish coating handles these loads quite well.
Wooden baseboard in the hallway is appropriate if:
-
Tile is laid in the main area, and walls are plastered or drywall (not tiled)
-
The hallway is large (from 6 m²), with good ventilation
-
Renovation is at 'comfort' level or higher, where aesthetics matter
-
The baseboard is coated with moisture-resistant oil or alkyd varnish
Wooden baseboard in the hallway is undesirable if:
-
The hallway is small (3-4 m²) with constant moisture accumulation at the threshold
-
Walls are tiled up to 60-80 cm height (then wooden baseboard is 'not needed' structurally - it fits between two tiled surfaces)
-
There's no proper ventilation - humidity is chronically high
Our factory also produces:


Kitchen: application zones and risk zones
In the kitchen, the situation is more complex because the kitchen is zoned:
| Kitchen zone | Humidity level | Recommendation for wood |
|---|---|---|
| Dining area, table | Normal | Wooden skirting board — good |
| Work area, kitchen unit | Periodically elevated | Wood with oil — acceptable |
| Sink area (by the sink) | High, splashes | Wood — undesirable. PVC, stainless steel |
| Stove area | Heat + steam | Wood — with reservations |
| Dining area in a studio | Normal | Wooden skirting board — good |
Rule: wooden skirting board in the kitchen — yes, but not near the sink area. By the sink — better tile to the floor or stainless steel profile.
Get Consultation
Where wooden skirting board next to tile works excellently
Most organic applicationof wooden corner skirting boardnext to tile — transition zone. Where tile ends and another covering begins (parquet, laminate, carpet), wooden corner or triangular skirting board acts as an architectural 'seam', connecting two seemingly incompatible materials. And it connects beautifully.
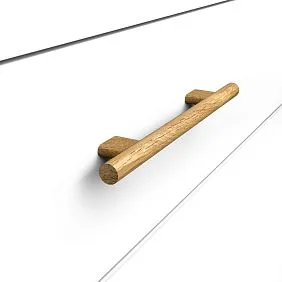
Corner profile 30×30 and 40×40 mm: skirting board as tile-wall transition
What is a corner skirting board and what it is created for
Wooden corner skirting board— profile with a right angle in cross-section: two identical shelves connected at 90°. In cross-section — an isosceles right triangle or a right angle with straight shelves.
Corner skirting board solves a problem that a regular overlay skirting board does not: it simultaneously covers the gap between the floor and the wall and conceals the joint of tile covering with a vertical surface.
Applied:
-
As a transition between floor tile and plastered wall
-
In the corner between tiled floor and tiled wall (when tile does not reach the floor — corner skirting board covers the bottom row of joints)
-
As a protective corner in high-traffic areas
Wooden skirting board 30×30: minimalist corner profile
Wooden skirting board 30×30 mm— standard corner size for low-traffic areas and small gaps. Two shelves of 30 mm each: one lies on the floor (tile), the other presses against the wall.
Technical specifications:
-
Cross-section: 30×30 mm
-
Standard strip length: 2.2 m
-
Wood species: beech, oak, pine
-
Weight per linear meter: approx. 0.15–0.2 kg
-
Application: hallway (dry area), kitchen (dining area), corridor with tiles
Installation feature for 30×30: with a thin profile (shelves 6–8 mm) — adhesive-only mounting. A dowel or nail into a 6 mm shelf will cause splitting. Mounting adhesive or silicone is the only correct option.
Wooden skirting board 40×40 mm: a more substantial corner profile
Wooden skirting board 40×40 mm— reinforced corner profile. Shelves of 40 mm — already sufficient width for thin fasteners to fit into the shelf. Wider coverage of the wall gap.
Where 40×40 is preferable to 30×30:
-
Hallway with high traffic — more robust profile, better withstands impacts
-
Walls deviating from vertical — wide shelf covers the gap
-
Tile-to-laminate transition with a large expansion gap (12–15 mm) — 40×40 covers more reliably
Mounting 40×40: adhesive over the entire back surface of both shelves + if necessary, a thin finishing nail (1.6 mm) through the shelf into the wall at a 45° angle (not straight to avoid splitting).
Comparison of corner profiles: 30×30 vs 40×40
| Parameter | 30×30 mm | 40×40 mm |
|---|---|---|
| Gap coverage | Up to 25 mm | Up to 35 mm |
| Shelf thickness | 6–8 mm | 9–12 mm |
| Allows nail | No (adhesive only) | Yes (thin finishing nail) |
| Visual weight | Light, elegant | Noticeable, confident |
| For traffic | Low | Medium and high |
| Price | Below | Higher |
Triangular skirting board in bathroom and hallway: hygiene and aesthetics
What is a triangular skirting board and where did it come from
Wooden triangular skirting board— in cross-section a right triangle, where the hypotenuse is the front face. Essentially, it's a corner skirting board with a diagonal front surface instead of a right angle.
A triangular skirting board fills the internal corner between the floor and the wall not with a 'right-angled corner,' but with a smooth diagonal. This is not just about aesthetics—it's a hygienic solution.
A straight internal corner between the floor and the wall is a trap for dirt, dust, and moisture. It's practically impossible to clean such a corner completely. The triangular skirting board rounds this corner—cleaning becomes easier, and the accumulation of contaminants is reduced.
That's precisely why the triangular skirting board is also called 'sanitary'—a direct reference to its use in rooms with heightened hygiene requirements.
Application of triangular skirting board by room
Hallway. The entrance area—daily dirt from the street, wet shoes. A triangular skirting board in the hallway eliminates 'dirt pockets' at the base of the wall. Mopping the floor—cleaner, faster.
Kitchen. By the cabinets, by the stove, in the work area. Grease, crumbs, droplets—everything accumulates at the base of the wall. A triangular skirting board here is a functional solution. Under cabinets, sometimes a ceramic triangular skirting board is laid instead of a wooden one—but wooden is suitable in areas without direct contact with water.
Bathhouse or sauna. A special case: a wooden triangular skirting board in a bathhouse is a traditional solution. Here, heat-treated wood (thermowood, thermo-spruce) or larch is used—species with high natural moisture resistance. A triangular profile at the floor of a wooden bathhouse is a classic that's been around for centuries.
Children's room with tiled floor. In children's rooms, hygiene is a priority. A triangular skirting board at the base of the wall simplifies cleaning and doesn't create 'hidden corners' for dust and allergens.
Dimensions of wooden triangular skirting board
| Size (legs) | Application | Features |
|---|---|---|
| 20×20 mm | Minimum, decorative | Adhesive only, fragile |
| 25×25 mm | Bathroom, children's room | Adhesive, lightweight |
| 30×30 mm | Hallway, kitchen | Main working size |
| 40×40 mm | Kitchen (work area), bathhouse | More durable |
| 50×50 mm | Bathhouse, technical rooms | Monumental, high strength |
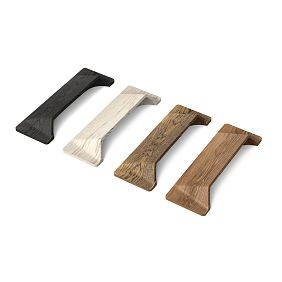
Wooden triangular skirting board: profile and appearance
The front face of the triangular skirting board (hypotenuse) comes in three variants:
Flat (straight diagonal). The simplest option—a geometrically honest diagonal plane. Suitable for minimalism, Scandinavian style, modern classic.
Slightly convex (radiused). A front face with a small radius—looks softer than a sharp diagonal. A universal option for most interiors.
With a chamfer or a bead. A more complex profile with a decorative element on the front side—for classic interiors.
Moisture-protective impregnations for wooden skirting board near tiles
Why regular varnish isn't enough
Wooden baseboards next to tiles face fundamentally different operating conditions compared to baseboards in a living room. The main threats are:
-
Water splashes (kitchen near the sink, hallway during wet cleaning)
-
Steam (kitchen during cooking, bathroom)
-
Mechanical contact with water (wet cloth cleaning along the baseboard)
-
Humidity fluctuations (kitchen humidity changes 10–15% within a day)
Regular glossy varnish (NC, PF) under such conditions gradually "peels" from the ends and base – where water accumulates. Micro-cracks form, water penetrates under the varnish, wood swells, and the varnish blisters.
Optimal coatings for wooden baseboards next to tiles
1. Oil with hydrophobic additives (Osmo Holzschutz Öl, Saicos, Arboritec).
Oil impregnates wood to a depth of 2–3 mm, without creating a surface film. When water hits it – water rolls off the surface (lotus effect with quality oils). If mechanically damaged – there's no "film" to peel: only a slight color change. Repair: reapply oil to the damaged area.
Disadvantage of oil: needs renewal every 1–3 years (depends on usage intensity).
2. Water-based parquet varnish (Tikkurila Kesto, Bona Traffic).
Modern water-based varnishes are elastic, don't yellow, and withstand wet cleaning well. When applied in 3 coats with interlayer sanding – reliable protection for 5–7 years.
Disadvantage: if the film is mechanically damaged – water penetrates under the varnish. Repair is more complex than with oil.
3. Two-component polyurethane varnish (Berger, Loba, Bona).
The most durable and moisture-resistant coating for wooden baseboards. Withstands intensive wet cleaning, resistant to household cleaning agents. For tiled hallways and kitchens – the optimal choice if maximum protection is needed.
Disadvantage: more difficult to apply, odor during application (good ventilation required), more expensive than water-based varnish.
4. Wax (Osmo Polyx-Oil, Rubio Monocoat).
Oil-wax – a compromise between oil and varnish. Wax creates an additional water-repellent barrier over the oil impregnation. Works well in hallways and kitchens in less intensive areas.
End treatment: a critically important point
The ends of wooden baseboards are the most vulnerable spot. End grain wood (cross-cut) is 5–8 times more hygroscopic than the face surface. Water is absorbed into the end instantly.
Rule: the ends of wooden baseboards placed next to tiles are treated first – even before installation. Apply several coats of oil or varnish with good impregnation. Particularly important are the ends near thresholds, where the baseboard ends next to a wet area.
Practical technique: immerse the ends of cut planks in a container of oil for 30 minutes – "preserving" the end from within. Then – apply coating to the face side.
Comparison table of coatings for baseboards next to tiles
| Finish | Moisture resistance | Durability | Repairability | Application difficulty |
|---|---|---|---|---|
| Regular varnish (NC, PF) | Low | 3–5 years | Low | Simple |
| Water-based parquet varnish | Medium | 5–7 years | Medium | Medium |
| Two-component polyurethane varnish | High | 8–12 years | Low | Complex |
| Oil with hydrophobic additives | Medium | 1–3 years before renewal | High | Simple |
| Wax-oil | Medium–high | 2–4 years before renewal | High | Simple |
Attaching wooden skirting board to tiled surface
Main limitation: you cannot attach to tiles with anchors
This is a fundamental point that changes the entire installation logic. Drilling tiles with a hammer-in anchor for skirting board attachment is technically possible, but in 90% of cases ends with tile cracking. Tiles cannot withstand lateral impact loads, and a hammer drill produces exactly those.
The only safe method of attachment through tiles is with a diamond drill bit at low RPM without hammering. But this requires special tools and takes a lot of time. For skirting board installation, this is impractical.
Conclusion: wooden skirting board adjacent to tiles is attached to the wall (above the tiles) or exclusively with adhesive.
Liquid nails: technology and adhesive selection
Construction adhesive ('liquid nails') is the primary method for attaching corner and triangular skirting boards to tiles. With proper adhesive selection — reliable, durable connection.
Which adhesive to choose:
Polyurethane construction adhesive (Soudal Fix All, Loctite PL 400, Moment Montazh).
-
Adhesion to tiles, wood, drywall, metal — excellent
-
Water resistance: high (cures in damp environment)
-
Elasticity after curing: moderate
-
Initial setting time: 10–15 minutes
-
Full cure: 24–48 hours
-
Recommended for hallway and kitchen
MS-polymer adhesive (Penosil MS-40, Tytan MS Polymer, Soudal T-Rex).
-
Adhesion to tiles and wood: very high
-
Water resistance: high
-
Elasticity: high — compensates for minor skirting board movement
-
Contains no solvents — safe for enclosed spaces
-
Best choice for tile + wood
Acrylic adhesive (standard liquid nails like Moment Montazh Classic).
-
Adhesion to tiles: good on clean surface
-
Water resistance: medium — gradually softens with constant water contact
-
For hallways without constant humidity — acceptable
Installation technology using liquid nails: step-by-step
Step 1: Surface preparation.
The tile and wall must be clean, dry, and degreased. Any grease, dust, or cement mortar residue drastically reduces the adhesive's adhesion. Wipe with a cloth soaked in acetone or a special degreaser (Isopropanol 99%).
Step 2: Cutting the skirting board.
Cut the strips with precise corner joints. For corner and triangular skirting boards, internal corners — cut at 45°, external corners — cut at 45° facing each other. Sand the ends with fine sandpaper (P150).
Step 3: Applying the adhesive.
Apply adhesive in a zigzag pattern or dots on the back of the skirting board (distance between dots: 8–10 cm). For triangular skirting boards: apply adhesive to both shelves (horizontal and vertical). First zigzag — along the horizontal shelf, second — along the vertical.
Step 4: Pressing and securing.
Place the skirting board against the wall/tile. Press firmly along the entire length for 15–20 seconds. For better fixation — create temporary "holders" from painter's tape: apply strips of tape every 30–40 cm, pressing the skirting board against the surface until the adhesive sets.
Step 5: Curing time.
Do not touch for 24 hours (until initial setting). Do not attempt to "adjust" the position after an hour — the adhesive has already started working, re-gluing will reduce adhesion.
Step 6: Sealing the joints.
After the adhesive has fully cured — apply silicone sealant to the joints (skirting board-tile, skirting board-wall). For hallways and kitchens — sanitary silicone with antifungal additives (Dow Corning 786, Soudal Silicon Sanitair). Smooth with a wet finger. Allow to set for 12 hours.
Silicone instead of adhesive: when it's better
Sanitary silicone as the primary adhesive — an option for areas with high humidity (bathroom, sink area). Silicone is elastic, completely waterproof. Disadvantage: lower load-bearing capacity compared to polyurethane adhesive. For lightweight triangular skirting boards 20×20–30×30 mm — quite sufficient. For heavy corner skirting boards 40×40 mm made of oak — only in combination with mechanical fasteners (if possible) or polyurethane adhesive.
Tip: in areas near water — apply polyurethane adhesive to the main surface, silicone — along the perimeter of the joint (along the top and bottom edges of the skirting board). The adhesive holds, the silicone seals.
Alternatives: PVC or stainless steel vs wooden skirting board
Honest comparison of three materials for tiled areas
Honesty is the main condition for a useful article. Wooden skirting board is not the best option in every situation near tiles. Let's examine the competitors.
PVC corner skirting board near tiles
Advantages of PVC in tiled areas:
-
Absolute water resistance — no treatment, no impregnations required
-
Flexibility — conforms to uneven tiles without gaps
-
Affordability — the most budget-friendly option
-
Simple installation with adhesive or double-sided tape
Disadvantages of PVC:
-
Yellows after 5–8 years
-
Chips or cracks upon impact, cannot be repaired
-
Environmentally worse than wood
-
Does not pair well with wooden doors, parquet — looks like a cheap element
Conclusion: PVC corner skirting next to tile — justified in technical rooms (storage, economy-class bathroom), in budget-renovation bathrooms, in rental housing.
Stainless steel skirting
Pros of stainless steel:
-
Absolute moisture and corrosion resistance
-
Durability: 30–50 years without maintenance
-
Modern look — pairs well with tile in hi-tech, loft, minimalism styles
-
Easy installation: adhesive or special clips
Disadvantages:
-
Cold — literally and visually
-
Does not pair with wooden interior elements
-
More expensive than PVC (though cheaper than oak wood)
-
Standard profiles — 10–15 mm: does not cover large gaps
Conclusion: stainless skirting — for stylish modern interiors (studio kitchens with hi-tech design, bathrooms with large tiles), where there are no wooden elements.
Final material selection matrix
| Room | Zone | Recommended skirting board | Justification |
|---|---|---|---|
| Hallway | Main zone | Wooden corner 30×30 or 40×40 | Aesthetics, durability with oil |
| Hallway | At the threshold (wet zone) | PVC or stainless steel | Constant humidity |
| Kitchen | Dining area | Wooden floor 50–70 mm | Normal humidity, aesthetics |
| Kitchen | By the sink | Stainless steel or PVC | Constant water splashes |
| Kitchen | By the cabinet | Wooden triangular 30×30 | Hygiene + aesthetics |
| Bathroom | Any zone | PVC or ceramic skirting | Constant humidity |
| Bath/sauna | Any zone | Wooden triangular made of larch/thermowood | Tradition + function |
| Corridor | Main zone | Wooden corner 40×40 | Durability under traffic |
Special situations: different tile heights, joints, complex corners
Tile with bevel and wooden skirting: gap at the base
Modern tiles often have a bevel on the front side: a 45° cut along the edge. When laying beveled tiles against a wall, the bottom row does not fit tightly to the wall — a noticeable gap forms at the base. A wooden corner skirting 40×40 mm is the perfect solution here: it covers both this gap and the gap between the tile and the wall.
Different height coverings: tile higher than adjacent covering
If in the hallway the tile is laid on a screed, and in the corridor laminate is on the same screed with underlay, then the covering heights are different: tile 8–10 mm, laminate + underlay = 12–14 mm. Total: laminate is 2–4 mm higher than the tile.
In this transition area, a woodencorner skirtingon the tile side is mounted slightly lower than on the laminate side. The level difference is hidden by a transition strip or compensated with sealant in the joint.
Non-standard corners: when the wall is not 90 degrees
In old housing stock (Stalin-era, Khrushchev-era buildings) corners can be 87–93° instead of ideal 90°. A corner skirting with a 45° miter cut in such a corner does not meet — either a gap or an overlap forms.
Solutions:
-
Trim the corner ends according to the actual angle (measure the angle with a protractor and set the miter saw to half of this angle)
-
Use a decorative corner block (a small wooden element that covers the corner and hides the joint)
-
For a triangular skirting in a non-ideal corner: file the adjacent end with a file "in place"
FAQ: answers to popular questions about wooden skirting next to tile
Can wooden skirting be installed in a bathroom?
Not recommended. The bathroom is a room with constantly high humidity (60–80% and above) and regular splashes. Even well-protected wood in a bathroom requires annual maintenance. Alternatives: ceramic skirting (part of the cladding), PVC skirting, stainless steel profile.
Exception: a bathroom in a wooden country house or sauna — where a wooden triangular skirting made of larch or thermowood is part of the overall wooden interior concept.
Wooden skirting 30×30 or 40×40 for a hallway — which to choose?
For a hallway with laminate or parquet — 40×40 is more reliable: wider shelf, better covers gaps, more resistant to shoe impacts. For a hallway with tile without heavy traffic — 30×30 is sufficient and looks more elegant.
Does wooden corner skirting need to be treated if there is tile in the hallway?
Absolutely, and especially the ends. Oil with hydrophobic additives or two-component polyurethane varnish — at least 2–3 coats on all surfaces, including the back side and ends. Untreated skirting next to tile in a hallway — will start to swell and darken already after the first winter.
How to remove a wooden baseboard glued with polyurethane adhesive to tile without damaging the tile?
First, cut the silicone seam with a sharp knife. Then — slowly "peel" the baseboard away from the tile by inserting a spatula into the gap. The adhesive stretches and tears at its weakest point — usually at the adhesive (not the tile). Remove any adhesive residue from the tile with a special polyurethane solvent (Soudal Solvent Cleaner).
Triangular baseboard — should it be painted or left with oil?
In the hallway and kitchen — oil is preferable to paint: an oil finish does not crack under exposure to moisture and temperature fluctuations. Paint in these areas begins to chip at the edges after 2–3 years. If color is important — pigmented oil is selected to match the tile or adjacent flooring.
About the company STAVROS
STAVROS wooden corner and triangular baseboard— is made of solid oak and beech with chamber drying to 8–10%, P180 sanding, and milling precision of ±0.2 mm. Each plank is ready for oil or varnish application without additional surface preparation.
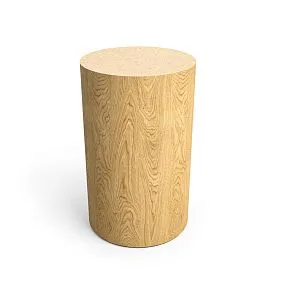
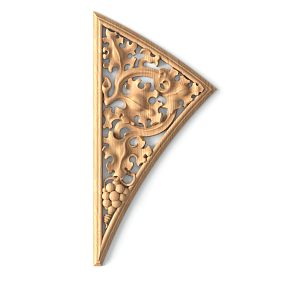
STAVROS corner and triangular profiles are available in sizes from 20×20 to 50×50 mm as part of a unified system withK-series floor baseboards, Carved casingsandwooden cornices— one manufacturer, one wood species, one color tone. For hallways, kitchens, country homes with wooden floors and tiled areas — a complete set of wooden trim from a single source.
Samples: 180 rub./set. Consultation on profile and finish selection for tiled areas: 8 (800) 555-46-75.
STAVROS — a wooden baseboard that knows the difference between a hallway and a living room — and responds to that difference with the right material.


