Article Contents:
- Why a Wooden Skirting Board for Laminate is Better Than Plastic
- An Honest Answer to the Question Everyone Asks
- Specific Advantages of Wood Over PVC When Working with Laminate
- When to Choose Plastic Anyway
- Laminate Expansion Gap: Why It's Important and How Much to Leave
- The Physics of a Floating Floor: Short and Clear
- Gap Requirements: Specific Numbers
- Skirting Board and Gap: How They Are Related
- Checking the Gap Before Installing the Skirting Board
- Wooden Skirting Board Dimensions: 50–70 mm Height as the Optimum for Laminate
- Why 50–70 mm Height is the Correct Range
- Wooden Skirting Board 50 mm: A Specific Standard Size
- Table for Choosing Skirting Board Height for Laminate
- Wooden Skirting Board Thickness: What to Choose
- Installing a Wooden Skirting Board on Laminate: Step-by-Step Guide
- The Main Installation Rule: Only to the Wall
- Tools and Materials for Installation
- Step 1: Acclimatizing the Skirting Board
- Step 2: Cutting the Skirting Board
- Step 3: Marking and Drilling
- Step 4: Applying Adhesive (Optional)
- Step 5: Installation
- Step 6: Finishing
- Joining Wooden Skirting Board in a Doorway
- Three Situations, Three Solutions
- Transition Strip: Installation Nuances
- Cutting the Skirting Board at the Threshold: How to Do It Neatly
- Painting a Wooden Skirting Board to Match the Laminate: Selecting a Stain
- Why Paint the Skirting Board to Match the Laminate, Not Just White
- Three methods for tinting wooden skirting boards to match laminate
- Tone matching practice: step by step
- Popular combinations: laminate + skirting board tone
- Special situations when installing wooden skirting boards on laminate
- Uneven wall: how to achieve a tight fit
- Underfloor heating under laminate: nuances
- Threshold at the entrance door: how to finish the skirting board
- FAQ: answers to popular questions about wooden skirting boards for laminate
- About the Company STAVROS
Laminate ranks first in popularity among floor coverings in Russian apartments — and for good reason. Affordable price, ease of installation, wide choice of decors. But laminate has one fundamental technical point that directly affects the choice of skirting board: it "floats." Laminate is laid without rigid fixation to the base — and expands with changes in temperature and humidity. This changes everything in the approach to installing floor skirting boards.
Wooden floor skirting board for laminate— is not just about "closing the gap at the wall." It is an element that must correctly work with the physics of the floating covering, match the tone to the laminate decor, and be installed to last as long as the floor itself — that is, 15–25 years without redoing.
This article is a complete practical breakdown: from choosing sizes to joining in a doorway and selecting stain to match the laminate. No generalities — only specifics, numbers, and proven techniques.


Why wooden skirting board for laminate is better than plastic


An honest answer to the question everyone asks
When a person buys laminate, the salesperson at a construction hypermarket almost always offers a plastic skirting board to go with it — "as a set." It's convenient, it's quick, it's cheap. But is it right?
Let's be honest.
Plastic skirting board for laminate — an economy-class solution with clear logic: "laminate is inexpensive, the skirting board shouldn't be expensive either." Works in the short term. But after 7–10 years, the plastic yellows (especially near windows), becomes brittle, corners crack. The laminate still looks fine at this time — but the skirting board already needs replacing.
Wooden skirting board for laminate— is a material whose service life matches or exceeds the covering itself. With proper coating (alkyd enamel, oil, acrylic) — 20–30 years unchanged. Moreover, a wooden skirting board can be repainted when the interior changes: switched to a different laminate, different wall tone — repainted the skirting board, and it's back "on theme."
Our factory also produces:


Specific advantages of wood over PVC when working with laminate
1. Repairability. A chip or scratch on a wooden skirting board — filler, sanding, touch-up. On PVC — only replacement of the strip.
2. Compatibility with tinting. Laminate today — huge choice of decors: natural oak, smoked oak, walnut, ash, concrete, stone. Wooden skirting board can be tinted with stain or oil to any tone. PVC skirting board — only in standard factory colors (white, wenge, oak, beech — and that's it).
3. Eco-friendliness. This is important for bedrooms and children's rooms. Solid wood skirting board with water-based paint or natural oil — no volatile compounds. PVC contains plasticizers that, when heated (radiator near the skirting board), can give off slight emissions.
4. Aesthetics. With laminate priced from 800 rub./m² (and above), PVC skirting board next to it looks dissonant. Wooden skirting board elevates the perception of the floor to the next level.
5. Impact resistance. A chair or cabinet leg hitting a wooden skirting board — a small mark. The same on a PVC skirting board — a chip and crack.
Get Consultation
When to still choose plastic
Honesty requires acknowledging: there are situations where PVC skirting board for laminate is a rational choice.
-
Bathroom with laminate (water-resistant laminate): PVC is absolutely not afraid of water
-
Rental housing: with high tenant turnover, installation speed is more important than durability
-
Tight budget: laminate 300 rub./m² + PVC skirting board — a logical pair
In all other cases —with a classic profile creates a sense of solidity, reliability.made from pine, oak, or beech array unequivocally surpasses PVC in the totality of characteristics.
Laminate expansion gap: why it's important and how much to leave
Physics of floating flooring: short and clear
Laminate is a floating floor covering. The planks connect to each other via a locking system but are not attached to the subfloor. The entire laminate 'carpet' lies freely on the underlayment and moves as a single unit when temperature and air humidity change.
When heated (in summer, when underfloor heating is on), laminate expands. When cooled (in autumn, when heating is not yet on) — it contracts. The difference in linear dimensions of the flooring in a 5×5 m room between summer and winter conditions can be 5–8 mm.
If the baseboard presses the laminate against the wall or against the baseboard on the other side — the flooring cannot move. It bulges in the middle or the locking joints crack.
Gap requirements: specific numbers
Minimum gap between the edge of the laminate and the wall (or another rigid obstacle):
| Room length | Minimum gap | Recommended gap |
|---|---|---|
| Up to 4 m | 8 мм | 10–12 mm |
| 4–8 m | 10 мм | 12–15 mm |
| 8–12 m | 12 мм | 15–18 mm |
| More than 12 m | 15 мм | 18–20 mm |
Most laminate manufacturers specify a gap of 8–12 mm in the instructions. This is the minimum. If the regional climate has large humidity fluctuations between seasons — take the upper limit.
Baseboard and gap: how they are related
The baseboard does NOT press the laminate against the wall. The baseboard only COVERS the gap visually — from above. The laminate under the baseboard moves freely.
This means: the lower edge of the baseboard should only slightly overlap the edge of the laminate (5–8 mm overlap) — but not press against it or rest on it.
Critical error: baseboard resting on the laminate (the bottom edge of the baseboard presses on the laminate plank). When expanding, the laminate lifts the baseboard — and the baseboard detaches from the wall or deforms.
Correct: baseboard is attached only to the wall, the lower edge — is 1–2 mm above the laminate surface or touches it without pressure.
Checking the gap before installing the baseboard
Before attachingwooden baseboard to the floor, check the gap around the entire perimeter. A simple method: take a piece of underlayment or a strip of laminate 8–10 mm thick and run it along the wall — the gap should be at least this value everywhere.
If the gap is less than 8 mm anywhere, it's a reason to trim the edge of the laminate (with a circular saw) before installing the baseboard, otherwise this area will swell in summer.
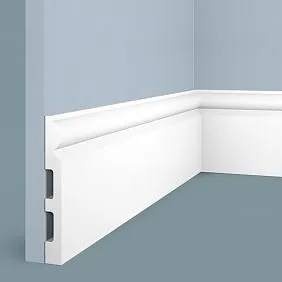
Wooden baseboard dimensions: height 50–70 mm as optimal for laminate
Why 50–70 mm height is the correct range
Wooden baseboard dimensionsare selected based on two practical requirements:
Requirement 1: the baseboard must reliably cover the expansion gap. With a 12–15 mm gap and standard laminate thickness of 8–12 mm — the lower edge of the baseboard should overlap the laminate edge by at least 5–8 mm. Total: the baseboard should 'cover' at least 20–25 mm from the floor level at the wall.
Requirement 2: the baseboard should be proportional to ceiling height. Standard apartment with 2.6–2.7 m ceilings — 50–70 mm baseboard. New building with 2.9 m ceilings — 60–80 mm. For apartments with ceilings below 2.6 m (Khrushchyovka) — 40–55 mm.
50 mm wooden baseboard: specific standard size
50 mm wooden baseboard— one of the most popular sizes for apartments with laminate. Why exactly 50:
-
Tall enough to reliably cover the 12–15 mm expansion gap plus 8–12 mm laminate thickness
-
Modest enough not to 'overload' the space of a standard apartment
-
When painted white — almost invisible on a white wall
-
When stained to match the laminate — creates a soft transition from floor to wall
Baseboard height selection table for laminate
| Ceiling height | Laminate thickness | Expansion gap | Recommended skirting board height |
|---|---|---|---|
| up to 2.6 m | 7–8 mm | 10–12 mm | 40–55 mm |
| 2.6–2.7 m | 8–10 mm | 10–12 mm | 50–60 mm |
| 2.7–2.9 m | 8–12 mm | 12–15 mm | 60–70 mm |
| 2.9–3.2 m | 8–12 mm | 12–15 mm | 70–90 mm |
| Above 3.2 m | Any | 12–18 mm | 90–120 mm |
Wooden baseboard thickness: what to choose
Thickness — the second key dimension. For laminate baseboards, standard thickness:
-
12–15 mm — thin, lightweight. For modern styles (minimalism, Scandinavian, loft). Mounted only with adhesive + finishing nails.
-
18–20 mm — classic. For most apartments. Mounted with dowels or adhesive + dowels.
-
22–25 mm — massive. For wide classic profiles. Only dowels or heavy-duty construction adhesive.
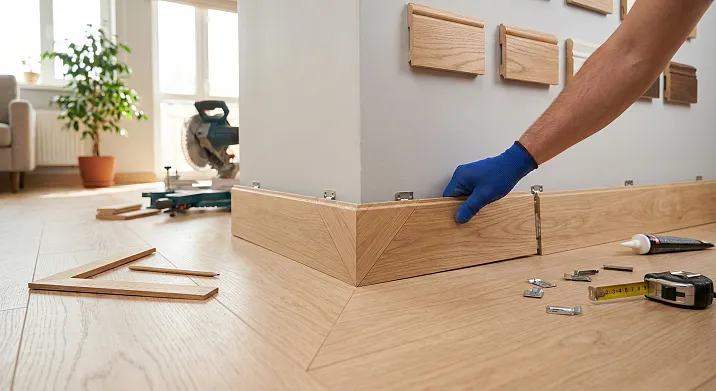
Installing Wooden Baseboard on Laminate: Step-by-Step Instructions
The main installation rule: only to the wall
This rule is so important that it's worth highlighting separately and in bold: wooden baseboard on laminate is attached exclusively to the wall. Never — to the laminate, to the underlayment, to the screed through the laminate.
The reason is explained above: laminate moves. Baseboard nailed to the floor "holds" the laminate — and the flooring swells.
Tools and materials for installation
Tools:
-
Miter saw with 45° stop (or miter box + fine-toothed handsaw)
-
Hammer drill with 6 mm drill bit (for concrete and brick walls)
-
Screwdriver + PZ2 bits
-
Tape measure, pencil, square
-
Nail set (if using finishing nails)
-
Caulking gun
-
Level or laser level
Consumables:
-
6×60 mm concrete nail anchors (for concrete walls) or 4×50 mm screws (for wooden frame walls)
-
Construction adhesive ("liquid nails" or polyurethane "Moment Montage")
-
White acrylic sealant or matching wall color
-
Wax pencils or wooden plugs matching baseboard color
Step 1: Baseboard acclimatization
Wooden baseboard is brought into the apartment and left in a horizontal position for 3–5 days. During this time, the baseboard's moisture content equalizes with the room's air humidity. This is critically important: if you install "fresh" baseboard with 12–14% moisture content in a dry apartment (winter, central heating, humidity 35–40%), the wood will shrink and gaps will appear at the joints.
Don't skip this step. Three days — a small pause for perfect results for years.
Step 2: Baseboard cutting
Cutting is the most crucial stage. An error in the angle — and the joint looks sloppy.
Internal corners (90°): planks join at 45°. Each plank is cut at 45° to the end. With proper measurement and cutting — a tight joint without gaps.
External corners (protruding, 90°): both ends are cut at 45° facing each other.
Straight joints on long walls: if the wall is longer than the plank (2.2 m), two ends are joined with a straight 90° joint. For a less noticeable joint — cut both ends at 45° in the same direction ("dovetail").
Life hack: always cut with a 2–3 mm margin and adjust with a handsaw or sanding. You can't lengthen cut wood.
Step 3: Marking and drilling
Place the baseboard against the wall. Mark fastener points with a pencil:
-
Anchor spacing: 40–50 cm
-
Distance from ends: 5–7 cm
Drill through the marked points with a hammer drill (with 6 mm bit) — through the baseboard into the wall. Depth in concrete — 45–50 mm. Insert anchors into the wall.
Step 4: Applying adhesive (optional)
On the back of the skirting board — a zigzag of construction adhesive. The adhesive ensures tight adhesion along the entire length (especially important on uneven walls) and reduces the load on the dowels. Without adhesive — the dowels hold, but gaps may remain on uneven walls.
Step 5: Installation
Place the skirting board against the wall, aligning it with the dowels. Hammer in the dowel-nails. The heads should be flush or slightly below the surface.
Check: The bottom edge of the skirting board should overlap the laminate by 5–8 mm, but not press on it. Lift the edge of the skirting board by hand — it should slightly pull away from the laminate (1–2 mm gap).
Step 6: Finishing
-
Holes above the dowel heads: wax pencil or wooden plug matching the skirting board color
-
Top seam of skirting board with wall: acrylic sealant, smooth with a wet finger
-
Corner joints: if necessary — a thin strip of acrylic in the joint, smooth
Joining wooden skirting board in a doorway
Three situations, three solutions
The doorway is the most challenging place for skirting boards. Here, planks from two different rooms (or a plank with a threshold) meet, and the floor needs to be finished both beautifully and functionally.
Situation 1: Same laminate in both rooms, same skirting board.
The simplest. The planks on each side of the doorway are cut flush with the door jamb line. The ends are cut at 90°, flush with the door jamb reveal. Visually — a continuous skirting board line on both sides of the door.
Situation 2: Different laminate in two rooms, floor transition.
In the doorway — a transition strip (joining threshold). The wooden skirting board on each side reaches the jamb line and is cut. The transition strip covers the joint of the two floor coverings. The skirting board at the threshold — without joining the adjacent plank: the threshold strip replaces it in this area.
Situation 3: One room leads to another without a door (arch, passage).
Here, the skirting board needs to be extended around the corner of the opening. Two options: a 45° miter cut (planks from two rooms join in the corner of the opening at 45°) or a decorative end element (wooden rosette overlay in the corner).
Transition strip: installation nuances
The transition threshold in a doorway under laminate is selected based on two criteria:
-
Tone: matching the laminate or matching the skirting board — depending on which dominates
-
Type: T-shaped (both coverings at the same height), ramp-type (coverings at different heights), corner (for transition from floor to stairs)
Threshold fastening: to the screed through the base (not to the laminate!) — with screws or dowels through a perforated strip.
Mitering skirting board at the threshold: how to do it neatly
If both rooms have the same laminate and skirting board — the wooden skirting board from one room 'meets' the skirting board from the other in the corner of the doorway.
Correct mitering:
Planks from both rooms extend into the corner of the opening. Each is cut at 45° toward the opposite side of the opening. The joint is at the vertex of the jamb corner. If done precisely — an invisible, neat joint.
Common mistake: the planks are not brought to the vertex of the jamb corner but cut too short — resulting in an unsightly gap at the jamb.
Painting wooden skirting board to match the laminate: selecting stain
Why paint the skirting board to match the laminate, not just white
White baseboard is a universal and neutral choice that works with most laminates. But for interiors where the laminate is not just a 'background' but a key element (oak parquet imitator, walnut, wenge), white baseboard creates a sharp break between the floor and the wall.
A baseboard stained to match the laminate creates a 'continued floor' effect — the eye glides from the baseboard to the laminate without a sharp transition. The space is perceived as more cohesive.
Three methods for staining a wooden baseboard to match laminate
Method 1: Water-based stain.
Water-based stain is the most controllable tinting tool. Applied with a brush, rag, or sprayer. Saturation can be adjusted: one layer — lighter, two-three layers — darker. After drying — varnish or oil on top for protection.
Tone range: from light oak (straw, natural) to dark (wenge, walnut, mocha). Water-based stain doesn't raise the grain as much as oil-based — final sanding between layers is needed, but minimal (P220 easily).
Method 2: Oil with pigment.
Oil with pigment (Osmo Polyx-Oil Tints, Rubio Monocoat, Saicos) — an impregnation that simultaneously stains and protects. One application replaces both stain and finish. Result — a matte 'live' surface without a film.
Ideal for interiors with laminate 'under oil' (parquet imitation with an oil finish). Baseboard under oil + laminate 'under oil' — an organic pair.
Method 3: Alkyd or acrylic enamel in a custom color.
If the laminate is neutral (gray concrete, white, light beige), the baseboard is painted with opaque enamel in a matched tone. Modern paints (Tikkurila, Dulux, Benjamin Moore) — 30,000+ colors in the catalog, you can match the exact tone to the laminate using a sample in any store.
Tone matching practice: step-by-step
Step 1: Take a laminate plank or its photo in daylight — not under artificial lighting.
Step 2: Determine the laminate's 'base tone'. Is the oak yellow-brown? Gray-brown (smoked)? Red-brown (walnut)? Determine the tone direction.
Step 3: Choose a stain or oil in this direction, but 1–2 tones darker than the laminate's background (the baseboard against the wall is always in shadow; if it's a lighter tone, it will visually 'fade').
Step 4: Do a test stain on a baseboard offcut. Let it dry completely (water-based stain — 2 hours, oil — 12 hours). Only a dry sample shows the final tone.
Step 5: Adjust if necessary. If too light — add a layer. Too dark — dilute the stain with water (only water-based stain can be diluted with water).
Popular combinations: laminate + baseboard tone
| Laminate decor | Recommended baseboard tone | Finish |
|---|---|---|
| Natural oak (light) | Honey oak, Golden Oak | Oil or varnish |
| Smoked oak (gray-brown) | Gray-brown, taupe | Oil with pigment |
| Whitewashed ash (white/light gray) | White or cream | Acrylic enamel |
| Walnut (red-brown) | Nut, medium brown | Oil, stain |
| Wenge (dark brown) | Wenge or dark espresso | Oil, enamel |
| Concrete gray | Anthracite or white | Acrylic enamel |
| Dark oak (chocolate) | Chocolate brown | Oil, stain |
Special situations when installing wooden skirting board on laminate
Uneven wall: how to achieve tight fit
Wall with a deviation of 3–5 mm over 2 m is a normal situation in most apartments. With such deviation, a wooden skirting board 20–25 mm wide "follows" the unevenness and fits with gaps.
Three solutions:
-
Mounting adhesive: apply along the entire length of the back side of the skirting board. The adhesive fills gaps up to 3–4 mm.
-
Acrylic sealant: along the top edge of the skirting board after installation. Masks gaps up to 3–4 mm.
-
Wide skirting board: skirting board 70–80 mm, secured with dowels spaced 30–35 cm apart, covers most unevennesses.
Underfloor heating under laminate: nuances
If there is electric or water underfloor heating under the laminate, the laminate heats up and expands more than without heating. Expansion gap — increase to 15–20 mm regardless of room length.
Wooden skirting board with underfloor heating— additional requirement for skirting board coating. With regular heating from a radiator or underfloor heating — oil-based coating is preferable (no film, does not crack). Varnish with large temperature fluctuations may develop surface cracks.
Threshold at entrance door: how to finish skirting board
At the entrance door, the laminate ends, and tile in the hallway (or other covering) begins. Wooden skirting board at the entrance door — end aligned with the door jamb line, at 90°. The end — sanded, painted to match the skirting board color. Joint with threshold — use acrylic sealant if necessary.
In hallway with tile, skirting board does not continue: tile has its own border or ceramic skirting board. Wooden skirting board — only where there is laminate.
FAQ: answers to popular questions about wooden skirting board for laminate
Can wooden skirting board be nailed to laminate with nails through it into the screed?
Absolutely not. A nail or screw through the skirting board into the laminate fixes the covering to the base — and the laminate cannot move with temperature changes. Result — swelling of the covering. Skirting board is attached only to the wall.
How to choose wooden skirting board for laminate with stone or concrete imitation?
For laminate "concrete-look" or "stone-look" — skirting board in a contrasting natural wood tone (light oak) creates a pleasant warm-cold contrast. Or — skirting board matching the wall color (white/light gray), which visually separates the "cold" floor from the wall.
Should wooden skirting board be painted before or after installation?
Professionals paint in two stages: primer + first coat of paint before installation (including ends — end grain wood is very hygroscopic). After installation — final coat of paint. This gives the best result: ends are protected, top coat covers minor installation defects.
Wooden skirting board 50 mm or 60 mm for a standard apartment with laminate?
For ceilings 2.6–2.7 m — 50–55 mm is sufficient. For ceilings 2.7–2.9 m — 60–70 mm. There's no need to choose 'with a margin': a baseboard proportionally larger than needed for the ceiling height 'weighs down' the space.
How to remove squeaking under laminate after installing the baseboard?
Laminate squeaking is not related to the baseboard. Causes: underlayment bunched up during installation, uneven screed, debris under the underlayment. Removing the baseboard and lifting the laminate 'sheet' to eliminate the cause is the only correct solution.
How much baseboard to take with a margin for an apartment?
Perimeter of rooms (excluding doorways) + 15% waste margin for miter cuts. For an apartment with non-standard angles (not 90°) — a 20% margin.
About the company STAVROS
Correct selectionwooden floor baseboard for laminatestarts with the right manufacturer. STAVROS K-series is chamber-dried oak and beech solid wood with 8–10% moisture content: when installed in a standard apartment with central heating, the baseboard does not dry out, crack, or deform.
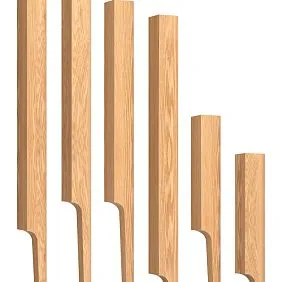
Over 30 profiles: from the slim K-034 (40 mm) for modern minimalist laminate flooring to the monumental K-066 (140 mm) for apartments with high ceilings. P180 sanding allows applying stain, oil, or enamel without additional surface preparation — straight from the package after acclimatization.
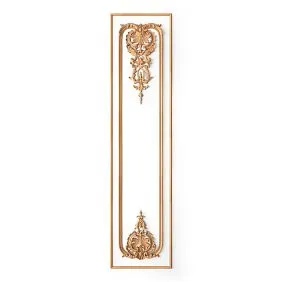
In a unified system of wooden decor for an apartment with laminate:Door Casings, KZ-series cornices, Wooden socketsandFurniture Handles— one wood species, one batch, one tone. Samples for matching the tone to your laminate: 180 rub./set. Consultation: 8 (800) 555-46-75.
STAVROS — a wooden baseboard that knows what a 'floating floor' is and works with it correctly.