Article Contents:
- When You Can't Drill the Wall — and Why Liquid Nails for Wooden Skirting is the Solution
- Scenario One: Rental Housing
- Scenario Two: Underfloor Heating
- Scenario Three: Decorative Wall Finishes
- Scenario Four: Monolithic Reinforced Concrete Walls
- Why This is Truly Reliable
- Choosing Mounting Adhesive: Moment, Titan, Soudal — Comparison
- Group One: Acrylate Mounting Adhesives
- Group Two: Polyurethane Mounting Adhesives
- Group Three: Hybrid MS-Polymer Adhesives
- Adhesive Comparison Table
- What NOT to use
- Surface Preparation: Degreasing, Primer, Wall Evenness
- Criterion One: Dryness
- Criterion Two: Cleanliness and Degreasing
- Criterion Three: Primer
- Criterion Four: Wall Evenness
- Preparing the Skirting Board Itself
- Applying Adhesive in a Zigzag — The Correct Technique
- Why Zigzag, Not a Straight Line
- Parameters of a Correct Zigzag
- Open Time — Why It's Needed
- The 'Apply Twice' Method for Difficult Surfaces
- Adhesive Consumption per 1 Linear Meter of Skirting
- Clamping and Fixing Until Dry — Time, Holding Methods
- Clamping Time: How Long to Hold by Hand
- Fixing Methods Without Continuous Holding
- Leveling: Horizontal Alignment Before Drying
- Temperature Regime for Installation
- Disadvantages of the Method and When a Dowel is Still Needed
- First drawback: irreversibility with polyurethane
- Second drawback: demanding wall evenness
- Third drawback: waiting time
- Fourth drawback: damp rooms
- When a dowel is mandatory
- Features of installing wooden skirting in corners
- Internal corner: 45° cut
- External corner: same logic
- Lengthwise joining in a straight section
- Wide wooden skirting: specifics of adhesive installation
- Two rows of adhesive: mandatory condition
- Press time increases
- Fixing the bottom edge
- Wooden skirting: material and cross-section selection before installation
- Oak skirting
- Beech skirting
- Pine skirting
- FAQ - answers to popular questions
- About the Company STAVROS

A hammer drill is not always an option. A rented apartment where load-bearing walls cannot be drilled. A new building with a thin monolithic slab where downstairs neighbors hear every hammer blow. Decorative Venetian plaster with a pattern that cannot be restored after drilling. Underfloor heating beneath the finish coating—and no desire to risk damaging the cable. Situations vary—but the conclusion is the same:wooden skirting on liquid nailsbecomes not a compromise, but a deliberate professional solution.
And here it's important to immediately dispel a myth. Installing skirting with adhesive is not a "temporary" method, not a "weak" option for those without a drill. With the right adhesive choice and proper application techniquewooden skirting on liquid nailsholds for decades—more reliably than dowels spaced 400 mm apart, which eventually start to wobble in crumbling plaster.
This article is a comprehensive professional guide to installing wooden skirting with construction adhesive. No drilling, no dust, no hammer drill—and with results worthy of even the most demanding client.


When you cannot drill the wall—and why liquid nails for wooden skirting are the solution
Before moving to technique—a few words about situations where adhesive installation is not a choice but a necessity. This is important to understand because the technology adapts differently to each situation.


First scenario: rental housing
A tenant pays for renovations but, under the contract terms, is not allowed to drill walls or make other "non-separable improvements" without the owner's approval.Liquid nails for wooden skirting—a way to install a full solid oak skirting without a single hole in the wall. If removal is needed—the skirting is carefully removed with a spatula, and adhesive is mechanically cleaned off.
Note: "Clean removal" is only possible with acrylic adhesives. Polyurethane adhesives create such a strong bond after polymerization that removing the baseboard without damaging the plaster will be virtually impossible. For rental properties — use only acrylic adhesive.
Our factory also produces:


Scenario two: Underfloor heating
Underfloor heating systems — both water-based and electric — run along the base of the wall. Drilling dowels into the wall at a height of 10–30 mm from the floor creates a risk of hitting a heating cable or water circuit tube. This risk is real: cables often run right next to the baseboard. Glue installation completely eliminates this scenario.
Get Consultation
Scenario three: Decorative wall finishes
Venetian plaster, decorative textured putty, relief wallpaper — none of these finishes can be spot-repaired in the dowel area after drilling. Glue installation leaves no holes.
Scenario four: Monolithic reinforced concrete walls
In monolithic buildings, perforating the wall is a difficult task: the concrete is dense, and the reinforcement creates a risk of hitting rebar. Installing with high-quality construction adhesive here is not only easier but also more logical: the adhesive holds excellently on monolithic concrete.
Why this is truly reliable
Modern polyurethane construction adhesive has a tensile strength of 2–4 MPa (20–40 kg/cm²). For comparison: a wooden baseboard 80 mm wide and 2,400 mm long creates a tensile load of no more than 0.3–0.5 kg per linear meter under standard conditions. That means the safety margin of the adhesive bond is more than a hundredfold.
Choosing construction adhesive: Moment, Titan, Soudal — comparison
The question "which adhesive for wooden baseboard" is not trivial. Different adhesives vary in open time, final strength, joint elasticity, and surface compatibility. Let's examine in detail.
Group one: Acrylic construction adhesives
Acrylic adhesive (based on an aqueous dispersion of acrylic polymer) — the most common and accessible type for baseboard installation.
Features:
-
Open time (before pressing): 5–15 minutes
-
Initial strength development time: 30–60 minutes
-
Full polymerization: 24–48 hours
-
Tensile strength: 0.8–1.5 MPa
-
Joint elasticity: low–medium
-
Odor: practically none
-
Compatibility: plaster, drywall, wood, MDF, brick
Examples: Moment Universal Mounting, Titan Classic, Alfix Bond.
Downside: For concrete and dense surfaces, acrylic strength may be insufficient under shear load. On an unprimed concrete wall — unreliable.
When to choose: Rental housing (removable), drywall partitions, plastered walls, if you need the ability to adjust the baseboard position before polymerization.
Group two: Polyurethane construction adhesives
Polyurethane adhesive (one-component, polymerizing upon contact with moisture) — the professional standard for installing wooden baseboards. This is what is strictly referred to as "liquid nails."
Features:
-
Open time: 10–20 minutes
-
Initial strength development: 20–40 minutes (requires firm pressing)
-
Full polymerization: 12–24 hours
-
Tensile strength: 2.0–4.0 MPa
-
Joint elasticity: medium (important for wooden baseboards that "breathe" with humidity changes)
-
Odor: moderate (solvent evaporates within the first few hours)
-
Compatibility: concrete, brick, plaster, wood, metal, drywall
Examples: Soudal Fix All Classic, Moment Crystal, Ceresit CS83, Tytan Professional.
Advantage on concrete: polyurethane chemically interacts with moisture in concrete — this enhances adhesion specifically on mineral surfaces.
When to choose: monolithic concrete, brick, dense plaster, any long-term installation without the need for dismantling.
Group three: hybrid MS-polymer adhesives
Adhesives based on MS-polymer (modified silane) — the latest generation of mounting adhesives. Combine the advantages of polyurethane and acrylate.
Features:
-
Strength: comparable to polyurethane (2.5–3.5 MPa)
-
Elasticity: high (±20% of the initial seam length)
-
Odor: minimal
-
Paintability: yes (after polymerization)
-
Contains no solvents — does not damage polystyrene foam and delicate surfaces
Examples: Soudal Fix All Flexi, Bostik MS Easy, Sika SikaBond AT Metal (universal option).
When to choose: expensive interiors with combined surfaces, baseboards wider than 100 mm (where seam elasticity is critical for seasonal wood expansion).
Adhesive comparison table
| Parameter | Acrylate | Polyurethane | MS-polymer |
|---|---|---|---|
| Tensile strength | 0.8–1.5 MPa | 2.0–4.0 MPa | 2.5–3.5 MPa |
| Press time | 30–60 min | 20–40 min | 30–60 min |
| Elasticity | Low | Medium | High |
| Compatibility with concrete | Weak | Good | Good |
| Removability | Yes | No | Difficult |
| Odor | No | Moderate | Minimal |
| Price per 300 ml tube | 200–350 RUB | 350–600 RUB | 500–900 rub. |
What NOT to use
-
Silicone sealant — not intended for installation, does not create a strong pull-off bond, delaminates over time
-
PVA wood glue — quickly loses strength when exposed to moisture and temperature fluctuations
-
Epoxy adhesive — joint is too rigid, does not compensate for wood movement due to humidity changes, impossible to disassemble
Surface preparation: degreasing, primer, wall evenness
Adhesive only holds on a prepared surface. This is not theory — it's the reason for half of all cases where the baseboard 'fell off after a year'.
First criterion: dryness
The wall must be absolutely dry. Wall moisture above 4% critically reduces the adhesion of acrylate and MS-polymer adhesives. Polyurethane, on the contrary, adheres better to a slightly damp surface — but only 'slightly'. A wet wall after recent plastering (less than 28 days of drying) is an unsuitable surface for any adhesive.
How to check: tape a 500×500 mm piece of polyethylene film to the wall, leave for 24 hours. If condensation appears under the film — the wall is damp.
Second criterion: cleanliness and degreasing
The wall surface must be free of:
-
Dust (brush off, vacuum)
-
Grease stains (handprints, machine oil from construction work — wipe with 'White spirit' solvent or isopropyl alcohol)
-
Flaking old paint or plaster (tap, remove loose fragments)
-
Traces of old adhesive (from the previous baseboard — remove with a scraper, sand with sandpaper)
Adhesive is applied to a clean and degreased surface — and only to that.
Third criterion: primer
Primer is a mandatory step when installing on the following surfaces:
Monolithic concrete — dense, non-porous surface with low adhesion. Without primer, even polyurethane adhesive may delaminate within the first months. Primer: concrete contact (quartz acrylic primer creating roughness) — apply with a brush, let dry for 1–2 hours.
Drywall — porous surface that actively absorbs adhesive. Without primer, the adhesive soaks into the drywall without creating an adhesive layer. Primer: deep-penetration acrylic primer (Knauf Tiefengrund, Ceresit CT17) — 1–2 coats.
Plaster with traces of whitewash or chalk paint — the chalk layer will peel off along with the baseboard. Whitewash must be washed off, the surface dried and primed.
Wooden wall or paneling — preliminary sanding with P120, degreasing, application of PVA primer.
Fourth criterion: wall evenness
Base evenness is a key factor for reliable adhesive installation. Wall deviation from vertical or horizontal up to 3 mm per linear meter — adhesive compensates (adhesive layer 2–4 mm acts as a sealing gasket). Deviation over 5–6 mm — adhesive no longer 'bridges': the baseboard either doesn't adhere or adheres only at contact points.
For severe unevenness: initial leveling putty over the entire contact plane — let dry, sand with P80, prime, then — installation.
Preparation of the baseboard itself
Wooden baseboardalso requires preparation of the back side before applying adhesive. The back surface of the baseboard must be:
-
Free of factory wax or oil (if the baseboard is supplied with a coated back side — sand with P80 sandpaper and degrease)
-
Free of dust and sawdust
-
Slightly rough (sanding with P80 creates 'anchors' for the adhesive)
Applying adhesive in a zigzag pattern — correct technique
Proper glue application technique is not just 'drawing a wave'. It's an engineering task, the solution of which determines load distribution and the final quality of the bond.
Why a zigzag, not a straight line
A straight line of glue along the entire baseboard creates uneven pressure: contact at the glue points, none in the gaps. When pressed, the glue does not spread evenly — areas without adhesion form.
The zigzag solves two problems simultaneously:
-
Evenly distributes glue when pressed — the zigzag 'opens up' and covers a larger area
-
Creates air 'pockets' between the zigzag points — they compensate for minor wall irregularities, preventing the baseboard from 'rocking' on point protrusions
Parameters of a correct zigzag
-
Glue bead diameter: 6–8 mm
-
Zigzag pitch: 80–120 mm (distance between zigzag 'peaks')
-
Zigzag amplitude: 20–30 mm (deviation from the axis along the baseboard)
-
Distance from the edge: the first and last zigzag points — no closer than 30–40 mm from the baseboard end
For baseboard width over 80 mm — two rows of zigzag: one near the bottom edge (10–15 mm from the edge), the second near the top (10–15 mm from the top edge). This creates two-point retention across the width and prevents the baseboard from 'tilting' away from the wall.
Open time — why it's needed
After applying glue to the baseboard — wait 3–7 minutes before pressing. This is called 'open time' — the period during which the solvent begins to evaporate and the glue transitions from a liquid to a viscous phase. In the viscous phase, the glue 'adheres' better when pressed and does not spread uncontrollably.
Applied glue — waited 5 minutes — pressed. That's the rule.
If the open time is too long (over 20 minutes for acrylic adhesives) — the glue forms a film and loses its adhesive properties. Monitor the time.
The 'apply twice' method for difficult surfaces
On loose or highly porous surfaces (old putty, perlite plaster, aerated concrete) double application is used:
-
Apply glue in a zigzag pattern to the baseboard
-
Apply a thin layer of glue to the wall in the contact area (straight brush strokes)
-
Allow both layers to sit for 5 minutes
-
Press the baseboard
The two glue layers 'fuse' upon contact — this provides a significantly larger adhesion area than a single layer when pressed against a porous surface.
Glue consumption per 1 linear meter of baseboard
Consumption depends on baseboard width and application method:
| Baseboard width | Number of zigzag rows | Consumption per 1 lm. |
|---|---|---|
| Up to 50 mm | 1 row | 40–55 g/l.m. |
| 60–80 mm | 1 row | 50–70 g/l.m. |
| 80–100 mm | 2 rows | 80–110 g/l.m. |
| 120–150 mm | 2 rows | 100–140 g/l.m. |
A standard tube of mounting adhesive is 300 ml (about 350 g). For a baseboard 80 mm wide, one tube covers 4–5 linear meters. For a 15 m² room with a perimeter of ≈16 l.m., 3–4 tubes will be needed.
Practical rule: buy tubes with a 20% surplus. Adhesive dries in the tube after opening within 24–48 hours (depending on type) — leftovers cannot be saved.
Pressing and fixing until drying — time, holding methods
Applying adhesive is the first half of the job. The second is holding the baseboard in the correct position until initial strength is achieved. And this is the moment where mistakes are most often made.
Pressing time: how long to hold by hand
Hold the baseboard continuously by hand for 1–3 minutes after pressing. During this time, the adhesive gains 'initial grab' — sufficient so the baseboard doesn't shift when released. This is not final strength — it's just position fixing.
Polyurethane adhesive — initial grab is faster (1–2 minutes). Acrylic — slower (2–4 minutes).
Fixing methods without continuous holding
Painter's tape. Apply strips of painter's tape along the top edge of the baseboard, overlapping onto the wall — every 400–500 mm. The tape 'presses' the top edge against the wall, the bottom is held by its own weight and the compressed adhesive. A simple, budget-friendly, effective method.
Wedge spacers at the floor. Small wooden wedges (or folded cardboard) are placed between the floor and the lower edge of the baseboard — creating pressure from bottom to top. Relevant if there is a gap between the baseboard and floor.
Temporary fixing dowels. A thin dowel without a nail is driven into the wall through the baseboard — only for holding during polymerization, then removed. The hole is masked with wood filler. A controversial method — violates the 'no drilling' principle, but sometimes the only way with a very uneven wall.
Construction tape with pressure battens. Professional method: a thin 10×20 mm batten is pressed against the baseboard, the batten is fixed with tape to the wall above the baseboard. The batten creates even pressure along the entire length. After drying, the batten is removed, tape is taken off.
Leveling: horizontal until drying
Until the adhesive fully sets (first 20–40 minutes) the baseboard can still be moved. This time is for checking and correcting horizontality. Tool — laser level or construction bubble level. Deviation from horizontal on a straight baseboard should not exceed 1–2 mm over 2 meters of length.
If the baseboard has 'moved' — carefully shift it using a putty knife under the lower edge. The adhesive still allows slight correction within the first 30 minutes.
Mounting temperature regime
Installing adhesive at temperatures below +5°C is prohibited for most acrylic and MS-polymer adhesives. At low temperatures, polymerization slows sharply or stops. Polyurethane adhesives work at +5°C, but full strength is achieved 2–3 times slower.
Optimal installation temperature: +15–25°C at air humidity 40–70%. At low air humidity (less than 30%) polyurethane adhesive polymerizes slower — increase pressing time.
Disadvantages of the method and when dowels are still needed
Honest talk. Adhesive mounting is not a panacea. There are situations where it is inapplicable or insufficient — and you need to know about it.
First disadvantage: irreversibility with polyurethane
Polyurethane adhesive, once fully polymerized, creates a bond with strength exceeding that of the plaster itself. When removing a baseboard glued with polyurethane, the plaster tears. This means: if you need to replace the baseboard in 10 years — you will have to repair the wall. For premises where baseboard replacement is in principle anticipated (rental, temporary housing) — only acrylic.
Second disadvantage: demanding wall evenness
Break in the adhesive zigzag with a gap between baseboard and wall over 5 mm — is not compensated. Adhesive is not filler. If the wall is uneven — the baseboard will stick only at contact points, elsewhere it will 'move'. Solution: preliminary wall leveling in the baseboard area or using high-fill (Gap Filling) adhesive like Soudal Fix All Flexi.
Third disadvantage: waiting
Working load (installing furniture, active room use) is permissible only after 24–48 hours — time for full polymerization. During installation, do not pull on the baseboard, lean furniture directly against it, create mechanical impacts nearby.
Minus four: wet rooms
In bathrooms and toilets, adhesive installation of wooden baseboards is fundamentally impractical. Not due to the unreliability of the adhesive, but because of the material itself: wood swells, warps, and begins to pull away from the wall under constant moisture conditions, regardless of the fastening method. For bathrooms, use PVC baseboards or ceramic baseboards.
When a dowel is mandatory
-
Walls made of aerated concrete or porous bricks with low surface layer strength - the adhesive pulls this layer off with it. A dowel goes deeper into the strong material.
-
Skirting board wider than 150 mm on a wooden floor with vibration (from walking) - vibration destroys the adhesive bond.
-
Rooms with constant vibration (technical building, near production) - adhesive will not withstand cyclic loads.
-
Temporary installation 'until a final decision' - a nail is easier to pull out than to tear off a glued skirting board.
Features of installing wooden skirting boards in corners
Corner joints are the weakest point of adhesive installation. Here, the adhesive experiences shear loads when joining two planks, and this is where it detaches first.
Internal corner: 45° cut
Both skirting boards are cut at 45° on a miter saw. A miter joint. Adhesive in the corner joint - a thin layer of woodworking PVA on the ends of both skirting boards. Not construction adhesive: construction adhesive lacks filling effect in thin seams; PVA bonds end-to-end pointwise and reliably.
After cutting - dry-fit, secure the corner with painter's tape, and only then apply construction adhesive to the back sides of both skirting boards.
External corner: same logic
External corner - both skirting boards are cut at 45° 'outward'. An external corner is subjected to more stress than an internal one (it can be bumped into, hit with furniture). For reinforcement - after installation, apply painter's tape to the corner during drying time, remove after 24 hours.
Lengthwise joining in a straight section
For wall lengths over 2,400 mm (standard skirting board length), joining two planks lengthwise will be required. The joint is made at a 45° angle (bevel cut) - then the gap from wood shrinkage goes into an invisible zone. A straight 90° butt joint creates a visible gap when the skirting board expands/contracts.
The joint location - not at the wall or corner, but in the middle part of the span. And precisely at the joint point - apply adhesive to the wall with extra reinforcement: 100–150 mm in each direction from the joint.
Wide wooden skirting board: specifics of adhesive installation
Wide Wooden Skirting Board100–150 mm wide and more - a separate story. The wider the skirting board, the higher the installation requirements, because the 'lever' of applied load is greater.
Two rows of adhesive: mandatory condition
For skirting boards wider than 80 mm - always two zigzag rows: top and bottom. Without the bottom row near the floor, the bottom edge of the skirting board 'pulls away' at the slightest unevenness. Without the top row near the wall, the top edge bulges out.
Two zigzag rows cover the maximum area of the skirting board's back surface - distributing the load evenly.
Press time increases
A wide skirting board is heavier. Its own weight creates a load on the adhesive before polymerization: the bottom edge tends to slide down the wall. A wide skirting board needs to be held against the wall for 3–5 minutes (not 1–2, as for a narrow one), and tape should be placed every 300 mm (not 400–500 mm).
Securing the bottom edge
The bottom edge of a wide skirting board is especially vulnerable. Method: a temporary seam of acrylic sealant between the floor and the bottom edge of the skirting board. Apply sealant in a thin 3–4 mm strip. It does not bear the load - it only holds the bottom edge until the main adhesive dries. After polymerization, the sealant can remain as a decorative seam (choose white or tinted) - or be cut off with a knife.
Wooden skirting board: material and profile selection before installation
Before choosing adhesive and installation technique - you need to correctly choose the skirting board itself. Because different wood species and different profiles require different installation approaches.
Oak skirting board
Oak is the densest and hardest material used in productionwooden baseboardsDensity 680–750 kg/m³. Oak skirting is heavier than birch and beech — when installing with adhesive, this means a longer holding time and a denser application of adhesive.
Advantage of oak: minimal crosswise expansion with changes in air humidity. Oak 'moves' less with seasonal changes than softwoods — the adhesive seam experiences fewer cyclic loads.
Beech skirting
Beech is a homogeneous, stable wood species with a density of 650–700 kg/m³. It reacts slightly more to humidity changes than oak. For rooms with a stable climate (apartment with central heating) — the difference is insignificant. For a country house with irregular heating — oak is better.
Pine skirting
Pine is a softwood species (density 450–550 kg/m³). Installation with adhesive is easier (light skirting), but pine reacts more actively to humidity changes. In rooms with sharp humidity fluctuations, pine skirting installed with adhesive may 'come loose' in the first winters — the adhesive cannot compensate for the significant crosswise expansion of softwood. For pinesolid wood skirtingit is better to combine adhesive with finishing nails every 400–500 mm.
FAQ — answers to popular questions
Can a wooden skirting be glued to a concrete wall without primer?
No. Monolithic concrete is a smooth, low-porosity surface with low adhesion. Without concrete contact or a special adhesion primer, the adhesive simply will not grip the surface. After a few months, the skirting will fall off. Primer is a mandatory step on concrete.
How long do liquid nails dry under a wooden skirting?
Initial grab — 20–60 minutes depending on the adhesive type. Main strength development — 6–12 hours. Full polymerization and maximum strength — 24–48 hours. Do not load the skirting until full polymerization.
How well does skirting hold on liquid nails with an operating heated floor?
Well — when using MS-polymer or polyurethane adhesive. Both types retain adhesion and elasticity when heated up to +80°C. Acrylic adhesive softens and loses strength when heated above +60°C — not suitable for heated floors.
Is it necessary to glue skirting joints in corners with mounting adhesive?
No. The joint in the corner — woodworking PVA on the end grain, not mounting adhesive. Mounting adhesive — only for attaching the back side of the skirting to the wall.
What to do if the skirting has come loose from the wall after a year?
Check the surface under the skirting: if loose plaster or whitewash is visible — it means the adhesive is holding, but adhesion has failed within the finishing layer. Solution: remove the loose layer, prime, repeat installation with polyurethane or MS-polymer adhesive. If the surface is solid — it means the adhesive was chosen incorrectly or the surface was not degreased.
What is the consumption of Moment liquid nails for a 70 mm skirting in an 18 m² room?
Perimeter of an 18 m² room ≈18 linear meters. Consumption for 70 mm skirting: ≈60 g/linear meter × 18 linear meters = 1,080 g ≈ 3 tubes of 300 ml + reserve. Take 4 tubes.
About the company STAVROS
Good installation is good material plus correct technology. The first part of this equation is provided by the manufacturer. The second — by you yourself, relying on precise knowledge.
STAVROS is a Russian manufacturer of wooden architectural elements made from solid oak and beech.Wooden Skirting Boardsin the STAVROS catalog are presented in several profiles and widths: from 40 mm to 150 mm and more. Material moisture content at release — 8–10%, surface sanded to P320. Precise dimensions, minimal percentage of geometry defects, batch uniformity — this is what makes adhesive installation truly reliable: a straight skirting provides uniform contact along its entire length.
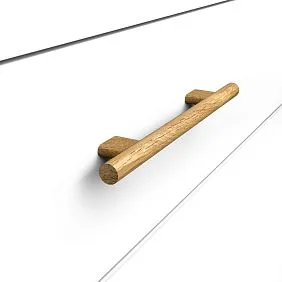
In the STAVROS assortment — a complete system of wooden decor:Door Thresholds, moldings and ceiling cornices, decorative overlays for furniture fronts, Furniture legsandWooden handles. Everything — from one production, same wood species, with the same level of quality. Because an interior is a system, not a set of separate parts.