


Article Contents:
- Two Different Items with One Name: Curtain Rod and Cornice Molding
- What Exactly a Ceiling Cornice Does to a Space
- KZ-008 Cornice by STAVROS: Architecture in Numbers and Sensations
- Why KZ-008 is Chosen for Serious Projects
- Wood Species for Ceiling Cornice: Oak, Beech, and MDF
- Oak Cornice: A Character That Cannot Be Imitated
- Beech Cornice: The European Standard of Precision
- MDF: Technological Perfection Without Texture
- Profiles and Sizes: How to Match a Cornice to Ceiling Height
- Choosing a Profile Based on Interior Style
- Installing a Wooden Cornice: From Marking to Finishing
- Preparation and Acclimatization
- Marking the Installation Line
- Cutting and Preparing Corners
- Fastening: Adhesive + Mechanical
- Joining Straight Sections
- Final Finishing After Installation
- Wooden Cornice in the Interior Trim System
- Wooden Cornice and Hidden Lighting: A Modern Technique
- About STAVROS: A Manufacturer with History and Standards
- FAQ: Answers to the Most Important Questions

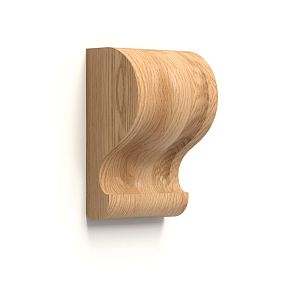
In an interior, there is a special place that is remembered last. The place where the wall meets the ceiling. This joint is not a problem or a task of the 'need to close a gap' variety. It is an architectural seam that, when handled skillfully, becomes one of the most expressive details of the entire room.wooden cornice— is the tool that turns this seam into a work of art.
Even in the architecture of Ancient Greece, the cornice occupied a strictly defined place in the order system: it crowned the column, completed the entablature, and formed that very projection which creates a shadow and separates the vertical wall from the horizontal ceiling. The Greeks understood: without this detail, a building loses its completeness. Without it, a column is just a pillar, and a wall is just a plane. It is the cornice that gives the structure a human scale and architectural completeness.
A millennium later, this principle works in a city apartment, a country house, a classic study. A solid wood cornice made of oak or beech is not a decorative whim. It is an architectural solution that shapes the space, defines its scale, and makes the interior complete.


Two Different Items with One Name: Curtain Rod and Cornice Molding
Before moving further, it is necessary to distinguish between two completely different items that are commonly called by the same name.
A curtain rod is a load-bearing structure (rod, rail, track) that is mounted above a window opening and holds a drapery. Its main task is functional: to ensure the sliding of a ring or hook along the load-bearing element. A wooden curtain rod is a cylindrical or shaped wooden crossbar with brackets, and it is only indirectly related to the topic of this article.
A cornice molding (or ceiling cornice) is a fundamentally different item. It is a profiled solid wood strip that is mounted along the entire perimeter of a room at the junction of the wall and ceiling. No curtains, no hooks — only an architectural form creating a visual transition between two planes. This is what is being referred to when speaking of asolid wood corniceas an element of classic interior.
Confusion between these two items is the source of many errors when searching and ordering. Remember the difference once and for all: a curtain rod is a drapery holder, a cornice molding is an architectural finishing element.


What exactly does a ceiling cornice do to a space
Let's conduct a thought experiment. Take a room with white walls and a white ceiling. The joint between them is a sharp straight line. The eye perceives it as a 'seam,' as incompleteness, as a place the architect didn't fully work out.
Now install around the perimeterwooden cornicewith a cove — a smooth concave transition. The same joint turns into a soft arc. The eye glides over it effortlessly. The room has gained completeness — like a sentence with a period at the end.
But the cornice does more than that. It:
-
Visually raises the ceiling (a light cornice, directing the gaze upward, creates a sense of greater height)
-
Hides inevitable cracks and deformations at the joint (the most vulnerable spot in any house)
-
Creates a horizontal line that organizes space just as the horizon line organizes a landscape
-
Provides a place for hidden lighting if an LED strip is installed behind the cornice
Our factory also produces:


Cornice KZ-008 by STAVROS: architecture in numbers and sensations
In the STAVROS assortmentceiling cornice KZ-008holds a special place. The 90×44 mm profile is an expressive horizontal line with clearly defined architectural significance.
Parameter A (height) — 90 mm. This is the scale at which the cornice is perceived as a full-fledged architectural element, not a thin decorative strip. With a ceiling height of 2.8 m, a 90 mm cornice constitutes about 3.2% of the room's height — this is a classic ratio, tested over centuries.
Parameter C (projection width) — 44 mm. Enough to create a shadow on the wall, enough to hide an LED strip behind it, enough for a monumental feel — and yet without excess.
Standard lengths — 2400 and 2600 mm. Long lengths reduce the number of joints and simplify installation in spacious rooms. Geometric tolerance — ±0.5 mm over the entire length. Material moisture content — 8±2% (control protocols available upon request).
Available in three materials: solid oak, solid beech, MDF. Two levels of sanding quality: Standard (machine) and Prestige (hand). Two sorting options: for enamel and for tinting.
Get Consultation
Why KZ-008 is chosen for serious projects
This cornice appears in interiors not because it's cheaper than analogues or easy to install. It is chosen for its proportion. 90×44 — this is a height-to-depth ratio of approximately 2:1. Classical architecture has established this ratio as harmonious: it is perceived by the eye as balanced, stable, complete.
Paired withwooden moldingson walls andwooden skirting boardof the same wood species below — KZ-008 completes the vertical system of wooden trim. At the bottom — the baseboard, in the middle — moldings at panel level, at the top — the cornice. With this triple horizontal, the interior achieves architectural fullness.
Wood species for ceiling cornice: oak, beech, and MDF
The choice of material is always a balance between aesthetic intent, budget, and operating conditions.
Oak cornice: a character that cannot be imitated
Oak is a species with a reputation. Density 740–900 kg/m³, Brinell hardness 3.7–4.0 units. But technical parameters are not the main thing. The main thing is the texture. The tangential fibers of oak create an expressive pattern that, on the surface of the cornice under oblique lighting, turns into a living, three-dimensional, constantly changing picture.
The radial rays of oak — medullary rays — give a characteristic pearlescent sheen on radial cuts. This cannot be reproduced in any other material. An oak cornice under transparent oil is an object that only gets better with years: oxidation of the surface layer gives that very noble dark tone we see in old English houses or classic libraries.
High tannin content (up to 10%) provides oak with natural resistance to biological influences. An oak cornice installed in a well-ventilated room with normal humidity literally lasts for generations.
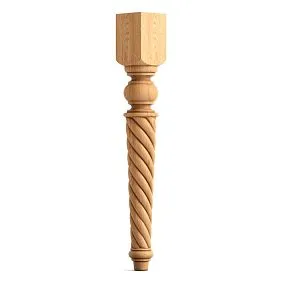
Next towooden balusters of an oak staircaseand oakwith matching legs— an oak cornice creates that very system of unified material that transforms a collection of objects into an interior.
Beech cornice: European standard of precision
Beech (Fagus orientalis) — a different character. Fine-grained homogeneous structure, density 690–780 kg/m³. Beech has no pronounced grain pattern — it is even, neutral, predictable. And this is its virtue, not a flaw.
BeechCornice from solid woodunder white enamel — is ideal. The surface accepts the coating evenly, without stains, without variations. A white cornice on a white ceiling — this is a classic of Scandinavian and modern interiors. A beech cornice under tinting — is also impeccable: it is dyed to any shade evenly and uniformly along its entire length.
Another virtue of beech — its formability after steaming at 100–110°C. Radius cornices for bay windows, rounded niches, arched openings are made from beech. The minimum bending radius of a beech blank with proper processing is 8–10 times the material thickness. For complex architectural tasks with non-standard geometry, beech is indispensable.
MDF: technological perfection without texture
An MDF cornice is not a compromise. It is a material with its own advantages, which in a number of cases make it the preferred choice. Density 750–850 kg/m³ (comparable to beech), absolute geometric stability, complete absence of internal stresses. Where solid wood might warp slightly with seasonal humidity changes, MDF remains impeccably straight.
An MDF cornice under white or colored enamel is the optimal choice for a modern interior without a pronounced wood texture. A special primer-isolator ensures perfect adhesion of the paint coating. Emission class E1 (for some batches — E0) meets the strictest sanitary requirements.
Profiles and dimensions: how to choose a cornice for ceiling height
This is a technical question that is solved by a clear algorithm. The height of the cornice should be proportionate to the height of the room. There is a proven rule: the width of the cornice is 1/8–1/10 of the room height.
| Ceiling Height | Recommended cornice height | Examples from the STAVROS assortment |
|---|---|---|
| 2.4–2.7 m | 45–60 mm | MLD-039from 1,250 rub. |
| 2.8–3.0 m | 70–90 mm | KZ-00890×44 mm |
| 3.1–3.5 m | 100–140 mm | STAVROS cornice series |
| from 3.6 m | 150–200 mm | Representative profiles upon request |
For a standard city apartment with a 2.7 m ceiling, the KZ-008 cornice (90 mm) is at the upper limit of the recommended range. This is good: a slightly larger cornice in a small room works to increase the visual height if painted the color of the ceiling.
For a country house with a 3.2–3.5 m ceiling — KZ-008 is just right: it doesn't get lost against the height and at the same time doesn't overwhelm the space.
Choosing a profile by interior style
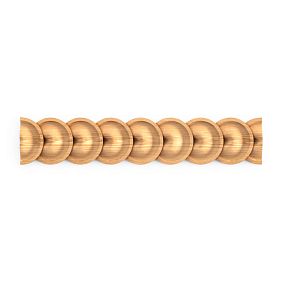
The cross-section profile is the language of style. Different form-factors speak different languages.
Rectangular profile (like KZ-008) — strict, clear, modern-classical. Reads well in lighting, creates a pronounced shadow. Appropriate in neoclassicism, modern classic, art deco, restrained minimalism.
Profile with a cavetto — a concave quarter-circle between wall and ceiling. A soft, smooth transition. This is pure classicism — from Renaissance to Empire. Next towooden moldings MLD-019on wall panels — a full-fledged classical program.
Profile with an ogee — S-shaped cross-section, alternation of convexity and concavity. This is Baroque. Playful, energetic. Good in interiors with rich decor, with gilding, with dark saturated tones.
Multi-level profile — several steps, several planes. This is monumental classicism. Such a cornice requires a high ceiling and a spacious room — otherwise it will swallow the space.
Installation of a wooden cornice: from marking to finishing
Self-installationwooden cornice— a task that anyone who confidently handles a miter saw can handle. The main enemy is inaccuracy when cutting angles. The main ally is a good laser level and patience.
Preparation and Acclimatization
A wooden cornice must acclimatize in the room before installation. Solid wood should be conditioned for at least 72 hours under future operating conditions (temperature 19–23°C, humidity 40–55%). MDF — 48 hours. During this time, the material reaches equilibrium moisture content and stops 'moving'.
The base — the wall and ceiling — must be dry (moisture content no more than 6–8%), level (tolerance ±1.5 mm per meter), and strong. Do not mount onto loose plaster or crumbling substrate: no adhesive will hold.
Marking the Installation Line
Using a laser level, mark a horizontal line around the entire perimeter of the room at the chosen height from the ceiling. Standard practice is flush with the ceiling or with a 10–20 mm offset for subsequent hidden lighting. Check: the line must be strictly horizontal, otherwise the cornice will 'wander' in height, and this will be visible.
Cutting and Preparing Corners
Internal corners (right angles of the room) are cut using the miter method at 45°. A miter saw with a precise angle stop is a mandatory tool. Cutting tolerance — ±0.1°. Even a slight deviation will result in a noticeable gap in the corner.
Practical recommendation: cut corners slightly longer than calculated and fine-tune the accuracy by test-fitting. You can always cut off more, but you can't add back.
External corners (protruding parts of walls, columns, fireplaces) — symmetrical cutting at 45° with opposite direction. An external corner is always more challenging than an internal one: the slightest deviation is visible from any side.
Apply a thin layer of adhesive or special end-grain sealant to the cut ends — this prevents moisture absorption and binds the fibers.
Fastening: Adhesive + Mechanical
Professional installation is always dual: adhesive creates a permanent bond, mechanical fasteners hold the cornice until the adhesive cures and provide backup to the adhesive joint.
Adhesive — polyurethane construction adhesive (Tytan, Moment, and equivalents). Apply in a zigzag pattern or dots to the back surface of the cornice. Allow 3–5 minutes until it reaches a stringy consistency.
Mechanical fasteners — depending on the substrate:
-
Concrete/brick: 6×40 mm hammer-in anchor, spacing 400–500 mm
-
Drywall: toggle bolt, spacing 300 mm
-
Wood (beam ceiling): 4.5×60 mm screw, spacing 400 mm
-
Stretch ceiling: only to the wall, having pre-installed a mounting profile around the perimeter
Fill fastener holes on the visible surface with wood filler matching the color. Sand with 220-grit after drying.
Jointing straight sections.
For long walls where a single length is insufficient, make joints on a miter cut (45°), not on a straight butt end. A miter joint closes up as it dries, a butt joint opens up. Place the joint above a door or in an inconspicuous location if possible.
Finishing After Installation
Fill all gaps in corners and at wall/ceiling junctions with paintable acrylic sealant. Specifically acrylic — it remains elastic, withstands seasonal material movement, and can be repainted.
After complete installation, sand the entire surface with 180-grit, then 220-grit. Prime with acrylic primer. Let dry. Apply the final coating in 2 coats with intermediate sanding using 320-grit.
Wooden Cornice in the Interior Molding System
A cornice never works alone. It is part of a system where each horizontal element echoes the others.
Wooden skirting board PLT-001-075at the bottom — this is the lower horizontal frame of the space. The KZ-008 cornice at the top — the upper one. Between them is the wall, which can be organizedwooden moldings MLD-019into a panel system. AddWooden casingson the doors — and the wall transforms into a complete architectural composition.
These are not decorative excesses. This is a principle used by architects of all great eras: space is organized by horizontals, and each horizontal must be defined.
New item in the assortment —False Beam BL-001from 3,630 rubles — extends the system toward the ceiling: wooden beams combined with perimeter cornices create the illusion of a wooden ceiling without actual structural load. This is architectural illusion of the highest level.
Wooden cornice and hidden lighting: a contemporary technique
One of the most popular requests in modern renovation is a cornice for hidden lighting. Principle: the cornice is mounted at a distance from the ceiling (20–50 mm), with an LED strip installed behind it. Light emerges from behind the cornice and diffuses across the ceiling, creating soft indirect illumination.
Cornice KZ-008with a 44 mm projection is well-suited for this task: it accommodates an LED strip 12–24 mm wide behind it, and the projection is sufficient to completely conceal the light source from direct view at any angle.
A wooden cornice with lighting creates a special nighttime ambiance in a room. By day — an architectural horizontal line of natural wood. By night — an invisible source of warm diffused light, transforming a white ceiling into a glowing screen. Two images of one object.
About STAVROS: a manufactory with history and standards
Behind every linear meterwooden cornicefrom the STAVROS assortment lies a story that began in 2002. Artists Andrey Ragozin and Evgeny Tsapko founded a workshop that, a year later, received an order for the reconstruction of the Konstantinovsky Palace in Strelna. This was an exam that set standards for decades to come.
The Hermitage, Alexander Palace, Trinity-Izmailovsky Cathedral, Sheremetev Mansion — these projects shaped the STAVROS team as professionals capable of meeting requirements that tolerate not a millimeter of deviation.
Today STAVROS is a production facility with its own drying chambers ensuring 8–12% humidity, four-sided planers of German manufacture (tolerance ±0.1 mm per linear meter), and multi-stage quality control — from incoming inspection of blanks to final geometry verification of finished products. Over 220 reviews, a 5.0 rating — this is not marketing, it's production culture.
buy a wooden cornicefrom oak, beech, or MDF from STAVROS means receiving a product with adhered tolerances, verified humidity, and twenty years of experience behind every detail. Showrooms in Moscow and St. Petersburg, delivery across Russia and CIS, orders from one linear meter.
FAQ: answers to the most important questions
What cornice height is suitable for a standard apartment with a 2.7 m ceiling?
According to the classic rule — 1/8–1/10 of the room height. For 2.7 m, that's 270–340 mm, which is too much for a standard room. In practice, for apartments with ceilings of 2.7–3.0 m, an optimal cornice height is 60–90 mm. KZ-008 (90 mm) is the upper limit, which works when the cornice is painted to match the ceiling color.
How does a cornice-molding differ from a ceiling skirting board?
A ceiling skirting board (cove) is a simpler element: a thin strip covering the wall-ceiling joint. A cornice-molding is a full-fledged architectural profile with a significant projection, creating shadow and perceived as an independent element. KZ-008 with a height of 90 mm is precisely a cornice, not a cove.
How to calculate the required linear meters of cornice?
Measure the room perimeter. Subtract the total width of door openings (if the cornice does not run above them). Add 10% for corner cuts and margin. Example: room 5×4 m, perimeter 18 m, two door openings of 0.9 m each. Needed: (18 − 1.8) × 1.1 = 17.82 lin.m. ≈ 18 lin.m.
Can a wooden cornice be glued to a stretch ceiling?
To the stretch fabric — no. The cornice is attached only to the wall and to the ceiling's load-bearing structures (slab, beams). If a stretch ceiling is present, it is necessary beforehand, before its installation, to mount a wooden embedded strip 50×50 mm along the perimeter of the walls at the required height — the cornice will be attached to it.
Should the cornice be painted before or after installation?
Professional answer: prime before, paint after. Primer is applied before installation — it protects the ends and facilitates subsequent painting. The finish coating is applied after installation and sealing of all joints and fastener holes — to achieve a uniform, smooth surface without installation marks.
How to avoid cracks in cornice corners?
Cracks in corners result from seasonal material movement. Fill corner joints with acrylic sealant (not silicone and not putty). Acrylic retains elasticity and does not crack with material expansion/contraction. Renew the sealant every 5–7 years at the first signs of cracking.
What finish coating to choose for an oak cornice?
Under clear oil — vibrant, expressive texture, natural shade with a warm golden tone. Renew every 5 years. Under polyurethane varnish — maximum protection, resistance to mechanical impact. Under tinting + varnish — the ability to achieve any shade from light walnut to dark wenge while preserving the wood's natural grain.
How to avoid a gap between the cornice and the ceiling?
A gap is inevitable if the ceiling is uneven — and it is always uneven. Solution: after installation, fill the gap with acrylic sealant, smooth with a wet finger, paint to match the ceiling color. Alternative: choose a cornice with a reverse bevel on the back surface — it compensates for ceiling unevenness and fits tighter.


