


Article Contents:
- Element Hierarchy: Balusters and Posts in Railing Structure
- Support Posts: Load Concentration Points and Design Accents
- Lower Connections: Foundation of Railing Reliability
- Upper Connections: Connection to Handrail
- Turn Landing: Architectural and Structural Challenges
- Winder Stairs: Where Geometry Challenges Craftsmanship
- Railing Durability: Factors and Threats
- Conclusion

A staircase is not merely a functional structure for moving between levels. It is an architectural construction where each element has meaning, where form follows function, where beauty is inseparable from reliability. If steps are the path and the handrail is the support for the hand, then balusters and posts are the skeleton of the railing, its load-bearing structure, its visual rhythm, its strength foundation.
Staircase railing is a complex system where numerous vertical elements (balusters and posts) connect with horizontal (handrail, intermediate rail) and inclined (stringer or tread) components, forming a unified spatial structure. This structure must withstand significant loads — horizontal (when a person leans on the handrail or accidentally hits the railing), vertical (self-weight of elements), dynamic (impacts, vibrations from walking). The strength of the railing is determined not only by the quality of individual elements but also by the reliability of their connection nodes.
Balusters and Posts for Staircases— are two related but distinct types of vertical railing elements. Balusters are numerous, slender, rhythmically spaced posts filling the space between posts. Posts are few, massive, key elements installed at critical points: start and end of the stair run, turns, landings, entries onto winder stairs. The difference is not only in size but also in function, constructive role, and methods of attachment.
A baluster primarily works under bending, receiving horizontal load from the handrail and transferring it to the tread. Its task is to create a visual barrier preventing falls, filling the space between the handrail and treads. A baluster is relatively slender (typically 40–60 mm in cross-section), installed at 120–150 mm spacing, and fastened with simple methods — via dowels, screws, or into the handrail groove.
A post acts as the primary load-bearing element, receiving significant loads from the handrail over a long span, transferring them to the tread or floor. Its task is to ensure the rigidity of the entire railing system, fix the handrail at key points, and create visual accents. A post is massive (typically 80×80, 100×100, 120×120 mm), installed every 1.5–3 meters, and fastened securely — with bolts, anchors, or strong connection nodes.
Understanding the difference between balusters and posts, their correct placement, and secure attachment at connection nodes — the key to creating a railing that will serve for decades, preserving both strength and aesthetics. This article is a detailed analysis of railing architecture, types of posts and balusters, connection node construction, installation specifics on straight runs and turns, on winder stairs, and factors affecting the overall system’s durability.


Element Hierarchy: Balusters and Posts in Railing Structure
Staircase railing is not a chaotic set of vertical posts. It is a hierarchical system where each element occupies its place and performs its function. Understanding this hierarchy is critical for proper design and installation.
Support Posts (newels) — the main elements of the hierarchy, bearing the 'kings' of the railing. They are installed at points of maximum load and stress concentration. Typical installation locations for support posts: start of the stair run (lower handrail post), end of the stair run (upper handrail post), 90 or 180-degree turns, edges of landings, entries and exits from winder stair sections. A support post has a massive cross-section — minimum 80×80 mm, but typically 100×100 or 120×120 mm for tall staircases and prestigious interiors.
The massiveness of a support post is due to the need to withstand significant loads. A handrail attached to a support post may experience load from several people simultaneously over a span of 2–3 meters between posts. When a person leans on the handrail in the middle of the span, a horizontal force (lateral thrust) arises, attempting to push the handrail away from the stair line. This force is absorbed by the support posts at the ends of the span, working under bending. The heavier the post, the less it deflects, the stiffer and more reliable the entire structure becomes.
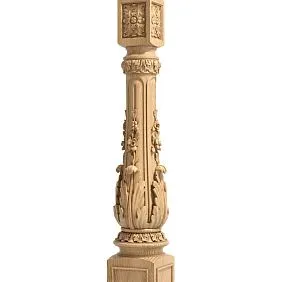
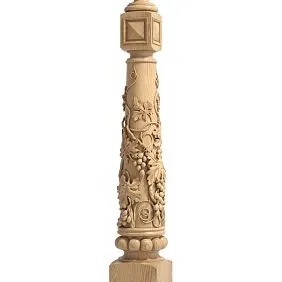
A support post is typically taller than balusters — rising from the floor or tread to the full height of the railing (900–1000 mm) plus extending above the handrail, ending in a finial. A finial is a decorative element crowning the post: a polished head, carved ball, or ornamental cap. A finial serves both an aesthetic function (completing the post visually, creating a visual accent) and a practical function (protecting the post’s end from moisture that could be absorbed by end grain fibers).
Intermediate Posts — elements of the second level of hierarchy, installed on long straight sections of the stair run to strengthen the structure. If the length of a straight stair run exceeds 3–3.5 meters, the handrail between support posts begins to noticeably sag under load. To eliminate sagging in the middle of the span, an intermediate post is installed, dividing the long span into two shorter ones. An intermediate post typically has the same cross-section as a support post (100×100 or 80×80 mm), but may be slightly thinner (if support posts are 100×100, intermediate posts may be 80×80). Finials on intermediate posts are usually the same as on support posts, for visual unity.
Balusters — elements of the third level of hierarchy, filling the space between posts. Their function is not load-bearing (they do not carry the main load from the handrail), but filling and decorative. Balusters create a visual barrier preventing falls, especially for children. According to building codes, the gap between vertical railing elements must not exceed 120–150 mm — a child must not be able to fit their head between balusters. Therefore, balusters are installed frequently, spaced 120–150 mm apart, sometimes as close as 100 mm for added safety or visual density.
Intermediate Rail (handrail support) — a horizontal element installed between balusters at approximately mid-height (about 400–500 mm from the treads). The intermediate rail performs several functions: increases the stiffness of balusters (they work under less than full height, divided into two shorter spans, reducing deflection), provides additional filling of the gap (important for families with small children), adds a decorative horizontal element. The intermediate rail typically has a cross-section of 30×50 or 40×60 mm, fastened to balusters via dowels or screws.
Visually, the hierarchy is instantly readable: massive posts as vertical accents, slender frequent balusters as fillers, the handrail as the horizontal connecting line. Disrupting the hierarchy — for example, balusters of the same thickness as posts, or posts barely distinguishable from balusters — creates visual cacophony and a sense of unprofessionalism.
Correct hierarchy is ensured not only by size but also by visual emphasis. Support posts often have more complex profiles than balusters — carved elements, larger-diameter polished details, decorative milling. Finials on posts are always heavier and more complex than the upper ends of balusters, which are hidden beneath the handrail. All this creates a clear visual hierarchy: posts dominate, balusters subordinate, the entire composition reads as a unified system.
The correct hierarchy is ensured not only by size but also by visual emphasis. Support posts often have a more complex profile than balusters — carved elements, precisely detailed parts of larger diameter, decorative milling. The tops of the posts are always heavier and more elaborate than the upper ends of the balusters, hidden beneath the handrail. All this creates a clear visual hierarchy: posts dominate, balusters subordinate, and the entire composition reads as a unified system.


Support Posts: Load Concentration Points and Design Accents
Support posts are not just thicker balusters. They are key structural elements whose correct installation determines the strength and longevity of the entire railing. A support post bears the load from the handrail over a span of 2-3 meters, which, when multiple people lean on it simultaneously, can amount to hundreds of kilograms of lateral force.
The lower newel post is the first post of the staircase, installed at the level of the first step or directly on the first floor's floor adjacent to the first step. It is the most heavily loaded post of the entire staircase. The handrail's start is attached to it, which on the first flight may be 2-4 meters long. When ascending the stairs, people lean on the handrail most actively at the beginning of the flight, creating maximum horizontal load specifically on the lower newel post.
The lower newel post is often made thicker than the others — if intermediate posts have a cross-section of 80×80 or 100×100 millimeters, the lower one may be 100×100 or even 120×120 millimeters. The height of the lower newel post is usually greater — if balusters and other posts are 900 millimeters high, the lower newel post may be 1000-1200 millimeters tall with a massive cap of 120-150 millimeters in diameter. This not only strengthens the structure but also creates a visual accent, marking the beginning of the staircase.
Mounting the lower newel post is the most critical. If the post is installed on the floor, anchor bolts or metal plates embedded in the floor are used. If the post is installed on the first step, it must be firmly connected to the step (through bolts or deep dowels with adhesive) and indirectly to the entire load-bearing structure of the staircase (stringer or landing beam).
The upper newel post is the last post of the staircase, installed at the level of the last step or on the second floor's floor adjacent to the last step. The upper newel post bears the load from the final handrail span. When descending the stairs, people lean on the handrail most heavily at the end of the flight, creating significant load on the upper newel post.
The upper newel post may be of the same thickness as the lower one, or slightly thinner (if the lower is 120×120, the upper may be 100×100). It is important that visually they are paired — identical profile, identical caps, symmetrical placement. Mounting the upper newel post is often simpler than the lower one, as it can be fixed to the second floor's floor, which is a strong rigid base.
Corner posts are posts installed at 90-degree (L-shaped) or 180-degree (U-shaped) turns of the staircase. A corner post is a critical point in the structure. Handrails approach it from two directions at an angle, creating a complex stress state. When leaning on the handrail on one flight, a horizontal force is generated that tries to displace the corner post. When leaning on the handrail on another flight, the force acts in another direction. The corner post must balance these forces acting in different directions.
The corner post is usually the most massive after the lower newel post — a cross-section of 100×100 or 120×120 millimeters is mandatory. The height corresponds to the level difference at the turn. If the turn is through a landing, the post has the full height of the railing (900-1000 millimeters). If the turn is through turning steps, the post may be higher, as turning steps create a level difference at the turn.
Mounting a corner post is the most complex. It must be securely fixed to the staircase's load-bearing structure — to the stringer, landing beam, landing, or floor. Often, through-bolt connections with metal plates are used, distributing the load. In some designs, the corner post is extended downward, passing through the landing and resting on the floor, creating a vertical support from floor to handrail — maximum rigidity.
Posts on turning steps are a specific type, installed at the entrance and exit from the turning step area. Turning steps are wedge-shaped steps, narrow on the inner side of the turn and wide on the outer side, allowing the staircase to turn without a landing. Turning steps create special conditions for railings: the height difference occurs not on the landing (horizontal surface), but on the steps themselves (inclined surface), and the handrail bends in three planes (up the flight, toward the turn, with changing slope angle).
The post at the entrance to turning steps is installed on the last straight step before the turn or on the first turning step. The post at the exit from turning steps is installed on the last turning step or on the first straight step after the turn. These posts must be massive (at least 100×100 millimeters), as they bear complex loads from the handrail bending in three planes.
Mounting posts on turning steps is complicated by the shape of the steps. A turning step is narrow on one side, and if the post is installed on the narrow part, the area of support is small. Therefore, posts on turning steps are often mounted not only to the step but also to the staircase's load-bearing structure — to the central support (if the staircase has a central column), to the wall (if the turning steps adjoin a wall), to the stringer or landing beam.
The decorative role of support posts is no less important than their structural role. Support posts are visual accents of the railing, elements that define the style of the entire staircase. A massive carved oak post with a spherical cap — classic, emphasizing the solidity and traditionalism of the interior. A minimalist square-section post with minimal finishing — modern, resonant with minimalism. A post with twisted elements, decorative appliqués, gilded caps — baroque, demonstrating luxury.
Cap designs are a separate design topic. Spherical caps with a diameter of 100-150 millimeters — a classic, universal, and elegant option. Conical caps — a strict option, suitable for restrained interiors. Figurative caps (in the shape of walnuts, pineapples, geometric shapes) — a decorative option, emphasizing individuality. Flat cap covers — a modern option, minimalist and concise.
The cap material is usually the same as the post material (wood), but alternatives are possible: metal caps (brass, bronze, stainless steel) create contrast with the wooden post, adding shine and accent. Glass or crystal caps — a rare exclusive option for luxurious interiors. Caps with lighting (built-in LEDs) — a functional solution, illuminating the staircase at night.
Our factory also produces:


Lower fixings: the foundation of railing reliability
Lower mounting of balusters or posts — the point where the vertical element connects to the step, floor, or load-bearing structure of the staircase. The reliability of this mounting determines the stability of the entire railing. Poorly mounted balusters become loose, creak, and may break over time. Poorly mounted posts create a safety hazard — under significant load, they may pull out, causing the railing to collapse.
Mounting with dowels — a traditional carpentry method used for centuries. A dowel is a cylindrical wooden rod with a diameter of 8-12 millimeters and a length of 40-60 millimeters. Coaxial holes are drilled in the end of the baluster and in the step for the dowel. The dowel is coated with carpentry glue (PVA or polyurethane), inserted into the step hole, and the baluster is mounted on it. The glue dries, creating a strong connection.
Advantages of dowel mounting: hidden (dowels are not visible from the outside, the baluster appears to grow from the step), aesthetic, sufficiently strong for balusters when properly executed. Disadvantages: labor-intensive (requires precise drilling of coaxial holes), requires time for glue to dry, disassemblable only with destruction (if the baluster needs to be removed, the dowel must be broken).
Dowel mounting is suitable for balusters on straight sections of the flight, where loads are moderate. For support posts, dowel mounting is insufficient — stronger methods are required.
Mounting with screws — a modern, fast method. A screw (usually 5-6 mm in diameter and 70-100 mm long) is screwed from below, under the step, through the step into the end of the baluster. The baluster is placed on the step, its position is marked, a guiding hole of 3-4 mm diameter is drilled from below through the step, and then the screw is screwed in, gripping the end of the baluster.
Advantages: speed (no need to wait for glue to dry), relative strength, hidden (the screw from below is not visible). Disadvantages: requires access to the underside of the step (not always possible in a finished staircase), the screw works on pull-out (under horizontal load on the baluster, the screw tries to exit the wood).
Screw mounting is suitable for balusters provided access from below is available. Reinforcement is possible by installing two screws at an angle to each other or by combining screws with glue.
Mounting in a groove — a method used when installing balusters on the stringer (the side inclined board of the staircase). A longitudinal groove of 15-20 mm depth and width corresponding to the baluster thickness is milled into the stringer. The lower ends of the balusters are inserted into this groove and additionally fixed with glue. A decorative strip may be installed over the groove, covering the gap and additionally pressing the balusters.
Advantages: reliability (balusters are fixed along the entire flight length by a single groove), hidden, aesthetic. Disadvantages: complexity of manufacturing (requires precise milling of the groove), inability to replace an individual baluster without dismantling the entire row.
Mounting in a groove — a professional method used in factory production of staircases. Ensures high rigidity and longevity.
Mounting on newel brackets — a method for support posts requiring maximum reliability. A newel bracket is a metal part (usually made of steel or stainless steel) that is bolted or anchored to the floor or step, and has a socket or bolt for installing the post. There are two types of newel brackets: socket-type (the bracket has a recess into which a peg on the post's end is inserted) and bolt-type (a threaded bolt protrudes from the bracket, which is screwed into the post's end).
Socket-type newel bracket: a peg of 30-50 mm diameter and 50-80 mm height is carved or cut from the base of the post. The newel bracket is anchored to the floor with anchor bolts. The post is inserted into the socket with its peg, and additionally secured with a side bolt or glue.
Bolt-type newel bracket: a hole for a threaded bolt of 10-12 mm diameter and 80-100 mm depth is drilled into the post's end. The newel bracket is anchored to the floor. The post is screwed onto the bolt (the bolt has threads, and the post's hole is threaded, or the bolt is screwed into a threaded bushing inserted into the hole).
Advantages of newel brackets: maximum reliability (the post is connected to the floor through a metal part capable of withstanding enormous loads), adjustability (bolt-type newel brackets allow height adjustment during installation), disassemblability (the post can be removed and reinstalled). Disadvantages: visibility (the newel bracket is visible at the base of the post, which may not be aesthetically pleasing to everyone), cost (quality newel brackets cost 500-1500 rubles each).
Pivot joints are the optimal solution for lower and upper handrail posts, corner posts, and all posts bearing significant load.
Combined fastening — a combination of several methods for maximum reliability. For example: dowel + glue + screw from below. Or: tenon in the post’s socket + side screw + glue. This combination safeguards against weakening of any single fastener — if the glue fails, the screw holds; if the screw loosens, the dowel holds.
For support posts, combined fastening is mandatory. For balusters, a single well-executed method is sufficient, but combinations increase longevity.
Get Consultation
Upper fastenings: connection to the handrail
Upper fastening of balusters or posts — the point where the vertical element connects to the handrail. The reliability of this fastening determines whether the handrail will wobble, creak, or separate over time. Upper fastenings operate under complex conditions: the handrail is inclined, constantly bears weight, vibrates during walking, and experiences torsional forces.
Fastening into the handrail groove — a classic method ensuring rigid connection. A longitudinal groove, 15–25 mm deep and width matching the baluster thickness, is milled into the underside of the handrail. The upper ends of the balusters are inserted into this groove, secured with glue, and may additionally be fastened with side screws (driven from the side through the handrail’s wall into the baluster’s end).
Advantages: reliability (balusters are fixed along the entire handrail length by a single groove), rigidity (no play, handrail and balusters function as a single unit), aesthetics (fastenings are concealed). Disadvantages: manufacturing complexity (requires precise groove milling), inability to adjust during installation (if the groove is milled inaccurately, balusters won’t fit).
The groove in the handrail is milled at the factory during handrail production. During installation on-site, balusters are placed on steps, their exact positions are measured, the handrail is marked at the top of the balusters, the groove is coated with glue, the handrail is placed onto the balusters, and additionally secured to support posts.
Dowel fastening — a method similar to lower fastening. In the upper end of the baluster and the underside of the handrail, coaxial holes are drilled for the dowel. The dowel, glued, connects the baluster to the handrail. This method is simpler than groove fastening (no need to mill a long groove, only precise holes), but less rigid (each baluster is fastened separately, no single connection through the groove).
Dowel fastening is suitable for small staircases with a small number of balusters. For long flights, groove fastening is preferred.
Fastening with screws from above — a method where a screw is driven from above, through the handrail into the end of the baluster. After driving, the hole is filled with putty, sanded, and finished to conceal the fastening. Or, the hole is covered with a wooden plug (chopstick) matching the handrail’s tone, which is glued and sanded flush.
Advantages: simplicity, reliability, adjustability during installation. Disadvantages: visibility of fastening marks (even masked holes may be noticeable under certain lighting), risk of handrail cracking when screws are driven close to the edge.
Fastening with metal struts — a modern method for disassemblable structures. A metal strut (bolt with threads on both sides or a rod with nuts) passes vertically through the handrail and baluster, clamping them together. The strut is concealed inside, with only small holes visible on top of the handrail and bottom of the baluster.
Advantages: maximum strength, disassemblability (staircase can be disassembled and reassembled during relocation or renovation). Disadvantages: installation complexity, visibility of holes.
Handrail connection to posts — a separate task, as posts bear the main load. The handrail connects to posts in several ways:
-
Handrail set into post: a groove (recess) is cut into the post, into which the handrail’s end fits. The connection is secured with dowels, screws, or bolts. A strong and aesthetic connection, but requires precise fitting.
-
Handrail connection to post top: the handrail rests on the top end of the post (which is beveled to match the handrail’s slope). The connection is secured with dowels or metal fasteners. A simple, but less rigid connection.
-
Metal brackets: concealed metal brackets (or special handrail fasteners) are mounted with one side to the post and the other to the handrail. They provide a rigid connection but require precise installation.
On support posts, handrail connection must be maximally reliable. Combinations such as: set-in + dowels + glue + screws, or metal through-bolts passing through the handrail and post, are used.
Turn at the landing: architectural and structural challenges
Turn at the landing — one of the most complex sections of a staircase from the perspective of guardrail construction. A straight flight has a constant incline angle, balusters are vertical or slightly inclined, and the handrail is straight in plan. A turn changes everything: direction of movement changes by 90 or 180 degrees, the handrail curves in the horizontal plane, the guardrail height may vary, and balusters and posts are installed at complex angles.
Turn via a landing — a classic solution where two flights are connected by a horizontal landing. The landing has a minimum size of flight width × flight width (e.g., 1000×1000 mm for a 1000 mm wide flight). Guardrail on the landing is horizontal (unlike the inclined guardrail on the flight), with a height of 900–1000 mm from the landing surface.
Support posts are installed on the landing: at the corners (where two flights meet) — mandatory, sometimes additional intermediate posts if the landing is long. Balusters are installed between posts at the same spacing as on flights (120–150 mm). The handrail on the landing is horizontal and connects to inclined handrails of the flights via corner elements or flexible transitions.
Structurally, guardrail on the landing is simpler than on winder steps: horizontal surface, right angles, simple baluster fastening. Aesthetically, the landing creates a pause in ascent, a resting spot, and a visual boundary between flights.
Turn via winder steps — a modern compact solution saving space. Winder steps are wedge-shaped: narrow on the inner side of the turn (100–150 mm) and wide on the outer side (400–500 mm). Typically, 3 winder steps are used for a 90-degree turn, and 6 for a 180-degree turn.
Guardrail on winder steps operates under complex conditions. Steps are inclined, but the incline angle varies from step to step. The handrail must smoothly curve horizontally, following the turn, while simultaneously rising vertically with the step ascent. Balusters are installed on steps of varying shapes and heights.
On the inner side of the turn (narrow part of winder steps), a support post — a central column — is often installed, to which the narrow ends of the winder steps and lower ends of balusters are attached. The central column may be wooden (a post with 100×100 or 120×120 mm cross-section, passing vertically through all winder steps) or metal (a steel pipe with 80–100 mm diameter).
Balusters on the outer side of the turn (wide part of winder steps) are installed on each step or every other step, depending on step width and required fill frequency. The spacing between balusters should remain within 120–150 mm for safety, which may require installing 2–3 balusters per step on the wide ends of winder steps.
Handrail on winder steps — the most complex element. It must curve in the horizontal plane, following the turn, and simultaneously rise vertically, following the step ascent. Such a handrail cannot be made from a straight stock — it is either bent (wood is steamed and bent to a template, then dried in the curved state), or glued from laminates (thin wood layers glued with a curve), or milled from a large-section solid stock (expensive in material).
Ready-made bent handrails for standard turns (90 degrees with a specific radius) are sold by stair component manufacturers. For non-standard turns, the handrail is custom-made, increasing staircase cost by 5000–15000 rubles per bent element.
The turning angle and radius affect the complexity of the railing. A 90-degree turn (L-shaped staircase) is simpler than an 180-degree turn (U-shaped). A large turning radius (smooth curve) is easier to manufacture as a bent handrail than a small radius (sharp bend). The minimum bending radius of the handrail depends on the wood species and cross-section: for oak with a 60×80 mm cross-section, the minimum radius is about 800-1000 mm, for beech — 700-900 mm, for pine — 600-800 mm.
Visual smoothness of the transition is an important aesthetic aspect. The handrail must bend smoothly, without breaks or abrupt changes in curvature. Newels at the turn should maintain verticality or follow one logical slope rule. Support posts at the entrance and exit of the turn should be symmetrical and visually balanced.
Poorly executed turns are immediately noticeable: the handrail breaks at unnatural angles, newels are tilted chaotically, gaps between newels at the turn increase or decrease unpredictably. A well-executed turn looks natural, as if the staircase and its railing grew organically, rather than being assembled from separate pieces.
Landing steps: where geometry challenges craftsmanship
Landing steps are an elegant architectural solution, allowing a compact placement of a staircase with a turn. However, behind the elegance lies geometric and structural complexity, especially for the railing.
The geometry of landing steps: each landing step has a wedge shape. The narrow end (on the inner side of the turn) has a width of 100-150 mm — this is the minimum required for safe foot placement, although practically, feet do not land on the narrow end, using the middle and wide parts. The wide end (on the outer side of the turn) has a width of 400-500 mm and more, depending on the turning radius. Along the path line (central line of the stair run, where feet usually land) the width of the landing step should be standard — 250-300 mm.
The angle between the front and rear edges of the landing step determines how sharp the turn is. For a 90-degree turn with three landing steps, each step turns 30 degrees. For an 180-degree turn with six landing steps, each step also turns 30 degrees — this is the optimal angle ensuring smooth ascent.
Mounting newels on landing steps is complicated by the inclined and wedge-shaped surface. On the wide end of the landing step, there is enough space to install newels using standard methods — on dowels, self-tapping screws, or in grooves. However, newels must be vertical (or follow the general slope rule along the stair run), which requires trimming the bottom end of the newel at an angle matching the slope of the step.
On the narrow end of the landing step, there is insufficient space for mounting newels. Therefore, on the inner side of the turn, one of the following options is usually used:
-
Central support column: a vertical post (wooden or metal), installed from floor to ceiling or from floor to slab, to which the narrow ends of the landing steps are attached. Newels (or their substitutes — metal rods, vertical boards) are also attached to this same column. The central column may be a decorative element (turned wooden post with a finial) or purely functional (thin metal tube, hidden within the structure).
-
Wall: if the landing steps abut a wall (internal corner of the room), the narrow ends of the steps are attached to the wall. Railing on the inner side is not required — the wall itself serves as the railing. A wall-mounted handrail (horizontal board mounted on brackets at 900 mm height) is often installed on the wall, which can be held onto while ascending along the inner radius of the turn.
-
Stringer: an inclined board running along the inner side of the stair run, to which the narrow ends of the landing steps are attached. Newels are mounted to the stringer, not to the steps. The stringer acts as a load-bearing element, distributing the load from the steps and railing.
On the outer side of the landing steps, newels are installed on the wide ends of the steps. The frequency of newel installation should ensure a gap no more than 120-150 mm. On the wide ends of the landing steps (400-500 mm), this may require installing 2-3 newels per step.
Problem: if one newel is installed per step on straight steps, but two or three on landing steps, a visual imbalance occurs. Solution: install newels not by the principle of "one per step," but by the principle of "even spacing of 120-150 mm." Then, on narrow straight steps, there will be one newel, on wide straight steps — possibly two, on wide ends of landing steps — two or three, maintaining visual rhythm.
Handrail on landing steps — the pinnacle of complexity. It must:
-
Bend in the horizontal plane, following the turn of the stair run
-
Ascend in the vertical plane, following the rise of the steps
-
Maintain constant height above the step surface (900-1000 mm)
-
Maintain constant cross-section and shape along its entire length
-
Smoothly connect with straight handrail sections before and after the turn
Such a handrail is a complex three-dimensional curve. Its manufacture requires either bending wood (steaming, bending to a template, drying), or laminating (thin wood layers are glued while bent, forming a volumetric curved element), or milling from a solid blank (a large cross-section solid piece of wood is milled to the required shape, which is wasteful of material).
Ready-made bent handrails for standard configurations of landing staircases (90-degree turn with 1000 mm radius, three landing steps) are sold by stair component manufacturers. The price of a bent handrail 1.5-2 meters long is 5000-12000 rubles depending on the wood species and profile complexity. For non-standard configurations, the handrail is custom-made, costing 10000-20000 rubles per element.
Alternative to a bent handrail — a composite handrail made of straight segments joined at angles. Such a handrail is cheaper and easier to manufacture, but creates breaks, angles, and is less ergonomic and visually less elegant. A composite handrail is acceptable for budget staircases, while for prestigious projects, a bent handrail is preferred.
Installing railing on landing steps requires experience and precision. An error in marking by 5-10 mm will result in the handrail not fitting on the newels, or newels not standing vertically, or uneven gaps between newels. Therefore, landing sections are usually entrusted to professionals, not installed by oneself.
Railing longevity: factors and threats
Staircase railing operates under harsh conditions: constant mechanical loads (hand support on the handrail, accidental impacts, vibrations during walking), fluctuations in humidity and temperature (especially on staircases leading to unheated attics or basements), ultraviolet radiation (for staircases near windows). Railing longevity is determined by material quality, correct construction, reliable fastenings, and regular maintenance.
Wood quality — the first factor of longevity. Wood must be properly dried to 8-10% moisture to avoid deformation after installation. Wood must be high grade (A or Extra), free of large knots, cracks, or rot that reduce strength. Hardwoods (oak, ash, beech) last longer than softwoods (pine, spruce) — an oak railing may last 100+ years, while a pine railing — 30-50 years with proper care.
Protective coating — a barrier between wood and the external environment. A quality multi-layer coating (3-4 layers of polyurethane varnish or oil-wax) protects against moisture, dirt, abrasion, and UV radiation. Coating must be renewed as it wears: varnish — every 10-15 years, oil — every 3-5 years. Signs of needing renewal: dullness, abrasion in contact areas, micro-cracks in the coating.
Fastening reliability — a critical factor. Loose fastenings are the primary cause of railing failure. A newel secured with one self-tapping screw from below may loosen after 5-10 years. A post secured only on dowels without additional bolts may weaken over time. For longevity, use combined fastenings, periodically check bolt tightness, and re-glue weakened dowel joints.
Mechanical wear — abrasion of the handrail from constant hand contact, abrasion of newels at impact points (often lower parts of newels are damaged by vacuum cleaners, children’s toys, carried furniture). Hardwoods wear slower. A handrail on heavily used stairs may wear down by 1 mm per year at constant grip points — after 20-30 years, this becomes noticeable. The coating protects the wood, but wears itself, requiring renewal.
Moisture deformation — change in wood dimensions due to fluctuations in air humidity. In winter, with intensive heating, air humidity drops to 20-30%, and the wood dries out. In summer, humidity rises to 60-70%, and the wood swells. These cycles repeat year after year, causing micro-damage: cracks, loosening of joints, warping. Stabilizing the indoor climate (humidifiers in winter, dehumidifiers in summer, maintaining humidity at 45-60%) extends service life.
Biological damage — wood damage by fungi, mold, insects (wood-boring beetles, longhorn beetles). Oak and larch are resistant to biological damage due to natural preservatives (tannins, resins). Pine, beech, and ash are vulnerable and require protection with antiseptics. Damage usually begins in areas of high humidity (e.g., if the staircase leads to a basement, an unheated cottage, or a poorly ventilated room). Signs: dark spots on wood, white mold, small holes and wood shavings (beetles). Upon detection — treat with antiseptics; in severe cases — replace damaged elements.
Ultraviolet radiation — for staircases near windows where direct sunlight hits the railing. UV radiation causes wood discoloration (darkening or fading), degradation of lignin (the binding substance in wood), and cracking of finishes. Protection — UV-filtering varnishes, curtains or blinds on windows during peak sun hours, regular refreshment of finishes.
Dynamic loads — vibrations caused by walking on the staircase. Each step creates a shock wave transmitted through the treads to the railing. Over years, millions of such micro-impacts can weaken fasteners and loosen joints. A rigid structure with secure fasteners and massive posts better withstands vibrations than a lightweight structure with thin elements and weak fasteners.
Service life of railing elements:
-
Oak balusters and posts with quality finish and secure fasteners — 80-100+ years
-
Beech, ash, larch — 50-80 years
-
Pine with good protection — 30-50 years
-
Handrail (the most heavily loaded element) — 30-50 years, may require replacement or restoration afterward
-
Finish: varnish — 10-15 years, oil — 3-5 years until renewal
-
Fasteners: glued dowels — 30-50 years, bolted — unlimited with periodic tightening
Signs of needing repair: loosening of balusters or posts (play when pressed), squeaking when resting on the handrail, cracks in wood (especially at fastener locations), worn finish (dullness, roughness), darkening of wood (possible onset of biological damage), visible gaps in joints (between handrail and balusters, between balusters and treads).
Prevention extends service life: regular dust cleaning (dust absorbs moisture, creating mold conditions), checking bolt tightness every 2-3 years, re-gluing weakened dowel joints at first signs of loosening, renewing finish before wood is exposed (don’t wait until varnish is completely worn), controlling indoor climate (humidity 45-60%, temperature 18-24°C).
Railing restoration — returning to original condition. Includes: dismantling loosened elements, replacing irreparably damaged balusters or posts, reinforcing fasteners, removing old finish, sanding wood, applying new finish. Restoration extends railing service life by decades and costs 50-70% less than full replacement.
Conclusion
Balusters and Posts for StaircasesThese are not just vertical poles filling space between treads and handrail. This is a thoughtfully designed hierarchical system, where massive support posts bear primary loads at critical points, intermediate posts reinforce long spans, balusters fill space and create visual rhythm. Understanding the role of each element, proper placement, and secure fastening — the foundation of safe and long-lasting railing.
Connection nodes — lower and upper fasteners — determine overall structural strength. Glued dowel connections provide aesthetic appeal and sufficient strength for balusters. Bolted connections through base plates guarantee maximum reliability for support posts. The groove in the handrail creates a rigid connection between balusters and handrail along the entire stair run. Combined fasteners prevent individual element loosening, ensuring decades of durability.
Staircase turn — an architectural and structural challenge where geometry becomes more complex, the handrail bends in three planes, balusters are installed at complex angles. Turning via a landing is structurally simpler but requires more space. Turning via treaded steps is more compact but demands skill in manufacturing curved handrails and precision in installation. A properly executed turn appears smooth and natural; an improperly executed turn looks jarring and illogical.
Treaded steps — embodiment of compromise between compactness and convenience. They save space, allowing placement of the staircase where a landing would require an additional meter of opening length. They create visual smoothness when the handrail bends naturally, not breaking at a right angle. But for these advantages, one must pay with increased structural complexity, higher precision requirements for manufacturing and installation, and the need for curved handrails.
Properly designed treaded steps with tread width along the path of 250-300 millimeters are convenient and safe. Improperly designed steps — with narrow treads, overly steep turns, uneven steps — become traps where it’s easy to trip. Therefore, designing staircases with treaded steps is best entrusted to professionals familiar with the calculation methods of wedge-shaped steps and the geometry of three-dimensional curved handrails.
Durability of railings on treaded steps depends on the same factors as on straight sections: wood quality, fastener reliability, protective finish, regular maintenance. However, loads on treaded sections are often higher — people lean more heavily on the handrail while navigating turns, creating increased stress on support posts. Therefore, support posts at the entry and exit of treaded sections must be massive (100×100 or 120×120 millimeters) and securely fastened — with bolts through base plates, with redundant fastening to load-bearing structures.
Company STAVROS specializes in manufacturing complete sets of elements for staircases of any configuration, including complex staircases with turns and treaded steps. In stock:balusters and postsin various species (oak, ash, beech, larch, pine), cross-sections (from 40×40 to 120×120 millimeters), profiles (simple square, polished classic, carved decorative), heights (standard 900 millimeters and custom-made).
STAVROS support posts are manufactured with various tops: classic spherical, conical, decorative, modern flat. Tops are made from the same species as the post, ensuring color and texture unity. Posts with increased cross-section (120×120, 150×150 millimeters) can be manufactured for large-scale staircases or prestigious interiors, where massiveness emphasizes solidity.
For staircases with treaded steps, STAVROS offers standard curved handrails (90-degree turns with radii of 800, 1000, 1200 millimeters) and custom curved handrails. Curved handrails are produced by laminating and subsequent profiling, ensuring strength, shape stability, and absence of internal stresses. Species for curved handrails: oak, ash, beech, larch — species that readily bend and retain shape for decades.
STAVROS technical support includes consultation on railing design: calculation of required number of balusters and posts, determination of support post locations, selection of element cross-sections according to loads, recommendations on fastening methods for different stair types (on stringers, on landing beams, cantilever, spiral). For complex projects, a specialist may visit the site for measurements and technical solution development.
Fastening elements in STAVROS assortment: adjustable and non-adjustable metal base plates (for support posts), wooden dowels of various diameters (8, 10, 12 millimeters), special concealed screws, threaded rods for disassemblable structures, polyurethane wood glue (provides water-resistant joints, does not degrade under humidity fluctuations).
Final finishing of balusters and posts is performed at STAVROS factory upon customer request: transparent varnishing (2-4 layers of polyurethane varnish with intermediate sanding), oil finish (2-3 layers of oil with wax, natural matte appearance), toning (color change while preserving texture), patination (artificial aging), opaque painting. Delivery without finish (only sanding) is possible for customer’s own final treatment — saving 100-300 rubles per element.
Element packaging ensures protection during transport: each baluster and post is wrapped in protective film, placed in sturdy cardboard boxes or wooden crates with padding, marked by quantity and weight. For distant regions, packaging is reinforced with additional moisture protection. Delivery to any region of Russia: own transport in Moscow and surrounding areas, logistics companies across Russia with optimal route and cost calculation.
Warranty onThe warranty from STAVROS covers 12 months for manufacturing defects. The warranty covers cracking and warping of wood (if caused by insufficient drying, not improper use conditions), peeling of the coating (if applied by the manufacturer), and deviation from stated dimensions. In the warranty period, defective elements are replaced free of charge.Correctly designed and high-quality manufactured balusters and posts — this is safety for decades. This is an architectural element defining the character of the staircase and the entire interior. This is an investment that pays off with a long service life without problems, repairs, or replacements. Massive support posts, securely fastened at key points, create a rigid frame. Frequent balusters, rhythmically filling the space, create a visual barrier and decorative pattern. The handrail, smoothly curved at turns or straight on landings, provides hand support and completes the composition.
Connection nodes — lower attachments to steps, upper connections to the handrail, handrail-to-post joints — are stress concentration points requiring special attention. Dowel joints on quality glue, bolted connections through washers, slots in the handrail, combined methods with redundancy — the choice of method depends on the type of element (baluster or post), installation location (straight section or turn), and loads. Cutting corners on fasteners is unacceptable — a loose railing is dangerous.
Architecture of railings on complex sections — turns through landings or winder steps — requires understanding of geometry, constructive logic, and aesthetic principles. Support posts are installed at points of direction change, creating visual accents and constructive nodes. Curved handrails follow the turn, ensuring continuity of the line. Balusters maintain verticality or follow a logical slope rule, creating a rhythmic pattern without chaos.
The longevity of railings — the result of proper material selection, quality manufacturing, reliable installation, and regular maintenance. A walnut railing with quality lacquer finish and bolted connections will last 80–100 years with minimal maintenance — dust wiping, coating renewal every 10–15 years, bolt tightness checks every few years. A pine railing with oil finish and dowel connections will last 30–50 years with regular care — oil renewal every 3–5 years, re-gluing weakened joints, protection from excessive humidity.
Balusters and posts made of wood
ChoosingBalusters and posts made of woodUnderstanding the architecture of railings — hierarchy of elements, roles of posts and balusters, construction of connection nodes, characteristics of turns and winder steps — transforms purchasing from an impulsive choice based on a picture into a conscious decision. You understand why a support post must be massive, why bolted connections through washers are more reliable than dowels, why curved handrails cost more than straight ones, why winder steps require special craftsmanship. This knowledge allows you to choose correctly, avoid mistakes, and obtain a result that will serve for decades without problems.
A staircase with quality baluster and post railings — this is the heart of the home, its vertical axis, the connecting link between floors. This is an element seen daily, touched hundreds of times, which must be reliable, comfortable, and beautiful. Investing in quality railings pays off with peace of mind, safety, and aesthetic pleasure for many years. And every time you ascend the stairs or simply admire its elegance, you will thank yourself for the right choice — for quality, reliability, and beauty.
The staircase with quality baluster and post railings is the heart of the home, its vertical axis, the connecting link between floors. It is an element seen daily, touched hundreds of times, which must be reliable, comfortable, and beautiful. Investing in quality railings pays off with peace of mind, safety, and aesthetic pleasure for many years. And every time you ascend the stairs or simply admire its elegance, you will thank yourself for the right choice — for quality, reliability, and beauty.


