Article Contents:
- What is molding and bагет: terminology and functions
- Profiles: from minimalism to baroque
- Wood: tactility and nobility
- Flat moldings: graphic purity
- Decorative moldings: relief and shadows
- Corner elements: protection and decoration
- Wood species for moldings
- Polyurethane: technological sophistication and versatility
- Quick assembly of compositions: advantages of casting
- Geometric stability: independence from climate
- Lightweight and Simplified Installation
- Ready-made corner elements: precision without trimming
- Standard panels: decorative panel systems
- 2D panels: planar geometry
- Bouazeri: classical three-part system
- Mirror fields: reflections within framing
- Joining with baseboards and casings: system unity
- Profile compatibility
- Color coordination
- Height ratios
- Installation without chipping: flawless technology
- Tool: cutting precision
- Marking: millimeter precision
- Adhesive: fixation technology
- Joints: art of invisibility
- Finishing: enamel, patina, multi-layer techniques
- Enamel on wood: covering beauty
- Patina: nobility of age
- Multi-layer techniques on polyurethane
- Material consumption and joints: practical mathematics
- Formula for calculating panel systems
- Allowance for trimming and joints
- Accounting for standard lengths
- FAQ: answers to common questions
- Conclusion: The Graphics of Perfection

Interior is the language of lines, proportions, rhythms. And among all tools for creating visual harmony, a special place is occupied byWooden moldingand polyurethane profiles — thin strips that create the graphics of space, divide planes into segments, frame, emphasize, accent. This is surgical precision in interior architecture, where a millimeter determines whether the composition will be flawless or compromised. Let's explore the technologies, materials, and techniques for creating that very graphic clarity which distinguishes a professional interior from an amateur one.


What is trim and molding: terminology and functions
In the professional lexicon of designers and carpenters, the terms 'trim' and 'molding' are used to denote thin decorative strips, but they have their nuances.
Trim — is a narrow strip (usually 10–40 mm wide, 8–15 mm thick), used for creating frames, dividing planes, decorating joints.Wooden moldingIt can be flat (rectangular cross-section), decorative (with relief profile), corner (for finishing edges and corners).
The functions of trim are diverse. It is the framing of panels in doors and furniture facades — trim creates a frame within which a panel (inserted panel) is located. It is the division of wall panels into separate fields — a classic boiserie technique, where the wall is divided by trim into rectangular segments, each of which can have its own finish. It is the decoration of mirrors, paintings, decorative inserts — trim creates an elegant frame that highlights the central element.
Molding — a term originating from frame production. Originally, molding referred to a profiled strip used to make frames for paintings and mirrors. In modern interior design, molding often refers to any decorative profile with relief used for framing.
wooden molding by the meterIt is sold by the linear meter and used to create custom-sized frames, frame panels, mirrors, wall compositions.
Staple — the simplest type of trim, a strip with rectangular or slightly rounded cross-section, used for securing glass in windows, doors, stained glass.wooden trimIt presses the glass against the frame, creating a sealed and aesthetically pleasing connection.


Profiles: from minimalism to baroque
The profile of trim determines its stylistic and visual impact.
Flat profile (rectangular cross-section) — minimalist, strict, modern. Creates clear graphic lines without shadow transitions. Width of such trims — from 10 to 30 mm, thickness — 8–12 mm. Used in modern interiors, Scandinavian style, minimalism.
Half-round profile (ovolo) — classic, soft, traditional. Creates a smooth shadow line, visually softens joints. Diameter from 12 to 25 mm. Used in neoclassical interiors, Provence, country style.
Decorative profile — with curves, ovals, steps, ornaments. Creates complex play of light and shadow, richness of detail. Width up to 50 mm, relief height up to 10–15 mm. Used in classical interiors, baroque, empire.
Corner profile — a special cross-section shape (usually L-shaped or beveled), intended for finishing external corners of furniture, wall panels, architectural elements. Protects corners from damage, creates decorative framing.
Our factory also produces:


Wood: tactility and nobility
Wooden trims and moldings — this is the choice of those who value naturalness, the possibility of multiple renewals, material value of the interior.
Get Consultation
Flat trims: graphic purity
FlatBuy wooden trimwhich can be made from oak, beech, ash — this is a universal tool for creating modern compositions. Typical sizes: 10×10, 15×10, 20×12, 30×15 mm (width×thickness).
Application of flat trims is diverse. Framing MDF or gypsum panels on walls — trim is mounted around the panel perimeter, creating a clear boundary. Dividing large planes into segments — on a smooth 4×3 meter wall, flat trims create a grid of 80×120 cm rectangles, visually structuring the space. Decorating furniture facades — surface-mounted trims on smooth cabinet doors create relief, imitating panel construction.
Advantage of wooden flat trims — possibility of perfect fitting. Wood is easy to cut, sand, and fit with precision down to tenths of a millimeter. Joints are practically invisible with proper installation.
Decorative trims: relief and shadows
wooden veneer with a decorative profilewith profile — this is no longer just a plane divider, but a full-fledged decorative element. Milled profile creates play of light and shadow, volume, visual complexity.
Typical decorative profiles for trims: ovolo (half-round convexity), ogee (S-shaped curve), roundel (cylindrical protrusion), concave (concave arc), combined profiles (combination of several elements).
Decorative trims are used in classical interiors to create boiserie — traditional French paneling systems. The wall is divided by decorative trims into rectangular fields, each field can be painted in a different color, covered with wallpaper, or filled with fabric. Trims create a three-dimensional frame around each field.
Also, decorative trims are used to frame mirrors, paintings, decorative panels. Wooden decorative trim, painted gold or silver, creates a museum frame effect.
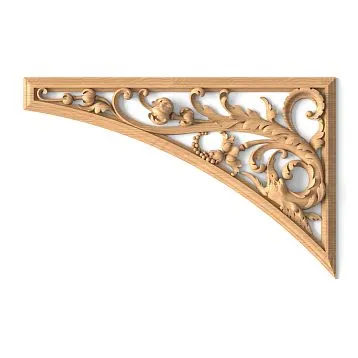
Corner elements: protection and decoration
Wooden corner veneerHas a special profile for mounting on external or internal corners. An external corner profile is usually L-shaped or beveled at 45 degrees on both sides. It is fitted onto the corner of furniture, wall panels, or columns, protecting it from scratches and creating a decorative trim.
An internal corner profile often has a concave shape and is used to conceal the junction of two planes meeting at a 90-degree angle. For example, when connecting a wall panel and ceiling, an internal corner profile creates a smooth transition, hiding any possible irregularities at the joint.
The advantage of wooden corner profiles is durability and ease of repair. If damaged, a corner profile can be easily replaced without affecting the main structure.
Wood species for corner profiles
The same wood species used for other interior trim — oak, beech, ash, pine, linden — are used for corner profiles. The choice of wood is determined by the interior style, budget, and requirements for strength.
Oak — for elite classic interiors. Expressive texture, high hardness, durability. Oak corner profiles last for decades and can be repainted or restored multiple times. Price is high, but justified by quality.
Beech — for projects where a smooth surface and toning capability are important. Beech corner profiles, after oiling and varnishing, look elegant with a delicate texture. Price is 20-30% lower than oak.
Ash — for interiors requiring an expressive texture (similar to oak but more graphic) at a more affordable price. Ash is light-colored with a contrasting ring pattern.
Pine — for projects with limited budgets or for corner profiles intended for covering paint (texture will be hidden). Pine corner profiles are 3-4 times cheaper than oak, but require careful selection (without knots or resin pockets).
Linden — for carved corner profiles and ornamental moldings. Linden is soft, easy to cut, ideal for hand carving. Used to manufacture moldings with rich decoration.
Polyurethane: technological and universal
Buy polyurethane moldingsToday, anyone who wants to quickly create complex decorative compositions on walls without spending on expensive wood and complicated installation can do so.
Quick composition sets: advantages of molding
Polyurethane corner profiles and moldings are produced by injection molding, allowing the creation of incredibly complex profiles with fine details. What would require hours of hand carving in wood can be reproduced in seconds using injection molding.
Collections of polyurethane moldings include hundreds of profiles of different widths (from 20 to 250 mm), relief heights (from 3 to 50 mm), and styles (from minimalist to baroque). For most models, ready-made corner elements, rosettes, and consoles are available, allowing complex compositions to be created using standard elements without custom manufacturing.
Geometric stability: independence from climate
Polyurethane is completely inert to humidity and temperature. A profile installed at 40% humidity will retain its exact dimensions even if humidity rises to 80%. Wood under such conditions expands by 0.5-1%, which for a 2-meter profile means a dimensional change of 1-2 mm. This may seem minor, but at joints, it will create visible gaps.
For rooms with variable humidity (kitchens, bathrooms, unheated verandas), polyurethane corner profiles are the optimal choice.
Lightweight and simplified installation
A polyurethane corner profile weighs 6-8 times less than a wooden counterpart of the same size. A 2-meter plank 30 mm wide weighs 50-80 grams versus 400-600 grams for wooden. This simplifies installation — lightweight elements are attached only with glue, without mechanical fasteners. Special polymer adhesives provide instant bonding, no long clamping required.
Ready-made corner elements: precision without trimming
For most polyurethane molding models, ready-made internal and external corner elements are produced. These are cast parts where the molding profile is already formed at a 90-degree angle. Simply glue the corner, attach straight sections to it — fast, simple, perfect.
Ready-made corners are especially valuable for complex ornamental profiles, where precise pattern alignment after cutting at 45 degrees is practically impossible by hand.
Typical layouts: decorative panel systems
Corner profiles and moldings are used to create typical decorative schemes — systems for dividing walls into fields, framing, and accents.
2D Panels: planar geometry
The simplest system — creating rectangular or square panels on a flat wall using corner profiles. On painted or wallpapered walls, corner profiles are glued to form frames.
Typical layout: a 4×3 meter wall is divided into 6 panels, each 1.2×1.4 meters (2 panels horizontally, 3 vertically). For framing, a flat profile 20×10 mm or a decorative profile 30-40 mm wide is used. Panels can be the same color as the wall (monochrome scheme, where profiles create relief and shadows) or contrasting (profiles white, wall colored, or vice versa).
Variation: panels of different sizes, asymmetrical composition. The central panel is large (2×2 meters), side panels are smaller (0.8×1.5 meters). This creates dynamism and focuses attention on the center.
Bouazery: classic three-part system
Bouazery — a traditional French wall paneling system, where the wall is divided horizontally into three parts: lower panel (panno), middle zone (main wall field), upper frieze.
The lower panel (height 80-120 cm from the floor) is framed by moldings forming rectangular fields. The fields are filled with wooden panels, painted in contrasting colors, and covered with fabric. The horizontal molding at the junction between the lower panel and the middle zone serves as a dividing cornice.
The middle zone may be smooth (simply painted) or also divided by moldings into vertical panels. A classic approach is symmetrical tall panels (width 60-80 cm, height 180-220 cm), visually raising the ceiling.
The upper frieze (60-80 cm from the ceiling) is a narrow horizontal band, framed above by the ceiling cornice and below by a horizontal molding. Often, the frieze is painted the same color as the lower panel, creating a visual frame for the middle zone.
Mirror fields: reflections framed
Mirror panels framed by moldings or a picture frame — an effective way to expand space. A mirror (usually rectangular or square) is mounted on the wall, and a wooden or polyurethane molding is applied around its perimeter, forming a frame.
Variants: one large mirror (1.5×2 meters) with a wide picture frame (width 80-100 mm), creating an illusion of a window or portal. A composition of several mirrors of different sizes, each in its own molding frame, creating an asymmetrical dynamic composition. A mirror panel made of many small mirrors (20×30 cm each) in moldings forming a regular grid.
Joining with baseboards and door casings: system unity
Moldings and trim do not exist in isolation — they are part of the interior trim system, including baseboards, door casings, and cornices. Harmony is achieved when all elements match in style, profile, and color.
Profile matching
If baseboards and door casings have a decorative profile with a molding, wall moldings should ideally have a similar profile. This creates visual unity, a 'family' feel among elements.
Many manufacturers produce trim collections where baseboards, door casings, moldings, and wall moldings share a unified design code — similar profiles, proportions, and details. Using elements from the same collection guarantees harmony.
Color coordination
Color scheme options: a single color for all trim elements (classic approach, creating unity), contrasting solutions (e.g., white moldings and baseboards on colored walls), gradient schemes (dark baseboards, medium door casings, light moldings — creating vertical color gradation).
Height relationships
Proportion rule: wall moldings are usually narrower than baseboards and door casings. If baseboards are 80 mm, door casings 70 mm, wall moldings — 30-50 mm. This creates visual hierarchy, where baseboards and door casings are primary framing elements, moldings are secondary, dividing elements.
Exception: in boiserie, where moldings play the main role, their width may be comparable to baseboards (60-100 mm).
Installation without chips: flawless technology
The quality of molding installation determines 90% of the final impression. Any chip, gap, or joint misalignment is immediately noticeable to the eye and spoils the overall look.
Tool: precision cutting
To cut wooden moldings, use a miter saw with a fine-tooth blade (60-80 teeth). A coarse-tooth blade leaves a ragged edge and chips. A fine-tooth blade gives a clean cut, especially on ends.
Critical: precision of the cut angle. For butt joints (at 45 degrees), even a 0.5-degree deviation will result in a visible gap over a 1-meter length. Use a miter saw with a laser guide and stops — this ensures repeatable accurate angles.
For polyurethane moldings, the same miter saw is suitable, but the blade must be fine-toothed (for plastic). You can also cut with a metal hacksaw — slowly, but cleanly.
Marking: millimeter precision
Before installing moldings, walls or surfaces are marked with millimeter precision. A laser level (projects perfectly horizontal and vertical lines), a long metal rule (2-3 meters), pencil, or chalk line are used.
Typical panel marking scheme: the central axis of the wall (vertical line down the middle) is determined, and panels of the required size are marked symmetrically from it. It is important that panels are symmetrical relative to the center — this creates visual harmony.
All intersections of moldings are marked on the wall with dots. During installation, moldings are precisely positioned according to these marks.
Adhesive: fixation technology
Wooden moldings are attached using construction adhesive ('liquid nails', polyurethane adhesive) or combined — adhesive + finish nails without heads (driven with an air gun, practically invisible).
Adhesive is applied in dots on the back of the molding (dots 5-10 mm in diameter, spaced 15-20 cm apart) or in a thin snake-like line. The molding is pressed against the wall and secured with painter’s tape or light nails until the adhesive sets (2-4 hours).
Polyurethane moldings are attached only with adhesive — special polymer adhesives (Orac Decor FDP500, Decomaster) provide instant fixation. Adhesive is applied in a thin line on the back, and the molding is pressed against the wall for 30-60 seconds. No additional fixation is required.
Joints: art of invisibility
Straight joints (joining two moldings on a straight section) are done butt-to-butt with adhesive applied to the ends. For wooden moldings, use carpenter’s PVA or butt joint adhesive; for polyurethane moldings, use a special butt joint adhesive that 'welds' the ends.
Corner joints (90 degrees) are made with a 'bevel' cut — each piece is cut at 45 degrees, forming a right angle when joined. Critical: angle accuracy, cut cleanliness, tight fit. Even the slightest gap is noticeable. After joining, the joint is filled with acrylic sealant, and excess is wiped off with a damp cloth.
For complex ornamental polyurethane moldings, pre-made corner pieces are used — this guarantees perfect pattern alignment.
Finishing: enamel, patina, multi-layer techniques
The final finish of the moldings determines their visual perception and integration into the interior.
Enamel on wood: covering beauty
Enamel finish hides wood texture, creating a smooth, colored surface. Water-based acrylic enamels are used — eco-friendly, odorless, with excellent adhesion to wood.
Enamel painting technique for wooden moldings: sanding (abrasive 240-320 grit, removing burrs, leveling surface), priming (acrylic primer, filling pores), intermediate sanding (320-400 grit, removing raised fibers), 2-3 enamel coats with intermediate light sanding.
White enamel — classic for moldings. White moldings on colored walls create clear graphics, visually structuring the space. Colored enamels allow creating accents — bright moldings on neutral walls or tonal solutions (moldings in tones darker or lighter than the wall).
Patina: the nobility of antiquity
Patina — an artificial aging technique, creating an antique furniture effect. Classic scheme: base light layer (ivory, light gray, white), over which a dark patina (brown, black, green) is applied, then partially worn away.
Patina remains in profile grooves, highlighting every relief detail. On raised parts, the light base shows through, creating an effect of wear from time and touch.
Patina is ideal for decorative moldings in classic interiors. A wooden molding with patina looks expensive, prestigious, and creates an atmosphere of tradition and history.
Multi-layer techniques on polyurethane
Polyurethane moldings — ideal base for complex decorative finishes. After base enamel application, a second layer of different color can be applied with partial wear (dry brush technique), creating a multi-layer effect. Metallic paints (gold, silver, bronze) can be applied to raised relief parts — resulting in a gilded effect.
Crackle technique (creating cracks on surface) is also applicable to polyurethane moldings. Special crackle lacquer is applied between two layers of different colors; upon drying, it forms cracks through which the lower layer shows through.
Material calculation and joints: practical mathematics
Correct calculation of required molding quantity is critical for budget and avoiding work stoppages.
Formula for panel systems calculation
The formula for calculating moldings for wall panels is:
Total molding length = (Number of horizontal lines × Wall width) + (Number of vertical lines × Wall height)
Example: wall 4×3 meters, panels 1×1.2 meters (4 panels horizontally, 3 vertically).
Horizontal lines: 4 (top, bottom, and 2 intermediate dividers between 3 rows) × 4 meters = 16 meters
Vertical lines: 5 (left edge, right edge, and 3 intermediate dividers between 4 columns) × 3 meters = 15 meters
Total: 16 + 15 = 31 linear meters of moldings
Allowance for cutting and joints
Always add allowance:
-
10-15% for cutting and bevel joints (45-degree angles produce more waste than straight cuts)
-
5% for possible defects, damage, or cutting errors
For our example: 31 meters + 15% = 35.7 meters. Round up to 36 meters.
Accounting for standard lengths
Moldings are sold in standard lengths: 2000, 2400, 3000 mm. Plan cutting to minimize waste.
For the example wall, it's optimal to buy moldings 3000 mm long (to match wall height, verticals without joints) and 2000 or 4000 mm (for width, horizontals). If buying only 2400 mm, horizontal moldings will need to be joined (4 meters = two 2-meter pieces), adding visible joints.
FAQ: answers to frequently asked questions
How does molding differ from molding?
Formally, molding is a general term for any decorative profile. Skirting is a more specific term, usually denoting thin strips (up to 40-50 mm wide) for framing panels, dados, or creating frames. Molding often refers to wider profiles (from 50 mm) used for decorating walls, ceilings, or creating architectural details. In practice, these terms are often used interchangeably.
Can wooden skirting be glued onto wallpaper?
Yes, but there is a risk. If the wallpaper is on paper-based, dense, and well-adhered to the wall — wooden skirting (light, narrow) will hold. But if the wallpaper is on non-woven backing, heavy, or poorly adhered — under the weight of the skirting, it may peel off from the wall. It is safer to glue skirting onto painted walls or primed wallpaper.
How to calculate the amount of skirting for a mirror?
Perimeter of the mirror + 10-15% reserve. For example, a 1x1.5 meter mirror, perimeter = (1+1.5)×2 = 5 meters. With reserve — 5.5-6 meters. If skirting is mitered at corners, each corner consumes approximately the width of the skirting. For 50 mm wide skirting, 4 corners consume 20 cm, which is already accounted for in the reserve.
Which is cheaper — wooden skirting or polyurethane molding?
Polyurethane molding is 40-70% cheaper than wooden skirting at initial purchase. A simple 30 mm polyurethane skirting costs 100-200 rubles/m, a similar wooden one from beech — 200-400 rubles/m, from oak — 350-600 rubles/m. But you must consider painting (mandatory for polyurethane). In the end, polyurethane is 30-50% cheaper than beech wooden skirting and 50-70% cheaper than oak.
How to avoid chipping when cutting skirting?
Use a fine-toothed blade (60-80 teeth for wood, special for plastic for polyurethane), cut with the front side up (chips, if any, will be on the back side), do not press down on the material during cutting (let the saw cut by itself, without forcing), for especially valuable skirting, apply painter’s tape at the cut location (it prevents fiber tearing).
Can wooden panels be used in humid areas?
Yes, but with limitations. Choose moisture-resistant species (oak, larch), coat with moisture-resistant lacquer in 3-4 layers, ensure good ventilation. For areas of direct water contact (bathrooms) — definitely polyurethane. In bathrooms with good exhaust ventilation, wooden skirting is acceptable.
How to fix a gap at the skirting joint?
Small gaps (up to 1 mm) are filled with acrylic sealant in the skirting color. Sealant is applied into the gap, smoothed with a wet finger, excess is wiped immediately. After drying, the gap is almost invisible. If the gap is larger than 2 mm — this is a mounting error, the joint needs to be redone (re-cut at the correct angle).
How long does paint take to dry on skirting?
Acrylic paints dry "to the touch" (can be gently touched) in 1-2 hours, full drying — 12-24 hours. Mounted skirting can be installed 24 hours after the final paint layer. Full coating strength is achieved after 7 days — during this time, avoid mechanical impact and intensive cleaning.
Conclusion: the graphic perfection
Skirting and molding — this is surgical precision in interior design. A millimeter here determines everything. Perfectly straight lines, flawless joints, exact proportions — this is what creates the feeling of professionalism, completion, attention to detail. The choice between wood and polyurethane is determined by project goals, budget, and usage conditions. Wood is where naturalness, tactile quality, the possibility of multiple renewals, and material prestige matter. Polyurethane is where moisture resistance, installation speed, ornament complexity, and affordable price are critical.
Modern approach — not "either-or", but "both". Wooden skirting on visible, tactile elements (cabinet facades, lower panels of boiserie), polyurethane on upper zones, ceiling compositions, in humid areas. This is a synergy of materials, where each operates in its zone of maximum efficiency.
Company STAVROS has been specializing in producing premium solid wood trim for over 15 years, offering a wide range of skirting, molding, and trim profiles for any design task. The catalog features more than 50 skirting profiles of various widths (from 10 to 80 mm), shapes (flat, decorative, corner), and species (oak, beech, ash, pine, linden).
In-house high-tech production with four-sided milling machines ensures ideal skirting geometry (tolerance ±0.2 mm), clean edges, and precise profiles. Kiln-dried wood to 8-10% moisture content guarantees material stability and prevents deformation during use in heated rooms.
Multi-stage sanding of skirting (final abrasive finish 280-320 grit) creates a perfectly smooth surface, ready for painting or lacquering without additional preparation. This saves time and guarantees high-quality finish results.
STAVROS experts will help select the optimal solution for your project: calculate the required amount of skirting considering panel layout and cutting allowance, recommend the optimal profile for your interior style, select the wood species based on budget and usage conditions, and advise on installation and finishing techniques.
Custom manufacturing services allow you to obtain skirting with non-standard profiles according to the client’s drawings. CNC milling machines reproduce any profile with accuracy to 0.1 mm. Coloring, lacquering, and patina services allow you to receive skirting fully ready for installation, in the desired color and finish.
Delivery across Russia, professional packaging (skirting is packed in special pallets with protective padding to prevent deformation during transport), quality guarantee — STAVROS creates conditions for implementing projects of any complexity. Choosing STAVROS means investing in that exact graphic clarity, millimeter precision, visual perfection that distinguishes a true professional interior from merely beautiful.