Article Contents:
- Chemistry of interaction: why not all paints are suitable
- Hazardous components
- Safe bases
- Surface preparation: the foundation of quality painting
- Assessment of element condition
- Surface cleaning
- Repairing defects
- Sanding
- Masking adjacent surfaces
- Priming: the invisible layer that determines quality
- Functions of Primer
- Choosing primer
- Priming technique
- Choosing paint: chemistry and aesthetics
- Types of paint for polystyrene
- Gloss, satin, or matte finish
- Color solutions
- Paint tinting
- Painting tools: choice of professionals
- Brushes
- Rollers
- Sprayers
- Additional tools
- Technique for painting ceiling profiles
- Painting before vs after installation
- Work area preparation
- Applying the first coat
- Inter-layer treatment
- Applying the second coat
- Finishing
- Technique for painting floor baseboards
- Features of preparation
- Choosing paint for floor baseboards
- Application technique
- Protective coating
- Decorative techniques: from patina to effects
- Patination
- Two-tone painting
- Metallic Coatings
- Crackle effect
- Imitating marble, wood, stone
- Gradient and ombre
- Stencil patterns
- Coating Protection and Care: Longevity for Decades
- Protective Coatings
- Time for Full Curing
- Regular maintenance
- Recoating
- Typical mistakes and how to avoid them
- Error 1: Incorrect Paint Selection
- Error 2: Lack of Primer
- Error 3: Poor Surface Preparation
- Error 4: Thick Paint Layers
- Error 5: Rushing Between Coats
- Error 6: Painting at Unsuitable Temperature
- Error 7: Using Dirty Tools
- Error 8: Insufficient Paint Mixing
- Error 9: Painting in One Coat
- Error 10: Removing Painter’s Tape After Full Drying
- Error 11: Painting Under Direct Sunlight
- Error 12: Ignoring Material Acclimatization Time
- FAQ: answers to common questions
- Conclusion

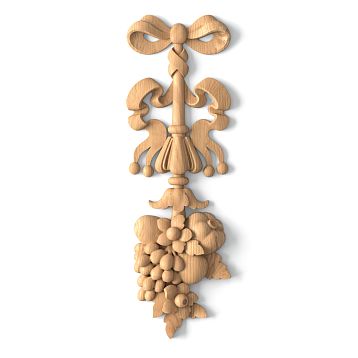
Painting decorative elements is the final note in the symphony of interior design. It is precisely at this stage that plain whitePolystyrene baseboard paintabletransforms into a fully-fledged design element, harmoniously fitting into the overall concept of the room. The quality of painting affects not only aesthetics but also the durability of decorative elements, their resistance to dirt, mechanical damage, and fading.
Many consider painting a simple task — take a brush, dip it in paint, and stroke the surface. However, a professional result requires knowledge, patience, and adherence to technique. An incorrectly selected paint may damage polystyrene, improper application technique will cause streaks and unevenness, and lack of preparation will lead to coating delamination. This article will reveal all the secrets of professional painting of polystyrene elements — from material selection to final finishing.
QuestionCan you paint a polystyrene baseboard?The answer is unequivocal: not only can it be done, but it must be done. Painting protects the material from ultraviolet rays and contamination, gives the interior a finished look, and allows adapting the decor to any color scheme. Modern paints create a durable, long-lasting coating that serves for decades without losing quality.


Chemistry of Interaction: Why Not All Paints Are Suitable
Polystyrene — a thermoplastic polymer sensitive to certain chemical compounds. Solvents contained in some paints react with polystyrene, destroying its molecular structure. The material softens, deforms, and loses relief definition. In the worst case, the element completely dissolves, turning into an amorphous mass.


Hazardous Components
Acetone — an aggressive solvent that instantly destroys polystyrene. Acetone-based paints are strictly prohibited.
Toluene and xylene — aromatic hydrocarbons used as solvents in alkyd and some polyurethane paints. Slower than acetone, but equally destructive to polystyrene.
White spirit — a mineral solvent. In high concentrations, it damages polystyrene, causing softening and deformation.
Nitrocellulose solvents — a mixture of active components in nitro paints. Extremely dangerous for polystyrene.
Our factory also produces:

Safe Bases
Water — the ideal solvent for paints intended for polystyrene. Water-emulsion and water-dispersed paints are absolutely safe.
Aliphatic alcohols (ethanol, isopropanol) in low concentrations do not damage polystyrene. Permissible in primers and paints.
Cellulose ethers — safe film-forming agents in some specialized paints for plastics.
The rule is simple: choose water-based paints or specialized paints for plastics and polystyrene. Check the labeling — it must clearly indicate "for polystyrene," "for expanded polystyrene," or "solvent-free."
Get Consultation
Surface Preparation: Foundation for Quality Painting
The quality of the final coating depends 70% on preparation. Paint does not hide defects — it emphasizes them. Every unevenness, scratch, or fingerprint will become visible after painting, especially under a glossy finish.
Assessment of Element Condition
Inspection. Carefully examine each element. Look for:
-
Scratches and dents from transportation and installation
-
Adhesive and sealant marks on the front surface
-
Uneven joints between elements
-
Fingerprints and dirt marks
Cleanliness test. Run a white cloth over the surface. If marks remain, cleaning is required.
Adhesion check. If elements were previously painted and require repainting, check the strength of the old coating. Apply painter’s tape to a section of old paint and sharply peel it off. If the paint flakes off, complete sanding down to the substrate is required.
Surface cleaning
Dust removal. Use a vacuum cleaner with a soft attachment to remove dust from textured elements. Wipe the surface with a dry microfiber cloth.
Degreasing. Fingerprints and oily stains prevent adhesion. Wipe the surface with:
-
Warm water + dishwashing liquid (1 tablespoon per liter)
-
70% Isopropyl alcohol (for heavy stains)
-
Special plastic degreaser
Wipe with a cloth soaked in the solution, then with a clean damp cloth to remove detergent residue. Dry completely.
Removing adhesive marks. If mounting adhesive has contacted the surface, remove it mechanically — gently scrape it off with a plastic putty knife. Remove residue with a degreaser. Do not use solvents.
Filling defects
Joints between elements. All joints, corner connections, and wall junctions must be filled with acrylic sealant. Choose white sealant marked 'paintable'.
Apply sealant in a thin bead using a cartridge gun. Level with a damp rubber putty knife or finger dipped in soapy water. Goal: create a smooth transition without visible edges. Wipe away excess immediately with a damp sponge.
Allow the sealant to dry according to instructions (usually 6–12 hours). Do not rush painting — wet sealant may shrink, making the seam visible.
Dents and scratches. Fill with interior acrylic putty. Apply with a rubber putty knife, slightly overfilling the defect. After drying (4–6 hours), sand flush with the surface using fine-grit sandpaper (180–220 grit).
Deep damage. For chips and deep dents, use two-component epoxy putty. It is stronger than acrylic and does not shrink. Mix components according to instructions, apply to the defect, level. After full curing (24 hours), sand smooth.
Holes from fasteners. If self-tapping screws were used during installation, fill the recesses above the heads with putty. Apply with a slight mound, then sand after drying. If needed, apply a second layer — the first may shrink.
Sanding
Sanding creates microtexture necessary for mechanical adhesion of primer and paint. Use fine sandpaper — 180–220 grit for primary sanding, 320–400 for finishing.
Sanding technique. Use light, circular motions without heavy pressure. Goal: create a matte surface, not remove material. Especially carefully sand textured elements — excessive pressure will flatten decorative details.
For flat surfaces, use a sanding block — sandpaper wrapped around a wooden block. This ensures even pressure and flat sanding.
For textured moldings, sand by hand, following the ornament contours. Use small pieces of sandpaper folded in half — this makes it easier to reach recesses.
Dust removal after sanding. Mandatory step. Dust from sanding interferes with adhesion. Remove most dust with a vacuum, then wipe the surface with slightly damp microfiber cloth. Allow to dry completely before priming.
Masking adjacent surfaces
If the elements are already mounted, protect adjacent surfaces from soil and paint.
Painters' tape. Apply high-quality painter's tape along baseboards and moldings on walls and ceiling/floor. Press firmly, especially the edge of the tape—paint must not seep here.
Use UV-protective tape if painting will take several days—regular tape left in sunlight leaves glue marks. Remove the tape immediately after painting, while the paint is still wet, for a smoother edge.
Protective film. Lay down polyethylene film or special protective paper under baseboards on the floor. Secure with painter's tape. This protects the floor covering from accidental drips.
Covering paper. Cover furniture and items that cannot be moved with protective film or paper.
Priming: an invisible layer that determines quality
Many skip priming, considering it unnecessary. This is a serious mistake. Primer performs critical functions without which quality painting is impossible.
Functions of primer
Improved adhesion. Primer creates an intermediate layer between polystyrene and paint. Its molecules bond with both polystyrene and paint, ensuring strong chemical bonding.
Evening out absorption. Polystyrene has low porosity but is uneven. Joints and spackled areas absorb paint differently than the base material. This causes uneven coating. Primer evens out absorption, ensuring uniformity of the finish layer.
Surface strengthening. Primer penetrates micropores, binds surface particles, creating a stronger base for paint.
Paint savings. A primed surface requires fewer paint layers to achieve coverage. Paint does not penetrate deeply, remaining on the surface, creating an even coating.
Anti-corrosion protection (for specialized primers). Some primers contain additives that protect against mold, fungi, and UV radiation.
Primer selection
Acrylic primers—universal solution for polystyrene. Water-based, fast-drying, good adhesion. Suitable for acrylic and latex paints. Examples: "Optimist", "Tex Universal", "Dulux".
Plastic primers—specialized formulations with enhanced adhesion to polymer surfaces. Ideal for polystyrene. More expensive than universal primers, but provide maximum coating durability.
Adhesion primers—contain components that improve bonding to smooth surfaces. Suitable for polystyrene, especially if previous paint was absent.
Primer-paint—combined formulation combining primer and paint. Convenient for quick work, but inferior in quality compared to separate application of primer and paint.
STAVROS, in cooperation with leading manufacturers of decorative elements such as Hi Wood (HiWood, Хай Вуд, Хайвуд), recommends using high-quality primers from reputable brands. Saving on primer leads to problems with the finish coating.
Priming technique
Primer preparation. Thoroughly mix the primer before use. If the consistency is too thick, dilute with water according to the manufacturer's instructions (usually up to 10% of volume). Do not over-dilute—this reduces coverage and protective properties.
Tool selection:
-
Brush—for narrow profiles, relief elements, hard-to-reach areas
-
Roller—for wide flat baseboards and moldings
-
Sprayer—for large volumes and perfectly even coverage
Brush application. Use a synthetic-bristle brush 40–60 mm wide for baseboards, 20–30 mm for narrow moldings. Dip the brush into primer to one-third the bristle length, then wipe off excess against the can’s edge.
Apply primer in a thin, even layer along the profile of the element. Use smooth, gentle strokes without heavy pressure. The goal is to create a thin film, not a thick layer. A thick layer takes longer to dry, may drip, and form runs.
For relief elements, the brush must penetrate into ornament recesses. Use tapping motions—gentle taps with the brush tip to fill recesses.
Roller application. For wide flat baseboards, a short-pile roller (5–10 mm) is effective. Pour primer into a paint tray, roll the roller over the textured surface of the tray for even distribution.
Roll the roller over the baseboard surface without heavy pressure. Ensure no buildup occurs at the edges. Use a brush to touch up recesses and edges.
Sprayer application. Professional method providing perfectly even coverage. Requires an airless sprayer or aerosol can.
Set the spray gun to fine atomization. Pressure - 2-3 atmospheres for water-based primers. Distance to surface - 20-30 cm. Movements should be smooth, parallel, with 50% overlap of previous passes.
Apply in thin layers - two or three thin layers are better than one thick layer. Allow 15-20 minutes between layers for solvent to evaporate.
Quality control. After applying the primer, inspect the surface at an angle. The primer should form an even layer without gaps, runs, or pooling. Re-apply primer with a brush to any missed areas.
Drying. Allow the primer to dry completely. Drying time is specified in the instructions - typically 2-6 hours for acrylic primers. Do not proceed with painting over an un-dried primer, as this will result in defects.
Primer sanding (optional). For a perfectly smooth finish, lightly sand the primed surface with fine-grit sandpaper (320-400 grit). This removes micro-roughness and raised fibers. After sanding, be sure to remove dust.
Second layer of primer (if necessary). If uneven absorption spots are visible after the first layer, apply a second layer. This is especially important when painting in dark, saturated colors — the primer creates a uniform base, preventing mottling.
Paint selection: chemistry and aesthetics
Paint for polystyrene baseboardsmust meet several criteria: safety for the material, durability of the coating, aesthetic qualities, ease of application.
Types of paint for polystyrene
Acrylic water-emulsion paints — optimal choice for most cases. Base — water dispersion of acrylic resins. Advantages:
-
Completely safe for polystyrene
-
Odorless, eco-friendly
-
Quick drying (2-4 hours between layers)
-
Easy to apply with brush, roller, or spray gun
-
Wide color range
-
Affordable price
Disadvantages:
-
Moderate abrasion resistance (suitable for ceiling elements, less so for floor baseboards)
-
Require 2-3 coats for full coverage
Examples: "Dulux Diamond", "Tikkurila Euro", "Caparol Samtex", "Benjamin Moore Aura".
Latex paints — improved version of acrylics. Contain latex additives that enhance coating elasticity and durability. Advantages:
-
All the advantages of acrylic paints
-
Enhanced resistance to abrasion and washing
-
Elastic coating, resistant to micro-cracks
-
Ideal for floor baseboards
Disadvantages:
-
Price 20-40% higher than acrylics
Examples: "Tikkurila Harmony", "Dulux Trade", "Sherwin-Williams ProClassic".
Alkyd enamels — traditional oil-based paints on alkyd resins. Can be used on polystyrene, but with caution. Advantages:
-
Very durable, glossy finish
-
High resistance to abrasion and moisture
-
Rich colors
Disadvantages:
-
Contains solvents (low concentrations, but risk exists)
-
Strong odor when applied
-
Long drying time (24 hours between layers)
-
Yellowing over time (white turns cream-colored)
If choosing alkyd enamel, perform a test on an inconspicuous area - apply a drop of paint, wait 30 minutes. If polystyrene has not softened, the paint is safe. Examples of safe alkyd paints: "Tikkurila Imperia", "PF-115 Enamel without odor".
Specialized paints for plastics - developed specifically for polymer surfaces. Contain enhanced adhesion additives. Advantages:
-
Maximum adhesion to polystyrene
-
Durable, long-lasting coating
-
Resistance to UV radiation
Disadvantages:
-
Limited color range
-
High price
-
Not always available in regular stores
Examples: "Kudo for Plastic", "Rust-Oleum Specialty", "Krylon Fusion".
Aerosol paints - convenient for small volumes and complex relief elements. Advantages:
-
Ease of application
-
Perfectly even coating without brush marks
-
Fast drying
Disadvantages:
-
High price per liter of paint
-
Difficult to control consumption
-
Requires protection of the room from aerosol
For polystyrene, choose aerosols marked "for plastic" or "acrylic". Examples: "Kudo", "Montana", "Bosny".
Gloss, semi-gloss, or matte
The gloss level affects the appearance and practicality of the coating.
Glossy paints (gloss over 60%). Create a shiny, reflective surface. Advantages:
-
Vibrant, saturated colors
-
Highlight decorative element relief
-
Easy to clean
-
Resistant to stains
Disadvantages:
-
Reveal any surface defects
-
Require ideal surface preparation
-
May create glare
Application: classic interiors with moldings, rooms with high hygiene requirements (kitchens, bathrooms).
Satin (semi-gloss) paints (gloss 30-60%). The golden middle. Light sheen without excessive gloss. Advantages:
-
Balanced aesthetics
-
Hide minor defects
-
Practical in maintenance
-
Universal for most interiors
Disadvantages:
-
Less expressive than glossy
Application: universal solution for residential spaces, offices.
Matte paints (gloss less than 10%). Create a velvety surface without shine. Advantages:
-
Noble, refined texture
-
Hide surface defects
-
Do not reflect glare
-
Visually soften the space
Disadvantages:
-
Less resistant to washing and abrasion
-
Accumulate dirt in pores
Application: classic interiors, bedrooms, living rooms, low-traffic areas.
ForPainting of polystyrene skirting boardsFor floor applications, semi-gloss or gloss paints are recommended — they are resistant to abrasion. For ceiling elements, any type is suitable, including matte.
Color Solutions
White — classic that never goes out of style. Refreshes the interior, visually expands the space, harmonizes with any colors. For white, choose paints marked "super white" or "ultra white" — they do not yellow over time.
White shades — ivory, cream, milk, pearl. Create warmth and softness, suitable for classic and vintage interiors.
In wall color — visually elongates walls, making ceilings appear higher. The boundary fades, making the space seem larger. Suitable for rooms with low ceilings.
In ceiling color (for ceiling elements) — creates a unified surface, visually raising the ceiling. Often used with colored ceilings + skirting boards of the same color.
In floor color (for floor skirting boards) — expands the space horizontally, creates a visual continuation of the floor covering. Popular with wooden floors — skirting boards are painted to match parquet or laminate.
Contrasting — creates graphic effect, clearly defines architecture. Popular schemes:
-
Black skirting board on white walls (Scandinavian, minimalism)
-
Dark gray on light gray walls (modern style)
-
Gold/silver on white (neoclassical, art deco)
Vibrant colors — bold choice for accent interiors. Blue, green, red skirting boards can become design highlights. Requires a delicate sense of balance.
Paint tinting
Most paints are sold in base white. To achieve the desired shade, tinting is used — adding colored pigments.
Machine tinting - performed in the store on special equipment. Advantages: color accuracy, repeatability, wide palette. Select the color from the catalog (RAL, NCS), and the operator will add the required amount of pigment.
Manual tinting - you add tint to the paint yourself. Advantages: flexibility, ability to create a unique shade. Disadvantages: difficult to reproduce the color when purchasing the next can.
For manual tinting: add tint gradually, thoroughly mixing. Apply a test patch on cardboard, let it dry - the color after drying differs from the wet one. Add more tint if necessary.
Important: tint the entire volume of paint for the project at once. Reproducing the exact shade manually is practically impossible.
Painting tools: choice of professionals
Tool quality directly affects the result. Cheap brushes leave bristles, cause streaks, and wear out quickly. Professional tools last for years, providing perfect coverage.
Brushes
Flat brushes - wide (40-100 mm). For painting wide flat baseboards. Create even coverage without streaks.
Radiator brushes - narrow (20-30 mm), with long handles, often curved. Convenient for painting baseboards behind radiators and in hard-to-reach areas.
Panel brushes - very narrow (10-20 mm), round. For painting recesses, small details, and edges.
Brush bristle material:
-
Synthetic (nylon, polyester) - for water-based paints. Do not absorb water, retain shape, durable.
-
Natural bristles - for alkyd paints. Absorb solvents, ensuring smooth application.
-
Mixed bristles - versatile, but inferior to specialized brushes.
For acrylic and latex paints, choose synthetic brushes. A quality brush has a dense bristle tuft, bristles of varying lengths (for better paint pickup), and a conical shape (thinner bristles at the tip).
Rollers
Foam rollers - for smooth surfaces, provide even coverage without texture. Disadvantage - leave micro-bubbles, and over time, they break down.
Velvet rollers - short, dense bristles. Ideal for semi-gloss and gloss paints, providing smooth coverage.
Rollers with 5-10 mm bristles - for matte paints, create a light texture.
Size. Mini-rollers 100-150 mm wide with 30-40 cm handles are convenient for baseboards.
Always use a paint tray with a ribbed surface - the roller is rolled out on it for even paint distribution and excess removal.
Sprayers
Electric paint sprayers - professional equipment. Types:
-
HVLP (High Volume Low Pressure) - high volume, low pressure. Minimum mist loss, economical.
-
Airless (no air) - high pressure. Fast work, suitable for large volumes.
For home use, a household electric paint sprayer with 400-600 W power is sufficient. Price - 3000-8000 rubles. Payback at volumes of 50 linear meters of baseboards.
Aerosol cans - for small volumes, repair work. Convenient, but expensive per liter of paint.
Additional Tools
Painting tape - for protecting adjacent surfaces. Choose quality tape with UV protection that does not leave adhesive residue.
Paint trays - with ribbed surface for roller rolling.
Paint mixer - attachment for drill for mixing. Essential for large volumes - manual mixing is inefficient.
Sandpaper - grit 220-320 for interlayer sanding.
Protective gear - gloves, goggles (when using a spray), respirator (if paint has odor).
Cloths and sponges - for removing drips, cleaning tools.
Solvent - for cleaning tools. For water-based paints, water is sufficient; for alkyd paints, use white spirit.
Painting technique for ceiling profiles.
What paint to use for polystyrene ceiling skirting boards.We've decided - acrylic or latex paints. Now about the application technique.
Painting before vs after installation.
Before installation. Advantages:
-
Convenience - elements are painted horizontally on a table or sawhorses.
-
Accessibility - you can paint all surfaces, including the back side.
-
Cleanliness - no need to protect the ceiling and walls.
-
Speed - you can use a spray without restrictions.
Disadvantages:
-
Joints and seams require touch-up after installation.
-
Risk of coating damage during transportation and installation
-
Difficult to match the exact color when touch-up joints.
After installation. Advantages:
-
Joints are painted immediately, no visible seams.
-
Uniform coverage along the entire length.
-
No need to worry about protection during installation.
Disadvantages:
-
Inconvenience - working at height, under the ceiling.
-
Need to protect the ceiling and walls.
-
Limitations in tool selection (spray is difficult to apply).
Recommendation: for simple smooth profiles, paint after installation. For complex relief elements, spray before installation, with touch-up of joints after mounting.
Workplace Preparation
If painting after installation, prepare a ladder or scaffolding for comfortable work. The height should be such that the ceiling skirting board is at eye level — this makes quality control easier.
Protect the ceiling and walls with painter's tape. Apply tape 1-2 mm from the edge of the skirting board — this ensures a clean edge. Cover the floor with protective film.
Ensure good lighting. Use a portable light or headlamp — they reveal unpainted areas.
Application of the first layer.
With a brush. Use a flat brush whose width matches the height of the skirting board (for a 10 cm skirting board, use a 60-80 mm brush). Dip the brush into paint to one-third the length of the bristles, then lightly press excess paint against the edge of the can.
Start with corners and joints — these are the most difficult areas. Use a fillet brush to paint recesses, relief grooves, and joint lines. Then use a flat brush to cover the main surface.
Move along the profile smoothly at a constant speed. Do not press down on the brush—paint should transfer with light contact. Ensure no drips form along the bottom edge of the skirting board.
Use a roller. For wide, smooth skirting boards, a mini-roller is effective. Roll paint into the tray, wipe off excess on the ribbed surface. Roll the roller along the skirting board without heavy pressure.
Problem areas—corners, joints, textured sections—touch up with a brush. A roller cannot reach into recesses.
Spray (if painting before installation). Place elements horizontally on sawhorses with 20–30 cm gaps. Set the spray gun: pressure 2–3 atm, medium-width spray pattern.
Spray from 25–30 cm away, with smooth, parallel movements and 50% overlap. Apply a thin layer—thick layers cause drips. The first layer is a base coat; do not aim for full coverage.
Quality control. After application, inspect the coating from various angles. Look for missed spots, unevenness, or drips. Immediately touch up missed areas. Wipe drips with a brush while paint is still wet.
Interlayer Processing
After the first layer dries (2–4 hours for acrylics), evaluate the result. Usually visible:
-
Uncovered recesses in textured areas
-
Color unevenness (stains, brush streaks)
-
Raised fibers (if surface was poorly sanded)
Light sanding (optional). If surface is rough, lightly sand with fine-grit sandpaper (320–400 grit). Use light, pressure-free motions. Goal: remove roughness, not remove paint.
After sanding, remove dust with a damp microfiber cloth, then allow to dry.
Applying the second layer
Technique is the same as for the first layer, but the goal is different—create a uniform, opaque finish.
Apply paint in a thinner layer than the first. Avoid pooling—second layer should be a finishing, leveling coat.
For rich dark colors, a third layer may be needed. Avoid achieving opacity with thick layers—three thin layers are better than one thick layer.
Final finishing
After the final layer dries (24 hours), evaluate the result. The coating should be uniform, without spots, streaks, or uncovered areas.
If defects remain, touch up locally with a fine brush. Apply an additional layer if necessary.
Remove painter’s tape while paint is still wet (within 2–4 hours after the final coat). If removed after full drying, paint may peel off along with the tape.
Painting technique for floor skirting boards
Floor skirting boards experience greater wear—contact with shoes, furniture, cleaning equipment. Requirements for coating durability are higher.
Preparation specifics
Floor skirting boards are often installed after all work is complete, when the room is already dirty with construction dust. Thorough cleaning is critical.
Vacuum the skirting boards, then wipe with a degreasing solution. Pay special attention to the bottom edge, where dust accumulates.
Choosing paint for floor skirting boards
Recommended: latex or acrylic paints marked 'washable' or 'durable'. Sheen: semi-gloss or gloss. Matte paints for floors are unsuitable—they wear out quickly.
Application technique
Protect the floor. Apply painter’s tape tightly along the skirting board to the floor. If the floor is already laid (laminate, parquet), be cautious—some tape types leave marks on the finish.
Alternative: plastic or metal putty knife. Press the knife tightly against the skirting board, then paint with a brush along the knife. The knife protects the floor from paint.
Painting order. Start at the top edge of the skirting board and move downward. This prevents accidental drips from spoiling already painted surfaces.
Paint textured elements first, then the flat front surface, and finally the bottom edge.
The lower edge is a problematic area. Here, paint may seep under the skirting board, forming drips. Use a semi-dry brush — minimal paint, light touch.
Alternative — before painting, place a thin plastic sheet under the lower edge. After painting, carefully remove it. The drips will remain on the sheet.
Number of coats. For floor skirting boards, at least 3 coats of latex paint are recommended for maximum coating durability.
Protective Coating
For additional protection of floor skirting boards in high-traffic areas (hallways, entryways), apply a finishing protective coating — acrylic or polyurethane varnish.
Choose a water-based varnish compatible with acrylic paints. Apply in thin layers with a brush or roller 24 hours after final painting. The varnish will create a hard, wear-resistant surface.
Decorative techniques: from patina to effects
Simple one-color painting is far from the only option. Decorative techniques transform an ordinary skirting board into a work of art.
Patina
Creating an antique molding effect. A contrasting patina is applied over the base coat, remaining in recesses to simulate aging over time.
Gold patina. Base color — white or cream. After full drying, apply gold paint (acrylic or water-based) with a fine brush into the recesses of the relief. Wipe off excess on raised parts immediately with a dry cloth.
Effect: raised areas light (base color), recesses gold. Creates an illusion of gilded molding.
Dark patina. Base color — white or light. Patina — dark brown, gray, black. Dilute dark paint with water 1:3. Apply to the relief, immediately wipe with a damp cloth, leaving paint only in recesses.
Effect: darkening in recesses, as if from accumulated dirt and time. Characteristic of vintage and shabby-chic interiors.
Contrasting patina. Base color — gray, beige. Patina — white. Creates the reverse effect — light recesses, dark raised areas.
Two-color painting
Base color on the main surface, contrasting on relief elements.
Technique. Paint the entire element with the base color in 2 coats, let dry. Then, using a fine brush, paint the relief details with the contrasting color. Requires precision and steady hands.
Options:
-
White base, gold/silver relief (classic, neoclassical)
-
Gray base, white relief (Scandinavian, modern)
-
Black base, bronze relief (art deco)
Metallic finishes
Metal imitation — gold, silver, bronze, copper.
Paints. Use acrylic metallic paints or special compositions for gilding/silvering.
Technique. Base coat — primer or covering paint of similar shade (for gold — ochre, for silver — gray). After drying, apply metallic paint in 2 thin coats.
Patté — imitation of gold leaf. Thin sheets of metallic film applied to special glue-mordant. Complex technique producing a real gilding effect. Used in prestigious interiors where maximum authenticity is required.
Crackle effect
Effect of cracked old paint. Special crackle varnishes are used.
Technique. Base paint layer (usually dark), drying. Apply crackle varnish, partial drying. Top coat (light). As the top layer dries, it cracks, revealing the lower layer. This creates a network of cracks imitating old paint.
Complex technique requiring experience. But the result is impressive — effect of centuries-old antique molding.
Imitation of marble, wood, stone
Special paints and techniques allow creating an illusion of expensive materials.
Marbling. Base color — white or light gray. While not yet dry, randomly apply several strokes of dark gray and black paint. Blot out with a sponge or brush to create marble-like veins.
Wood imitation. Use special paints with wood pigment or a comb technique. Base layer - light brown or ochre. After partial drying, run a comb with bristles to create wavy lines mimicking wood texture.
Alternative - special paints with a wood effect. Applied in one layer; texture forms naturally upon drying due to special additives.
Stone imitation. Sponging - a technique of applying paint with a sponge. Base color - gray or beige. Dip the sponge into a darker paint, blot it on paper (to remove excess), and lightly apply to the surface. Creates a texture resembling stone.
For granite effect, use 3-4 shades of gray, applying them alternately with a sponge. Finish with fine black paint splatters using a toothbrush (to mimic inclusions).
Gradient and ombre
Smooth color transition from dark to light or from one shade to another
Technique. Prepare 3-4 shades of one color - from darkest to lightest. Apply the darkest shade to the lower part of the skirting board, the lightest to the upper part. Paint the transition zone (middle) with intermediate shades, blending the edges with a wet brush.
Work quickly while the paint is still wet. Result - smooth transition without visible edges.
Stencil patterns
To create repeating ornaments, use stencils.
Technique. Paint the skirting board with a base color, let it dry. Place the stencil and secure it with painter’s tape. Apply contrasting paint with a sponge or spray. Remove the stencil - a clear pattern remains on the surface.
You can use ready-made stencils or make your own from thick plastic or cardboard.
Coating protection and maintenance: longevity for decades
Correct painting is only the beginning. The longevity of the coating depends on subsequent care and protection.
Protective coatings
Acrylic lacquer. Transparent protective coating based on water. Applied over dried paint (after 24-48 hours). Creates a hard film protecting against abrasion, moisture, and dirt.
For floor skirting boards, use wear-resistant lacquers marked 'for floors'. Choose gloss level depending on paint - matte lacquer for matte paint, glossy for glossy paint.
Apply with a brush or roller in thin layers. For maximum protection - 2 coats with 4-6 hours drying time between coats.
Polyurethane lacquer. More durable than acrylic. Creates an exceptionally durable coating. But more expensive and has a slight odor during application. Use only water-based polyurethane lacquers - solvent-based ones may damage polystyrene.
Wax. For classic interiors where authenticity is needed. Special decorative waxes (antique wax, patina wax) are applied to painted surfaces and rubbed in with a soft cloth. Creates a soft satin sheen and protects against moisture and dirt.
Wax requires periodic renewal (every 1-2 years), but provides a unique tactile surface and elegant appearance.
Full curing time
Paint dries to the touch in 2-4 hours, but full curing (polymerization) takes 7-14 days. During this period, the coating is vulnerable:
-
Avoid mechanical contact
-
Do not wash painted elements
-
Do not place furniture directly against painted surfaces
-
Ventilate the room to speed up curing
After 2 weeks, the coating reaches full strength and is ready for use.
Regular Maintenance
Dry cleaning. Weekly, remove dust with a soft dry microfiber cloth or vacuum cleaner with a soft attachment. Dust is abrasive and gradually wears down the coating.
Wet cleaning. Once a month, wipe painted elements with a damp (not wet!) microfiber cloth using neutral cleaning agent. Dish soap is suitable - 1 tablespoon per liter of warm water.
Wipe with a damp cloth, then with a clean damp cloth to remove cleaning residue, and dry thoroughly. Avoid prolonged contact with water.
Removing stains. Wipe fresh stains immediately with a damp cloth. For dried stains, soften with soapy water and gently rub with a soft sponge.
Protection against mechanical damage. Use felt pads on furniture legs. Do not drag heavy objects along baseboards. Install protective mats in hallways.
Protection against UV radiation. Direct sunlight causes fading. Use curtains or blinds on the sun-exposed side. Paints with UV filters significantly increase durability.
Even high-quality coatings lose their freshness over time. Signs of needing renewal:
Recoating
Fading color
-
Yellowing on white surfaces
-
Scratching in contact areas
-
Micro-scratches, abrasions
-
Stains that cannot be cleaned
-
Partial repainting. Local defects (scratches, stains) should be touched up locally. Clean the area, lightly sand it, and apply 1-2 thin coats of paint with a brush.
Difficulty - selecting the exact shade. If the original paint remains, use it. If not, you will need to re-color, and achieving an exact match is difficult.
Full repainting. When significant loss of appearance occurs, full renewal is required.
Preparation: Wash with degreaser, lightly sand (320 grit), remove dust, prime (if old coating is heavily worn).
Painting: 2 coats of new paint using the primary coating technique.
Repainting in another color: White can be repainted to any color without problems. Dark to light requires a 2-3 coat primer, followed by finish paint.
Error 1: Incorrect paint selection
Typical mistakes and how to avoid them
Even experienced craftsmen sometimes make mistakes. Knowing typical problems helps prevent them.
Problem: Using paints with solvents. Polystyrene softens, deforms, and loses its relief. In the worst case - complete destruction.
Solution: Always check paint composition. Use only water-based acrylic, latex paints, or specialized paints for plastics. If unsure - test on an inconspicuous area.
Error 2: Lack of primer
Problem: Paint applies unevenly, creates spots, does not adhere well, peels off.
Solution: Always prime the surface. Primer is mandatory, not optional. Saving 100-200 rubles on primer results in ruined work.
Error 3: Poor surface preparation
Problem: Dirt, glue residue, and unevenness are visible under paint. The coating looks uneven.
Solution: Thorough cleaning, degreasing, sanding, and filling defects. Preparation should take 50% of the total work time.
Error 4: Thick paint layers
Problem: Runs, long drying time, cracking during curing, loss of relief detail.
Solution: Better 3 thin coats than 1 thick one. Thin coats dry quickly and provide a smooth, defect-free finish.
Error 5: Rushing between coats
Problem: Applying the next coat on an un-dried previous one. Paint mixes, forming lumps, unevenness, and spots.
Solution: Strictly follow the inter-coat drying time specified by the manufacturer. Usually 2-4 hours for acrylic paints. It’s better to wait longer than to ruin the work by rushing.
Solution: Strictly observe the intercoat drying time specified by the manufacturer. Usually 2-4 hours for acrylic paints. It is better to wait longer than to ruin the work by rushing.
Error 6: Painting at inappropriate temperature
Problem: Paint dries incorrectly at temperatures below +5°C or above +30°C. Defects form, adhesion is compromised.
Solution: Optimal painting temperature is +15...+25°C, humidity 40-60%. Do not paint in unheated rooms in winter or in hot weather without air conditioning.
Error 7: Using dirty tools
Problem: Residues of previous paint, dried clumps, bristles get into fresh coating, causing defects.
Solution: Thoroughly wash brushes and rollers after each use. Check tool cleanliness before work. New brushes should be "combed" — remove loosely held bristles.
Error 8: Insufficient paint mixing
Problem: Pigments and binder separate during storage. Unmixed paint gives uneven color and inconsistent coverage.
Solution: Mix paint for at least 2-3 minutes with a stick or mixer before use. Stir periodically during painting.
Error 9: Painting in one coat
Problem: Desire to achieve coverage in one pass. Thick layer is applied, causing runs and defects. Or gaps remain, base shows through.
Solution: Plan at least 2 coats. First — base, thin. Second — covering, finish. For saturated colors — 3 coats.
Error 10: Removing painter’s tape after full drying
Problem: Paint peels off with the tape, forming uneven edges.
Solution: Remove tape 1–2 hours after applying the final coat, when paint has set but not fully dried. Pull tape at 45° angle with slow, smooth motion.
Error 11: Painting under direct sunlight
Problem: Paint dries too quickly, doesn’t have time to spread. Brush marks and unevenness form.
Solution: Work in shade or under diffused light. If window faces the sun — shade it or paint in the evening.
Error 12: Ignoring material acclimatization time
Problem: Cold paint from basement, cold elements from outdoors. Condensation forms during application, paint fails to adhere.
Solution: Bring paint and elements into the work area at least one day before painting. All materials must be at room temperature.
FAQ: answers to frequently asked questions
Are polystyrene baseboards and moldings necessarily painted?
No, they are supplied white and can be used without additional painting. However, painting protects against dirt, UV radiation, allows color matching with interior palette, and extends service life.
How many paint coats should be applied?
Minimum 2 coats. First — base, second — covering. For saturated dark colors — 3 coats. Each layer must be thin.
How long should I wait before applying the next coat?
For acrylic and latex paints — wait 2–4 hours (exact time specified on packaging). For alkyd — wait 24 hours. Do not rush — an un-dried layer will ruin the work.
Can I paint already installed elements?
Yes, most professionals paint after installation — seams become invisible. Protect adjacent surfaces with painter’s tape.
How does ceiling and floor trim paint differ?
Floor trim experiences greater load and requires more durable paint — latex wear-resistant. Ceiling trim requires only standard acrylic paint.
Can baseboards be painted a different color?
Yes. White is easily repainted in any color. Dark to light requires a preliminary covering primer in 2-3 coats.
Is sanding between coats necessary?
Not mandatory, but recommended for an ideal result. Light sanding with 320-grit sandpaper removes roughness and improves adhesion of the next layer.
Why is paint peeling off?
Main causes: poor preparation (dirt, grease), absence of primer, incompatible paint (with solvents), application on a wet layer.
How to achieve a perfectly even finish without brush marks?
Use a high-quality synthetic-bristle brush, apply thin coats, work quickly along the profile. Or use a spray gun — it provides the smoothest finish.
How long after painting can baseboards be washed?
Full paint curing — 7-14 days. Avoid wet cleaning before this time. Afterward, you can clean with a damp cloth and mild cleaning agents.
Conclusion
Painting and finishingPolystyrene baseboard paintable— is an art accessible to everyone. Following the technology, choosing the right materials, patience, and care guarantee a professional result.
QuestionCan you paint a polystyrene baseboard?— has a clear positive answer. Moreover, painting is not only permissible — it is recommended for protecting the material and creating a finished interior.Paint for polystyrene baseboardsIt must be water-based — acrylic or latex, without aggressive solvents.
TechnologyPainting of polystyrene skirting boardsIncludes mandatory stages: thorough surface preparation, priming, applying a minimum of two thin paint coats with proper inter-coat drying time. Each stage is important — skipping any reduces the final result quality.
ChoosingWhat paint to use for polystyrene ceiling skirting boards.Depends on the finish requirements. For ceiling elements, standard acrylic paint with the required gloss level is sufficient. For floor baseboards, latex wear-resistant paints are recommended, providing maximum protection against abrasion.
Decorative techniques — patina, metalization, marble and wood effects — transform a simple polystyrene element into a work of decorative art. They require certain skills, but the result is worth it — a unique interior with individual character.
STAVROS Company, in partnership with leading manufacturers of decorative elements such as Hi Wood (HiWood, Хай Вуд, Хайвуд), guarantees high-quality products perfectly suited for painting. Smooth surface without defects, precise geometry, quality material — all this ensures an excellent final finish result.
Properly painted polystyrene elements last for decades, maintaining an impeccable appearance. They require no complex maintenance — just regular dry cleaning and periodic wet cleaning. Refreshing the coating every 7-10 years restores the original freshness.
Investing time in quality painting creates an interior that will delight with beauty and longevity. Polystyrene baseboards and moldings, after professional painting, visually match expensive plaster moldings, yet significantly surpass them in practicality, water resistance, and ease of maintenance. This is a sensible choice for those who value the combination of aesthetics, quality, and affordability.