


Article Contents:
- 1. What is a room mood board?
- 1.1 Definition and Essence
- 1.2 Why do you need a room mood board?
- 2. Preparation for Creating a Room Mood Board
- 2.1 Defining the goal and concept
- 2.2 Researching the Space and Personal Preferences
- 3. Gathering Materials for the Mood Board
- 3.1 Searching Online Resources
- 3.2 Traditional Sources and Personal Observations
- 3.3 Collecting Tactile Materials
- 4. Systematization and Selection of Materials
- 4.1 Classification by categories
- 4.2 Selection of key elements
- 5. Arranging the Room Mood Board
- 5.1 Choosing the Working Format
- 5.2 Composition Principles
- Balance and Harmony
- Contrast and Unity
- Iterative Process
- 6. Final Refinement and Feedback
- 6.1 Break and fresh perspective
- 6.2 Obtaining Feedback
- 7. Practical Tips and Creative Ideas
- 7.1 Be Bold and Experiment
- 7.2 Pay Attention to Details
- 7.3 Continuous Updates and Refinements
- 7.4 Share Your Ideas
- 8. Conclusion
In the world of interior design, every element matters, and every detail can set the tone for the entire space. When it comes to creating a unique, cozy, and functional interior, one of the most effective tools is the room mood board. This visual board is not just a collection of images, textures, and color swatches, but a true guide to bringing to life the dream of an ideal space. In this article, we will thoroughly examine what a room mood board is, why it is needed, and how to step-by-step create a composition that will become the foundation for designing your room. We will share practical tips, creative ideas, and inspiring approaches so that you can create a mood board that reflects your individuality and style.


1. What is a room mood board?


1.1 Definition and Essence
A room mood board is a visual collage that combines images, color palettes, texture samples, furniture, decorative elements, and even small details that together create the atmosphere, character, and mood of a specific interior. It is not just a random collection of pictures, but a carefully thought-out composition in which each element contributes to creating a unified visual narrative.
● Visual Representation of the Idea: The mood board allows you to visually represent how the future space will look even before starting work.
● Communication Tool: It helps the designer convey their vision to the client and obtain feedback, significantly simplifying the project approval process.
Action Plan: The mood board becomes the starting point for selecting materials, furniture, color schemes, and other elements needed to decorate the room.
Our factory also produces:


1.2 Why is a room's mood board needed?
● Visualization of the concept: It is often difficult to convey an abstract mood or idea through words. A mood board allows you to "show" the future result, making ideas more understandable and tangible.
● Time and resource savings: A well-thought-out visual concept helps avoid unnecessary revisions and rework, as all key decisions are made early on.
● Client alignment: When the client sees the completed mood board, it is easier for them to approve the overall style, understand which materials and colors will be used, and make adjustments before implementation begins.
● Finding inspiration: Creating a mood board stimulates creative thinking and helps gather all the best ideas in one place, which may lead to unexpected yet harmonious combinations.
Get Consultation
2. Preparation for creating a room's mood board
2.1 Defining the goal and concept
Before starting work on the mood board, it is important to clearly define what you want to see in your room:
● What mood or atmosphere do you want to create?
It could be a cozy nook, a modern minimalist space, or an eclectic mix of different styles.
● What functionality will the room have?
The room may be a bedroom, living room, home office, or children's room. Each space requires an individual approach to material selection and decoration.
● Which stylistic directions inspire you?
Determine which design trends or elements you want to use: Scandinavian minimalism, industrial style, art deco, or something entirely unique.
Practical tip: Write down all your ideas and associations in a notebook. Create a list of key words, such as "cozy," "light," "spacious," "warmth," or "modern." These words will serve as your guide when selecting visual materials.
2.2 Researching the space and personal preferences
Before starting to collect images, inspect the space you plan to furnish:
● Analysis of the current state:
If it is an existing room, pay attention to its features: size, lighting, architectural elements. This will help understand what changes are possible and which elements need to be preserved.
● Personal preferences:
Think about which colors, textures, and shapes you like. Review your old photos, saved images, and even items that inspire you. Personal style is the foundation of a successful design.
Tip: Take photos of the current state of the room and its surroundings to later compare them with the selected images for the mood board.
3. Collecting materials for the mood board
3.1 Searching online resources
In the digital age, the internet provides an inexhaustible source of ideas:
● Pinterest:
Create thematic boards dedicated to different aspects of interior design: furniture, textures, color palettes, decorative elements. Save images you like and return to them later.
● Instagram:
Follow profiles of renowned designers, interior bloggers, and relevant hashtags to stay updated on the latest trends.
● Design portals (Behance, Dribbble):
These platforms allow you to see professionals' work and find unconventional solutions for your space.
Tip: Save materials into separate collections: one for color palettes, another for textures, and a third for furniture and accessories. This will simplify the subsequent work of assembling the mood board.
Don't forget about classic methods:
● Design magazines and catalogs:
Here you can find unique solutions and ideas that are not always available on the internet.
Walking around the city, visiting museums, exhibitions, as well as simply appreciating the beauty of nature can provide unforgettable impressions.
● Personal observations:
Walking around the city, visiting museums, exhibitions, and simply appreciating nature's beauty can create unforgettable impressions.
● Archives and vintage albums:
Retro elements can add character and uniqueness to your mood board.
Practical tip: Create a special notebook for notes and photos, where you can capture your ideas at the moment they appear. This can be either a physical notebook or a digital archive.
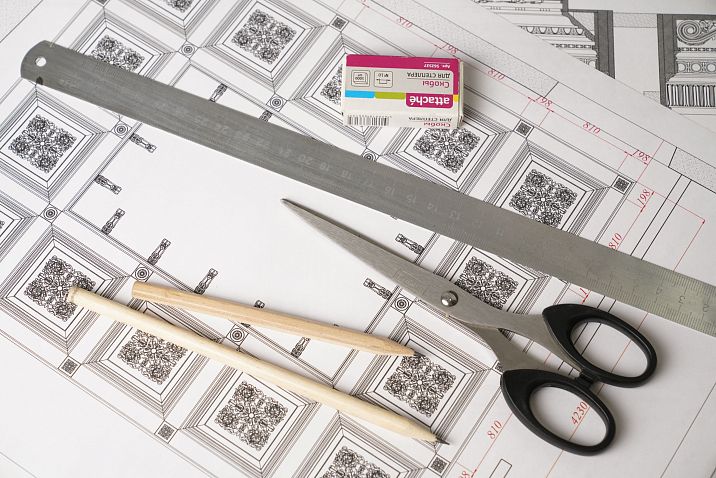
3.3 Collecting tactile materials
If you are working on interior design, it is important not only visual, but also tactile perception:
● Fabric and material samples:
Collect fabric swatches, wallpaper samples, panels, tile or wood samples. These elements will help you visualize how different surfaces will combine in the room.
● Physical textures:
Feel the material by touch, assess its quality, texture, and durability.
Tip: Organize your physical collection of samples in a separate album or box, so that you can quickly find and use them in your mood board when needed.
4. Systematization and selection of materials
4.1 Classification by categories
After you have collected many materials, it's time to organize them:
● Color palette:
Break down all images and samples into primary, secondary, and accent colors. This will help create a harmonious palette.
● Textures and materials:
Group all tactile and visual samples: smooth, rough, shiny, matte, etc.
● Functional zones:
If the room has several functional zones (e.g., work area, relaxation zone, play area), distribute materials according to these categories.
Tip: Use digital tools (e.g., tables or specialized programs) to create a clear structure. A physical mood board can be divided using tape or labeled blocks.
4.2 Selection of key elements
From your entire collection, select the materials that most accurately convey your concept:
● Emotional perception:
Which images and textures evoke the desired associations and emotions?
● Compatibility:
Check how well the materials match each other in color, texture, and style.
● Practicality and functionality:
Assess whether the selected materials are suitable for real use in the room.
Detailed advice: Don't be afraid to remove unnecessary elements. A concise moodboard with key details highlighted will be clearer and more effective than an overloaded composition.
5. Room Moodboard Layout
5.1 Choosing the Work Format
Decide whether you will create a moodboard in digital or physical format:
● Digital mood board:
Tools such as Canva, Milanote, Adobe Spark, or Photoshop allow you to easily move elements, scale images, and share the result with your team.
● Physical mood board:
Creating a collage on a large sheet of paper, in an album, or on a poster allows you to experience tactile sensations and adds an extra dimension to the work.
Tip: If possible, use both formats. Create a digital prototype, then transfer it to physical form for final review.
5.2 Composition Principles
When creating a moodboard, it is important to follow several key principles:
Balance and Harmony
● Element Balance:
Arrange images so they create visual balance. Avoid overloading one part of the composition; leave 'white space' to give the eye a rest.
● Information Hierarchy:
Determine which elements are primary (focal points) and which are secondary. Focal elements should immediately capture attention.
Contrast and Unity
● Play with Contrasts:
Combine bright and muted tones, smooth and textured surfaces, strict lines and free forms. Contrast helps highlight important elements, but ensure they harmonize with each other.
● Overall Unity:
Despite the variety of elements, the moodboard should work within a unified stylistic key, reflecting the overall concept and mood.
Iterative Process
● Experiment:
Don't be afraid to rearrange elements and try different layout options. Sometimes the best result emerges after several iterations.
● Compare Variants:
Create several versions of the moodboard, evaluate them, discuss with colleagues, and choose the most harmonious and inspiring one.
Tip: Save intermediate moodboard versions. This will allow you to return to previous ideas if new combinations fail to meet expectations.
6. Final Refinement and Feedback
6.1 Break and Fresh Perspective
After completing the composition, take a break. Step away from the work for several hours or the next day. A fresh perspective will help you identify areas that need adjustment.
● Analyze Final Composition:
Check whether the final moodboard matches your original concept and evokes the desired emotions.
Making adjustments:
If any elements seem unnecessary or, conversely, underdeveloped, don't hesitate to modify or add new details.
6.2 Getting Feedback
Discuss the finished mood board with colleagues, friends, or clients:
● Colleagues and Partners:
Joint discussion will help identify weak points and discover new ideas.
● Clients:
The feedback received will help ensure that the mood board accurately conveys the intended mood and style, and allow necessary adjustments before project implementation.
Tip: Share your mood board on social networks or professional platforms — diverse opinions will help you refine your work.
7. Practical Tips and Creative Ideas
7.1 Be Bold and Experiment
Don't be afraid to try unexpected combinations. Sometimes the most unconventional solutions turn out to be the most effective.
● Blending Different Styles:
For example, try combining elements of modern minimalism with retro accents. This can create a unique and memorable look.
● Using Bright Accents:
Add a few bright details to your mood board that will serve as 'the highlight' of the composition. They can become the central element, setting the tone for the entire space.
7.2 Pay Attention to Details
Every small detail matters:
● Shapes and Lines:
Carefully select images where shapes and lines contribute to creating the desired mood.
● Textures:
Choose samples that you can not only see but also feel. After all, tactile perception plays an important role in creating an atmosphere.
● Color Palette:
Don't be afraid to experiment with shades, but ensure the overall palette remains harmonious.
7.3 Continuous Updates and Refinements
A mood board is a living document that should and can be updated:
● Regularly return to it:
Add new elements, remove outdated ones, and refine the composition.
● Stay Updated with Trends:
The design world is constantly changing, and your mood board should reflect current trends.
7.4 Share your ideas
Communicating with other people can open new horizons:
● Collaboration:
Discuss your ideas with colleagues, join professional communities, and attend workshops.
● Feedback:
Post mood boards on social networks to get audience feedback and be inspired by others' ideas.
8. Conclusion
Creating a room mood board is an engaging and creative process that helps transform abstract dreams into a concrete visual plan. From carefully defining the concept to gathering, organizing, and arranging materials — each stage requires attention to detail and care. Your mood board becomes not only a starting point for implementing a project, but also a reflection of your individuality, creative approach, and unique worldview.
Let each of your mood boards become a source of inspiration, a foundation for future achievements, and a guide into the world of limitless design possibilities. Create boldly, experiment, and remember: every detail matters, and your mood board is the key to creating the perfect room that will delight the eye and inspire new ideas.
If you dream of bringing your boldest ideas to life in interior design and creating a space that is not just functional, but truly inspiring, trust the professionals. STAVROS is a reliable partner in the world of design, helping to turn abstract concepts into real masterpieces.
STAVROS offers comprehensive solutions for interior design, branding, and implementation of projects of any complexity. Their innovative approach, deep understanding of current trends, and attention to every detail will help you create a moodboard that becomes the foundation of your success.
Let each room mood board reflect your soul, be a source of inspiration, and the first step toward realizing your dream of a beautiful and harmonious space. Create boldly, experiment, and discover new dimensions of your creativity!


