Article Contents:
- Anatomy of Stair Railing: Understanding Structural Features
- Key Components of the Railing System
- Material science in the context of installation
- Tool Preparation: The Professional Master's Toolkit
- Essential tools
- Specialized fixtures
- Technological Methods of Mounting: Choosing the Optimal Solution
- Mounting on Metal Studs
- Mounting with Structural Self-Tapping Screws
- Connection using wooden dowels
- Step-by-Step Installation Technology: From Marking to Final Finishing
- Preparation Stage: Precision — The Key to Success
- Preparation of Mounting Holes
- Installing Balusters: Sequence of Operations
- Features of Installation in Various Structural Solutions
- Fastening to Wooden Treads
- Mounting to the Stair Stringer
- Working with Metal Framework Elements
- Quality control and defect elimination
- Checking geometry and strength
- Typical Errors and Ways to Eliminate Them
- Final finishing and protective coatings
- Preparing the surface for finishing
- Choosing and applying protective-decorative coatings
- Ergonomics and Safety of Stair Railing Systems
- Requirements of Regulatory Documents
- Adaptation to User Needs
- Maintenance and Longevity
- Regular care for wooden elements
- Signs of Need for Repair
- Modern Trends in Stair Railing Design
- Minimalist solutions
- Integration of modern technologies
- Economic Aspects of DIY Installation
- Material Cost Calculation
- Comparison with Professional Services
- Conclusion
A wooden staircase without reliable railings is like a picture without a frame — functional, but lacking completeness and safety. Installing Balusters on a Staircase Yourself It is an art where technical precision combines with aesthetic vision. Each vertical post becomes not just a structural element, but part of an architectural ensemble that will serve for decades.
Modern masters know: quality baluster installation determines not only the appearance of the staircase but also the safety of all family members. Properly installed support elements withstand significant loads, ensure railing stability, and create a sense of reliability with every ascent and descent.


Anatomy of Stair Railing: Understanding Structural Features


Key Components of the Railing System
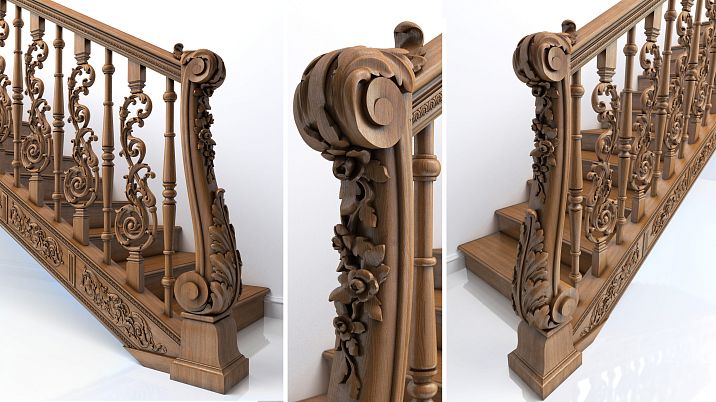
A baluster is a vertical support that connects a step or stringer to the handrail. These elements serve a dual function: providing structural support for the railing and creating a visual rhythm of the stair run. Standard baluster sizes range from 50×50 mm to 60×60 mm in cross-section, with a height of 900 to 1100 mm.
The intermediate rail serves as a connecting element between balusters and the handrail. It evenly distributes the load along the entire length of the railing and allows for hiding mounting hardware. The handrail completes the structure at the top, providing a comfortable hand support and giving the railing a finished appearance.
Our factory also produces:


Material science in the context of installation
Spruce wood, the most popular material for making balusters, has an optimal balance of strength and workability. The moisture content of quality wood should not exceed 8-10%, ensuring dimensional stability after installation. The density of spruce is approximately 520 kg/m³, providing sufficient strength with a relatively light structure.
Hardwood species — oak, beech, ash — require more careful preparation of mounting holes, but provide exceptional durability of connections. Softwood species simplify the installation process but require more careful selection of mounting hardware.
Get Consultation
Tool Preparation: Professional Master's Arsenal
Basic Toolset
A quality drill with a set of wood drill bits of various diameters becomes the primary tool for installing balusters. Drill bits of 5-6 mm are used for preliminary drilling, while bits of 8-10 mm are used to create holes for bolts and dowels.
A circular saw ensures precise angled cuts required for fitting balusters to the staircase’s incline. A laser level or a construction level at least 1 meter long guarantees the vertical alignment of each element. A tape measure, square, and pencil for marking complete the basic set of measuring tools.
Specialized Tools
Clamps of various sizes allow temporary fixation of elements during assembly and ensure tight fitting of parts when gluing. A plumb bob helps control the verticality of balusters at all stages of installation. A hammer with a soft face prevents damage to wood during fitting.
A sander or a set of abrasive paper of various grits is necessary for final surface finishing before applying protective-decorative coatings. Brushes and rollers for applying glue, varnish, and paint complete the tool arsenal.
Fastening Technologies: Choosing the Optimal Solution
Mounting on Metal Bolts
Threaded bolts of 8-10 mm diameter provide the most reliable connection of balusters to the base. This method is especially recommended for support posts subjected to increased loads. A central hole is drilled into the baluster’s end to a depth of 40-50 mm, with a diameter 1-2 mm smaller than the bolt’s diameter.
The bolt is screwed into the baluster using PVA wood glue, which provides additional fixation and prevents spontaneous loosening. The protruding part of the bolt should be 50-70 mm to ensure secure fastening into the tread or stringer.
A hole of 5-6 mm diameter and depth corresponding to the length of the protruding bolt part is drilled into the base. The hole is filled with glue, and the baluster is placed in position. Full curing of the glued joint takes 24 hours.
Fastening with Construction Screws
Screws of at least 8 mm diameter with a flat head provide quick and reliable mounting of balusters to wooden treads. A through hole of 5-6 mm diameter is drilled into the tread, which widens at the bottom to accommodate the screw head’s size.
Wood glue is applied to the baluster’s end, and the element is secured with a screw driven from below the tread. This concealed fastening does not compromise the staircase’s aesthetics and allows for tightening the connection if needed. The hole at the bottom of the tread is covered with a decorative plug.
Connection Using Wooden Dowels
Dowels of 8-12 mm diameter represent a traditional method of connecting wooden elements. This method ensures strong and durable fastening, especially when using quality wood glue. Coaxial holes to a depth of 30-40 mm each are drilled into the baluster’s end and the tread.
The dowel should fit into the hole with slight force, ensuring a tight fit. Wood glue is applied to the dowel and into the holes before installation. The baluster is placed in position and held until the glue fully dries. Such a connection is practically impossible to disassemble without damaging the elements.
Step-by-Step Installation Technology: From Marking to Final Finishing
Preparation Stage: Precision is the Key to Success
Initial marking determines the quality of all subsequent work. On treads, locations for baluster installation are marked according to construction norms: the distance between adjacent baluster centers should not exceed 150 mm. For a 50 mm wide baluster, the optimal spacing is 120-130 mm.
Marking begins at the extreme points of the staircase run. Between support posts, a string is stretched to serve as a reference for determining the position of intermediate balusters. Each mark is checked with a tape measure and square to ensure accurate placement.
Baluster height is calculated individually for each tread, taking into account the staircase’s incline. The standard handrail height is 900 mm above the tread level, but may vary depending on the staircase’s structural features and the client’s preferences.
Preparation of Fastening Holes
Drilling holes requires special care and precision. The hole’s center must be precisely aligned with the baluster’s axis to ensure even load distribution. To prevent wood chipping, a backing board or plank is used.
Hole depth is controlled by a special drill stop or a mark on the drill’s surface. Exceeding the calculated depth may weaken the tread’s structure, while insufficient depth will not ensure reliable fastening.
When drilling hardwood, it is recommended to use lubricant — machine oil or soap solution. This prevents drill bit overheating and ensures clean holes. Drilling is performed at medium speeds with periodic withdrawal of the bit to remove chips.
Baluster Installation: Sequence of Operations
Baluster installation begins with the end support posts, which define the geometry of the entire railing. Each post is installed strictly vertically, checked for level in two planes. Temporary fixation is achieved using braces or clamps.
Intermediate balusters are installed after the final securing of support posts. A string is stretched between posts at the height of the top ends of the balusters, serving as a reference for leveling. Each baluster is checked for verticality and adjusted if necessary.
Glued joints require time to fully cure. During the first day after installation, avoid placing loads on the handrail or applying sudden impacts to the balusters. The optimal temperature for glue setting is 18-22°C with relative air humidity of 50-60%.
Installation Features in Various Structural Solutions
Fastening to wooden treads
Wooden treads with a thickness of at least 40 mm provide a reliable base for attaching balusters. When using bolts, the hole in the tread is drilled to a depth of 50-60 mm, ensuring the connection's strength under dynamic loads.
Special attention is paid to the direction of wood fibers at the attachment point. The hole should be aligned parallel to the fibers or at a slight angle to them. A perpendicular orientation may cause the tread to crack as the wood dries.
For additional strength, a metal bushing may be installed in the hole, preventing wood damage under dynamic loads. The bushing is secured with adhesive and must not protrude above the tread surface.
Mounting to the stair stringer
Attaching balusters to the stringer requires a special approach due to the inclined base. The stringer's angle must be considered when marking and drilling holes. The bottom end of the baluster is beveled to match the stringer's incline.
The depth of the hole in the stringer is limited by its thickness and should not exceed 2/3 of the element's total thickness. When the stringer is insufficiently thick, additional fasteners or reinforcing strips are used.
Additional joint rigidity is provided by using metal angles, which are attached to the inner side of the stringer. This solution is especially relevant for staircases with large spans and increased loads.
Working with metal framework elements
Modern staircases often have a metal frame to which wooden treads and balusters are attached. In this case, special fasteners — metal plates with holes for screws or bolts — are used.
The mounting plate is welded to the metal frame or secured with bolts. Wooden balusters are attached to the plate with screws. This connection ensures high strength and allows replacing wooden elements without dismantling the metal frame.
Joints between metal and wood require corrosion protection. Metal elements are coated with anti-corrosion compounds, and wood is treated with a wood preservative. A non-woven material gasket is placed between metal and wood to prevent direct contact.
Quality control and defect elimination
Checking geometry and strength
After installing all balusters, a comprehensive quality check is performed. The verticality of each baluster is checked with a level, and the overall geometry of the railing is checked with a taut string. Deviations from verticality should not exceed 2 mm per meter of height.
The strength of the connection is checked by gently rocking each baluster. A properly installed element should have no play or movement. If weak connections are detected, they are reinforced with additional fasteners or replaced with a new adhesive.
Visual inspection reveals possible surface defects, splinters, or cracks in the wood. Minor defects are filled with wood putty; major defects require replacing the element. The surface finish quality must meet the requirements of final finishing.
Typical errors and ways to correct them
Inaccurate marking leads to uneven baluster placement and disrupts the visual perception of the staircase. Correction requires dismantling incorrectly installed elements and reinstalling them following the marking procedure.
Insufficiently deep mounting holes reduce connection strength and may cause balusters to loosen during use. Deepening existing holes is only possible if the base has sufficient thickness. Otherwise, additional fasteners must be used.
Balusters tilted relative to verticality disrupt the railing's aesthetics and may indicate errors in marking or installation. Minor deviations are corrected by adjusting fasteners; significant deviations require reinstalling the balusters.
Finishing and protective coatings
Surface Preparation for Finishing
Baluster sanding is performed in several stages with gradually decreasing abrasive grit. Initial sanding is done with 120-150 grit sandpaper, final sanding with 220-240 grit. Special attention is given to end surfaces and joint areas.
Dust removal after sanding is done with a dry brush and vacuum cleaner. Remaining dust is wiped off with slightly damp cloth, after which the surface must be completely dry. The quality of surface preparation determines the appearance of the final finish.
Wood primer ensures even absorption of the final finish and improves its adhesion to the surface. Special primers are used for coniferous species, blocking resin exudation. Primer is applied in a thin layer with a brush or roller.
Choosing and applying protective-decorative coatings
Varnish coatings provide maximum protection for wood against moisture and mechanical damage. Polyurethane varnishes are characterized by high strength and wear resistance, while acrylic varnishes offer ecological safety and quick drying. Varnish is applied in 2-3 coats with intermediate sanding.
Oil coatings highlight the natural wood texture and allow the wood to breathe. Oil penetrates deeply into the wood structure, creating a protective barrier from within. Such coatings require periodic renewal but are easily restored without completely removing the previous layer.
Wax coatings give wood a noble matte sheen and a pleasant tactile surface. Wax is applied in a thin layer and polished with soft cloth. Such a coating requires careful maintenance but creates a unique atmosphere of coziness and warmth.
Ergonomics and safety of stair railings
Regulatory document requirements
The height of the staircase railing should be at least 900 mm for residential buildings and at least 1200 mm for public buildings. The distance between vertical railing elements should not exceed 100 mm, preventing children from slipping through. The handrail must withstand a horizontal load of at least 0.8 kN/m.
The handrail's shape should allow for comfortable hand grip. Optimal cross-section dimensions are 40-60 mm in width and 25-40 mm in height. The surface should be smooth, free of burrs and sharp edges. The handrail's temperature should not cause discomfort upon contact.
The start and end of the handrail must have a safe termination — a bend toward the wall or a special cap. Protruding ends of handrails are not permitted for safety reasons. When changing the direction of the staircase, the handrail must have smooth transitions without sharp bends.
Adaptation to user needs
For families with young children, it is recommended to install an additional handrail at a height of 500–600 mm from the step level. Such a handrail may be attached to the main balusters or have its own supports. The surface of the child’s handrail should be particularly carefully treated.
Elderly people and people with disabilities require special attention to the ergonomics of the staircase. The handrail must begin and end beyond the first and last steps. Additional lighting of the handrail increases safety when using the staircase at night.
Anti-slip elements on the steps and special treatment of the handrail ensure additional safety. Ribbed surfaces or special inserts prevent slipping of hands on the handrail. Contrast coloring of the first and last steps improves their visibility.
Technical maintenance and longevity
Regular care for wooden elements
Weekly dry cleaning with a vacuum cleaner or soft brush removes dust and prevents its accumulation in screw recesses. Wet cleaning is performed with slightly damp cloth without using aggressive cleaning agents. Excessive moisture may cause wood deformation and damage to the finish.
Monthly inspection reveals possible defects in the finish, loosening of fasteners, or cracks in the wood. Minor scratches and abrasions are repaired by local restoration of the finish. Serious damage requires professional repair.
Seasonal maintenance includes checking the tightness of all fasteners and updating the protective coating as needed. In rooms with variable humidity, it is recommended to monitor the condition of adhesive joints and reinforce them if necessary.
Signs of the need for repair
Looseness in baluster joints indicates weakened fasteners or failure of adhesive joints. Such defects require immediate elimination to prevent further structural damage. Temporary fixation with additional fasteners allows safe use of the staircase until major repair is performed.
Cracks in the wood may be due to natural drying of the material or exceeding calculated loads. Surface cracks are filled with wood putty; deep cracks require reinforcement with metal plates or replacement of the element.
Color change in wood may indicate fungal damage or exposure to ultraviolet radiation. In the first case, treatment with antiseptic compounds is required; in the second case, updating the protective coating with UV filters is necessary.
Modern trends in staircase railing design
Minimalist solutions
Modern design tends toward simplicity of forms and purity of lines. Rectangular or square-section balusters without decorative elements create a strict and elegant look. Such solutions are especially popular in interiors in high-tech, minimalist, or Scandinavian styles.
Increased spacing between balusters, while maintaining safety requirements, creates a sense of lightness and airiness in the structure. Using balusters with variable cross-sections or asymmetric placement adds dynamism to a static staircase structure.
Contrasting material combinations — dark wood with metal, light woods with black fasteners — create expressive accents in the interior. Such solutions require special attention to craftsmanship quality and precision of installation.
Integration of Modern Technologies
Built-in LED lighting in balusters or handrails creates an effective illumination of the staircase and increases its safety. Concealed wiring is laid in special channels or cavities within wooden elements. Lighting control can be automated using motion sensors.
Smart monitoring systems for structural condition include vibration and deformation sensors that transmit data to the owner’s mobile device. Such systems allow real-time monitoring of the staircase’s technical condition and planning preventive maintenance.
Using composite materials in combination with natural wood ensures increased durability while preserving natural beauty. Composite elements are not susceptible to rotting or deformation, which is especially important in rooms with variable humidity.
Economic Aspects of DIY Installation
Calculation of material costs
The cost of materials for installing balusters constitutes a significant portion of the total cost of staircase fabrication. Quality pine balusters cost between 300 and 800 rubles per piece, depending on the complexity of processing and dimensions. Balusters made of hardwood cost 2–3 times more.
Fastening materials — bolts, screws, glue — constitute a relatively small portion of the cost, but their quality is critically important for the reliability of the structure. Saving on fasteners is unacceptable, as it may lead to serious consequences during staircase operation.
Tools for single use can be rented, significantly reducing overall costs. Specialized tools — drill guides, clamping devices for gluing — are cost-effective only for large-scale projects or professional work.
Comparison with professional services
DIY installation of balusters allows saving 40–60% of the cost of hiring professionals. However, one must consider the time spent learning the technology, purchasing tools, and actually performing the work. For an inexperienced craftsman, the entire process may take 2–3 times longer than for a professional.
The quality of self-performed work depends on the experience and neatness of the executor. When following the technology and using quality materials, the result may not be inferior to professional work. However, mistakes during work may require redoing and additional expenses.
Warranty obligations for self-performed work do not exist, which should be considered when making a decision. Professional craftsmen usually provide a warranty on completed work for 1 to 3 years.
Conclusion
The process of how to install balusters on a staircase by yourselfrepresents an exciting journey into the world of carpentry, where every detail matters. Properly installing balusters on a staircase by yourself not only ensures the safety and functionality of the structure but also creates a unique architectural accent in the home’s interior.
Skill comes with experience, but even a beginner carpenter can achieve a professional result by following proper techniques and paying close attention to details. Every stage of work — from selecting materials to final finishing — requires an understanding of physical processes and the properties of wood.
Modern technologies and materials open up new possibilities for creative self-expression in designing stair railings. Combining traditional woodworking methods with innovative solutions allows creating unique structures that serve not only functional purposes but also become works of applied art.
Investments of time and effort into quality work pay off through longevity and beauty of the result. A staircase with properly installed balusters becomes a source of pride for the homeowner and a central interior element that will delight the eye and serve faithfully for many decades.
STAVROS Company offers a wide range of high-quality materials and components for staircase construction, as well as professional consultations on all aspects of installation and maintenance of wooden structures. Our long-standing experience and deep understanding of customer needs allow us to propose optimal solutions for any task in the field of staircase construction.