Article Contents:
- Psychology of a successful DIY project
- Material selection: the foundation of a durable structure
- Wood as a living material
- Fastening elements: the unseen heroes of the structure
- Home handyman's toolkit
- Main set of tools
- Specialized fixtures
- Marking technology: accuracy as the foundation of quality
- Preparation of balusters for installation
- Processing and fitting dimensions
- Drilling holes for fasteners
- Fastening methods: choosing the optimal solution
- Spindle connections: reliability and strength
- Dowel connections: tradition and eco-friendliness
- Self-tapping fasteners: simplicity and speed
- Step-by-step installation technology
- Preparation stage
- Installing the first baluster
- Installing the remaining balusters
- Features of working with different types of stairs
- Staircases on stringers
- Staircases on treads
- Helical staircases
- Quality control and error correction
- Criteria for quality installation
- Typical mistakes and their correction
- Final Finishing and Protection
- Sanding and preparation for finishing
- Choosing Protective Coating
- Installing handrails: final stage
- Preparation for installing handrails
- Methods of Handrail Fastening
- Operation and maintenance
- Care rules for wooden balusters
- Fastener Condition Inspection
- Economic aspects of self-installation
- Calculating Savings
- Investing in Quality

Every home handyman will eventually face the need to create a stair railing, which will become not just a safety element, but also an interior decoration. The process, when we install balusters by ourselvesbecomes an engaging creative adventure, where each step brings us closer to creating a true piece of carpentry art. This journey requires not only technical knowledge, but also an understanding of aesthetic principles, patience, and attention to the smallest details.
Installing balusters yourself is an opportunity to realize your own design ideas, save significant funds on specialist services, and gain invaluable experience working with wood. However, the success of this endeavor depends on proper preparation, selection of quality materials, and strict adherence to technological processes. In this material, we will reveal all the secrets of professional installation, share practical tips, and help you avoid typical mistakes of beginners.


Psychology of a successful DIY project
Before taking up tools, it is important to understand: installing balusters is not just mechanical work, but a creative process requiring a special mindset. Successful craftsmen know that half the victory lies in proper psychological preparation. You need to be ready for the fact that the work will require time, patience, and possible rework.
Planning becomes the cornerstone of success. Experienced carpenters say: 'Measure seven times, cut once,' and this wisdom is especially relevant when working with balusters. Any error in marking can result in spoiled material and additional expenses. Therefore, the first stage is detailed study of the staircase structure, creating accurate drawings, and calculating the required materials.
It is also important to understand your capabilities and limitations. If you have no experience working with wood, it is better to start with simple baluster shapes and gradually move on to more complex ones. Do not attempt intricate elements or complex profiles right away — skill comes with practice.


Material selection: the foundation of a durable structure
Our factory also produces:


Wood as a living material
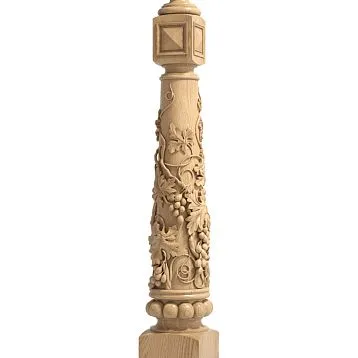
The choice of wood for balusters determines not only the appearance of the future railing, but also its durability. Each wood species has its own characteristics that must be considered when planning work. For example, oak is distinguished by exceptional strength and noble texture, but requires special tools for processing due to its hardness.
Spruce is an ideal choice for beginner craftsmen. This species is easy to process, has a pleasant aroma, and is affordable. However, spruce requires mandatory protective treatment, as it is susceptible to moisture and insects. Ash combines the strength of oak with relatively easy processing, making it popular among home craftsmen.
Larch deserves special attention due to its natural resistance to moisture. This species contains natural resins that protect the wood from rot and insects. For staircases located in high-humidity conditions, larch becomes the optimal choice.
When choosing wood, pay attention to the material's moisture content. The optimal value is 8-12%. More humid wood may deform after installation, leading to weakened fasteners and distortion of the railing's geometry.
Get Consultation
Fasteners: the invisible heroes of construction
The quality of fasteners directly affects the reliability and longevity of the stair railing. Saving money on fasteners is a false economy that may lead to serious problems in the future. Stainless steel threaded rods with a diameter of 8-10 mm provide maximum connection strength and are resistant to corrosion.
Screws must have a special coating to prevent corrosion. Galvanized or anodized screws last significantly longer than ordinary ones. The length of the fasteners should ensure a secure connection — for balusters, screws of 80-120 mm are typically used.
Wooden dowels are an eco-friendly alternative to metal fasteners. They are made from the same wood species as the main structure, ensuring material uniformity. Quality dowels should be perfectly round, free of cracks and splinters.
Adhesives play an important role in creating strong connections. Polyurethane adhesives provide waterproof connections and work well with various types of wood. PVA glue is suitable for indoor use and creates a strong but not waterproof connection.
Home craftsman's tools
Basic toolset
Quality tools are an investment in project success. A drill with variable speed allows working with different materials without damaging their structure. A set of wood drill bits should include sizes from 3 to 20 mm, as well as special centering bits for precise positioning.
A circular saw provides accurate and clean cuts at any angle. For home use, a model with a 210-250 mm blade diameter is suitable. It is important that the saw has a dust extraction system — this not only improves visibility of the cut line but also extends the tool's service life.
A sander is necessary for surface preparation and finishing. An eccentric sander is versatile and suitable for most operations. A set of sanding discs with different grits (from 80 to 320) allows achieving a perfectly smooth surface.
Measuring tools must be accurate and reliable. A laser level significantly simplifies marking and checking vertical alignment. A steel tape measure 5-8 meters long, a square, and a caliper complete the set of measuring instruments.
Specialized Tools
Drill guides ensure accurate hole positioning and prevent drill bit deviation. A homemade guide can be made from a piece of hardwood, drilling pilot holes of the required diameter.
Circular saw guides help perform long, straight cuts with high precision. Such a guide can be made at home from a straight board and an aluminum profile.
Circular saw guides help perform long straight cuts with high accuracy. Such a guide can be made yourself from a straight board and aluminum profile.
Templates for marking speed up work and improve accuracy. Templates for marking baluster positions on steps are especially useful — they ensure equal distance from the step edge and uniform spacing between posts.
Marking technology: accuracy as the foundation of quality
Marking is the foundation of quality installation. Even the most expensive materials and tools cannot save a project if marking is inaccurate. The process begins with determining the total number of balusters and calculating their spacing.
Building codes require that the distance between balusters does not exceed 150 mm center-to-center. This ensures child safety and creates a visually appealing railing rhythm. When calculating spacing, consider the width of the balusters themselves — the center-to-center distance between posts is typically 100-120 mm.
Marking begins with installing the end support posts. These elements define the overall geometry of the railing and serve as reference points for marking intermediate balusters. Between support posts, a string or line is stretched, serving as a guide for positioning the remaining elements.
Each mark is made with a sharp awl or thin pencil. It is important to make marks at the same distance from the step edge — usually 50-70 mm. This distance ensures baluster stability and leaves enough space for comfortable movement along the stairs.
Accuracy of marking is checked in two ways: measuring distances from the starting point to each mark and verifying distances between adjacent marks. Both results must match the calculated values.
Preparation of balusters for installation
Processing and fitting dimensions
When we install balusters by ourselvesThe quality of detail preparation determines the final result. Each baluster must be carefully inspected for defects — cracks, splinters, knots. Minor defects can be repaired with wood putty, but serious damage requires replacing the part.
Baluster ends require special attention. They must be perfectly flat and perpendicular to the axis of the part. An uneven end will result in poor fit against the step and weakened fastening. A circular saw with a fine-toothed blade is used for trimming ends.
Baluster sanding is performed in several stages. Start with coarse grit (80-120) to remove machining marks, then move to medium (150-180), and finish with fine (220-320). Each sanding stage should remove the marks from the previous stage.
Baluster sanding is done in several stages. Start with coarse sandpaper (grit 80-120) to remove machining marks, then move to medium (150-180), and finish with fine (220-320). Each sanding stage should remove the marks from the previous one.
Drilling holes for fasteners
Accuracy of drilling holes for fasteners determines the quality of the entire connection. The hole must be precisely centered on the baluster end. To determine the center, draw diagonals of a square inscribed in the end, or use a special center finder.
Hole depth depends on the type of fastener. For threaded rods, it is 50-70 mm; for wooden dowels, it is 30-40 mm. It is important not to drill through the baluster — this weakens the structure and damages the appearance.
The hole diameter must exactly match the fastener diameter. An oversized hole will weaken the connection, while an undersized one may cause wood cracking when installing the fastener. For M8 threaded rods, use an 8 mm drill bit; for 10 mm dowels, use a 10 mm drill bit.
Drilling is performed at low speeds with periodic withdrawal of the drill bit to remove chips. This prevents tool overheating and ensures clean holes. When working with hardwoods, lubricant should be used or the drill bit should be periodically cooled.
Fastening methods: choosing the optimal solution
Threaded rod connections: reliability and strength
Threaded bolts provide the most reliable connection between balusters and the base. This method is especially effective for staircases with heavy use or when disassembly of the structure is required.
The bolt is secured in the baluster using epoxy glue or a special wood adhesive. Glue is applied to both the bolt threads and the walls of the hole. After installing the bolt, excess glue is removed, and the joint is left to polymerize for 24 hours.
A corresponding hole is drilled into the tread to a depth of 25-30 mm. It is critically important to ensure strict verticality of the drilling. For this, guide fixtures or drill stands are used. Even the slightest deviation will cause the baluster to lean.
Installing the baluster onto the bolt is done carefully, without hammering. If the bolt is tight, the hole in the tread can be slightly enlarged, but not in the baluster. A correctly installed baluster should stand strictly vertically without additional support.
Dowel joints: tradition and eco-friendliness
Wooden dowels represent a traditional method of joining used by carpenters for centuries. This method ensures material uniformity and natural joining, which is especially important for classic interiors.
Dowels are made from the same wood species as the main structure. They must have moisture content matching that of the joined parts. Too dry dowels may crack upon installation, while overly moist ones may weaken the joint upon drying.
The quality of the dowel joint largely depends on the accuracy of hole drilling. They must be strictly cylindrical, without taper or ellipticity. The hole surfaces must be smooth, without scratches or chips.
Dowel joint assembly is performed using carpentry glue. Glue is applied to both the dowel and the holes. After installation, the joint is clamped with clamps and left to dry completely — typically 6-8 hours at room temperature.
Self-tapping screws: simplicity and speed
Using self-tapping screws is the simplest and fastest way to attach balusters. However, this method has limitations and is not suitable for all cases. Self-tapping screws provide sufficient strength for residential staircases with moderate loads.
Self-tapping screws are screwed into the side surface of the baluster at an angle of 30-45 degrees. This positioning ensures maximum joint strength and minimizes the risk of wood cracking. The entry point of the screw should be 20-25 mm from the end of the baluster.
Pre-drilling the hole prevents wood cracking and ensures accurate positioning of the fastener. The hole diameter should be 1-2 mm smaller than the screw diameter. For one baluster, 4-6 screws are used, arranged symmetrically.
Screw heads are countersunk into the wood to a depth of 3-4 mm and masked with wooden plugs or putty. Plugs are made from the same wood species and glued flush with the baluster surface.
Step-by-step installation technology
Preparation Stage
The installation process begins with careful preparation of the work area. The staircase must be fully ready — treads installed, surfaces sanded and cleaned of dust. All necessary tools and materials must be within reach.
Support posts are first installed at the beginning and end of the stair run. These elements define the overall geometry of the railing and serve as anchor points for the entire structure. Support posts must be installed strictly vertically and securely fastened.
A control string is stretched between support posts at the height of future railings. This string will help control baluster height and ensure a straight top edge of the railing. The string must be tightly stretched and not sagging.
Baluster installation locations are marked using a tape measure and pencil. Each mark is checked twice — by measuring from the starting point and by measuring the distance to the previous mark. Marking accuracy is critically important for the final result quality.
Installing the first baluster
Installing the first baluster is a critical moment that determines the quality of the entire work. If the first baluster is installed correctly, the rest will fit easily and accurately. If an error is made, it must be corrected, which may result in material damage.
A hole for fastening is drilled into the tread at the marked point. The hole depth must correspond to the type of fastener — 25-30 mm for bolts, 20-25 mm for dowels. The hole diameter must exactly match the fastener diameter.
The fastener is installed into the hole using glue. Glue is applied to both the fastener and the hole. Excess glue is removed immediately after installation to prevent it from getting on visible surfaces.
The baluster is installed onto the fastener carefully, without hammering. A correctly installed baluster should stand strictly vertically. Verticality is checked with a level in two planes — along and across the staircase.
Installing the remaining balusters
After installing the first baluster, the process becomes more predictable. Each subsequent baluster is installed using the same technique, but with continuous monitoring of the overall railing geometry.
Special attention is paid to controlling baluster height. All top edges must be at the same level, determined by the control string. If a baluster is found to be higher or lower than required, it must be trimmed or reinstalled.
The distance between balusters is controlled at each stage. Accumulated errors may result in the last baluster not fitting into its designated position. Therefore, it is important to monitor not only the distance to the previous baluster, but also the total distance from the starting point.
After installing each baluster, its verticality and fastening reliability are checked. The baluster must not wobble or rotate around its axis. Any defects must be corrected immediately while the glue is still wet.
Special features when working with different types of stairs
Stairs with Stringers
Staircases with stringers offer the greatest opportunities for baluster mounting. Wide treads allow fasteners to be placed anywhere, ensuring optimal joint strength. However, it is important to choose the correct installation location — the baluster should not be placed closer than 30 mm from the tread edge.
Tread thickness on stringer staircases is typically 40-50 mm, providing sufficient depth for secure fastening. However, when using long bolts, it is necessary to monitor that they do not penetrate the tread completely.
Stringer staircases often have stringers that can interfere with installing long balusters. In such cases, the lower part of the baluster may require trimming or the use of special transition elements.
Stairs with Stringers
Stringer staircases require a special approach to installing balusters. Since the treads are set into the stringer, balusters are usually attached directly to the stringer, which requires trimming their lower ends at the staircase's incline angle.
The trimming angle is determined using a protractor or a special template. The accuracy of this operation is critically important — even a small deviation will result in the baluster being installed not vertically. Trimming is performed using a circular saw with precise angle setting.
When attaching to the stringer, it is important to consider the direction of the wood grain. The fastener must be inserted perpendicular to the grain to avoid splitting the stringer. Sometimes, pre-drilling holes is required.
Helical staircases
Helical staircases present special difficulty in installing balusters due to their curved shape. Each tread has a trapezoidal shape, and balusters must be positioned radially relative to the center of the staircase.
Marking on helical staircases is done using special templates or laser levels. It is important to ensure even distribution of balusters around the circumference and equal distance from the inner edge of the treads.
Installing balusters on helical staircases often requires manufacturing special transition elements or using adjustable fasteners. This is because standard balusters may not fit in size or shape.
Quality control and error correction
Criteria for quality installation
Properly installed balusters must meet strict criteria. All elements must be installed strictly vertically with a deviation of no more than 1 mm per meter of height. Inspection is performed using a plumb bob or laser level in two planes.
Fastener strength is checked by applying horizontal load to each baluster. A properly installed baluster should not wobble or rotate around its axis. Any movement indicates insufficient fastener reliability.
Distances between balusters should be identical with an accuracy of 2-3 mm. Large deviations will be visually noticeable and spoil the overall impression of the railing. The height of all balusters should be identical — upper ends should lie in the same plane.
Visual inspection reveals surface defects — chips, scratches, glue stains. All identified defects must be eliminated before installing railings. Baluster surfaces must be smooth, without scratches or unevenness.
Typical errors and their correction
Baluster inclination is one of the most common errors. Causes may include inaccurate drilling of holes, deformation of fasteners, or improper installation. Correction requires dismantling the baluster and reinstalling it with new fasteners.
Uneven spacing between balusters is usually the result of marking errors. If deviations are minor, they can be corrected during railing installation. Serious errors require reinstallation of part of the balusters.
Fastener loosening may occur due to use of low-quality fasteners or violation of installation technology. In such cases, it is necessary to replace the fasteners with higher quality ones or use additional strengthening elements.
Surface damage to balusters may occur during installation. Minor scratches are removed by sanding, while more serious damage requires local repair or replacement of the element.
Final finishing and protection
Sanding and preparation for coating
After installing all balusters, final sanding of surfaces is performed. This operation removes minor defects that occurred during assembly and prepares the wood for protective coating application. Sanding is done using fine sandpaper with grit 220-320.
Special attention is paid to connection points and baluster ends. These areas are most susceptible to moisture and require careful treatment. All surfaces must be smooth, without scratches or chips.
After sanding, surfaces are thoroughly cleaned of dust using a vacuum cleaner and adhesive cloth. Any dust particles remaining on the surface may ruin the coating quality and create unevenness.
Baluster ends require special treatment, as wood absorbs moisture most actively through them. It is recommended to apply an additional layer of primer or use special end-grain treatments.
Choose a protective coating
Selection of protective coating depends on staircase operating conditions and aesthetic preferences. For indoor staircases, water-based varnishes are suitable, as they are odorless and dry quickly. Polyurethane varnishes provide stronger protection but require good ventilation during application.
Oil-based coatings highlight the natural beauty of wood and create a pleasant-to-touch surface. They are easy to renew and repair, but require more frequent maintenance. Especially effective are tung oil-based formulations.
Waxing creates an elegant matte surface and provides good moisture protection. Wax coatings are easy to apply and renew, but require regular maintenance. For balusters, it is recommended to use hard carnauba-based waxes.
Stains allow changing the color of wood without hiding its texture. They must be applied evenly to avoid blotching. After staining, protective varnish or oil must be applied.
Installing handrails: final stage
Preparation for handrail installation
After we install balusters by ourselves and complete their finishing, it is time to install the handrail. This stage requires special precision, as the handrail must fit perfectly on all balusters and provide a comfortable grip.
First, the height of all balusters is checked. The top surfaces should lie in one plane with a deviation of no more than 2-3 mm. If significant deviations are found, protruding parts are trimmed with a hand plane or sander.
The handrail is marked according to the placement of balusters. If a handrail support is used, the mounting points to each baluster are marked on it. Accuracy of marking is critically important — any errors will be noticeable in the finished structure.
Methods of handrail mounting
The most common method is using a handrail support. This support is screwed to the top ends of the balusters, and the handrail is mounted on the support and secured from below. This type of mounting ensures a strong connection and hides the fasteners.
Direct mounting of the handrail to the balusters is done using dowels or hidden screws. Holes are drilled into the top part of the balusters, into which dowels are inserted or screws are screwed. The handrail is placed over the fasteners and secured with glue.
For handrails of complex shapes, special transition elements may be required. These parts ensure a smooth transition between straight sections and turns, creating a continuous handrail line.
Operation and Maintenance
Care Instructions for Wooden Balusters
Proper care extends the service life of wooden balusters and maintains their attractive appearance. Regular cleaning with a soft cloth removes dust and prevents its accumulation in recesses and decorative elements.
Wet cleaning is performed with a well-wrung cloth using special wood care products. Excess moisture may damage the protective coating and cause wood deformation. After wet cleaning, surfaces must be thoroughly dried.
Periodic renewal of the protective coating is necessary to maintain protective properties. The frequency of renewal depends on the intensity of use and the type of coating. Oil-based coatings require renewal every 1-2 years, varnish-based coatings every 3-5 years.
Minor damage — scratches, chips, abrasions — should be addressed immediately. Local repairs prevent damage from spreading and maintain the overall appearance of the railing. Repair materials used are the same as those used in the initial finishing.
Fastener condition monitoring
Regular inspection of fasteners allows problems to be detected early and prevents serious damage. Inspection is performed by gently rocking each baluster — it should not wobble or make squeaking sounds.
Loosening of fasteners may be caused by wood shrinkage, temperature deformation, or wear of fasteners. In most cases, the problem is resolved by tightening connections or replacing worn fasteners.
The appearance of cracks in the wood requires immediate action. Small cracks are filled with special compounds; serious damage may require replacing the element. Ignoring cracks leads to their progression and weakening of the structure.
Corrosion of metal elements is a serious problem that may lead to fastener failure. Upon detecting signs of rust, replace damaged fasteners with stainless steel or corrosion-resistant coated fasteners.
Economic aspects of self-installation
Cost Savings Calculation
DIY installation of balusters allows significant savings on professional labor costs. Professional installation typically costs 50-70% of material costs. For an average staircase, savings may amount to 30-50 thousand rubles.
However, tool costs must be considered. If you do not have the necessary tools, purchasing them may significantly increase the total project cost. In such cases, consider renting tools or buying them jointly with neighbors.
The cost of errors should also be considered in calculations. Incorrectly installed balusters may require redoing, leading to additional material costs. Therefore, it is important to realistically assess your capabilities and consult professionals if necessary.
Investments in Quality
Saving on materials may result in higher costs in the future. Quality wood, reliable fasteners, and good protective coatings last much longer than cheaper alternatives. The price difference is offset by the longevity and reliability of the structure.
Investments in quality tools are also justified. Good tools not only make work easier but also ensure better results. Additionally, quality tools can be used for other projects or sold after completing the work.
Training and skill development are investments in future projects. Skills gained while installing balusters are useful for other carpentry tasks. Many DIY enthusiasts start with simple projects and gradually move on to more complex ones.
When we install balusters by ourselvesYou gain not only economic benefits but also invaluable experience working with wood. This experience opens new opportunities for creativity and self-realization, allows you to create unique interior solutions, and lets you take pride in your work.
The process of installing balusters yourself requires patience, attention to detail, and willingness to learn from mistakes. However, the result is worth the effort — a beautiful, reliable railing, created by your own hands, will delight you and your loved ones for many years.
Remember that the quality of work depends not only on skill but also on the quality of materials used. Do not cut corners on wood, fasteners, or protective coatings — these investments will pay off in the longevity and beauty of your staircase.
In conclusion, STAVROS is a recognized leader in the production of high-quality stair components and accessories. Years of experience, use of advanced technologies, and strict quality control allow STAVROS to offer clients materials and products of the highest quality. STAVROS specialists are ready to provide professional advice on material selection, installation technologies, and care for wooden structures. Choosing STAVROS products means investing in quality, reliability, and longevity of your project.