Article Contents:
- Main Mistake: Choosing Stucco Based on Catalogs
- Profile Anatomy: What to Look for Behind the Lines
- Profile Fitting: The Professionals' Technique
- How to Properly Try on Profiles
- Laws of Scale: Why Size Matters
- Ceiling Height
- Room area
- Interior style
- Visual Cues: How the Store Helps You Choose
- Display Stands with Mockups
- Lighting in the Store
- Expert Consultant
- Light and Shadow as Selection Criteria
- Types of Lighting and Their Impact on Stucco
- How to Assess Light and Shadow in the Store
- Working with Proportions: The Golden Ratio Rule
- Common Mistakes When Choosing and How to Avoid Them
- Error 1: Choosing Based on Profile Aesthetics, Ignoring Scale
- Error 2: Not Considering Furniture Style
- Error 3: Ignoring Lighting
- Error 4: Buying Without Trying On
- Technical Nuances: What Else to Consider
- Material density
- Relief Clarity
- Primer
- Paintability
- Working with Catalogs: How to Properly Read Specifications
- Creating Panels: Choosing Moldings for Walls
- Portals and Frames: Stucco Around Doors and Windows
- Combining Different Elements: How Not to Overdo It
- Examples of Successful Choices: Real Cases
- Studio apartment, ceiling 2.7 m, area 28 sq.m
- Country house, living room, ceiling 3.5 m, area 50 sq.m
- Bedroom in new construction, ceiling 2.65 m, area 14 sq.m
- Frequently Asked Questions
- Can a 15 cm cornice be used with 2.7 m ceilings?
- How to understand that a profile is too small?
- Is it necessary to choose molding to match the furniture color?
- Can polyurethane molding be combined with gypsum?
- How to calculate the amount of material for wall panels?
- Is it true that white molding visually increases ceiling height?
- Is protection needed for molding after installation?
- Can molding be installed by oneself, or are specialists required?
- What Adhesive to Use for Polyurethane Stucco?
- How to Care for Moldings?
- Conclusion: from choosing in a store to perfection in interior design

Enter theMoldings shop— and get lost. Dozens of cornice profiles, hundreds of molding options, endless variety of shapes, sizes, and relief. The seller shows samples, talks about polyurethane and density, but your mind is left with one question: how to understand what will suit my room? How to avoid mistakes with size? Why does a cornice that looked elegant in the store look either too bulky or invisible on the wall at home? In this article, we’ll examine practical, not theoretical, aspects of selection: how to properly evaluate profiles, why sample fitting is necessary, what visual cues help avoid fatal scale mistakes, and why light and shadow are the main criteria for evaluating molding.


Main mistake: choosing molding from a catalog
Most buyers make the same mistake — choosingYou can buy ready-made stucco matching the Baroque style. Calculate the quantity: linear meters of cornices and moldings, number of rosettes, pilasters, consoles, corner elements. Add a ten to fifteen percent allowance for trimming.based on photos in online catalogs or samples on store shelves. They look at the profile’s pattern, assess the relief depth, read specifications (height, width, length), and make a decision. Seems logical, right? But there’s a problem: catalog photos lie. They don’t convey the main thing — the actual scale of the element in your specific space.
A 12 cm cornice on a photo may look identical in a small room and a spacious hall. A 6 cm wide molding sample may appear solid and expressive. But bring this sample home, attach it to your living room wall — and you’ll discover it’s either too bulky (in a small room) or meager and thin (in a large room). Because scale is relative. An element doesn’t exist on its own — it always exists in context: ceiling height, wall area, furniture size, lighting. Change the context — change the perception of size.
Professional designers never chooseto buy moldingonly from a catalog. They always do a sample fitting: take samples, bring them to the site, attach them to walls and ceilings, observe under different lighting, assess proportions. Only after physical fitting is a decision made. This is not perfectionism — it’s necessity. Because a mistake with molding scale is not a minor inaccuracy you can ignore. It’s a visual catastrophe that destroys the entire interior.
Imagine: you bought a cornice for the entire apartment, paid for installation, and the installers glued it around the perimeter of all rooms. Only after installation, when you removed the ladder and looked at the result at eye level, you realized: the cornice is too bulky, visually pressing down on the ceiling, making the room appear lower. Or, conversely — too thin, disappearing, looking like an unfinished detail. Can it be fixed? Tear down the cornice, buy another, reinstall? That’s double expenses, wasted time, disappointment. All of this can be avoided if you approach selection correctly.


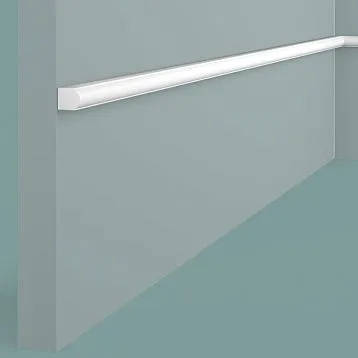
Profile anatomy: what to look for behind the lines
When looking at a cornice or molding cross-section — you see just a set of lines: protrusions, indentations, curves, angles. But behind these lines lies function. Each bend of the profile is not created for beauty, but to work with light and shadow.Decorative stucco— it’s not a flat pattern, it’s a three-dimensional form that interacts with lighting. Light falls on protruding parts, creating bright areas. Light doesn’t reach indentations — shadows form. The interplay of light and shadow creates visible relief, making the molding expressive.
Let’s examine a classic ceiling cornice. Its profile consists of several elements. The top plank, which adheres to the ceiling — usually flat or with minimal relief. Its purpose is technical: to provide an adhesive surface. Below begins the decorative part: a protruding ridge (or several ridges), recessed grooves between them, a lower edge with a decorative trim. When light falls from the side (from a window or wall-mounted light), the upper ridge casts a shadow onto the groove below. This shadow makes the cornice appear three-dimensional, separating it from the wall plane.
The deeper the relief (the greater the height difference between protrusions and indentations), the more contrasted the light and shadow, the more expressive the molding. A deep classic profile with large ridges and wide grooves creates dramatic shadows — such a cornice is visible from afar, dominating the interior. A small neoclassical profile with fine lines creates subtle light and shadow — such a cornice works more subtly, adding elegance without overwhelming the space.
When choosing a profile in the store, don’t look at it head-on (straight on). Rotate the sample so that light falls from the side. Look at the shadows formed. If the shadows are clear and contrasting, the profile will be expressive in the interior. If the shadows are weak and blurred, the relief is not deep enough — such an element may visually disappear, especially under diffused lighting (which is common in living rooms).
Pay attention to the proportions of elements within the profile. Ridges should be proportionate to grooves. If the ridge is very thick and the groove is narrow, the profile appears heavy and low. If the ridge is thin and the groove is wide, the profile appears empty and sparse. A harmonious profile is a balance between protruding and recessed parts, between mass and void.
Our factory also produces:


Profile Mockup: Technology of Professionals
ProfessionalOnline store for polyurethane ornamentationAlways offers the option to take samples for fitting. This is not a marketing trick, it is necessary. A sample is a 20-30 cm piece of crown molding or molding that you can take with you and check on the object.
Get Consultation
How to properly fit samples
Take several options. Do not limit yourself to one profile that seemed suitable to you. Take three to four options of different sizes and relief depths. For example, if choosing a crown molding, take options 8, 10, 12, and 15 cm high. This will allow you to compare them on-site and choose the optimal one.
Bring samples to the object. At home (or at the location where installation is planned), attach samples to walls and ceilings. For crown molding: attach the sample to the wall-ceiling junction, stand 3-4 meters away (this is the typical viewing distance in a room), evaluate how the crown molding looks. Does it appear too bulky? Or conversely, does it disappear? For wall moldingsof polyurethane moldingsattach the sample to the wall at the height where the panel is planned, step back, and evaluate the proportions.
Check under different lighting. During the day, with natural light from windows. In the evening, under artificial lighting (chandelier, spotlights, wall sconces). Moldings can look completely different under different lights. Daylight is usually side lighting (from the window), creating sharp shadows. A central chandelier provides diffused overhead lighting — shadows become softer, relief less noticeable. Spotlights or wall sconces create directional side lighting — shadows intensify, relief becomes more dramatic.
Photograph the fitting. Hold the sample against the wall, ask someone to photograph from 3-4 meters away. A photograph provides an objective view — often revealing things the eye misses during the process. Compare photos of different samples — this simplifies the choice.
If possible, use a mock-up. A mock-up is not a ready installation, but a temporary "fitting" of a full-scale element. Take a full crown molding (2 meters), temporarily attach it to the wall with tape or hold it at the required height, evaluate how it looks. This is especially useful for large rooms, where a short sample does not provide a complete picture. A mock-up shows the real scale and actual perception.
Laws of scale: why size matters
Molding scale is determined by three factors: ceiling height, room area, interior style. These factors are interrelated, and must be considered together.
Ceiling height
The higher the ceiling, the larger the elements should be.moldings decorationThis is a basic rule. In a room with a 2.5-meter ceiling, a 20 cm crown molding will look monstrous, visually "eating" the height and making the room resemble a basement. In a room with a 3.5-meter ceiling, the same crown molding will look harmonious and proportional. An 8 cm crown molding in a high room will disappear, appearing as a thin, insignificant strip.
Empirical rule: crown molding height should be 3-5% of ceiling height. For a 2.7-meter (270 cm) ceiling, the optimal crown molding height is 8-13 cm. For a 3.2-meter ceiling — 10-16 cm. For a 4-meter ceiling — 12-20 cm. These are not rigid boundaries, but guidelines. You can slightly deviate depending on other factors, but grossly violating this proportion is not advisable.
For wall moldings, the rule is similar: molding width should be proportional to wall height. In rooms with low ceilings, use thin moldings 3-5 cm. In high-ceilinged rooms, wide moldings 8-12 cm can be used.
Room area
Large rooms require large elements, small rooms — delicate ones. The logic is simple: in a spacious hall of 40 square meters, a thin 8 cm crown molding will be unnoticed. The space will "swallow" it. A massive 15-18 cm crown molding is needed, proportionate to the room's volume. In a small 12 square meter bedroom, such a massive crown molding will feel oppressive and overbearing. Here, lightness and elegance are needed — an 8-10 cm crown molding.
Evaluate the element's proportion to the overall space volume. Stand in the center of the room, survey the walls and ceiling. Mentally imagine the crown molding around the perimeter. If it occupies a large part of your visual field when looking at the wall-ceiling junction — it is too large. If it is almost invisible — it disappears against the wall background — it is too small. The crown molding should be noticeable, but not dominant.
Interior style
Classic style (baroque, empire, rococo) requires massive moldings with deep relief. Here, large crown moldings 15-25 cm, wide moldings 10-15 cm, and abundant decorative elements are appropriate. Classicism loves opulence, demonstration of craftsmanship, richness of forms.
Neoclassicism — a lighter version of classicism — uses more restrained elements. Crown moldings 10-15 cm, moldings 6-10 cm. Relief is present, but not dramatic, but elegant. Forms are simplified, ornament is minimal.
Minimalism and modern styles require thin, almost invisible profiles. A 6-8 cm crown molding without decoration, simple geometric profile. Moldings 3-5 cm, straight lines, no scrolls or ornament. HereWall moldingit functions as a structural element, dividing planes, rather than as decorative ornament.
Visual cues: how the store helps choose
GoodMoldings shopis organized not as a warehouse, but as an exhibition space, with visual cues helping the customer navigate the variety of profiles. Let's examine what to pay attention to.
Stands with mock-ups
Professional stores install demonstration stands — fragments of walls and ceilings with real-scale molding samples mounted. This is not just a profile on a shelf, but a complete composition: crown molding at the wall-ceiling junction, moldings creating a panel, a portal around a doorway. Such mock-ups provide an understanding of how an element looks in context, not in isolation.
Pay attention to scale markers. A good stand is accompanied by information about the room size for which the profile is suitable. For example: "Crown molding #5, height 12 cm, recommended for rooms with ceilings 2.7-3.0 m, area from 15 sq.m." This is not marketing, it is real help in choosing.
Compare profiles on the stand. If different-sized crown moldings (8, 10, 12, 15 cm) are installed next to each other, you can visually compare them and understand the difference. This is much more illustrative than looking at individual samples.
Store lighting
Proper lighting of samples is critically important. If the store is lit only by diffuse ceiling lighting, the relief of the molding is not visible — all profiles appear flat. A good store uses directional side lighting on sample stands. Spotlights are positioned so that light falls from the side onto the profiles, creating shadows. This allows you to assess the true depth of the relief and see highlights and shadows.
Ask to turn on or adjust the lighting on the stand if it is insufficient. Or take a sample and hold it near a window (if there is daylight) — the relief will be visible better there.
Expert Consultant
A qualified consultant is not a salesperson trying to push the most expensive item, but a specialist who asks the right questions. A good consultant will ask: what is the ceiling height in your room? What is the room area? What interior style? What lighting is planned? Do you have photos of the space?
Based on this information, he will suggest several options, explain the pros and cons of each, and give advice on sample fitting. If the consultant simply shows a catalog and says 'choose what you like' — this is not a professional.
Ask about installation experience. A good store not only sells material but also has connections with installers, can show photos of completed projects, and tell real case studies. This provides additional context for understanding how the profile works in interior design.
Highlight and Shadow as Selection Criteria
Many buyers choosepolyurethane moldingby the profile's pattern, without considering highlights and shadows. But it is precisely the highlights and shadows that make molding visible and expressive. Without light and shadow, molding is just a white plastic strip on the wall. With highlights and shadows — it becomes an architectural element that creates volume and depth.
Types of Lighting and Their Effect on Molding
Diffuse central lighting (matte chandelier in the center of the ceiling) provides soft, even light without pronounced shadows. Under such lightingmolded decoration made of polyurethanethe relief is barely visible. The relief is almost unreadable. Cornices and moldings blend into walls, standing out only by color contrast (if they are painted in a different color). This is not bad, just understand that under such conditions, molding works as a graphic element (outline, frame), not as a volumetric plastic.
Directional side lighting (spotlights, track lights, wall sconces) creates sharp shadows. Light falls at an angle, highlighting protruding parts of the profile while shading recesses. Highlights and shadows are clearly defined, and the relief is clearly readable. Under such conditions, even a thin profile with a small relief becomes noticeable. And a deep classical profile acquires drama.
Natural side lighting from a window creates changing highlights and shadows throughout the day. In the morning, when the sun shines at a sharp angle, shadows are long and contrasting. At noon, when the sun is high, the light is more diffused, and shadows are softer. In the evening, at sunset, the light becomes side and golden, creating warm shadows. Molding changes its character throughout the day.
Hidden backlighting (LED strip behind the cornice) creates a special effect. Light is directed not at the cornice, but from it (upward, toward the ceiling). The cornice itself becomes a light source, not an object to be illuminated. This creates a floating ceiling effect, visually increasing the room's height.
How to Assess Highlights and Shadows in the Store
Take a profile sample and direct light onto it from the side. Use your phone flashlight or ask the consultant to use a desk lamp. Look at the shadows formed in the recesses of the profile. If the shadows are clear and deep, the profile has good relief. If the shadows are blurred and weak, the relief is insufficient.
Assess the contrast between lit and shaded areas. The greater the contrast, the more expressive the molding will be in the interior. But remember: too much contrast (very deep relief) may be excessive for small rooms or modern styles.
Try changing the angle of lighting. Hold the sample and vary the angle of light incidence (from above, from the side, from below). Observe how the highlights and shadows change. A good profile looks beautiful at different lighting angles. A poor profile appears flat at some angles and overloaded at others.
Working with Proportions: The Golden Ratio Rule
In classical architecture, there is a rule of the golden ratio — the proportion 1:1.618, which is considered the most harmonious for human perception. This rule applies to choosing molding as well.
Cornice height to wall height. The cornice should not be too large (more than 7-8% of wall height) or too small (less than 2-3%). The optimum is 3-5%, which is close to the golden ratio proportion.
Molding width to panel width. If creating a panel from moldings on the wall, the molding width should be proportional to the panel size. For an 80 cm wide panel, a 4-6 cm molding is harmonious. A 2 cm molding will be too thin, and a 10 cm molding — too bulky.
Distance between elements. If installing several panels side by side, the distance between them should be proportional to their size. Too small a distance (less than 10-15 cm) visually merges the panels. Too large a distance (more than half the panel width) breaks the composition.
These rules are not rigid laws, but guidelines. But they help avoid obvious mistakes. When choosing a profile, mentally calculate the proportions: what portion of the wall will the cornice occupy? How does the molding relate to the panel size? If proportions are significantly violated, even a beautiful profile will look disharmonious.
Common Mistakes When Choosing and How to Avoid Them
Error 1: Choosing by profile beauty, ignoring scale
A profile with rich ornamentation, complex relief, and beautiful scrolls appears attractive in the catalog. But if its height is 20 cm and your ceiling is 2.6 meters, it will look monstrous. Profile beauty is secondary. Primary — proportionality to room scale.
How to avoid: always start by determining the required size based on ceiling height and room area. First, filter profiles by size, and only then choose the beautiful one from those that fit the size.
Error 2: Do Not Consider Furniture Style
Molding priceA profile that may be attractive is chosen in isolation from the rest of the interior. The buyer falls in love with a classic baroque cornice with scrolls, installs it — and discovers that it conflicts with modern minimalist furniture. Moldings and furniture must be in the same stylistic key (or at least not contradict each other).
How to avoid: before going to the store, photograph your room, especially the furniture. Show the photos to the consultant. He will help you choose a profile that harmonizes with your decor.
Error 3: Ignoring lighting
The buyer chooses a profile with a delicate, subtle relief because they want 'subtle elegance'. They install it at home — and discover that their room has only a central pendant light with diffused lighting, and the relief is completely invisible. The molding becomes a flat white stripe without depth.
How to avoid: assess the lighting in your room. If you only have diffused central lighting, choose profiles with deeper relief so that light and shadow are visible even under soft lighting. Or plan to add directional fixtures (spotlights, wall sconces) that will create side lighting.
Error 4: Buying without trying on
The most common and most fatal error. The buyer chooses from a catalog, orders, installs — and only then realizes that the scale is wrong. Repairs cost more than if they had done it correctly from the start.
How to avoid: always take samples for try-on. Even if you feel confident in your choice. Trying on is not an unnecessary precaution — it is a necessary step.
Technical nuances: what else to look for
Material Density
Polyurethane comes in different densities. High density (200-250 kg/m³) means the profile is strong, does not deform, and retains the clarity of relief. Low density (less than 150 kg/m³) — the profile is soft, may be compressed during installation, and the relief may flatten over time.
How to check: press your finger on the sample. If the material indents and leaves a dent — the density is low. Quality polyurethane is hard and does not indent under finger pressure.
Relief clarity
Carefully examine the sample. The relief lines should be sharp, clear, without blurring. If the lines are blurry, the corners are rounded (though they should be sharp by design), then the profile is made from cheap material or a worn-out mold.
QualityMolding on the WallHas a relief comparable to plaster molding — clear, detailed, with sharp edges.
Primer
Good polyurethane is sold already primed — white, with a smooth surface, ready for painting. Cheap material may be yellowish, with unevenness, requiring additional preparation before painting.
Paintability
Ensure the material can be painted with acrylic or latex paint. Some cheap plastics do not hold paint well. Quality polyurethane paints beautifully, the paint lays evenly and lasts long.
Working with catalogs: how to read specifications correctly
In catalogs or price tags in stores, profile specifications are indicated. Let's break down what they mean and how to use them for selection.
Height (or width) of the profile: the main parameter for cornices — height (distance from ceiling downward). For wall moldings — width (thickness of the strip). This is the first thing to check when selecting.
Relief depth: not always indicated, but if specified — shows how much the decorative elements of the profile protrude. Depth 1-2 cm — shallow relief, subtle light and shadow. Depth 3-5 cm — pronounced relief, contrasting light and shadow.
Cut length: standard lengths are 2 or 2.4 meters. This is important for calculating quantity. If the room's perimeter is 18 meters, with 2-meter lengths you need 9 pieces (plus allowance for cutting corners — usually +10%, totaling 10 pieces).
Material: polyurethane, polystyrene (foam), plaster, wood. For residential spaces, polyurethane is optimal — lightweight, strong, moisture-resistant, and inexpensive.
Style: classic, neoclassic, modern, minimalism. This is a guide for matching the interior.
Price per linear meter: allows calculating the budget. Multiply the price by the room's perimeter (for cornices) or total molding length (for panels), and add 10-15% for trimming.
Creating panels: choosing moldings for walls
If you plan to create panels on walls (frames frompolyurethane wall moldings), choosing moldings has its own specifics.
Molding width: for small panels (60-80 cm per side) use thin moldings 3-5 cm. For large panels (100-150 cm) — wider 6-10 cm. The molding should be noticeable but not dominate the panel.
Molding profile: for neoclassicism, simple profiles with one or two rolls, without ornamentation, are suitable. For classicism, profiles with decorative elements (scrolls, leaves, ornament) can be used.
Profile Symmetry: Moldings can be symmetrical (top and bottom of the profile are identical) or asymmetrical (one side differs from the other). For panels, symmetrical moldings are preferable — they look consistent from all sides of the frame.
Color:Buy polyurethane wall moldingswhite color and paint to match the wall tone (neoclassical) or in a contrasting color (classical). A contrasting color highlights panels more vividly, but requires caution — it can overload the interior.
Portals and Frames: Moldings around doors and windows
Molding around openings — a classic technique that gives doors and windows architectural significance. Here, the choice of profile is determined by the size of the opening and the style.
Portal molding width: usually 8-15 cm. Too narrow molding (less than 6 cm) around a door looks sparse and fails to create a framing effect. Too wide (more than 15 cm) overloads, especially in small rooms.
Door height affects the choice. A standard 2-meter-high door — molding 8-12 cm. A tall door (2.5 meters in rooms with high ceilings) — molding 12-15 cm.
For windows, molding can be thinner (6-10 cm), especially if the windows are small. Large panoramic windows require more substantial framing.
Corner Elements: In classical portals, decorative corner pieces — rosettes, scrolls — are installed at the corners (where vertical and horizontal moldings meet). This adds decorative detail. In neoclassicism, corners are usually simple, without additional elements.
Combining Different Elements: How Not to Overdo It
Often, several types of molding are used in one room: ceiling cornice, wall moldings for panels, portals around doors, may beWooden baseboardor polyurethane. It is important that all elements harmonize with each other.
Profile Unity: It is desirable that all elements are from the same collection or at least in the same style. If the cornice is classical with ornamentation, wall moldings should also be classical. If the cornice is neoclassical and minimalist, moldings should also be minimalist.
Proportionality: If the cornice is large (15 cm), wall moldings should be proportionally large (8-10 cm). If the cornice is thin (8 cm), moldings should also be thin (4-6 cm). A sharp contrast in scale between elements creates disharmony.
Do Not Overload: Molding is effective in moderation. If you install a cornice around the entire perimeter plus panels on all walls plus portals around all doors and windows, it may become overloaded. Better to distribute accents: cornice around the perimeter, panels on one accent wall, portal around the entrance door. Leave the rest clean.
Examples of Successful Selection: Real Cases
Studio apartment, ceiling 2.7 m, area 28 sq.m
Task: Highlight the living area, add elegance, without overloading the small space.
Solution: Thin ceiling cornice 9 cm around the perimeter, without ornamentation, simple profile with two rolls. On the wall behind the sofa — three vertical panels of molding 5 cm wide. Moldings and cornice are painted in wall color (light gray), standing out only by relief.
Result: The space has acquired structure, classical elegance has appeared, but lightness is preserved. Molding has not 'eaten' the height, has not overloaded the small area.
Country house, living room, ceiling 3.5 m, area 50 sq.m
Task: Create a formal classical interior matching the scale of the room.
Solution: Massive ceiling cornice 18 cm with deep relief, classical profile with ornamentation. On the walls — large panels of molding 10 cm wide. Portal around the fireplace 15 cm wide. All elements in white color (contrast with colored walls).
Result: The interior turned out grand, respectable, proportions are harmonious. Large elements are proportionate to the large volume of the room.
Bedroom in a new build, ceiling 2.65 m, area 14 sq.m
Task: Add coziness and elegance, visually not lowering the already low ceiling.
Solution: Cornice 8 cm, as thin as possible, but with clear relief (so that light and shadow are noticeable). Behind the headboard — rectangular frame of molding 4 cm. Everything is painted in wall color (beige).
Result: The bedroom looks elegant, an accent has appeared behind the bed, but the ceiling height visually has not suffered. Thin elements have not overloaded the small space.
Frequently asked questions
Can a 15 cm cornice be used with 2.7 m ceilings?
Technically possible, but visually it will be heavy. Such a cornice will 'eat' 5.5% of wall height, which is close to the upper limit of the recommended range (3-5%). If the room is large in area (over 30 sq.m) and the style is classical, this is acceptable. If the room is small or the style is modern, it's better to choose a 10-12 cm cornice.
How to understand that the profile is too small?
Attach a sample to the wall and step back 3-4 meters. If the profile is almost invisible, blending into the wall background, it means it's too small for your room. Also, assess the light and shadow: if even under side lighting the relief is barely noticeable, the profile is not expressive enough.
Is it necessary to choose molding in the tone of furniture?
Not necessarily in the same tone, but stylistic harmony is required. If the furniture is classical (carved legs, curved lines, rich texture), the molding should also be classical. If the furniture is modern (straight lines, minimalism), the molding should be simple, without excessive decoration.
Can polyurethane molding be combined with gypsum?
Yes, but with caution. Gypsum molding usually has a deeper, more expressive relief than polyurethane. If you place a gypsum cornice next to a polyurethane molding, the difference may be noticeable. It's better to combine elements made of the same material or choose high-density polyurethane, which has relief quality close to gypsum.
How to calculate the amount of material for wall panels?
Draw a scaled wall scheme, mark the panels. Calculate the total length of all horizontal and vertical molding segments. Add 15% for cutting angles and possible errors. Divide by the length of one molding segment (usually 2 meters), round up — you get the number of pieces.
Is it true that white molding visually increases ceiling height?
Not exactly. White color makes the element more noticeable (contrasting against colored walls), but it doesn't necessarily increase height. It's the correct scale of the cornice and the use of hidden lighting (LED strip behind the cornice, illuminating the ceiling) that visually raises the ceiling. In neoclassicism, molding is often painted to match wall color — this makes it stand out by relief, not color, creating a more refined effect.
Is protection needed for molding after installation?
Polyurethane does not require special protection. After installation,— everything must correspond to the chosen era.it is painted with acrylic or latex paint — this is the protective coating. Paint protects from dust, moisture, and mechanical damage. In bathrooms, you can use moisture-resistant paints or varnishes for additional protection.
Can molding be installed by oneself or are specialists required?
Installing ceiling cornices and simple wall moldings is well within the reach of someone with basic repair skills. Carefulness and precision in cutting angles (using a miter box), correct adhesive are required. Complex compositions (panels with decorative inserts, doorways, multi-level cornices) are better entrusted to professionals — these require experience and professional tools.
What glue to use for polyurethane molding?
Special polyurethane adhesive (e.g., 'liquid nails', polyurethane glue) or acrylic putty. PVA is not suitable — weak fixation. Construction foam is not suitable — it expands and deforms elements. Adhesive is applied to the back of the element in a thin wavy line, the element is pressed against the wall and held until it sets (1-2 minutes), it can be secured with painter's tape.
How to care for stucco?
Polyurethane molding painted with paint does not require special care. Periodic dry cleaning (brushing off dust with a soft brush or vacuum cleaner with brush attachment). If stained, wipe with a damp cloth and mild detergent. Do not use abrasives or aggressive chemicals — they may damage the paint. After some time (5-10 years), you can repaint if the paint has faded or if you wish to change the color.
Conclusion: from selection in the store to perfection in interior design
Choosing molding inMoldings shopis not a quick catalog purchase, but a thoughtful process requiring understanding of scale, proportions, and light and shadow. A beautiful profile in isolation may turn out unsuitable for a specific room. Scale is determined not by absolute dimensions (8 or 15 centimeters), but by the relationship to ceiling height, room area, and interior style.
Sample fitting on-site — not overcaution, but necessity. Only by attaching the profile to a real wall and evaluating it under real lighting can you determine if it suits the space. Store mockups and visual suggestions help narrow the choice, but the final decision should be made after physical sample fitting.
Light and shadow — what makespolyurethane stuccoalive, three-dimensional, architectural. A profile without pronounced relief, which does not create play of light and shadow, becomes a flat graphic line. Relief should be evaluated under side lighting, understanding how it will work under the conditions of your room.
Harmony of elements — key to success.Moldings made of polyurethaneCornices, doorways, baseboards must be in a unified style, proportionate to each other, not conflicting with furniture or overall interior concept. Molding works as a system, not as a set of separate elements.
Errors in scale are costly — both financially and emotionally. Removing incorrectly installed cornice, buying a new one, redoing — this is double cost. But even worse than money is disappointment: wasted effort, time, anticipation of a beautiful result — and instead, failure. Therefore, do not rush, take samples, do fittings, consult, photograph, compare. The right choice is worth these efforts.
ProfessionalOnline store for polyurethane ornamentationIt is not just a warehouse with goods, but a partner in creating your interior. A good store offers not only material, but also expertise: consultations, sample fittings, demonstration stands, installation recommendations, connections with trusted craftsmen. This is an investment in the result.
Company STAVROS has been a reliable partner for those creating interiors with impeccable taste for more than two decades. Wide assortmentpolyurethane moldingincluding cornices, moldings, decorative elements, inserts — everything needed to realize any design concept. High-density materials, clear relief, profiles for different styles — from classic to minimalism.
The STAVROS catalog offers solutions for spaces of any scale: slender, elegant profiles for apartments with low ceilings, heavy cornices for spacious halls and country homes. The company’s consultants will help you select elements suitable for your space, offer sample pieces, and provide installation advice. The quality of materials is proven by thousands of completed projects — from apartments to residences, from cafes to hotels.
STAVROS is not just a store — it is expertise in architectural decoration. Here, they understand that choosing moldings is not merely purchasing an item, but creating an atmosphere, defining the character of the interior, and embodying your vision of beauty and comfort. When profiles are chosen correctly, when scale matches the space, when light and shadow play across the relief — the interior achieves completeness, harmony, that very elegance which distinguishes thoughtful design from a random collection of elements. This is the art of interior design. And it begins with the right choice, made in the right store.