Article Contents:
- Why the Wall: The Philosophy of Accent Decorating
- Choosing a Wall for Decorating: Where Molding Will Shine the Most
- The Wall Behind the Bed Headboard in the Bedroom
- The Sofa Wall in the Living Room
- TV Zone — A Functional Accent
- Fireplace Wall — A Historical Accent
- Compositional Schemes: From Simple Frames to Complex Panels
- Single Central Frame — Minimalism and Focus
- Triptych — Rhythm and Repetition
- Panel Grid — A Classic Wall System
- Asymmetric Compositions — A Modern Approach
- Decorative Wall Element — Choosing Profiles and Overlays
- Moldings — Linear Foundation
- Overlays — Point Accents
- Corner elements — finishing of joints
- Molding in the Bedroom — Creating an Atmosphere of Tranquility
- Monochromatic Palette — Elegance Without Contrasts
- Soft Inserts — Comfort and Texture
- Lighting as Part of the Composition
- Living Room — A Space for Bold Solutions
- Contrast Painting — Graphics and Depth
- Mirror Inserts — Expanding Space
- Combining with Modern Furniture — Contrast of Eras
- Color, Light, Material — Creating a Cohesive Composition
- Painting Molding — Technique and Nuances
- Patination — An Aged Effect
- Lighting the Decorative Wall
- Practical Aspects — From Concept to Implementation
- Designing the Composition — Paper and Calculations
- Wall Preparation — The Foundation of Quality
- Installation of molding — precision and patience
- Final finishing — painting and protection
- STAVROS — the architect of your ideal space
- Frequently asked questions about decorative walls with molding
- How much does it cost to decorate an accent wall with molding?
- Can molding be mounted on wallpaper?
- What is the minimum room size for wall molding?
- How long does it take to install a decorative wall?
- Can gypsum molding be used instead of polyurethane?
- How to care for wall molding?
- Does molding need to be repainted after a few years?
- Can molding be removed when moving?
- What mistakes are most often made when decorating a wall with molding?
A blank wall is not just the absence of decor. It is a missed opportunity to create a focal point, define the character of a space, and tell a story about the owners' taste. A wall with molding transforms a silent vertical surface into an architectural statement, where every relief curl, every geometric frame, every decorative rosette works to create an atmosphere. The question is not whether molding is needed on walls — the question is how to use it so that the interior gains depth, elegance, and completeness.
Molding has long ceased to be a privilege of palaces and mansions. Modern technologies, especially polyurethane casting, have made decorative elements accessible, easy to install, and durable. But accessibility has created a new problem: an abundance of unskilled solutions, where molding is used thoughtlessly, overloading the space, disrupting proportions, and creating visual chaos instead of harmony. How to avoid these mistakes? How to create a wall where beautiful molding works for the overall concept, not against it?
This article is a guide to the art of accent walls with molding. We will analyze the principles of selecting a wall for decoration, explore various compositional schemes — from minimalist frames to complex panels, discuss the specifics of applying decorative molding in bedrooms and living rooms, and consider color solutions and combinations with other materials. You will learn how to correctly calculate the number of elements, how to choose the scale of decor depending on the room's area, and how to create a balance between richness and restraint. The article contains practical recommendations, specific examples of compositions, and answers to typical questions that arise when planning a decorative wall.


Why the wall — the philosophy of accent decoration
Molding can adorn ceilings, frame doors, and highlight fireplaces. But a wall is a special field for decor. It is vertical, at eye level, and perceived as a painting. A properly designed wall becomes the compositional center of a room, an object that draws the eye upon entry.
An accent wall solves several tasks simultaneously. It structures the space, creating a visual hierarchy. In a room where all four walls are the same, the eye wanders, finding no point of focus. An accent wall provides that focus — it becomes the main one, while the others serve as background. This is especially important in large spaces, where without structuring, a sense of emptiness and discomfort arises.
The second task is masking architectural flaws. Not all rooms are perfectly proportioned. Narrow, elongated spaces, asymmetrical walls, unfortunate placement of windows and doors — all of this can be corrected with decor. Wall molding, arranged according to a specific scheme, redirects attention and creates an illusion of correct proportions where they are lacking.
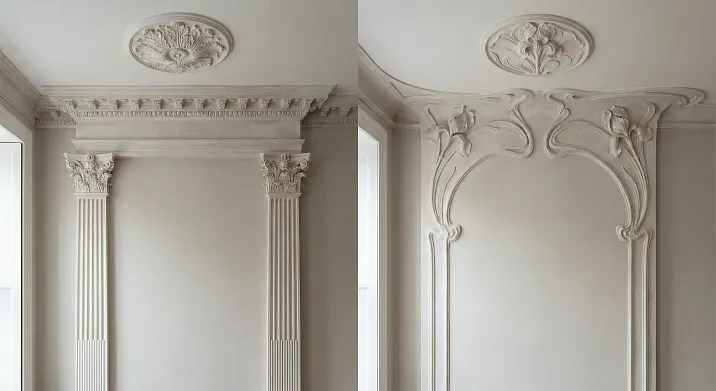
The third task is creating a stylistic key. The style of the entire interior is read from how the accent wall is designed. Strict geometric frames made of thin moldings — neoclassicism. Lavish Baroque cartouches and floral ornaments — historicism. Minimalist horizontal stripes — modern classic. One decorative technique sets the tone for the rest of the design.


Choosing a wall for decoration: where molding will shine the most
Not every wall is suitable for rich decorative molding. The choice of wall is determined by the room's function, its layout, and the placement of furniture and light sources.
Our factory also produces:


Wall behind the bed headboard in the bedroom
A classic choice for the bedroom. The bed is the compositional center of this room, and the headboard is a natural focal point. Decorating the wall behind the bed creates a frame for the headboard, turning the sleeping area into an architectural object.Beautiful moldings on wallsIn the bedroom, it works to create an atmosphere of coziness, intimacy, and security.
The size of the decorative composition is tied to the size of the bed. For a double bed 160–180 cm wide, a frame made of moldings should be wider — 200–240 cm, extending beyond the edges of the mattress by 20–40 cm on each side. The height of the composition ranges from 150 to 250 cm, depending on the ceiling height. A frame that is too small looks stunted, while one that is too large feels overwhelming.
Inside the frame, there can be contrasting paint (a dark background inside a light frame or vice versa), decorative wallpaper with a pattern, a soft panel made of fabric or leather, or even a mirror insert to create a depth effect. The frame itself can be complemented with corner appliqués — floral ornaments, geometric rosettes, classic volutes.
Get Consultation
Sofa wall in the living room
The wall along which the sofa is placed is the second most popular choice for accent decor. The sofa is the main piece of furniture in the living room, the place where the family gathers and guests are received. The wall behind the sofa is visible to everyone entering, and it shapes the first impression of the room.
The composition on the sofa wall is often built from several panel-frames arranged horizontally. Three square or vertically oriented rectangular frames above the sofa is a classic scheme. The distance between frames is 15–30 cm, and the total width of the composition is 80–90% of the sofa's width. Inside the frames, paintings, mirrors, textile inserts, or simply contrasting paint can be placed.
An alternative approach is one large panel spanning the entire width of the sofa and part of the wall above it. Inside the panel is a symmetrical composition of decorative overlays: a large central overlay and several smaller ones in the corners. This solution creates monumentality and is suitable for large living rooms with high ceilings.
TV zone – a functional accent
The wall where the TV is placed is another popular spot for decoration. Balance is important here: the decor should not distract from the screen but should frame it, integrating it into the overall wall composition. A TV without framing looks like a foreign technical object disrupting the style of a classic interior.
The solution is to create a decorative panel around the TV. Moldings frame the area where the screen is placed, creating a frame with 20–30 cm margins on all sides of the TV. The frame can be complemented with side pilasters creating vertical accents and an upper frieze with a floral ornament.
Important point: wires and communications need to be hidden before installing the molding. Wire conduits are concealed inside the wall or masked with decorative elements. Planning such details is part of designing a decorative wall.
Fireplace wall – a historical accent
If the room has a fireplace (real or decorative), the wall with it is a natural choice for rich decoration. Historically, the fireplace was the center of the home, the place around which family life revolved. Modern interiors preserve this symbolism.
The fireplace portal is framed with moldings creating an architectural frame. Above the portal is a decorative shelf serving as the base for the next tier of decor: a mirror in a molded frame, a painting, a clock. On the sides of the fireplace – pilasters or vertical molding panels creating symmetry. The upper part of the wall above the fireplace is a place for a large decorative overlay, a ceiling rosette (not necessarily round – oval, rectangular options are possible), or even a molded panel with a narrative composition.
Compositional schemes: from simple frames to complex panels
Molding on walls can be organized in different ways. There are time-tested compositional schemes that guarantee a harmonious result.
Single central frame – minimalism and focus
The simplest scheme: one rectangular or square frame made ofpolyurethane wall moldings, placed in the center of the wall. Inside the frame is an accent filling. The frame size depends on the wall area: for a 3×2.5 meter wall, a frame of 150×120 cm or 180×140 cm is optimal. The margins from the wall edges to the frame should be even – this creates a sense of balance.
The molding profile is chosen depending on the scale: for large frames – wide molding (8–12 cm), for small ones – narrow (4–6 cm). The frame is complemented with corner overlays that mask the molding joints and add decorativeness. Corner overlays can be floral (acanthus leaves, laurel wreaths), geometric (rosettes with radial symmetry), or classic (volutes).
Triptych – rhythm and repetition
Three vertical rectangular frames, arranged horizontally with equal intervals – a classic scheme for long walls. The distance between frames is 20–40 cm, the width of each frame is 50–70 cm, the height is 100–150 cm. Such a composition creates rhythm, guides the eye along the wall, and structures the space.
Inside the frames – identical or varied filling. Identical (three mirrors, three paintings of the same size, three textile inserts of the same color) creates strict symmetry. Varied (the central frame larger than the side ones, different fillings) adds dynamism but requires careful selection of elements to avoid disrupting the composition.
Panel grid – a classic wall system
A more complex scheme: the wall is divided into several horizontal tiers and vertical sections, forming a grid of rectangular panels. The classic version is three tiers: lower (from the floor to a height of 80–100 cm), middle (the main part of the wall), upper (under the ceiling, height 30–50 cm). Each tier is further divided into 2–4 vertical sections.
This scheme is called 'boiserie' and dates back to French interiors of the 17th–18th centuries.wall panels boiseriecreate a sense of architectural integrity, turning the wall into an independent work of art. Inside the panels, contrasting material is placed: dark wood on a light background, silk fabrics, gilded leather, decorative plaster.
Designing boiserie requires mathematical precision. The proportions of the panels follow the golden ratio rule or simple ratios (1:1.5 or 2:3). The width of the moldings is the same throughout the composition, joints are made at a 45° angle with perfect fitting. Any deviations, irregularities, or asymmetry ruin the impression.
Asymmetrical compositions – a modern approach
For modern interiors where classical symmetry seems too strict, asymmetrical schemes are used. Moldings create frames of different sizes, positioned not in the center of the wall but shifted to one edge. Overlays are placed not symmetrically but in groups, creating visual movement.
This approach requires a developed artistic sense and understanding of compositional balance. Asymmetry does not mean chaos – elements must balance each other in visual weight. A large element on the left is compensated by a group of small ones on the right. A composition shifted upward is balanced by a horizontal strip of molding at the bottom.
Decorative element for the wall – choosing profiles and overlays
Molding is not just moldings. A full-fledged decorative composition includes various types of elements, each playing its own role.
Moldings – linear foundation
moldings, cornices, and baseboards– linear elements forming frames and boundaries. For wall compositions, moldings with a width from 3 to 15 cm are used. Narrow moldings (3–5 cm) are suitable for small rooms and delicate compositions. Medium (6–10 cm) – universal, work in most interiors. Wide (11–15 cm) – for large rooms with high ceilings, where small decor would be lost.
The molding profile can be smooth (simple convex or concave surface), relief (with ornament: meanders, floral motifs, geometric patterns), or combined (smooth sections alternate with ornamented ones). For strict modern interiors – smooth profiles. For classic ones – relief with recognizable historical motifs.
Moldings are cut at a 45° angle to create frames. The quality of the cut is critical — even a 1° deviation creates a noticeable gap in the corner. For precise cutting, a miter saw or miter box is used. After installation, joints are filled with acrylic sealant, sanded, and painted — a properly executed joint becomes invisible.
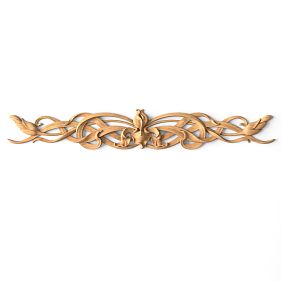
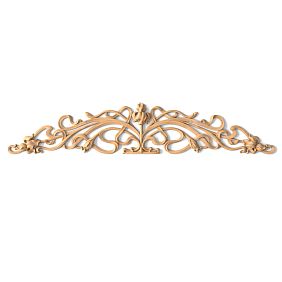
Appliqués — point accents
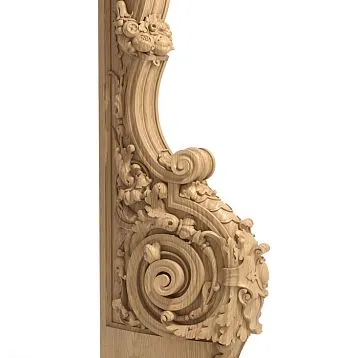
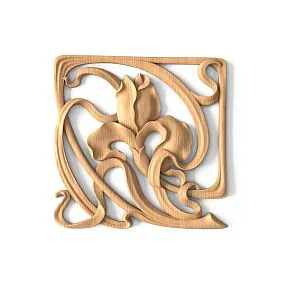
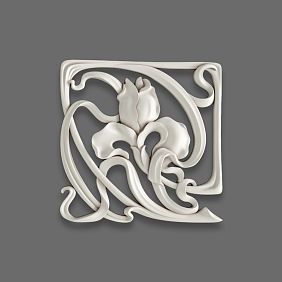
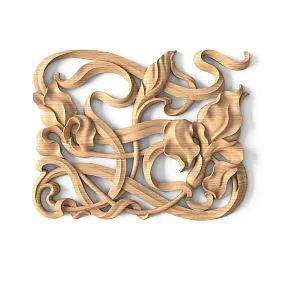
Decorative appliqués are individual elements that are mounted on a flat wall or inside molding frames. They come in various shapes: round rosettes, square panels, rectangular vertical and horizontal elements, corner appliqués, asymmetrical cartouches.
The ornamentation of appliqués is diverse: botanical motifs (acanthus leaves, laurel branches, grapevines), geometric patterns (rosettes with radial symmetry, meanders, braids), sculptural elements (putti, mascaron, garlands). The choice of ornament is determined by the interior style.
Wall claddingallows creating a visual center of the composition. A large appliqué with a diameter of 40–60 cm is placed in the center of the molding frame, attracts the eye, and becomes the main decorative element. Small appliqués (10–20 cm) are grouped in the corners of frames, creating a rhythmic pattern.
Corner elements — finishing the joints
The corners of molding frames are critical points of the composition. A simple 45° joint is functional but visually plain. Corner appliqués mask the joint and add decorative appeal. They can be classical (volutes, scrolls), botanical (leaves emerging from the corner), geometric (rosettes inscribed in the corner).
The size of the corner appliqué should correspond to the width of the molding. For a molding 8 cm wide, an appliqué of 8×8 cm or 10×10 cm is suitable. An appliqué that is too small will get lost, one that is too large will look bulky.
Molding in the bedroom — creating an atmosphere of tranquility
The bedroom is an intimate space, a place for rest and recovery. Here, decor should be restrained, not overwhelming perception, creating a sense of security and harmony. A wall with molding in the bedroom serves these purposes if the scale, color, and composition are chosen correctly.
Monochromatic palette — elegance without contrasts
The most elegant solution for a bedroom is monochromatic molding. White molding on white walls, gray on gray, beige on beige. The decor is perceived through relief, the play of light and shadow, not color contrast. This solution visually enlarges the space, creating a sense of lightness and airiness.
Monochromatic molding requires perfect execution quality. Any defects — roughness, uneven joints, adhesive drips — will be noticeable. Wall preparation must be impeccable: leveling, puttying, priming, final painting. Moldings are installed with jeweler-like precision, joints are carefully filled and sanded.
After installation, the entire wall is painted one color — both the molding and the background. Matte paints are used, which do not create glare and emphasize the relief. Lighting is planned to highlight the volume: side lighting (sconces, floor lamps) creates deep shadows in the recesses of the relief, making the decor expressive.
Soft inserts — comfort and texture
Inside molding frames on the wall behind the headboard, soft panels are often placed — elements upholstered in fabric or leather with soft filling (foam, synthetic padding). This is not only decorative but also functional: a soft wall behind the back provides comfort if you like to read or watch TV while leaning on pillows.
Fabric for soft panels is chosen to be dense, non-pile, and abrasion-resistant: jacquard, velour, faux suede, natural or artificial leather. The fabric color can match the wall color (monochromatic solution) or be contrasting (dark blue fabric in a white molding frame on a light gray wall).
The soft panel is installed after the moldings are in place. Its size exactly matches the inner perimeter of the frame; the edges are tucked under the molding or butted tightly. Tufting (buttons recessed into the soft surface, forming a geometric pattern) adds an additional decorative layer.
Lighting as part of the composition
A decorative wall in the bedroom requires proper lighting. General overhead light is insufficient — it does not reveal the relief of the molding; the composition looks flat. Local lighting directed at the wall is necessary.
Sconces are placed on either side of the bed at a height of 140–160 cm from the floor — this is both functional (light for reading) and decorative (wall accent lighting). Light fixtures are chosen with adjustable light direction to allow the beam to be aimed at the wall, emphasizing the relief.
Hidden backlighting is a more modern solution. An LED strip is placed behind the moldings or in niches, creating soft backlighting. The wall seems to glow from within; the decor is perceived as three-dimensional and dramatic. The backlight color is warm white (2700–3000 K) to create a cozy atmosphere.
Living room — a space for bold solutions
If the bedroom requires restraint, the living room allows for experimentation. More saturated compositions, contrasting color solutions, and large decorative elements are appropriate here. A wall with molding in the living room becomes an architectural statement, a demonstration of taste and status.
Contrast painting — graphics and depth
White molding on dark walls or gold on deep blue, green, burgundy — a classic technique for living rooms. Contrast makes the decor maximally noticeable, graphic, and expressive. Every line of the molding, every scroll of an appliqué is clearly readable against the contrasting background.
A dark background requires good lighting — otherwise, the room will look gloomy. The number of light fixtures is increased, and lamp wattage is higher than for light interiors. But the effect is worth it: a dark wall with white or gold molding creates a dramatic, solemn atmosphere suitable for formal living rooms.
Gilding of molding is a separate topic. It is not necessary to use real gold leaf (although for premium interiors, even that is possible). Modern paints with metallic pigments (gold, silver, bronze, copper) create a convincing imitation. Gilding can be full (the entire element is covered with gold paint) or partial (gold only on the protruding parts of the relief, creating a patina effect).
Mirror inserts — expanding space
Mirrors inside molding frames are an effective technique for small living rooms. The mirror reflects the space, visually doubling it and adding light. Three vertical mirrors in molded frames on a wall create the illusion of additional windows or doorways.
Mirrors can be clear (ordinary mirror with silver amalgam) or tinted (bronze, graphite, smoky mirror). Tinted mirrors are less active, creating a more restrained, noble effect.
Installing mirrors inside molded frames requires precision. First, the moldings are installed, then the mirror is mounted inside the frame using adhesive or mechanical fasteners. The gap between the mirror and the molding — 5–10 mm — is filled with sealant matching the molding color, creating a smooth transition.
Combining with modern furniture — a contrast of eras
One of the current trends is combining classical wall moldings with modern furniture. A sofa with a laconic form without decoration, a glass and metal coffee table, minimalist floor lamps — against a wall with exquisite molding panels and floral overlays. The contrast creates tension, making the interior not boring, but fresh.
This technique requires a sense of measure. The molding should be elegant, not overloaded — otherwise the contrast turns into conflict. The furniture can be modern, but not ultra-avant-garde — a certain restraint of forms is needed. The color palette unites different eras: neutral tones (white, gray, beige) for the molding and walls, accent colors (deep blue, emerald, terracotta) for textiles and accessories.
Color, light, material — creating a holistic composition
Molding is not an end in itself, but part of the overall interior solution. Its color, lighting, and combination with other materials should be thought out as a single system.
Painting molding — technique and nuances
Polyurethane molding is supplied white, primed, and ready for painting. But painting is not a formality; it is an important stage that determines the final appearance of the decor.
For interior molding, water-based or acrylic paints are used — they are odorless, dry quickly, and create a matte or semi-matte surface. Glossy paints are not suitable for molding — the shine makes the relief less expressive, and glare interferes with perception.
Painting is done in 2–3 layers. The first layer is the base, filling the material's micropores. The second is the main layer, creating the desired color and coverage. The third is the finishing layer, optional, to achieve a perfectly even coating without streaks.
Tools — a brush with soft bristles or a velour roller with short pile. A paint sprayer is rarely used — paint consumption is higher, and surrounding surfaces need protection from overspray. For molding with complex relief, a brush is preferable — it penetrates into recesses, painting all areas.
Patination — the effect of antiquity
Patination is a technique that creates the effect of noble antiquity. Dark paint (brown, gray, black, green) is applied to a light base and rubbed into the recesses of the relief. The protruding parts are wiped, remaining light. The result is a contrast: light convexities and dark recesses, like in antique molding where patina — the patina of time — has accumulated in the recesses.
Patination technique: on a completely dried base coat (usually white, cream, or light gray), dark paint diluted to a semi-transparent consistency is applied with a brush. After 3–5 minutes, while the paint is not yet dry, the surface is wiped with a damp cloth or sponge. The paint is removed from the protrusions, remaining in the recesses. After drying, the effect is fixed with varnish or a finishing layer of the base paint diluted with water.
Lighting a decorative wall
The relief of the molding is revealed through light and shadow. Frontal lighting (the light source is located opposite the wall) makes the relief flat — shadows are minimal, and the volume is not perceptible. Side lighting (the light source is to the side of the wall, at mid-height level) creates long shadows, emphasizing every detail of the relief.
Special light fixtures are used for accent walls: track-mounted spotlights (adjustable fixtures that can be directed at the desired angle), wall sconces with directional light, floor lamps with adjustable shades. The light beam is directed parallel to the wall at a 30–45° angle — this is optimal for revealing the relief.
Light color temperature — warm (2700–3000 K) for classic interiors, neutral (4000–4500 K) for modern ones. Cold light (5000 K and above) makes the interior non-residential, hospital-like, and is not suitable for living spaces.
Practical aspects — from concept to implementation
Beautiful ideas are good, but implementation is important. How to move from concept to a finished decorative wall? Let's consider the practical sequence of actions.
Designing the composition — paper and calculations
Before buying molding and starting installation, you need to design the composition. Measure the wall: width, height, location of outlets, switches, and other elements that need to be avoided or integrated into the composition.
Draw the wall on paper to scale (a convenient scale is 1:20, meaning 5 cm on the drawing equals 1 meter in reality). Outline the furniture that will stand against the wall (bed, sofa, chest of drawers). Now place the molding frames, observing proportions and symmetry.
Calculating the amount of molding: the perimeter of one frame multiplied by the number of frames, plus 10–15% for trimming and possible defects. For example, a 150×120 cm frame has a perimeter (150+120)×2 = 540 cm = 5.4 meters. Three such frames — 16.2 meters. With a margin — 18–19 meters. Molding is sold in segments of 2 or 2.4 meters, so you need 8–9 segments.
Wall preparation — the foundation of quality
The wall for molding must be even. Permissible deviations — no more than 2–3 mm over 2 meters of length. Major unevenness must be corrected with plaster or drywall.
Preparation sequence: cleaning off old wallpaper, paint, and dirt. Repairing cracks and potholes with plaster compounds. Primer to strengthen the surface and improve adhesion. Final puttying with a thin layer to create a perfectly smooth surface. Sanding after the putty dries. Re-priming. Painting the wall in a base color (if a colored solution is planned) or white primer (if the final color will be applied after molding installation).
Molding installation — precision and patience
Installation begins with marking. Use a laser level to apply horizontal and vertical lines. Mark the position of the moldings with a pencil. Lay out the elements on the floor in the order they will be installed — this will help avoid mistakes.
Adhesive for polyurethane molding — specialized mounting adhesive (polyurethane or acrylic). The adhesive is applied to the back of the molding in a zigzag or dots. The element is pressed against the wall and held for 30–60 seconds. For long moldings, temporary fixation with painter's tape or small nails (which are removed after the adhesive sets) is used.
Molding joints — critical points. Cutting at a 45° angle is done with a miter saw. Before gluing, check the joint 'dry' — the elements should fit without a gap. If there is a gap, adjust the cut. After installation, the joints are filled with white acrylic sealant, excess is removed with a damp sponge. After drying, the joint is sanded with fine sandpaper until completely smooth.
Overlays are installed after the moldings. Adhesive is applied in dots to the back side, the overlay is pressed against the wall and held for 30 seconds. Overlays are lightweight; additional fastening is usually not required.
Final finishing — painting and protection
After the adhesive has completely dried (24 hours), painting is performed. If the molding and the wall will be the same color, everything is painted together. If the molding is contrasting, the wall is painted first (carefully outlining the contours of the moldings with a brush), then the molding.
The brush is moved along the direction of the relief, painting all the recesses. Movements are light, without pressure — pressure leaves marks. For painting, use high-quality brushes with natural or mixed bristles — they do not leave streaks or bristles.
After painting (if required), patination is performed. The technique is described above. The final stage is protection. A matte water-based varnish is applied to the molding — it protects against dust and dirt, allowing the surface to be wiped with a damp cloth. The varnish is applied with a soft brush in one thin layer.
STAVROS — the architect of your ideal space
When the conversation turns to where to find quality molding, how to properly design a decorative wall, who will bring the idea to life, the name STAVROS sounds like the answer to all questions. The company STAVROS is not just a supplier of decorative elements, but a comprehensive partner in creating interiors where every detail is thought out, every element is in its place, every wall becomes a work of architectural art.
Molding in interiors from STAVROS— is hundreds of options for moldings, cornices, baseboards, overlays, rosettes, made from high-quality European polyurethane. Material density of 350–400 kg/m³ ensures strength and shape stability. Geometric accuracy (deviations no more than 0.5 mm per linear meter) guarantees perfect joints. Relief detailing reproduces the finest nuances of the ornament — every petal, every curl is drawn with jeweler's precision.
The STAVROS assortment covers all stylistic directions. Classical profiles with Ionic volutes and Corinthian acanthus leaves for historical interiors. Strict geometric moldings for neoclassicism. Minimalist smooth profiles for modern spaces. Each style is represented by dozens of items, allowing you to select elements precisely according to your concept.
But STAVROS is not just a catalog. The company offers a full cycle of services for creating decorative walls. STAVROS designers will develop a concept for decorating an accent wall, taking into account the room's layout, furniture placement, lighting, and your stylistic preferences. You will receive a 3D visualization — see the result before work begins, can make adjustments, and select alternative options.
Material quantity calculation is done with accuracy to the linear centimeter. You will receive a specification: which elements, in what quantity, what total footage, what additional materials (adhesive, sealant, paint) will be required. This eliminates errors in procurement — there will be neither shortages nor surpluses.
Delivery is organized to any region of Russia and the CIS. Elements are packaged in protective film and corrugated cardboard, preventing damage during transportation. For Moscow, St. Petersburg, and nearby regions, delivery by STAVROS's own transport is possible — this guarantees safety and precise deadlines.
STAVROS installation teams (if necessary) will perform professional installation. Experience working with polyurethane molding, knowledge of all technological nuances, attention to detail — the key to a perfect result. Joints are tight and invisible, geometry is precise, painting is even without streaks or drips. A 3-year warranty is provided for completed work — if problems arise (peeling, cracking, deformation), the company will fix them free of charge.
The warranty on STAVROS products is 5 years. This is not a formality, but real responsibility. STAVROS polyurethane molding does not yellow, does not deform, does not lose relief, and retains its original appearance for decades. Numerous completed projects — private houses, apartments, commercial interiors — confirm the reliability and durability of the products.
STAVROS pricing policy is transparent and competitive. Own production, direct contracts with European raw material suppliers, optimized logistics allow offering premium quality at reasonable prices. Special terms and volume discounts are provided to wholesale buyers — designers, construction companies, foremen. Regular promotions and seasonal offers make quality molding even more accessible.
STAVROS showrooms in Moscow and St. Petersburg are spaces where you can see, touch, and assess product quality. The exhibition includes ready-made interior solutions: wall fragments with various decoration options, samples of all molding profiles, collections of overlays and rosettes. Consultants will help select elements, calculate the required quantity, and advise on installation technology.
The online catalog on the STAVROS website contains detailed descriptions of all items with photos, dimensions, and technical characteristics. A convenient filter system allows selecting elements by style, size, and type. The shopping cart and online payment make the ordering process quick and convenient.
Choosing STAVROS, you choose a company that understands: a wall with molding is not a set of elements, but a thoughtful composition where every detail enhances the whole. A company that possesses the knowledge, experience, and resources to implement the boldest ideas. A company for which quality is not a marketing phrase, but a real work standard, confirmed by thousands of satisfied clients and hundreds of successful projects.
Frequently asked questions about decorative walls with molding
How much does it cost to decorate an accent wall with molding?
The cost depends on the wall area, complexity of the composition, and selected elements. A minimal solution (one frame made of simple molding 150×120 cm with corner overlays) — from 8,000 to 15,000 rubles for materials. An average composition (three frames with overlays and internal decor) — 25,000–50,000 rubles. A complex boiserie panel system on the entire wall — from 80,000 to 200,000 rubles. Installation cost (if not doing it yourself) — 50–100% of the material cost.
Can molding be mounted on wallpaper?
Technically yes, but not recommended. The adhesive holds the molding not on the wallpaper, but on the wall beneath them. If the wallpaper is poorly adhered, the molding will peel off along with the wallpaper. The correct order: first, the molding is installed on a prepared plastered wall, then everything is painted. If you want wallpaper inside the molding frames, it is applied after installing the moldings with precise trimming along the inner contour.
What is the minimum room size for molding on walls?
Molding is appropriate in rooms from 12–15 m² and above. In small rooms (8–10 m²), rich molding decor overloads the space. But even in small rooms, molding can be used if it is restrained: one thin molding framing a mirror or painting, several small overlays. The scale of the decor should correspond to the scale of the room.
How long does it take to install a decorative wall?
Depends on complexity. A simple composition (one frame) is installed in 2–4 hours. An average one (three frames with overlays) — in one working day. A complex panel system — in 2–3 days. Additional time is required for wall preparation (1–3 days depending on condition) and painting (1 day). Total: from the start of preparation to final painting — 3–7 days.
Can plaster molding be used instead of polyurethane?
Yes, but it is more difficult and expensive. Plaster molding is heavier (requires reinforced fastening), fragile (easily damaged during transportation and installation), and afraid of moisture (not suitable for damp rooms). Polyurethane lacks these disadvantages, while being visually indistinguishable from plaster after painting. Plaster makes sense only for restoring historical interiors where material authenticity is required.
How to care for molding on walls?
Maintenance is minimal. Every 2–3 months — dry cleaning with a soft brush or vacuum with a dust removal attachment for recesses in the relief. Once a year — wipe with a slightly damp cloth (if the molding is coated with protective varnish). Avoid abrasive cleaners and stiff brushes — they can damage the painted surface. If stains appear (grease spots, fingerprints), remove with soapy water, then wipe with a clean damp cloth.
Does the molding need to be repainted after a few years?
High-quality acrylic paint maintains its appearance for 7–10 years. After this period, slight fading (especially if the wall is exposed to bright sunlight) or staining that cannot be removed by wiping may occur. In this case, the molding is repainted. The process is simple: light sanding of the surface with fine sandpaper to remove dirt, priming, painting in 1–2 coats. Work time — a few hours.
Can the molding be removed when moving?
Theoretically yes, but practically difficult. Polyurethane molding is glued to the wall with strong adhesive. When attempting to remove the molding, it may break, and the wall may be damaged. Additionally, after removal, adhesive residue will remain on the back, which is difficult to remove. It is easier to leave the molding for the new owners (this even increases the apartment's value when selling) or use its elements to decorate the new home, purchasing any missing pieces.
What mistakes are most often made when decorating a wall with molding?
Typical mistakes: not maintaining proportions (too large decor in a small room or too small in a large one), breaking symmetry (frames of different sizes or unevenly placed), poor joints (gaps in molding corners), overloading with decor (too many elements, no visual rest), incorrect lighting (frontal light does not reveal the relief). Preliminary planning and consultation with professional designers help avoid mistakes.