Article Contents:
- Idea and planning: the key to success
- Inspiration and concept
- Material selection
- Functionality and aesthetics
- Construction development
- Tools for working with wood
- Work area preparation
- Step 1. Marking and cutting
- Step 2. Processing and sanding
- Step 3. Assembling the structure
- Step 4. Finishing and painting
- Step 5. Decoration
- Plan in advance
- Experiment with finishes
- Pay attention to details
- Follow safety procedures
- Be inspired by successful project examples
- Savings and individuality
- Development of creative skills
- Opportunity for self-expression
Creating your own wooden shelves is not just a craft project, but a true creative process capable of transforming an ordinary space into a cozy, stylish, and functional piece of art. Handmade shelves not only help save budget, but also allow you to bring to life individual design ideas, highlight your uniqueness and creative potential. In this article, we will thoroughly explain how to make beautiful wooden shelves by hand, share tips on material, tool selection, working techniques, and finishing, so the result will exceed all expectations.


Idea and planning: the key to success


Inspiration and concept
The first step in creating beautiful shelves is forming an idea. Inspiration can be found everywhere: in nature, architecture, vintage interiors, modern design trends. Ask yourself why you need shelves: they can serve as storage for books, decorative items, or even collectibles. Think about the interior style — perhaps you want the shelves to blend seamlessly into a classic, rustic, or minimalist design.
Determine the size and shape. Plan how many shelves you need, their dimensions, and how they will be arranged on the wall. Make sketches or rough drafts — even simple diagrams will help you visualize the final result. A clearly defined concept will help avoid mistakes in the following stages of work.
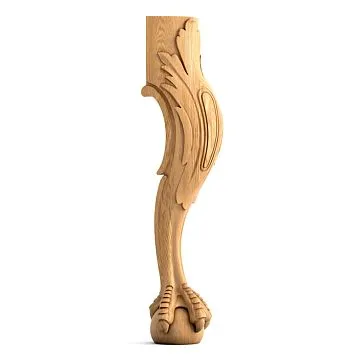
Our factory also produces:


Material selection
For making shelves, the most important thing is choosing quality wood. Natural wood has a warm, lively tone and unique texture that gives the item a special charm. Various types of wood will work well: pine, oak, beech, walnut. Each type has its own characteristics—some are softer, others are strong and durable. If you are just starting to work with wood, pine may be a good choice due to its availability and ease of processing. To create truly exclusive shelves, you can use oak or walnut, which will give the item elegance and sophistication.
Don't forget about hardware: quality corner brackets, screws, and possibly special fastening systems will be needed to mount shelves. The choice of finishing materials also matters: natural oil, wax, or varnish will highlight the beauty of the wood and protect the surface.
Get Consultation
Shelf Design and Construction
Functionality and aesthetics
When designing shelves, it's important to combine functionality with aesthetic appeal. Shelves should not only be strong and stable but also visually pleasing and harmoniously integrated into the interior. Consider how they will be used: if they are bookshelves, pay attention to the convenience of placing books and decorative items. If the shelves are intended for small accessories, consider adding several levels or drawers.
Construction Development
There are many construction options: a classic straight shelf, a shelf with rounded edges, a step-like shelf, or even asymmetrical designs that look very modern. If you have experience working with tools, you can experiment with different shapes and create unique constructions by combining them with decorative elements.
To ensure structural reliability, calculate the load that the shelves will bear. If you plan to place heavy items on them, make sure the construction includes sufficient fastening elements and support points. Make a drawing indicating dimensions, angles of inclination, and fastening locations. This approach will help avoid errors during cutting and assembly.
Required Tools and Preparation
Woodworking Tools
To create beautiful shelves to make by hand, you will need the following set of tools:
● Saw. A circular saw or band saw can be used to cut boards to the required sizes.
● Planer or sander. Required for surface processing, removing burrs, and straightening edges.
● Drill and drill bits. For drilling holes for fasteners.
● Plumb bob and tape measure. For accurate measurement and alignment of the structure.
● Square and pencil. For marking cutting and drilling lines.
● Brushes, rollers, and rags. For applying protective coatings and finishes.
Preparation of the Work Area
Organize your workspace so that it is well-lit and has enough space to work with boards. Don't forget about safety: use safety goggles, gloves, and ear protection if necessary. Prepare all tools in advance, check their condition, and ensure you have all necessary consumables — wood, fasteners, and finishing materials.
Step-by-step instruction for making shelves
Step 1. Marking and Cutting
Start by marking the boards according to your drawing. Use a square and tape measure for precise measurements. After marking, carefully cut the boards into the required pieces. It is important to maintain straight lines to ensure the shelves are even and neat. If you are making multiple shelves, try to make their sizes and shapes identical — this will give the final result a sense of harmony.
Step 2. Processing and Sanding
After cutting, process the edges of the boards using a sander or by hand with sandpaper. Sanding will remove burrs and roughness, making the surface smooth and pleasant to the touch. Pay attention to all parts that will be visible after assembly — from the edge to the surface to which the finish will be applied.
Step 3. Assembling the Structure
Assemble shelvesusing fastening elements: corner brackets, screws, and other connecting parts. Start with the main frame, then attach the shelf to it. If the structure includes multiple levels, check their stability. Don't rush — proper assembly ensures the long-term durability and reliability of the entire structure. If possible, conduct a preliminary assembly without fasteners to ensure all parts match the drawing exactly.
Step 4. Finishing and Painting
Now that the structure is ready, it's time for finishing. Apply the chosen protective coating to the shelf surfaces: this could be varnish, oil, or wax. If you want to preserve the natural look of the wood, choose transparent oils that will highlight the material's texture and color. For a unique effect, you can also use paint or stain, selecting a shade that harmonizes with the interior. Apply the coating evenly, following the manufacturer's recommendations and allowing each layer to dry thoroughly.
Step 5. Decoration
To make your shelves look even more elegant, you can add decorative elements. These may be carved patterns, decorative appliqués, or even hand-painted designs. Consider which style suits you best—classic, rustic, or modern minimalism. Every detail contributes to creating a unique look, transforming shelves from simple functional items into true works of art.
Tips and recommendations from experienced masters
Plan in advance
Before starting work, carefully plan the design and create a detailed plan. Study different construction options, look at examples of work online or in specialized magazines. The more time you spend on planning, the less likely it is that errors will occur during the process.
Experiment with finishes
Do not be afraid to experiment with finishes and decorative elements. Try various combinations of oils, varnishes, and paints. Sometimes a small detail can dramatically change the overall appearance of the item. Use your creative abilities and create unique textures by combining the natural look of wood with modern design solutions.
Pay attention to details
In every item, it is important to pay attention to small details. Even the most neatly sewn seam or perfectly smooth surface creates an impression of high-quality work. Do not neglect sanding, line straightness, and fastener neatness — these are what make your work professional and aesthetically pleasing.
Observe safety techniques
When working with wood, always remember safety techniques. Use protective goggles and gloves, work in a well-lit area, and do not rush. Each stage requires attention and focus, especially when using power tools. Remember, the quality of your work directly depends on how carefully and safely you work.
Be inspired by successful project examples
Look at the works of other masters, study their approaches and solutions. The Internet, master classes, and specialized forums are an excellent source of ideas and inspiration. You will see how to realize the most daring ideas and how modern technologies help bring even the most complex projects to life.
Advantages of making shelves by yourself
Savings and individuality
Creating wooden shelves yourself not only saves money, but also allows you to create a unique item fully matching your tastes and needs. This is especially important for those who value individuality and strive to make their interior truly personal. Handmade shelves are a reflection of your personality, creative approach, and skill in working with natural materials.
Development of creative skills
The process of making shelves by yourself is not only practical activity, but also an excellent opportunity to develop your creative skills. You will learn to work with tools, study the subtleties of wood processing, master finishing and decorating techniques. Such experience is undoubtedly useful in the future, as the ability to create something with your own hands is a skill that is always valued and in demand.
Possibility of self-expression
Each project completed by your own hands becomes a reflection of your individuality. You can experiment with shapes, colors, and textures, bring the most daring design ideas to life. This is not just shelves — this is your artwork, reflecting your vision of beauty and harmony. Creating such items, you become not just a craftsman, but an artist who conveys a part of your soul through your work.
Conclusion: Creativity inspired by nature
Making beautiful wooden shelves by your own hands — is an amazing journey into the world of creativity, where every detail matters, and the final result becomes a true work of art. This process combines ancient craft traditions with modern technologies, allowing you to create items capable of transforming any interior and becoming its unique feature.
Let your shelves, made with soul and attention to every detail, become not only a functional element, but also a reflection of your individuality, a symbol of striving for perfection, and proof that true beauty is born where nature meets human talent. Each stage — from planning and material selection to assembly and finishing — becomes a creative process that brings joy, satisfaction, and confidence in your abilities.
Discover the magic of working with wood, experiment with shapes, colors, and textures, create unique solutions that will inspire you and those around you. Because beautiful wooden shelves made by your own hands are not just furniture — they are a reflection of your soul, your personal artwork, which will delight you for many years.
Let every shelf you create become a symbol of harmony, coziness, and aesthetic enjoyment, reminding you that creativity has no boundaries, and true art is born where passion, hard work, and love for nature meet. With such confidence and inspiration, you will not only transform your interior, but also leave a mark in the world where handmade labor, naturalness, and true beauty born from the heart of nature are valued.