Article Contents:
- Engineering foundation of attachment: understanding loads and stresses
- Calculation of connection load-bearing capacity
- Technologies for attaching to wooden floors
- Screwed connection: the gold standard of reliability
- Screwed connection: simplicity and efficiency
- Dowel connection: traditional carpentry technique
- Special cases of attachment
- Installation on parquet and laminate floors
- Attachment to heated floors
- Attaching handrail to balusters: final stage
- Connection through a handrail support rail
- Direct connection of handrail to balusters
- Tools and materials for quality installation
- Cutting Tools
- Measuring tools
- Fastening materials
- Quality Control and Testing
- Geometric control
- Strength Testing
- Typical Errors and Ways to Prevent Them
- Marking Errors
- Errors in drilling
- Assembly errors
- Maintenance and repair of connections
- Preventive Measures
- Repair work
- Modern Trends and Innovations
- New Materials
- Technological innovations
- Conclusion

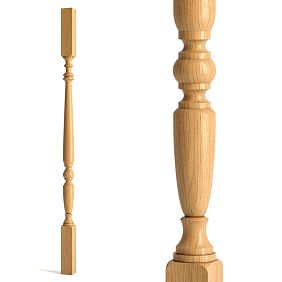
Creating a safe and aesthetically pleasing staircase structure requires special craftsmanship in installing each element. The question of, how to attach a baluster to a wooden floorbecomes a key point, determining not only the strength of the entire railing system, but also its longevity. Proper installation of balusters ensures structural stability for decades, creating a harmonious unity of functionality and beauty.
The mastery of attaching balusters to a wooden floor lies in understanding the physical properties of wood, the characteristics of different species, and their behavior under load. Each connection must consider the direction of the grain, natural stresses in the material, and possible deformations due to changes in humidity. A professional approach to this task transforms an ordinary staircase into a work of carpentry art.


Engineering foundation of attachment: understanding loads and stresses
Successful installation of balusters begins with a deep understanding of the physics of loads experienced by the staircase structure. Vertical loads from the weight of the handrail and accidental impacts are transmitted through the balusters to the floor, creating compressive stresses in the wood. Horizontal forces arise when people lean on the handrails and can reach significant values, especially under dynamic loads.
Torque moments appear with uneven load distribution and can lead to weakened fastening if not considered during the design of connection joints. Understanding these factors allows selecting the optimal fastening method for each specific situation.
Material science aspects play a critical role in selecting the installation technology. Hardwood species (oak, beech, ash) have high strength but require pre-drilling holes for fasteners. Softwoods (pine, spruce) are more workable but less resistant to dynamic loads.


Calculation of connection load-bearing capacity
Normative requirements establish minimum strength parameters for staircase railings. The horizontal load on the handrail must be at least 100 kg/m without residual deformation. This requirement defines the minimum characteristics of fastening elements and their installation methods.
The safety factor for stair structure components is taken as 2-3. This means the actual strength of connections must exceed the normative requirements by several times. This approach ensures long-term reliability of the structure even under intensive use.
Load distribution in the railing system is uneven. Maximum forces occur at the support posts at the beginning and end of the stair run, as well as at the balusters located in the middle of the span. Understanding this principle allows optimizing the fastening design for each specific element.
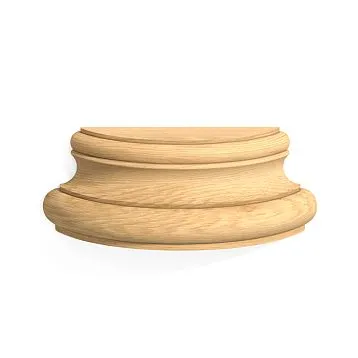
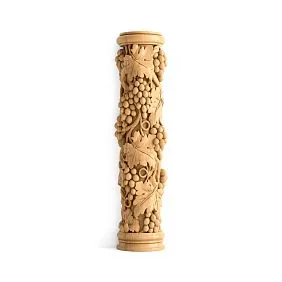
Our factory also produces:


Technologies for attaching to wooden floors
Get Consultation
Screwed connection: the gold standard of reliability
Threaded screws with a diameter of 8-12 millimeters provide the most reliable attachment of balusters to a wooden floor. The technology involves drilling a central hole in the lower end of the baluster to a depth of 60-70 millimeters and a corresponding hole in the floor to a depth of 40-50 millimeters.
The installation process begins with precise marking of attachment locations. A laser level is used to ensure strict verticality of the holes. The drill bit diameter should be 1-2 millimeters smaller than the screw diameter to ensure a tight fit.
Fixation of the screw in the baluster is performed using epoxy glue or a special wood adhesive. The glue must fill all voids around the screw, creating a monolithic connection. The polymerization time is 24-48 hours depending on the type of glue and ambient temperature.
Installing the baluster onto the prepared screw requires care and precision. The end of the baluster is coated with glue, after which the element is screwed onto the screw until full contact with the floor surface. It is important to monitor the verticality of the installation at all stages of the process.
Screwed connection: simplicity and efficiency
The question of how to attach a baluster to a wooden floor using self-tapping screws, often arises during self-installation. Self-tapping screws for wood, 80-100 millimeters long with hexagonal heads, provide sufficient strength for most applications.
Angular mounting involves screwing self-tapping screws at an angle of 30-40 degrees through the side surface of the baluster into the floor base. Four screws are used for one baluster, arranged in a cross pattern. Pre-drilling holes with a diameter 1 millimeter smaller than the screw diameter prevents wood cracking.
Hidden mounting is achieved by countersinking screw heads to a depth of 5-8 millimeters, followed by filling the holes with wooden plugs or putty matching the color of the base material. This approach ensures an aesthetically pleasing appearance of the connection.
Enhancing the connection with adhesive compounds increases the reliability of screwed mounting. Contact surfaces are treated with carpentry glue PVA or polyurethane compound before final fixation with screws.
Dowel joint: traditional joinery technique
Wooden dowels with a diameter of 8–10 millimeters represent an eco-friendly method of fastening balusters. Dowels are made from the same wood species as the main structural elements, ensuring material uniformity and eliminating differences in temperature and humidity-induced deformations.
The installation technology requires high precision in drilling holes. Special dowel guides or bushings are used to ensure strict coaxial alignment of holes in the baluster and floor. The hole depth in the baluster is 40–50 millimeters, and in the floor — 30–40 millimeters.
Dowel insertion should be tight but not so tight as to cause wood cracking. Dowels are pre-coated with glue and driven into holes using a wooden mallet through a spacer. The protruding part of the dowel is also coated with glue before installing the baluster.
Advantages of the dowel joint include its eco-friendliness, the possibility of disassembling the structure, and the absence of metal components that may cause corrosion or electrochemical processes.
Special mounting cases
Installation on parquet and laminate floors
Parquet floors require a special approach to baluster fastening due to the relatively small thickness of planks (15–22 millimeters). The fastening must pass through the parquet and be secured in the subfloor or joists.
Initial marking is performed taking into account the position of joists under the parquet. A metal detector or tapping is used to determine the location of load-bearing elements. Fastening into gaps between joists is not permitted.
Protection of the finish from damage during drilling is ensured by using sharp drill bits and low drill speeds. The hole in the parquet is drilled 1–2 millimeters larger than the fastener diameter to compensate for possible misalignment.
Sealing the joint prevents moisture from entering under the parquet. Silicone sealants or special mastics are applied around the base of the baluster after installation.
Fastening to heated floors
Heated floors create additional difficulties in installing balusters. Elevated temperature may cause accelerated drying of adhesive compositions and changes in wood properties.
Adhesive selection must consider the operating temperature regime. Thermally resistant compositions based on epoxy or polyurethane resins are used, retaining their properties up to 60–80 degrees Celsius.
Temperature in the baluster installation zone is monitored using an infrared thermometer. Installation work is performed with the heating system turned off, followed by gradual ramp-up to operating mode.
Compensatory gaps are provided between the base of the baluster and the floor to compensate for thermal deformations. A 1–2 millimeter gap is filled with elastic sealant.
Handrail mounting to balusters: final stage
Correct Handrail mounting to balusters Determines the functionality and aesthetics of the entire staircase structure. Preparation of the upper ends of balusters includes cutting them at an angle corresponding to the staircase slope and creating mounting locations for fastening elements.
Connection via a handrail support rail
A 20×40 mm handrail support rail is fastened to the upper ends of balusters using screws or dowels. A corresponding-sized groove is milled into the handrail for installing the rail. This method ensures even load distribution and simplifies handrail installation.
The rail marking is performed according to the actual position of installed balusters. A flexible rail or string is used to determine the exact mounting line, taking into account the staircase slope.
The rail is secured to the balusters using 40–50 mm long screws driven from above at an angle. Screw heads are countersunk and covered with wooden plugs.
Installing the handrail on the handrail support rail completes the installation of the guardrail system. The handrail is secured from below through the rail using screws, ensuring concealed fastening and an aesthetically pleasing appearance.
Direct connection of handrail to balusters
Dowel connection of the handrail to balusters requires high precision in manufacturing mating surfaces. Holes for dowels are drilled into the handrail, installed in the upper ends of the balusters.
Hole marking in the handrail is performed using a template made according to the actual position of the balusters. Each hole is individually marked, taking into account possible deviations in the installation of vertical elements.
Holes are drilled at an angle corresponding to the staircase slope. Guiding fixtures are used to ensure the accuracy of the drilling angle.
Assembly of the joint is performed using glue on all contact surfaces. The handrail is installed onto the balusters simultaneously along the entire length, followed by clamping until the glue fully dries.
Tools and materials for quality installation
Cutting Tools
A drill with a set of drill bits of various diameters — the primary tool for creating holes for fasteners. Drill bits must be sharp and designed for wood. Using dull or inappropriate drill bits may result in chipping and inaccurate holes.
A miter saw ensures precise cutting of balusters and handrails at required angles. The quality of the cut is critically important for the tightness of connections and the overall appearance of the structure.
A router is used to create grooves in handrails and to process mating surfaces. Different types of routers allow creating connections of any complexity.
Measuring tools
The laser level ensures accurate marking and control of the vertical alignment of balusters. Deviations from verticality exceeding 2 millimeters per meter of height are not permissible.
A protractor is necessary to determine the cutting angles of balusters and handrails. The accuracy of angular dimensions is critically important for the quality of joints.
Tape measure and ruler are used for marking distances between balusters and controlling element dimensions. Measurement accuracy must be at least 1 mm.
Fastening materials
Stainless steel threaded rods with a diameter of 8-12 millimeters provide maximum joint strength. The rod length should be 100-120 millimeters for secure fixation in wood.
Wood screws with hexagonal heads, 80-100 millimeters long, are used for screw fastening. The thread must be sharp and deep to ensure secure fixation in wood.
Wooden dowels are made from the same wood species as the main components. The dowel diameter must exactly match the hole diameter to ensure a tight fit.
Adhesives are selected based on operating conditions. Wood glue PVA is suitable for indoor use, while polyurethane adhesives are for high-humidity environments.
Quality control and testing
Geometric control
Verticality of each baluster is checked using a level or plumb bob. Deviation from verticality must not exceed 2 millimeters per meter of height.
Checking distances between balusters ensures uniform railing and compliance with safety requirements. Maximum distance between baluster centers must not exceed 150 millimeters.
The height of the handrail installation is checked from the stair level. The standard height is 900 millimeters for residential spaces and may vary depending on the building's purpose.
Strength Testing
Static loads are applied to various points of the structure to test connection strength. Standard horizontal load is 100 kg/m without residual deformation.
Dynamic tests simulate real operating conditions. Repeated application of loads helps identify potentially weak areas in the structure.
Fatigue tests are conducted for critical structures. Cyclic loading over a specified time allows assessment of long-term connection reliability.
Typical errors and ways to prevent them
Marking Errors
Inaccurate marking is the most common cause of problems during baluster installation. Using quality measuring tools and careful size verification at each stage helps avoid this error.
Misaligned holes may cause baluster misalignment or prevent installation. Using drill jigs and guiding fixtures ensures accurate drilling.
Incorrect cutting angles at the top ends of balusters disrupt the geometry of the connection with the handrail. Accurate determination of the staircase slope angle and use of high-quality angle tools prevent this error.
Drilling errors
Wood chips during drilling occur due to using dull drill bits or incorrect drilling settings. Sharp drill bits and low drill speeds ensure clean holes without damage.
Incorrect hole depth may result in insufficient joint strength or damage to structural elements. Using depth limiters on drill bits ensures accurate drilling.
Overheating wood during drilling may cause burning of hole edges and weakening of the joint. Periodically removing the drill bit for cooling and removing shavings prevents overheating.
Assembly Errors
Insufficient adhesive quantity results in weak joint strength. The adhesive must evenly cover all contact surfaces and protrude from joints when parts are pressed together.
Premature loading of joints before the adhesive fully cures may weaken them. The polymerization time must be respected according to the adhesive manufacturer's instructions.
Incorrect assembly sequence may create additional difficulties during installation. Planning the operation sequence and preparing all elements in advance simplifies the assembly process.
Maintenance and repair of joints
Preventive measures
Regular inspection of joints should be conducted at least twice a year. Special attention is given to baluster mounting points to the floor, where maximum loads are concentrated.
Controlling room humidity helps prevent wood deformation and joint weakening. The optimal air humidity level is 45-65%.
Fastener tightening is performed upon detecting joint loosening. Threaded connections are tightened with torque control to avoid damaging the wood.
Repair work
Replacement of weakened fastener elements may be required after several years of operation. New elements must exactly match the dimensions and material of original parts.
Repair of damaged holes is performed using wooden plugs or epoxy compounds. After repair, new holes are drilled in adjacent areas.
Joint reinforcement may be required when loads increase or operating conditions change. Additional fastening elements are installed without compromising the integrity of the main structure.
Modern trends and innovations
New materials
Carbon fiber-based composite fasteners offer high strength at low weight. They are corrosion-resistant and ensure long-term joint reliability.
New-generation adhesives with improved adhesion and elasticity allow creating more reliable joints. Some formulations have the ability to self-repair minor cracks.
Smart materials with variable properties open new possibilities for creating adaptive joints. Shape-memory materials can compensate for thermal deformations.
Technological innovations
Laser marking ensures unparalleled positioning accuracy of elements. Laser projectors create precise templates for marking holes and cutting lines.
Robotic drilling guarantees ideal hole accuracy and repeatability. Robots can work with precision down to fractions of a millimeter, which is unattainable with manual processing.
Digital modeling allows optimizing joint designs even during the design phase. Finite element analysis programs calculate stress distribution and identify potentially weak areas.
Conclusion
The skill of attaching balusters to a wooden floor is developed through deep understanding of materials, mastering various techniques, and accumulating practical experience. Each project is unique and requires an individual approach, but core principles remain unchanged: measurement accuracy, material quality, and strict adherence to technology.
Properly installed balusters ensure not only the safety of staircase use but also create an aesthetically pleasing interior element. Investments in quality materials and professional installation pay off through long-term durability and reliability of the structure.
Modern requirements for the safety and durability of stair structures are constantly increasing, stimulating the development of new technologies and materials. However, the foundation of success always remains the professionalism of the installers and their responsible attitude toward every detail of the work.
quality wooden balusters for staircases and their correct installation — this is an investment in the safety of your family, the beauty of your home, and your own satisfaction with the created space.
When selecting materials for stair structures, special attention should be paid to the reputation of the supplier and the quality of the products. The company STAVROS has proven itself as a reliable manufacturer of high-quality solid wood products. Years of experience, use of modern technologies, and strict quality control at all production stages allow STAVROS to create products that fully meet the highest standards and exceed even the expectations of the most demanding clients, striving to create flawless stair structures.