


Article Contents:
- Designing and selecting materials: key stages
- How to make a wardrobe yourself at home: material selection
- Hardware and parts
- Step 1: Preparing parts and assembling the frame
- Step 2: Installing shelves and drawers
- Step 3: Installing doors
- Step 4: Decorating the wardrobe
Making a wardrobe yourself is a unique opportunity to create furniture that will fully meet your needs, perfectly fit your interior, and last for many years. This process gives you complete freedom in choosing materials, style, and functionality. You will not only save money on buying ready-made furniture, but also add individuality to your home, which is not found in furniture purchased from a store.
In this article, we will thoroughly examine all stages of work: from designing the wardrobe to its assembly and finishing, paying attention to each step, including how to make a wardrobe yourself at home and decorate it with decorative elements such as furniture decor and decorative items for furniture. You will learn how to properly choose materials, hardware, and parts to create a functional and stylish wardrobe.


Designing and selecting materials: key stages
The first step on the path to creating a wardrobe is design. It is precisely at this stage that you determine the shape, size, placement of shelves and drawers, type of doors, and, of course, material selection. Before beginning the design, it is important to accurately measure the space where the wardrobe will be placed. This will help avoid errors in subsequent stages.
If your wardrobe will be installed in a hallway or a small room, it makes sense to consider an angular wardrobe option, which will help save space. Angular wardrobes made by yourself are an excellent solution for small rooms, as such constructions efficiently use every centimeter. If the wardrobe is needed in the kitchen, it is necessary to consider requirements for moisture resistance of materials.


How to make a wardrobe yourself at home: material selection
For the frame and shelves of the wardrobe, you can use MDF, particleboard, or solid wood. Each of these materials has its advantages:
-
Solid wood is a durable and eco-friendly material. If you want to create a beautiful wardrobe yourself, it is better to use wood, which will give the item a solid and natural look.
-
Particleboard is a more affordable material that can also be used to create a wardrobe. A particleboard wardrobe can look stylish and modern, especially if you use quality hardware and decorative elements.
Our factory also produces:


Hardware and parts
Quality hardware is an important part of any wardrobe. In addition to the frame, shelves, and doors, you will need:
-
Furniture legs for the wardrobe. They will ensure the stability of the structure and add an aesthetic appearance. You can buy wardrobe legs made of wood for a classic style.
-
Fastening elements: brackets, screws, shelf supports.
-
Hardware for doors: hinges, handles, drawer guides. If you plan to install sliding doors, use rails for smooth movement.
Before starting work, be sure to create your own wardrobe drawings. This will help avoid errors during the assembly stage.
Get Consultation
How to make a wardrobe yourself: step-by-step guide
Now that you have selected materials and prepared the project, you can begin assembling the wardrobe. Let's consider a step-by-step guide on how to make a wardrobe yourself, paying attention to each detail.
Step 1: Prepare parts and assemble frame
The first stage is preparing the cabinet parts. If you are using MDF or particleboard, you will need to cut the side panels, shelves, back panel, and doors. If you plan to install the cabinet on legs, prepare the mounting holes for them in advance.
-
Prepare the panels and shelves. According to your drawings, cut all elements. If you are using solid wood, it is important to carefully sand the edges to prevent splinters and scratches.
-
Assembling the frame. Start by attaching the side panels to the lower part of the cabinet. Use metal brackets for secure connection. To add stability, attach the back panel — it will give the entire structure rigidity.
-
Installing cabinet legs. Choosing the right legs is important for stability and aesthetics. If you need a tall cabinet, choose tall cabinet legs, which will give the item an elegant look. For the kitchen, choose kitchen cabinet legs, they will provide a convenient height for use.
Step 2: Installing shelves and drawers
When the cabinet frame is ready, it’s time to move on to the internal fittings. Shelves play an important role in the cabinet’s functionality, so it’s crucial to correctly calculate their height and quantity.
-
Installing shelves. Depending on the cabinet’s purpose, shelves can be positioned at different heights. To allow flexibility, you can use adjustable shelf brackets, which will let you change their positions in the future.
-
How to make drawers in a cabinet yourself. If your project includes pull-out drawers, install guides for smooth opening and closing. Drawers can be made from the same material as the cabinet frame, adding handles to the front panel for convenience.
Step 3: Installing doors
Now let’s consider how to make cabinet doors yourself. Doors can be hinged, sliding, or louvered — each option has its own features and requires appropriate hardware.
-
Hinged doors. This is the classic option for cabinet doors. To install them, use hinges that attach to the side panels. Ensure the doors open smoothly without sticking. For secure locking in the closed position, install magnets.
-
Sliding doors. For a sliding cabinet, use guide rails along which the doors will move. This is the ideal option for spaces where you need to save space.
-
Louvered doors. Louvered cabinets are ideal for rooms where good ventilation is required, such as a wardrobe or balcony. For such doors, use louvers that are mounted on a frame.
Step 4: Decorating the cabinet
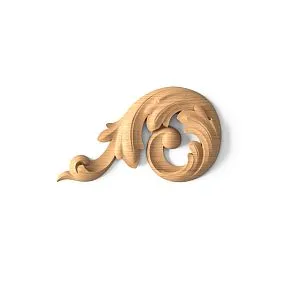
When the main work is complete, the most pleasant stage arrives — finishing and decorating the cabinet. If you want to give your cabinet a special elegance, you can use decorative elements such as decor for furniture. Carved appliqués can be placed on cabinet doors or side panels, giving it individuality and a finished look.
Furniture decor can also include moldings or decorative strips, which will help the cabinet stand out among other furniture pieces.
-
Painting or varnishing. If you are using solid wood, cover the cabinet with varnish or oil to protect the wood. This not only extends the lifespan of the item but also highlights the natural beauty of the material. Varnish will give the cabinet a glossy finish, while oil will preserve the natural wood texture.
-
Decorative appliqués. Install carved appliqués or moldings to make the cabinet look elegant and refined. You can use Furniture decor wood, which will give the item a finished look.
Now that you know how to make a cabinet yourself, you can begin bringing your ideas to life. This process requires time, patience, and attention to detail, but in the end, you will get a unique cabinet that perfectly suits your needs and becomes a true decoration of your home.
Using high-quality materials and components from the company Stavros, such as cabinet legs и decor for furniture, you will be able to create durable and stylish furniture that will delight you for many years. Don’t be afraid to experiment with design and materials — create a cabinet that reflects your individuality and taste.


