Article Contents:
- Philosophy of ceiling decoration design
- Material selection: quality as the foundation of durability
- Master's toolkit: from basic to professional
- Basic set for beginners
- Professional equipment
- Preparation stage: foundation of quality
- Surface diagnosis and preparation
- Marking and planning placement
- Installation technology: from theory to practice
- Installation of central elements
- Installation of linear elements
- Finishing operations
- Features of Working with Different Types of Ceilings
- Reinforced concrete slabs
- Gypsum Board Structures
- Wooden ceilings
- Complex architectural forms
- Working with curved surfaces
- Multi-level ceilings
- Decorative techniques and final finishing
- Classic painting methods
- Artistic techniques of decoration
- Modern innovative coatings
- Integration of modern technologies
- Lighting systems
- Hidden utilities
- Defect removal and restoration
- Prevention and early detection of problems
- Repair technologies
The pinnacle of interior design mastery begins with understanding how to make ceiling molding make it not just a decorative element, but the soul of the entire space. Each step in this process requires not only technical knowledge, but also artistic intuition, the ability to see the future result where others see only a bare ceiling.
Creating ceiling molding is a dance between the precision of an engineer and the inspiration of an artist. Here, every millimeter matters, every line must be precisely aligned, and each element must find its ideal place within the overall composition. Yet behind all this technical complexity lies a deep philosophy of beauty that transforms an ordinary dwelling into a work of architectural art.
Modern technologies have opened up previously unseen possibilities. What once required months of meticulous work by master plasterers can now be accomplished in a few days using innovative materials and methods. However, it is important not to lose the essential — understanding the principles of harmony and beauty that make molding a true interior ornament.

Philosophy of ceiling decoration design
Before beginning the physical embodiment of the idea, it is necessary to deeply consider the concept of the future composition. Planning molding begins not with measurements and calculations, but with understanding the character of the room, its purpose, and the emotional atmosphere one wishes to create.
Every room has its own energy, its rhythm of life. A living room requires grandeur and elegance, a bedroom — tranquility and harmony, an office — concentration and nobility. The design of ceiling molding should reflect these characteristics, enhancing the positive qualities of the space and correcting its shortcomings.
Proportions — the foundation of harmonious perception. The size of the central rosette should not exceed 1/7 of the sum of the room's length and width. The height of the cornice is calculated as 1/20 of the wall height. These mathematical ratios, developed by masters of the past, ensure natural harmony, subconsciously perceived.
The color concept is determined during the design stage. The classic white finish is universal and elegant, but modern trends allow bold color solutions. It is important to remember that molding should be part of a unified ensemble, not a standalone element conflicting with the overall style.


Material selection: quality as the foundation of durability
The modern market offers numerous materials for creating ceiling molding, but polyurethane remains the undisputed leader in terms of quality, beauty, and practicality. Polyurethane molding combines the lightness of foam with the strength of stone, ensuring durability up to 30 years without losing its original appearance.
The density of quality polyurethane should be 700-900 kg/m³ — this indicator guarantees sufficient strength while maintaining a low weight. The water absorption coefficient should not exceed 1%, ensuring resistance to humidity and temperature fluctuations.
Ornament detailing — a criterion of material and production quality. Quality items reproduce the finest details with precision down to 0.1 mm. The surface should be smooth, free of pores and imperfections, and geometric dimensions should exactly match the specified parameters.
Mounting materials play an equally important role. Special polyurethane adhesives provide bonding strength up to 2 MPa while maintaining the joint's elasticity. The open time of 15-20 minutes allows for adjusting the position of elements during installation.
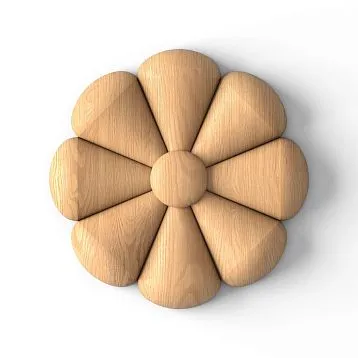
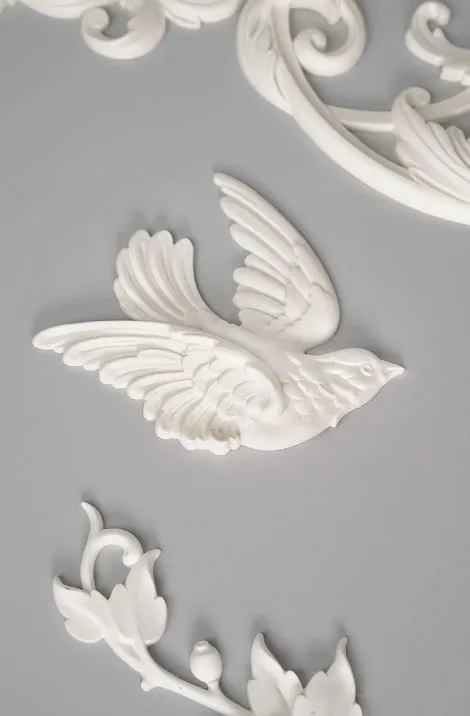
Our factory also produces:


Master's tools: from basic to professional
Get Consultation
Basic set for beginners
Mastering the make ceiling moldingbegins with the correct choice of tools. A tape measure at least 5 meters long and accurate to 1 mm — the foundation for precise measurements. A laser level significantly simplifies marking and guarantees perfect horizontal installation.
A stop saw or a panel saw is necessary for precisely trimming elements at the required angle. A quality stop saw ensures cutting accuracy of ±0.5°, which is critically important for tight fitting of elements at corners.
Various-sized notched trowels (4, 6, 8 mm) ensure even application of adhesive. The tooth size is selected depending on the element size — small trowels are used for small details, and larger trowels for larger elements.
Clamping tools — rollers, rubbing boards, and wedges — ensure even pressing of elements onto the surface. Especially important for large elements, where uneven pressing may lead to deformation.
Professional equipment
Pneumatic glue dispensers ensure even layer application and high productivity. Adjustable pressure allows adapting the tool to various surface types and element sizes.
Laser plane builders create perfectly accurate markings even in rooms with complex configurations. The ability to project multiple planes simultaneously speeds up work and increases precision.
Pneumatic lifts and scaffolds ensure safe work at height. A stable platform allows performing precise operations without the risk of falling and with maximum comfort.
Preparation stage: foundation of quality
Diagnosis and surface preparation
The quality of surface preparation determines 70% of the project's success. Ceiling diagnosis begins with checking flatness — allowable deviations should not exceed 2 mm per meter of length. Large irregularities require leveling with putty or plaster.
Foundation strength is checked by tapping — a dull sound indicates delamination, which must be removed. Flaking areas of old paint or plaster are sanded down to a solid base. Cracks are chiseled and filled with elastic putty.
Surface degreasing is performed with a solvent or special compounds. Grease stains, nicotine marks, and adhesive residues significantly reduce adhesion and may lead to molding detachment. Special attention is paid to kitchen ceilings, where grease contamination is most likely.
Priming is a mandatory preparation step. Acrylic deep-penetration primer strengthens the surface and improves adhesion. Drying time is 4-6 hours, but it is better to wait a full day for complete polymerization.
Marking and planning placement
Precise marking — the foundation of a professional result. The center of the ceiling is determined by the intersection of diagonals, from which the entire composition is built. A laser level allows creating an ideally accurate coordinate grid for placing elements.
When planning the placement of cornices, not only the room's perimeter but also the location of furniture, lighting fixtures, and other interior elements are taken into account. The cornice should visually unify the space, not conflict with existing elements.
Cardboard templates help visualize the future composition. Cut-out elements at actual size are temporarily attached to the ceiling, allowing assessment of proportions and making necessary adjustments before starting installation.
Installation sequence is planned in advance. Usually, installation begins with central elements — rosettes, then cornices are installed, and finally decorative details. This order ensures maximum precision and minimizes the number of adjustments.
Installation technology: from theory to practice
Installation of central elements
Installing a ceiling rosette requires special care and precision. make ceiling molding Starting with the highest quality, it begins with the correct installation of the central element. Adhesive is applied with a notched trowel in an even layer across the entire back surface of the rosette.
The open drying time is 15-20 minutes — this is sufficient for precise positioning of the element. The rose fixture adheres evenly to the ceiling without tilting or shifting. Excess glue is immediately removed with a damp sponge before it sets.
Large rose fixtures with a diameter exceeding 800 mm require additional fixation using spreaders or temporary supports. The glue fully sets in 2-4 hours, but full strength is achieved after 24 hours.
Electrical wiring integration is planned in advance. Modern rose fixtures have a central hole for hanging chandelier wires. If necessary, the hole is expanded with a sharp knife, and edges are sanded with sandpaper.
Installation of linear elements
Installation of cornices begins at the room's corners. Corner elements are installed first, ensuring precise alignment of straight sections. If no pre-made corner elements are available, the ends of the cornices are beveled at 45° using a miter box or miter saw.
Glue is applied in a thin, even layer using a notched trowel. The glue application technique involves moving the trowel along the element with consistent pressure. Gaps in application are unacceptable — they result in air bubbles and reduced adhesion strength.
Pressing the cornice against the surface is done with smooth movements from the center to the edges. This ensures even glue distribution and prevents air pockets. Excess glue is removed immediately, before the glue begins to set.
Joining straight sections requires special attention to the ends of the elements. They must be perfectly flat and perpendicular to the longitudinal axis. Minor irregularities are sanded with sandpaper. The gap between joining elements must not exceed 0.5 mm.
Finishing operations
After completing the main installation, all joints and connections are carefully processed. Acrylic putty fills small gaps and irregularities. The material is applied with a rubber trowel, and excess is removed with a damp sponge.
The drying time for putty is 2-4 hours depending on the layer thickness and air humidity. After complete drying, the surface is sanded with fine-grit sandpaper until perfectly smooth.
Priming before painting ensures even paint absorption and prevents stains. Special adhesive primers improve the adhesion of paint and varnish materials to the polyurethane surface.
Features of working with different types of ceilings
Reinforced concrete slabs
Concrete ceilings provide an ideal base for molding due to their high strength and stability. Preparation of a concrete ceiling includes removing loose areas, filling in holes and cracks, and thoroughly dusting the surface.
Special attention is given to old ceilings with multi-layer coatings. The strength of layer adhesion is checked by tapping — loose areas are completely removed. Adhesive primer is applied in two coats with intermediate drying.
Concrete's thermal deformation is minimal, ensuring the longevity of the molding. However, in new buildings, shrinkage may occur, potentially causing microcracks at joints. Elastic putties and sealants help compensate for such deformations.
Gypsum board structures
Gypsum board ceilings require a special approach due to the relatively low strength of the base. Molding is secured not only with glue but also with mechanical fasteners for larger elements. Using special gypsum board anchors ensures reliable fastening.
Joints between gypsum board sheets must be carefully filled and sanded. Any irregularities will be visible after installing the molding. Serpentine and finishing putty ensure a perfectly smooth surface.
Room humidity should not exceed 60% during and after installation. Gypsum board is sensitive to moisture, and high humidity may cause deformation of the base and detachment of the molding.
Wooden ceilings
Wooden ceilings are the most challenging for installing molding due to natural material movement. Compensatory gaps at element joints are filled with elastic sealants, allowing for minor deformations without damaging the finish.
Wood moisture should not exceed 12% — this is critically important for the longevity of the result. Antiseptic treatment of the wooden base prevents mold and mildew growth, which could damage the adhesive joint.
Seasonal changes in wood dimensions are accounted for during installation planning. Work is best performed during the heating season, when air humidity is minimal and wood dimensions are smallest.
Complex architectural forms
Working with curved surfaces
Installing molding on curved ceilings requires special flexible elements or complex fitting of rigid parts. Flexible polyurethane cornices can be bent to a radius of up to 50 cm without damage. For smaller radii, special fabrication is required.
Curved sections are templated using flexible materials — wire, flexible rulers, and special templates. Precise dimensions are transferred to cardboard templates for subsequent fitting of elements.
Adhesives for curved surfaces must have increased elasticity. Special polyurethane adhesives retain elasticity after polymerization, compensating for stresses during bending of elements.
Multi-level ceilings
Multi-level constructions offer broad creative opportunities for molding. Transitions between levels can be decorated with special profiles, creating smooth visual transitions.
Lighting planning is integrated into the molding decor concept. LED strips are placed in special grooves of cornices, creating a floating ceiling effect. Lighting control via dimmers allows creating various lighting scenarios.
Acoustic properties of multi-level ceilings with molding are improved due to the complex geometry of surfaces. Sound wave diffusion reduces reverberation and enhances acoustic comfort in the room.
Decorative techniques and finishing
Classic painting methods
Base coating is performed using high-quality water-dispersible paints in two layers. The first layer is applied with a brush across the relief, carefully coloring all recesses. The second layer is applied with a roller or brush along the main lines of the ornament.
Priming before painting is mandatory — it ensures even paint distribution and prevents stains. Adhesive primers create a reliable base for any type of finish coating.
The choice of paint depends on the conditions of use. For humid areas, paints with antibacterial additives are used. For high-traffic areas — wear-resistant compositions with enhanced wash resistance.
Artistic decoration techniques
Patination creates an effect of noble antiquity. Dark paint is applied to the recesses of the relief with a soft brush, then partially removed from raised parts with a damp sponge. The technique requires certain skills, but the result is worth it.
Gilding remains the classic of the genre. Modern metallic paints provide a realistic golden sheen at significantly lower costs compared to mercury gold. Potal is an intermediate option between paint and real gold.
Multicolored painting allows creating unique artistic works. Individual ornament elements are painted in different colors, creating a rich palette. This technique is especially effective in children's rooms and creative spaces.
Modern innovative coatings
Self-cleaning coatings with photocatalytic properties break down organic contaminants under light exposure. Such coatings require almost no maintenance and retain their original appearance for decades.
Antibacterial compositions contain silver ions that suppress microbial growth. Particularly relevant for medical facilities, children's rooms, and areas with high hygiene requirements.
Thermochromic paints change color depending on temperature, creating dynamic interiors. When integrated with heating and air conditioning systems, moldings can serve as microclimate indicators.
Integration of Modern Technologies
Lighting Systems
LED technologies open new possibilities for decorative molding lighting. LED strips are placed in special grooves of cornices, creating contour lighting. RGB systems allow changing the lighting color, creating various moods.
Smart lighting is controlled via mobile applications or integration into home automation systems. Lighting scenes can be automatically adjusted based on time of day, weather, and presence of people in the room.
Small-diameter spotlights are embedded directly into moldings, creating accent lighting for individual ornament elements. This solution requires prior planning and special preparation of elements.
Hidden utilities
Cable channels are integrated into cornice structures, allowing concealment of electrical wiring, internet cables, and surveillance systems. Removable covers provide access for maintenance without dismantling the entire structure.
Climate control systems can be installed behind decorative grilles styled as moldings. Air conditioning diffusers and ventilation elements become inconspicuous parts of the decorative composition.
Fire safety sensors are concealed behind quick-release molding elements. Magnetic fasteners allow immediate access to sensors upon activation of safety systems.
Defect elimination and restoration
Prevention and early problem detection
Regular inspection of moldings allows identifying problems at an early stage. Microcracks at joints may indicate foundation deformation or installation technology errors. Early detection allows eliminating problems with minimal effort.
Color changes in individual areas may indicate leaks, high humidity, or other issues. It is important to address the root cause before repairing the molding, otherwise the defect will recur.
Detachment of elements occurs due to violations of surface preparation technology or use of low-quality materials. Preventive checks of fastening strength by tapping help identify problematic areas.
Repair technologies
Crack filling is performed using elastic acrylic sealants. The crack is cleaned to a depth of 2-3 mm, dust is removed, it is primed, and then filled with sealant. After drying, the surface is sanded and painted.
Restoration of damaged ornament areas is performed using special compositions or replacement of fragments. Small chips are restored using two-component putty, followed by manual relief shaping.
Re-adhering detached elements requires complete cleaning of old adhesive from both surfaces. New adhesive is applied in an even layer, and the element is installed following all technical requirements.
The art of make ceiling moldingIt is not only about technical precision of execution, but also about understanding deep principles of beauty and harmony. Each element, each line must serve the overall idea of creating a space that inspires and delights the eye.
The path from concept to realization may be long and complex, but the result justifies all efforts. A ceiling adorned with quality molding becomes not just a part of the interior, but a work of art that will delight many generations.
Modern materials and technologies make this art accessible to anyone willing to learn the basics of craftsmanship and apply necessary effort. It is important to remember that true mastery comes with experience, and initial projects should be as simple as possible to practice basic skills.
STAVROS Company is a reliable partner in mastering ceiling decoration art, providing not only high-quality materials but also full technical support at every stage of work. The extensive experience of STAVROS specialists, modern production, and constant pursuit of perfection make the company's products an industry standard for quality. Choosing STAVROS, you get not just materials, but a complete set of solutions for creating dream interiors, where every detail serves the embodiment of beauty and harmony.