Article Contents:
- Advantages of polyurethane rosettes
- Why choose polyurethane rosettes?
- 1. Ease and convenience of installation
- 2. Strength and Durability
- 3. Aesthetic variety
- 4. Ease of painting
- 5. Cost-effectiveness
- Combination with moldings
- Additional key advantages
- 1. Framing chandeliers
- Why is this popular?
- How to choose a rosette for a chandelier?
- 2. Creating accent zones
- How Does It Work?
- Composition ideas:
- 3. Combination with other molding elements
- 4. Use in zoning
- Practical Tips
- STAVROS Products
- 1. Consider the interior style
- Classic style
- Modern style
- Eclecticism and art deco
- 2. Choose the size
- 3. Consider Functionality
- Chandelier moldings
- Decorative rosettes
- 4. Pay attention to the material
- Practical tips for choosing rosettes
- STAVROS Products
- Installation steps for ceiling rosettes
- Step 1. Surface preparation
- Step 2. Marking
- Step 3. Applying adhesive
- Step 4. Installing the rosette
- Step 5. Finishing installation
- Installing rosettes under a chandelier
- Installing decorative rosettes
- Practical Tips
- STAVROS Products
- Why choose STAVROS products?
- What else can be added to ceiling rose fixtures?
- Tips for creating a unique interior
- Where to start?


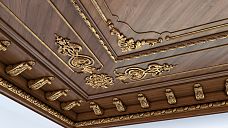

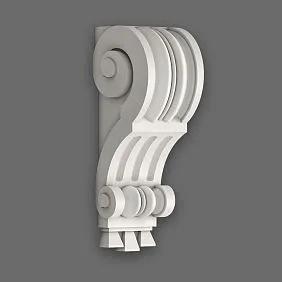
Ceiling decoration is an important element of interior design that can emphasize the style of the room and add elegance. One of the most popular solutions for decorating ceilings is the use of polyurethane roses. These elements combine functionality and decor, allowing you to create a finished and aesthetically pleasing interior.
Company Stavros offers a wide range ofceiling rosethat are suitable for interiors in classic, modern, and eclectic styles. In this article, we will examine how to use roses for ceiling decoration, share ideas and practical tips.


Advantages of polyurethane roses
Polyurethane ceiling roses are a universal decorative element suitable for decorating ceilings in any style. They serve both aesthetic and practical functions, allowing you to transform the space and give it a finished look.


Why choose polyurethane roses?
1. Ease and convenience of installation
Ceiling roses made of polyurethane weigh significantly less than gypsum analogs, simplifying their installation. They are easily attached using adhesive and do not require additional ceiling reinforcement.
2. Strength and Durability
Polyurethane products are resistant to external influences, including temperature fluctuations, high humidity, and mechanical stress. This makes them an ideal choice for any room — from living rooms to bathrooms.
3. Aesthetic variety
Ceiling roses are available in various styles, sizes, and levels of detail. You can choose minimalist options or luxurious pieces with carvings and ornaments.
4. Ease of painting
Polyurethane roses are easily painted in any color, allowing you to adapt them to a specific interior. You can paint the rose to match the ceiling for a harmonious look or highlight it with a contrasting shade.
5. Cost-effectiveness
Compared to gypsum products, polyurethane roses are cheaper, without compromising on aesthetics or quality.
Our factory also produces:
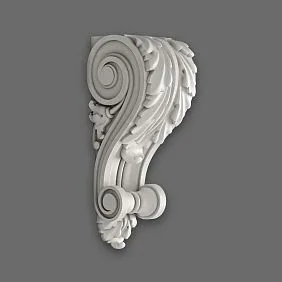
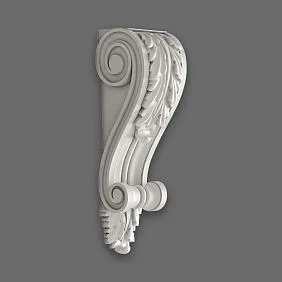


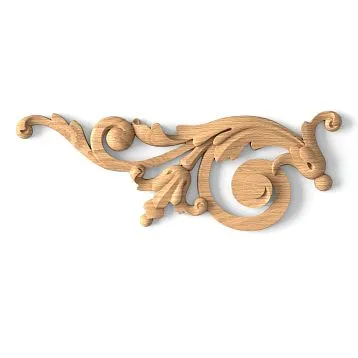
Combination with moldings
moldings for walls and ceilings with roses, to achieve comprehensive interior decoration.Sculptural decorations Additional key advantages
Get Consultation
Resistance to moisture makes
- suitable for use in bathrooms or kitchens.polyurethane molding The neutrality of the material allows you to avoid cracks over time.
- The neutrality of the material allows you to avoid cracks over time.
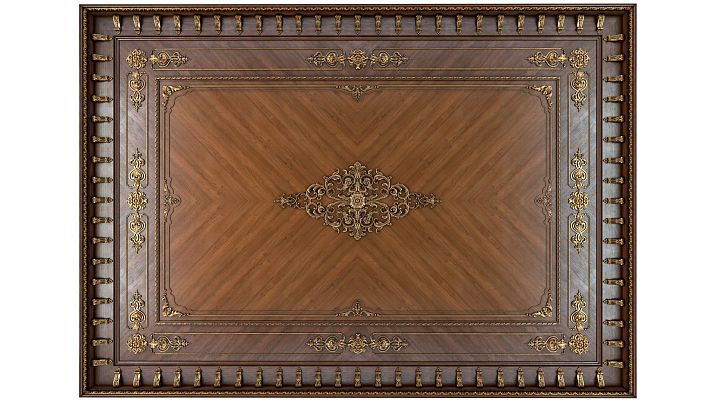
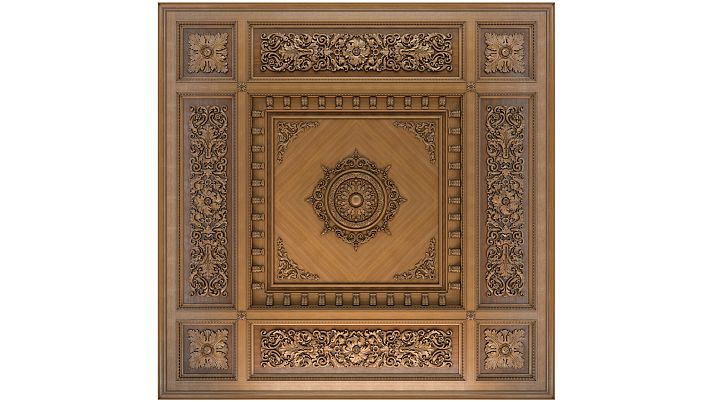
Ideas for using ceiling roses
Polyurethane ceiling roses are not only a decorative element but also a tool for creating a unique interior design. They are ideal for decorating ceilings, zoning spaces, and highlighting accent areas. Let's consider the most popular ways to useceiling roses made of polyurethane in the interior.
1. Framing chandeliers
Why is this popular?
outlets under chandeliers perform two functions:
● Highlight the lamp's beauty by framing it with an elegant pattern.
● Conceal mounting hardware, making the ceiling more neat.
How to choose a ceiling rose for a chandelier?
● For classic interiors: Choose large roses with threading and ornamentation.
● For modern style: Select minimalist and sleek models.
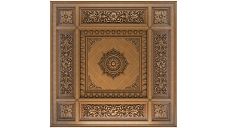
2. Creating accent zones
How does it work?
Ceiling roses can be used to create accent zones on the ceiling. For example:
● Place severalceiling roses in a symmetrical composition.
● Combine them withceiling moldings to create complex decorative structures.
Composition ideas:
- A series of ceiling roses along the ceiling line in the living room creates a sense of depth and structure.
- Circular compositions with ceiling roses and moldings emphasize the central area of the room.
3. Combining with other ceiling moldings
Polyurethane ceiling roses look great paired withwall moldings. This allows you to create a cohesive design that harmoniously unites the ceiling and walls.
● Add polyurethane cornices to transition from walls to ceiling.
● Use moldings to highlight ceiling roses.
4. Use in zoning
Ceiling roses can be used for visual zoning of the ceiling in large rooms. For example:
● In the living room, zone the space above the dining area and the relaxation zone.
● In the bedroom, emphasize the area above the bed with a largeceiling rose.
Practical tips
- Color solutions
Ceiling roses can be left white for a classic look or painted in any color. Try using metallic shades (gold, silver) to add luxury. - Combination with backlighting
Add LED backlighting around outlets to create soft illumination that highlights their shape and ornament. - Placement
Use symmetry to create an orderly design or experiment with asymmetry for modern interiors.
STAVROS Products
STAVROS Company offers:
● Ceiling roses made of polyurethane for any interiors.
● ceiling stucco for creating harmonious compositions.
● polyurethane decorative elements for walls and ceilings.
How to choose ceiling outlets?
Choosing ceiling outlets made of polyurethane is an important decoration stage that affects the overall style of the interior and functionality of the space. STAVROS offers a wide rangeceiling rosesthat allows you to find the perfect solution for any room.
1. Consider the Interior Style
Classic style
For classic interiors, choose outlets with elegant ornaments and carvings. They highlight the luxury and elegance of the room. For example:
● Outlets with floral patterns.
● Models with geometric elements in an antique style.
Modern style
For modern interiors, it's better to choose minimalistceiling rosettesthat add accents but do not overload the space. Round shapes with a minimalist relief or smooth models are popular.
Eclecticism and Art Deco
Here, unique shapes and combinations of patterns are appropriate. Use outlets with unusual designs or combine them withceiling moldings to create complex compositions.
2. Choose the size
The size of the outlet should correspond to the area of the room and the height of the ceiling.
● Small rooms: Choose compact outlets with a diameter up to 40 cm. They will not visually overload the space.
● Large rooms: For large living rooms or halls, large models with a diameter of 60 cm and more are suitable.
● High ceilings: Use outlets with deep relief to create a striking accent.
3. Consider functionality
Outlets under chandeliers
If the outlet is installed under a chandelier, ensure there is a hole in the center for wiring. Choose a model that harmonizes with the chandelier's design.
Decorative rosettes
For creating accents, chooseceiling rosettes without holes. They are used for symmetrical compositions or zoning.
4. Pay attention to the material
Polyurethane Rosettes from STAVROS are distinguished by durability and ease of installation. They are suitable for rooms with increased humidity, such as bathrooms and kitchens.
Practical tips for choosing sockets
- Compare several options
Before purchasing, check the catalog to select a model that perfectly fits the interior. - Consider color scheme
Choose sockets that can be painted to match the ceiling or made accentual using contrasting shades. - Plan the composition in advance
If you plan to use several decorative elements, create a sketch or consult a designer.
STAVROS Products
STAVROS Company offers:
● Ceiling Rosettes of different styles and sizes.
● polyurethane molding for creating comprehensive design solutions.
● decorative elements for zoning and accents.
How to install ceiling sockets?
Correct installation of polyurethane ceiling sockets is the key to their aesthetic appearance and durability. This process does not require complex tools and skills, and due to the lightness of the materials Ceiling Rosettes easily attach to the ceiling even in home conditions.
Installation steps for ceiling sockets
Step 1. Surface preparation
Before installation, ensure the ceiling is clean, dry, and level:
● Remove dust, dirt, and remnants of old coatings.
● Fill in imperfections or cracks if necessary.
● Mark the exact location for socket mounting. If used under a chandelier, ensure wiring is routed to the correct point.
Step 2. Marking
For symmetrical placement of the socket, use a tape measure, pencil, and level:
● Mark the center of the room or area where the element will be installed.
● If the socket is part of a composition, pre-mark the placement of all decorative elements.
Step 3. Applying adhesive
Apply mounting adhesive to the back of the socket. Evenly distribute it along the edges and central area. For heavy models, use special adhesive for polyurethane molding.
Step 4. Installing the socket
● Press the socket firmly against the ceiling and hold it for several minutes until the adhesive sets.
● Ensure the socket is level. Use a level to check.
Step 5. Finishing installation
● Fill gaps between the socket and ceiling with acrylic sealant to create a smooth transition.
● After the adhesive dries, sand the seams and paint the socket the desired color.
Installing sockets under a chandelier
If the socket is installed to frame a chandelier, perform the following additional steps:
- Make a hole in the center of the socket for wiring if not already provided.
- Install the socket, passing the wires through the hole.
- After installation, connect and secure the chandelier.
Installation of decorative sockets
For symmetrical compositions:
- PlaceCeiling Rosettes in the form of a geometric pattern (e.g., circles, squares, or lines).
- Use moldings and cornices to connect sockets into a single composition.
Practical tips
- Use quality materials
For secure mounting, use specialized putty adhesive. It ensures strong adhesion even on uneven surfaces. - Check the placement before fixing
Before final gluing, position the socket against the ceiling to check symmetry and alignment with the marking. - Ensure even pressure
Make sure the socket is pressed evenly to avoid gaps or misalignment.
STAVROS Products
STAVROS Company offers:
● Ceiling Rosettes for chandeliers and decorative compositions.
● ceiling stucco for creating harmonious decor.
● Adhesives and sealants for secure mounting.
Conclusion
Polyurethane ceiling sockets are a stylish, functional, and affordable decorative element that allows you to transform the ceiling, create accents, and highlight the unique interior style. Thanks to their easy installation and versatile design, they can be used in both classic and modern interiors.
Why choose STAVROS products?
high-qualityCeiling Rosettes and other decorative elements that will help you create a harmonious interior:
- Wide Range
The catalog features sockets of various shapes, sizes, and designs — from classic ones with elegant patterns to minimalist models. - Reliable quality
Polyurethane products are distinguished by their strength, durability, and resistance to moisture and temperature fluctuations. - Versatility of application
Sockets are easy to paint, allowing them to be adapted to any interior color scheme. - Delivery to any region
STAVROS products are available for delivery throughout Russia, including major cities such as Moscow and St. Petersburg, and remote regions. The company ensures reliable packaging and timely delivery. - Individual approach
If you need unique solutions, STAVROS is ready to offer custom-made items.
What else can be added to ceiling sockets?
● polyurethane molding for decorating walls and ceilings.
● Moldings and cornices for creating finished compositions.
● decorative elements for zoning and accent decoration.
Tips for creating a unique interior
- Experiment with compositions
Combine moldings and cornices with the sockets to create complex and original patterns on the ceiling. - Add lighting
Backlighting behind or around the sockets creates a cozy atmosphere and highlights their beauty. - Use contrasts
Paint the sockets in colors contrasting with the ceiling to make them stand out against the overall interior.
Where to start?
- Choose appropriateCeiling Rosettes in the STAVROS catalog.
- Define the style and color scheme of your interior.
- Consult with specialists from the company for advice on installation and selection of additional decorative elements.
Create a ceiling that will become a true decoration of your home, together with STAVROS!