Article Contents:
- Why a narrow windowless bathroom is a challenge, not a sentence
- Decorative panel concept: skirting that became architecture
- Mirror from panel to ceiling: how optics defeat physics
- Panel materials: moisture-resistant wood and properly treated MDF
- Color solution: how dark panel and light mirror create volume
- Combination with wall-hung plumbing and concealed installations: clean lines
- Why it works: psychology of narrow space perception
- Lighting: perimeter illumination of the mirror surface
- Layout options: one wall or two?
- Mirror installation: wall mounting and safety
- Panel installation: step-by-step technology for wet areas
- Interior style: from neoclassical to contemporary minimalism
- Mistakes to avoid
- Implementation cost: what makes up the budget
- Panel and mirror care: solution durability
- Real examples: how it looks in real life
- Alternatives and variations: if the basic scheme doesn't fit
- Psychology of hospitality: why the guest bathroom matters
- Frequently Asked Questions
- What else to add: accessories and details
- 2026 trends: what's relevant now
- Lighting influence on color and atmosphere
- Combination with other decor elements: ceiling, floor, hardware
- Why choose STAVROS products
- Conclusion: turn a disadvantage into a signature feature

A narrow windowless bathroom can become a true design diamond if you know a simple trick: combining a decorative panel made of wooden skirting on the lower wall with a mirror surface above. This technique doesn't just solve the crampedness problem—it transforms a modest space into a visual attraction where every centimeter works for volume, light, and status.


Why a narrow windowless bathroom is a challenge, not a sentence
Let's admit it right away: a small guest toilet of two to three square meters without natural lighting is a headache for most apartment owners. A dark, stuffy, cramped corner you don't want to enter and want to leave quickly. But isn't that the real task of design—to take the most disadvantageous space and make it work as well as a formal living room?
The problem with narrow bathrooms lies not so much in size as in the feeling of confinement. When walls literally press in, when the eye has nothing to focus on, when light is absorbed by monotonous tiles or painted surfaces—the space becomes oppressive. But what if we change the very geometry of perception?
HighWooden baseboardIn the format of a wall panel plus a mirror rising from this panel to the ceiling — that's the formula that has been winning on the pages of design publications for ten years. And not just winning, but working flawlessly in the most hopeless cases. Why? Because this technique operates on three levels simultaneously: materiality, optics, and emotion.


The concept of a decorative panel: a baseboard that became architecture.
A traditional baseboard is a modest strip five to seven centimeters high that covers the joint between the floor and the wall. It is functional, inconspicuous, almost neutral. But what if you increase its height to one hundred, one hundred twenty, or even one hundred fifty centimeters? What if you turn the baseboard into a full-fledged wall panel that forms the lower tier of the room?
This is exactly what the technique of high decorative panels offers. In a narrow bathroom, one or two walls are completely clad witha high wooden floor baseboardthat rises to a height of ninety to one hundred twenty centimeters. Sometimes vertical slats or moldings are added, creating a paneled structure reminiscent of classic boiserie. Sometimes the panel remains smooth, with a laconic profile.
Why is this needed? First, the panel creates a horizontal division of the wall. Instead of a monotonous vertical plane, a clear boundary appears, dividing the space into two tiers. This creates rhythm, structure, and visual complexity. Second, the material of the panel — natural wood or high-quality MDF — introduces tactility, warmth, and nobility. Third, a dark or contrasting color of the panel (dark walnut, wenge, graphite, deep blue) creates a visual anchor at the bottom, which psychologically grounds the room, making it stable.
It's important to understand: a highwide wooden baseboard 100-200 mmis not just decor, it's an architectural element. It changes the proportions of the walls. In a narrow bathroom, where the width is only one to one and a half meters, a panel one hundred twenty centimeters high occupies almost half the height to the ceiling (standard two hundred fifty to two hundred seventy centimeters). This is a significant volume that dictates the perception of the entire room.
Can you use not only wooden but alsopolyurethane wall moldings? Absolutely! Polyurethane is completely moisture-resistant, does not deform in high humidity, is lighter in weight than wood, and easier to install. You can create a panel by framing the perimeter with polyurethane moldings and filling the interior with a painted surface or wallpaper. The main thing is that the lower part of the wall is perceived as a single panel structure with a clear upper edge.
Our factory also produces:


Mirror from panel to ceiling: how optics defeats physics
And now — the key moment. Above the decorative panel, from its upper edge to the very ceiling, a mirror surface is mounted. Not a small mirror above the sink, not a decorative insert, but a solid sheet one hundred twenty to one hundred fifty centimeters high, occupying the entire wall or a significant part of it.
What happens to the space? Magic. The mirror doubles the volume, reflecting the opposite wall, plumbing, light, your own presence. A narrow bathroom one meter twenty wide visually becomes wider by the depth of the reflection. The gaze gets lost in this optical game, stops bumping into the wall, starts to slide, searching for boundaries. And doesn't find them where expected.
But this is not the only effect. The mirror rising to the ceiling stretches the height of the room. The eye slides upward along the reflection, following the vertical line. The ceiling seems higher. The space gains air. Instead of a cramped box, a space with depth, height, and perspective appears.
The contrast between the dark panel at the bottom and the light mirror at the top enhances the effect. The dark part grounds, weighs down the bottom, creates a foundation. The light, reflective upper part lightens, dissolves, opens up. The result is a classic composition: a heavy foundation and a light superstructure. This principle has worked in architecture for centuries — from ancient temples to skyscrapers. And it works in your bathroom.
An important nuance: the mirror must be truly large. Not a strip thirty centimeters high, but a full-fledged mirror wall. Small mirrors fragment the space, create fragmentation. A large mirror unifies, expands, liberates. The ideal option is a mirror sheet from the upper edge of the panel to the ceiling, at least eighty centimeters wide or more. If the wall is narrow (for example, the end wall in an elongated bathroom), the mirror can occupy its entire width.
Get Consultation
Materials for the panel: moisture-resistant wood and MDF with proper treatment
The bathroom is a high-humidity area. Even if it's a guest toilet without a shower, there is always condensation, steam from hot water when washing hands, splashes. Therefore, the choice of material for the panel is critical. Not every wood can withstand these conditions without deformation, swelling, or mold.
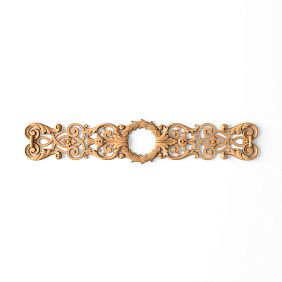
The optimal choice is natural solid oak or beech. Oak has natural high density, low hygroscopicity, and contains tannins that prevent rotting. Beech is slightly less moisture-resistant, but with proper treatment also shows excellent durability. The company STAVROS produceswooden and MDF baseboardsfrom selected solid oak and beech, which undergo multi-stage chamber drying to a moisture content of eight to nine percent. This ensures geometric stability even with humidity fluctuations.
But wood itself, even oak, is not fully protected from moisture. The key point is the finish treatment. For bathrooms, it is recommended:
-
Water-based polyurethane varnish in three to four layers. It creates a hard, waterproof film that does not allow moisture to penetrate the wood.
-
Oil-wax with a high wax content. Wax fills the pores of the wood, repels water, and creates a silky surface.
-
Hard wax (for example, Osmo or equivalent). Applied in two to three layers, it forms a durable protective coating.
Important: regular stain or unprotected oil without wax is not suitable! They do not create a barrier against moisture. The wood will absorb water, swell, and over time may darken, and spots may appear. Therefore, do not skimp on the finish.
An alternative to solid wood is high-density MDF panels (HDF, density over seven hundred fifty kilograms per cubic meter) with a moisture-resistant coating. STAVROS MDF is not just a pressed wood board, but a high-tech material that undergoes special treatment. SuchMDF moldingsand baseboards are primed and painted with enamel in factory conditions, which guarantees uniform coating and its water resistance.
Another excellent option is polyurethane elements.Wall polyurethane moldingIt is absolutely not afraid of moisture. It does not absorb water (water absorption less than one percent), does not deform, does not rot, and does not develop mold. Polyurethane can be washed, is unaffected by condensation, and can even be installed in close proximity to the shower area. At the same time, modern STAVROS polyurethane moldings and skirting boards have clear profile detailing, not inferior to wood, and can be painted any color.
Thus, three materials are suitable for a bathroom panel: solid oak or beech with polyurethane varnish or wax, high-density MDF with factory enamel coating, and polyurethane. All three options are available in the STAVROS range, and the choice depends on your budget, desired texture, and interior style.
Color scheme: how a dark panel and a light mirror create volume
We have already mentioned that the contrast between the lower panel and the upper mirror is the key to visually expanding the space. Now let's be specific: which colors work best?
Dark panel
Dark shades at the bottom are a classic interior design choice. Why? Because dark is perceived as heavy, dense, and material. It grounds the space, creating a visual anchor. In a narrow bathroom, a dark panel one hundred to one hundred twenty centimeters high forms a solid foundation upon which the entire composition is built.
Which dark colors are suitable?
-
Graphite gray. Modern, neutral, elegant. Not as gloomy as black, but deep enough to create contrast.
-
Dark walnut. A rich brown with chocolate notes. Noble, warm, prestigious.
-
Wenge. Almost black with light brown veins. Dramatic, luxurious, expressive.
-
Deep blue (navy blue). An unexpected but very effective choice. Blue on the verge of black adds depth and individuality to the interior.
-
Dark green (forest green). A trend of recent years. Deep green creates a sense of natural strength and calm.
Important: a dark panel does not mean gloominess. It creates contrast and structure but must be combined with a light upper part; otherwise, the room will indeed become oppressive.
Light mirror
A mirror is inherently light—it reflects light, doubles illumination, and creates visual lightness. But what exactly is reflected? The opposite wall, ceiling, light fixtures, interior details. Therefore, it is important that these elements are also light or neutral.
Recommendation: ceiling—white or light gray. The opposite wall (if not covered by the panel)—light: white, cream, light beige, light gray. This ensures the mirror reflects light surfaces, enhancing the sense of spaciousness.
The 'dark bottom—light top' contrast works unfailingly. It creates visual stability (heaviness below, lightness above), emphasizes height (dark visually lowers the reference point, light raises the ceiling), and forms a clear graphic structure. As a result, a narrow bathroom ceases to be a 'box' and becomes a thoughtful, complex, voluminous space.
Combination with wall-hung plumbing and concealed installations: purity of lines
A high decorative panel from a skirting board is not just decor; it is an interior philosophy where every detail works towards cleanliness and conciseness. And in this philosophy, wall-hung plumbing is a natural ally.
A wall-hung toilet, mounted on an in-wall installation, does not touch the floor. Free space remains underneath. This visually lightens the room, creates a sense of floating, and simplifies cleaning. When the entire lower part of the bathroom is free of bulky structures, the decorative panel is perceived as a single, cohesive element; its lines are not interrupted by plumbing legs or protruding pipes.
A wall-hung sink works on the same principle. Console mounting frees up the floor, creating airiness. If the sink is installed against a wall with a mirror, its silhouette is beautifully reflected, doubling the visual interest.
Concealed installations are not just a technical element; they are a necessity for creating a graphically clean interior. All utilities (water supply and drain pipes, toilet tank, mounting frames) are hidden inside a false wall or niche. Only the ceramic plumbing and flush button remain visible. No protruding parts, no visual noise.
In a narrow bathroom, where every centimeter is visible, purity of lines is critical. Wall-hung plumbing, concealed installations, a smooth panel, a continuous mirror—all this creates a sense of refinement, thoughtfulness, and professionalism. The interior looks as if an architect worked on it, not just someone who tiled it.
Additional advantage: wall-hung plumbing allows the panel to easily continue along the entire length of the wall. You do not need to work around a sink cabinet or adapt to toilet legs. The panel runs as a single mass from corner to corner, and the mirror is equally continuous. This enhances the visual impact, creating monumentality in miniature.
Why this works: the psychology of perceiving narrow spaces
Let's step away from technical details for a moment and talk about how a person perceives small spaces. Why does a narrow bathroom seem cramped? Not only because of its actual dimensions but also because of how our brain processes visual information.
When walls are close, the gaze quickly hits an obstacle. There is no perspective, no depth. The brain reads this as a danger signal: space is limited, there is no exit, you need to be on guard. Hence—the feeling of discomfort, the desire to leave quickly.
A mirror breaks this pattern. It creates the illusion of space continuation. The gaze does not hit the wall but goes into the depth of the reflection. The brain perceives this as real space for a split second, and even when understanding comes, the feeling of spaciousness remains. This is not deception but a psychological effect used in design for centuries.
Horizontal division of the wall (panel at the bottom—mirror at the top) also plays a role. A uniform vertical plane is perceived as a barrier. A wall divided into two tiers becomes more complex, more interesting to the eye. The brain lingers on it, studies it, reads the structure. This distracts from the small size of the room, shifting attention to details.
The contrast between dark and light adds dynamism. A monochrome space (all white or all gray) appears flat and static. Contrast creates movement, rhythm, and drama. The eye moves from the dark bottom to the light top, following the vertical line. This enhances the sense of height, making the ceiling appear visually higher.
Thus, the technique of a tall panel and a floor-to-ceiling mirror works not just as a decorative device, but as a tool for managing perception. It utilizes the characteristics of human vision and psychology to turn a drawback (small size) into an advantage (an expressive, memorable interior).
Lighting: perimeter backlighting of the mirror surface
Light is half the success. Without proper lighting, even the most thoughtfully designed finish will lose its impact. In a narrow bathroom with a mirrored wall, lighting should be multi-layered, but the main focus is the mirror backlighting.
Perimeter backlighting of the mirror
The ideal solution is an LED strip installed around the perimeter of the mirror panel (top and sides, less often the bottom). The strip is mounted in a concealed profile or directly behind the mirror if a beveled or wall-recessed mirror is used. The light is directed at the mirror, reflects off it, creating a soft, even glow.
Advantages of such backlighting:
-
Uniformity. No harsh shadows, the face is softly illuminated from all sides. This is important for the sink area where you wash, shave, apply makeup.
-
Visual lightness. The backlighting creates a floating mirror effect, as if it doesn't touch the wall but hangs in the air. This adds modernity and airiness.
-
Volume enhancement. Light reflected from the mirror is doubled. The room becomes brighter, more spacious, more comfortable.
Light temperature is important. For a bathroom, neutral white (4000–4500 Kelvin) is recommended. It is close to daylight, doesn't distort colors, and creates a feeling of cleanliness and freshness. Warm light (3000 Kelvin) can be appropriate in classic interiors with a dark-toned wooden panel—it enhances the warmth of the wood, creating a cozy atmosphere. Cool white (5000–6000 Kelvin) suits ultra-modern minimalist bathrooms but can be too harsh for a small space.
Additional lighting
In addition to mirror backlighting, the bathroom should have a ceiling light (general lighting) and, preferably, local backlighting for the decorative panel.
Ceiling light—recessed spotlights or a compact surface-mounted chandelier. They provide a basic level of illumination when you enter the room. Dimmable light (with adjustable brightness) is recommended to change the atmosphere depending on the time of day.
Panel backlighting from below (a concealed LED strip along the baseboard near the floor) creates a floating panel effect. This is an optional element, but it enhances the visual complexity of the interior, adds depth, drama. It looks especially impressive with dark panels: light seems to stream from underneath them, emphasizing the contour and creating mystery.
Important: all light fixtures and LED strips for the bathroom must have a moisture protection rating of IP44 or higher. This guarantees safety against water splashes and condensation.
Layout options: one wall or two?
Now for specifics: on which walls to install the panel and mirror? This depends on the bathroom's shape, door location, and plumbing.
Option 1: Long wall
If the bathroom is elongated (e.g., 120 cm wide and 240 cm long), the mirror with the panel is installed on one of the long walls. Best—on the wall opposite the entrance. When you open the door, the first thing you see is the mirrored surface stretching upward and the dark elegant panel at the bottom. This creates a visual impact, a 'wow' effect.
The sink is usually located on this wall. A wall-mounted console is attached to the wall, with the mirror above it. The sink can be at the level of the panel's top edge (110–120 cm from the floor) or slightly lower. The faucet is mounted to the wall or in the countertop.
The opposite long wall remains free or is decorated more neutrally: tile, painted surface, continuation of the panel without a mirror. The short end walls: one is occupied by the door, the other by the toilet.
Option 2: End wall
If the bathroom is wide but short, the mirrored panel can be installed on the end wall. This visually lengthens the room: the mirror creates an illusion of the space continuing inward. Especially effective if there is a window or door opposite the mirrored end wall—the reflection creates a multi-layered perspective.
In this case, the sink can be placed along a long wall, and the mirror on the end serves as a visual accent, not a functional element. But this is rare—more often the mirror combines decorative and practical roles.
Option 3: Two adjacent walls
The most luxurious solution: the panel and mirror decorate two adjacent walls meeting in a corner. This creates a volumetric composition effect, where the finish embraces the space from two sides. In the corner, mirrors can be joined at a 45-degree angle (mitered joint) or at 90 degrees (butt joint). The first option is technically more complex but gives a flawlessly smooth transition. The second is simpler, but the mirror edge is visible in the corner.
The panel on two walls also joins in the corner. If solid oak, beechwooden baseboards are used, the corner connection is made at a 45-degree angle, as when installing a floor baseboard. This is a classic joinery technique ensuring strength and aesthetics.
Two mirrors in a corner double the reflection effect: they reflect each other, creating an infinite corridor. This may be too intense for a very small bathroom (overload effect), but in a room of three to four square meters, it gives a stunning visual result.
Mirror installation: wall mounting and safety
A large mirror with a height of one hundred twenty to one hundred fifty centimeters and a width of eighty to one hundred twenty centimeters is a serious structure weighing ten to twenty kilograms (depending on glass thickness). Installation requires a professional approach.
Mounting methods
-
Adhesive mounting. The mirror is glued to the wall with special mirror adhesive (neutral silicone or hybrid adhesive). The wall must be perfectly flat, dry, and dust-free. The adhesive is applied in dots or zigzags, the mirror is pressed against the wall, and fixed with supports until completely dry (twenty-four to forty-eight hours).
Pros: the mirror fits tightly to the wall, no gaps, looks monolithic.
Cons: if the wall is uneven, stress may occur in the glass, risk of cracks. Dismantling is difficult - the mirror will have to be broken.
-
Mechanical mounting on profiles. Special aluminum or plastic profiles (concealed or exposed) are used, which hold the mirror at the top and bottom or around the perimeter. The mirror is inserted into the profiles and secured.
Pros: easier installation, the mirror can be removed and replaced. Profiles compensate for minor wall irregularities.
Cons: visible profiles may disrupt aesthetics (but concealed ones solve this problem). Precise sizing is required.
-
Combined method. The mirror is glued and additionally secured with fasteners (brackets or profiles on the sides/top). This is the most reliable method for large, heavy mirrors.
Safety
The mirror in the bathroom must be safe. Recommendations:
-
Glass thickness minimum four millimeters, preferably five to six. Thin glass is fragile and may crack from temperature changes or mechanical impact.
-
Protective film on the back side. If the mirror breaks, the film will hold the fragments, preventing them from scattering.
-
Tempered glass (laminated). This is a mirror with increased strength, which when broken disintegrates into small, non-sharp fragments rather than large, dangerous shards. More expensive than regular, but safer.
If there are children in the house, tempered glass or a film on the back side is mandatory.
Panel installation: step-by-step technology for wet rooms
Installation of a decorative panel fromhigh skirting boardin a wet room has its peculiarities. You cannot simply screw wood to the wall and forget - moisture protection, proper fastening, and accounting for thermal expansion are needed.
Wall preparation
The wall must be flat, dry, treated with an antiseptic (mold protection). If the wall is concrete or brick - plastered and primed. If drywall - moisture-resistant gypsum board (GKLW), with mandatory priming.
Marking. Determine the panel height (usually one hundred to one hundred twenty centimeters from the floor). Draw a horizontal line using a level - this is the top edge of the panel. If the panel consists of several horizontal rows of skirting, mark each row.
Skirting installation
Wooden skirting boards are attached to the wall with screws or adhesive. For wet rooms, a combination is recommended: adhesive (moisture-resistant on polyurethane or hybrid basis) plus screws for reliability.
-
Cut the skirting to the required length. If the wall is long (more than two hundred fifty centimeters), joining two pieces will be required. The joint is made at a forty-five-degree angle (miter cut) for invisibility.
-
Apply adhesive to the back of the skirting in dots or strips.
-
Place the skirting against the wall strictly according to the markings.
-
Secure with screws (for solid wood - two to three screws per two-meter skirting). Sink the screw heads, then fill with putty.
If creating a paneled design (with vertical and horizontal elements), first mount the horizontal moldings (top and bottom edges of the panel), then the vertical ones (dividers). Corner joints - at forty-five degrees.
Finishing treatment
After installation, the panel is puttied (gaps and screw holes are filled), sanded, primed, and painted or varnished.
For a wet room — at least three coats of polyurethane varnish or enamel. Each coat must dry completely before applying the next. The final coat can be additionally sanded with fine abrasive (grit four hundred to six hundred) for perfect smoothness.
If Polyurethane moldings are used, the process is simpler: they are glued with polyurethane adhesive without screws, joints are sealed, then the panel is painted with acrylic paint for wet rooms.
Interior style: from neoclassical to contemporary minimalism
The technique of a tall panel and mirror is universal and works in different styles. Details change — the skirting profile, panel color, mirror shape — but the principle remains the same.
Neoclassicism
A tall paneled panel made of wooden skirting boards and moldings, painted white, cream, or soft gray. The top edge of the panel is finished with a profiled molding with a classic ornament. Mirror in a thin frame (gold, bronze, patina) or frameless. Plumbing — classic-shaped ceramics (oval sink, toilet with smooth lines). Lighting — sconces in the shape of candlesticks, chandelier with crystal elements.
Modern classic
Smooth panel made of wide wooden skirting boards without ornament, painted in graphite, dark blue, deep green. Skirting profile — straight with a chamfer or elegant rounded. Frameless mirror with perimeter lighting. Plumbing — strict geometric shapes (rectangular sink, toilet with clear lines). Faucets — chrome or matte black steel. Lighting — recessed spotlights, hidden LED strip.
Minimalism
Panel made of MDF or polyurethane, painted in a monochrome color (white, gray, black). Absolutely smooth surface without decoration. Full-wall mirror without a frame. Plumbing — laconic, often concealed installation (faucet built into the wall, countertop or integrated sink). Lighting — hidden, creating a floating effect. No details, no decorations — only form, light, reflection.
Scandinavian style
Panel made of light wood (beech, ash) with natural texture, coated with oil-wax. Panel height is medium (eighty to one hundred centimeters). Mirror with a wooden frame made of the same wood or frameless. Opposite wall — white or light gray. Plumbing — simple, functional. Accents — live plants, textiles (towels, rug) in natural tones. Lighting — warm, cozy.
As you can see, the same technique — panel plus mirror — adapts to any style. The main thing is to correctly select materials, proportions, and colors.
Mistakes to avoid
Even an excellent idea can fail if mistakes are made in implementation. Here are typical mistakes when creating a panel with a mirror in a bathroom.
Mistake 1: panel too low
If the panel is only fifty to sixty centimeters high, it will not create the desired effect. It will look like a regular border or wide skirting board, not an architectural element. Minimum height for a panel is eighty centimeters, optimal is one hundred to one hundred twenty.
Mistake 2: small mirror
A mirror sized forty by sixty centimeters above the sink will not expand the space. It will serve its utilitarian function but will not create visual volume. The mirror should be large — from eighty centimeters in width and from one hundred twenty in height.
Mistake 3: insufficient contrast
If the panel is gray and the wall above it is also gray, boundaries blur, structure is lost. Clear contrast is needed: dark at the bottom — light at the top, or vice versa (though the reverse option is less effective).
Mistake 4: poor moisture protection
Using unprotected wood, regular MDF without moisture-resistant coating, water-soluble paints — all this will lead to rapid deterioration of the panel. In a bathroom, only materials with reliable hydrophobic treatment can be used.
Mistake 5: incorrect lighting
One central ceiling light is not enough. The mirror will remain dark, the face will be in shadow. Perimeter lighting of the mirror or at least lighting from two sides is mandatory.
Mistake 6: ignoring ventilation
Even the most moisture-resistant materials suffer without good ventilation. The bathroom must have a working exhaust fan, preferably with a humidity sensor. Otherwise, condensation will settle on the panel, mirror, creating conditions for mold.
Implementation cost: what makes up the budget
How much does it cost to create such a bathroom? Let's break down the main expense items.
Materials for the panel
-
Wooden skirting boards made of solid oak or beech STAVROS: from two thousand to four thousand rubles per linear meter (depending on profile and height). For a panel one hundred twenty centimeters high on a wall two meters long, about ten linear meters of skirting will be needed (five rows of two meters each). Total: twenty to forty thousand rubles.
-
MDF skirting boards: from eight hundred to two thousand rubles per linear meter. For the same panel: eight to twenty thousand rubles.
-
Polyurethane moldings: from six hundred to one and a half thousand rubles per linear meter. Total: six to fifteen thousand rubles.
Mirror
-
Standard mirror four millimeters thick, size one hundred twenty by eighty centimeters: three to five thousand rubles.
-
Mirror with a beveled edge or tempered: five to ten thousand rubles.
-
Mirror with integrated lighting (ready-made): ten to twenty-five thousand rubles.
Lighting
-
LED strip (five meters): one and a half to three thousand rubles.
-
Aluminum profile for the strip: five hundred to one thousand rubles per meter.
-
Power supply: one and a half to three thousand rubles.
-
Ceiling spotlights (two to three pieces): two to five thousand rubles.
Plumbing
-
Wall-hung toilet with installation: fifteen to fifty thousand rubles (depending on the brand).
-
Wall-hung sink: five to twenty thousand rubles.
-
Faucet: three to fifteen thousand rubles.
Labor
-
Panel installation (including wall preparation, mounting, painting): ten to twenty thousand rubles.
-
Mirror installation: three to seven thousand rubles.
-
Electrical work (lighting, switches): five to ten thousand rubles.
-
Plumbing installation: ten to twenty thousand rubles.
Total, the minimum budget for project implementation (with inexpensive materials and labor in the region) is about eighty to one hundred thousand rubles. Maximum (premium materials, Moscow/St. Petersburg) is two hundred fifty to three hundred fifty thousand.
This is not the cheapest bathroom finishing option. But the result is worth it: instead of a bland little room, you get a stylish, memorable space that makes an impression and works to visually expand the room.
Panel and mirror care: solution durability
After the panel and mirror are installed, it is important to care for them properly to maintain their original appearance for years.
Wood panel care
If the panel is coated with polyurethane varnish or enamel, care is simple: wipe with a damp cloth, use mild cleaning agents without abrasives or aggressive chemicals as needed. The varnish coating protects the wood, so the panel will withstand moderate humidity and water splashes.
If the panel is treated with oil-wax, it is advisable to renew the coating once a year to a year and a half: light sanding with fine abrasive (grit four hundred to six hundred), applying a fresh layer of oil. This maintains the protective barrier and appearance.
Avoid direct water spray on the wood panel. If the bathroom has a shower, it is better not to place the panel in close proximity to the shower area or protect it with a glass partition.
Polyurethane panel care
Polyurethane is low-maintenance. Wash it with any household cleaners; it is not afraid of water and does not absorb dirt. Painted polyurethane can be periodically repainted, refreshing the interior.
Mirror Care
Clean the mirror with glass cleaner or a solution of water and vinegar (one-to-one ratio). Avoid abrasive sponges—they scratch the surface. After a shower or bath, wipe the mirror with a dry cloth to remove condensation and streaks.
If the mirror has backlighting, periodically check the LED strip: individual diodes may fail, causing dark spots. The strip is easy to replace.
Ventilation
The key to the longevity of any materials in a humid environment is good ventilation. The exhaust fan should turn on automatically (via the light switch or a humidity sensor) and run for at least fifteen to twenty minutes after using the bathroom. This removes excess moisture, prevents condensation, and protects all surfaces.
Real-life examples: what it looks like in practice
To better illustrate the concept, we'll describe several real projects.
Example 1: bathroom in a studio apartment
Area: two and a half square meters, width: one hundred ten centimeters. The long wall opposite the door is fully covered with a panel made of wooden baseboard one hundred twenty centimeters high, painted graphite gray. The baseboard profile is straight with a bevel, minimalist. Above the panel—a mirror measuring one hundred twenty by one hundred thirty centimeters (up to the ceiling) with perimeter lighting (neutral white light). Wall-mounted sink thirty-five centimeters wide, faucet built into the wall. Opposite wall—white ceramic tile. Ceiling white, floor—porcelain tile resembling concrete. Wall-hung toilet, installation hidden in a false wall.
Result: the bathroom feels spacious, modern, and expensive. The mirror visually expands the space, the graphite panel adds depth and contrast.
Example 2: guest bathroom in a country house
Area: three square meters, square shape. Two adjacent walls feature raised paneling one hundred ten centimeters high, made of beech baseboards and moldings painted white. The top edge of the panel—a profiled cornice. Above the panel on both walls—mirrors in thin gold frames. Console sink with a wooden countertop, bronze faucet. Ceiling with a decorative rosette and chandelier (classic style). Floor—marble tile.
Result: an interior in the neoclassical spirit, elegant, with a touch of luxury. Mirrors on two planes create an enfilade effect, making the room seem twice as large.
Example 3: minimalist bathroom in an office
Area: three and a half square meters. The long wall is fully covered with a smooth MDF panel one hundred centimeters high, painted matte black. Above the panel—a full-wall mirror (two hundred forty by one hundred fifty centimeters) frameless, with bottom lighting (hidden strip along the top edge of the panel). Countertop-mounted round sink, black countertop, matte black faucet. Opposite wall—gray. Floor black porcelain tile. No toilet (separate WC).
Result: a brutal, strict, expressive interior. The black panel and mirror create a graphic play of light and shadow, making the space look unconventional and memorable.
Alternatives and variations: if the basic scheme doesn't fit
The panel and mirror technique is flexible. If the classic scheme doesn't work for some reason, it can be adapted.
Variation 1: mirrored panel at the bottom, regular wall above
Reverse option: the lower part of the wall (eighty to one hundred twenty centimeters high) is clad with mirror tiles, the upper part—painted or wallpapered. This also expands the space, but the effect is different: the mirror at the bottom reflects the floor, feet, creating a sense of instability, some unease. This suits bold design solutions but may be psychologically uncomfortable for conservative people.
Variation 2: horizontal strip of mirror at eye level
Instead of a mirror up to the ceiling—a wide horizontal strip (forty to sixty centimeters high) at sink level. Above and below—painted wall or panel. This is a more traditional option, offering less visual expansion but easier to implement.
Variation 3: mirrored ceiling
Radical solution: part of the ceiling (above the sink or the entire area) is mirrored. This creates a sense of infinite height, as if the space extends upward. But a mirrored ceiling requires perfect installation and regular maintenance (condensation settles on it faster than on vertical surfaces).
Variation 4: panel made of wall panels
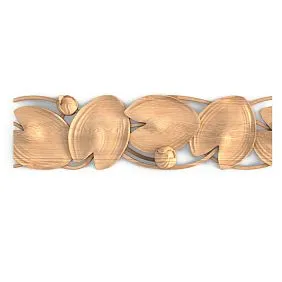
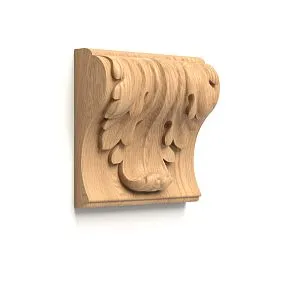
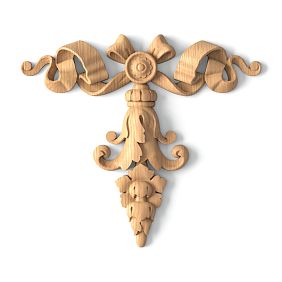
Instead of baseboards, ready-made wooden wall panels STAVROS can be used—carved, with three-dimensional decor, in classic style. They are installed as modules, create a rich texture, and suit luxurious interiors. A mirror is placed above the panels as well.
Psychology of hospitality: why the guest bathroom matters
It might seem that the guest bathroom is a secondary space. Guests spend a minute or two there, so why invest in expensive finishes? But the psychology of hospitality suggests otherwise.
The bathroom is a place where a guest is alone with themselves. There's no host, no need to keep up conversation, one can relax and look around. And if the bathroom turns out to be well-thought-out, stylish, unexpectedly beautiful—it makes a strong impression.
The guest thinks: 'If even the bathroom is designed like this, what about the other rooms!'. This is the reputation effect. You demonstrate attention to detail, taste, and a willingness to invest in quality. This elevates the status of the entire property.
A narrow bathroom transformed into a small masterpiece with a dark panel and a floor-to-ceiling mirror is a conversation starter. Guests will remember it, discuss it, and may even ask for the designer's contact. This works for your reputation as a host with excellent taste.
So, investing in a guest bathroom is not a luxury, but a strategy for creating a strong first impression.
Frequently asked questions
Can a regular mirror be used, or is a special bathroom mirror needed?
A regular mirror is suitable if it is of high quality (the amalgam does not oxidize). But for a bathroom, a mirror with a moisture-resistant amalgam and a protective film on the back is better. This guarantees durability and safety.
How often does the wooden panel coating need to be renewed?
With proper initial treatment (polyurethane varnish in three to four coats), the panel will last five to seven years without renewal. Oil-wax requires renewal every one and a half to two years.
Won't the mirror constantly fog up?
If ventilation works well, fogging is minimal. Additionally, you can treat the mirror with an anti-fogging agent (sold in auto shops for glass) or install a mirror with heating (a built-in film heats the surface, preventing condensation). In a guest bathroom without a shower, the fogging problem is generally not critical.
Can the panel and mirror be made by yourself?
If you have experience working with wood and tools, installing a panel frombaseboardsis feasible by yourself. Cutting to size, attaching with glue and screws, painting — all this is doable. The mirror is better entrusted to professionals: large glass requires care, a mistake can lead to a crack.
How practical is dark wood in a bathroom?
Very practical, if properly protected. Dark varnish or enamel creates a hard surface that is easy to clean. Minor scratches and wear are less noticeable on dark than on white. The only nuance is that water droplets and streaks are visible on a dark glossy surface, so it's better to choose a matte or semi-matte finish.
What is the minimum bathroom size for implementing this idea?
Minimum — one and a half square meters. If the room is very tiny (one meter by one and a half meters), the mirror and panel will still work, but the effect will be weaker. Optimum — from two and a half square meters.
Can a wooden panel be combined with tiles?
Yes, this is a classic combination. For example, the wall with the sink — a wooden panel and mirror. The other walls — ceramic tiles. Or: the lower part of all walls — wooden panel, the upper part — tiles. The main thing is to maintain proportions and color harmony.
How long does installation take?
With ready materials and a professional team — two to three days. A day for wall preparation and panel installation, a day for painting (accounting for layer drying time), half a day for mirror and lighting installation.
Is a special permit required for such work in an apartment?
If you are not touching load-bearing walls, not changing the location of plumbing (moving risers), no permit is required. Wall finishing, panel and mirror installation — this is cosmetic renovation.
What to do if the wall is uneven?
Before installing the panel, the wall needs to be leveled with plaster or drywall. Wooden skirting boards follow the wall's profile, and if it is crooked, there will be gaps between the skirting board and the wall. This looks sloppy and reduces moisture protection.
Can a light panel be used instead of a dark one?
Yes, but the effect will be different. A light panel (white, cream, light gray) blends with the mirror and ceiling, the contrast disappears. The space becomes brighter, but loses structure and graphic quality. If you want a light Scandinavian interior — a light panel is suitable. For a dramatic modern style, a dark one is needed.
What to do if the bathroom has low ceilings (two meters forty centimeters)?
This is not an obstacle, but rather an advantage. With a low ceiling, a panel one hundred to one hundred twenty centimeters high will occupy about half the height, the mirror above it — the remaining one hundred twenty to one hundred forty centimeters to the ceiling. The mirror will visually stretch the height, the ceiling will appear higher. This is one of the best techniques for rooms with low ceilings.
Is a frame needed for the mirror?
Not necessarily. A mirror without a frame looks modern, minimalist, visually lighter. A frame adds classicism, completeness, but can 'eat up' part of the reflective surface. If a frame, then a thin one (one to two centimeters), matching the panel or contrasting (e.g., gold or bronze for a classic style).
HowWall finishing with moldingsaffects the perception of the bathroom?
Moldings create structure, divide planes, add volume and complexity. In a narrow bathroom, this distracts the eye from the small size, shifting attention to details. A paneled molding wall is perceived as a sign of a high-quality, well-thought-out interior. This contributes to the status and visual richness of the space.
What else can be added: accessories and details
The panel and mirror are the foundation of the composition, but details complete the look and add individuality.
Shelf under the mirror
A narrow shelf (ten to fifteen centimeters deep) made from the same wood as the panel, at the level of the panel's top edge. You can place soap, a candle, or a small vase with flowers on it. The shelf breaks up the transition from the panel to the mirror, creates a horizontal line, and is functional.
Towel hooks
Built into the panel or mounted on the wall nearby. It's better to choose hooks in a unified style with the rest of the hardware (faucet, toilet paper holder). Bronze, matte chrome, black steel — depending on the overall concept.
Paper holder and toilet brush
Hidden or minimalist models. For example, a paper holder built into a niche or mounted on an end wall. A toilet brush in a closed housing, stylistically neutral.
Plants
Live greenery enlivens the bathroom, adds freshness. Moisture-loving plants are suitable (fern, spider plant, snake plant). The pot can be placed on the shelf under the mirror or on the edge of the sink.
Air fresheners
Candles, diffusers with essential oils, incense sticks. It's important not to overdo it: too strong a scent in a small enclosed space can be suffocating. A light citrus, lavender, or eucalyptus scent creates a feeling of cleanliness and freshness.
Textiles
The hand towel should be high-quality, matching the interior tone. If the panel is dark, the towel can be contrasting (white, cream, light gray) or matching (graphite, blue). Avoid bright, garish colors — they disrupt harmony.
Soap dispenser
Wall-mounted or countertop. Better built into the countertop or mounted on the wall — this frees up the sink, avoiding visual clutter. Material and color — in accordance with the overall style.
All these details may seem minor, but they are precisely what transform a bland bathroom into a space with character, creating a sense of completeness and care for comfort.
Trends for 2026: what's relevant now
Interior design is constantly evolving, and what was fashionable five years ago may look outdated today. What trends are relevant in 2026 for bathroom finishes?
Natural materials and eco-friendliness
Wood, stone, ceramic, metal — all genuine, without imitations. People are tired of plastic and synthetics, they want tactility, natural textures.wooden baseboards are usedfit perfectly into this trend.
Dark, deep colors
Graphite, charcoal, dark blue, emerald green, burgundy — all are at the peak of popularity. Dark interiors create drama, depth, luxury. A small space in dark tones ceases to be a drawback and becomes intimate, cozy, stylish.
Contrasting combinations
Not monochrome, but bright contrasts: black and white, graphite and gold, dark blue and brass. Contrast creates visual tension, interest, dynamism.
Large formats
Large mirrors, large-format tiles (sixty by one hundred twenty centimeters and larger), wide baseboards. Small details fragment the space, large ones unify, enlarge, and add monumentality.
Hidden utilities and minimalism
No protruding pipes, visible outlets, or eye-catching switches. Everything is built-in, hidden, integrated. Clean lines, conciseness, functional beauty.
Smart technologies
Motion-sensor lighting, heated mirrors with built-in clocks, touch-controlled faucets, wall-hung toilets with bidet function. Technologies should be invisible but enhance comfort.
Individuality
Rejection of standard solutions. Every interior should be unique, reflecting the owner's character. Standard white tiles and plastic cabinets are a thing of the past. Today, an authorial approach, unconventional materials, and bold color solutions are valued.
High-panel fixtures and floor-to-ceiling mirrors fit perfectly into all these trends. They are natural (wood, mirror), contrasting (dark and light), large-format (large mirror, high baseboard), minimalist (clean lines), and individual (colors, materials, proportions can be varied). This is a solution that will remain relevant for many years to come.
The influence of lighting on color and atmosphere
We've already discussed the technical aspect of lighting (mirror lighting, spotlights, LED strips). Now about the psychological impact of light on the perception of space.
Cool light (five to six thousand kelvins)
Bright, sharp, invigorating. Creates a feeling of cleanliness, sterility, modernity. Suitable for minimalist interiors with white or gray surfaces. Combined with a dark panel, it can be too contrasting, creating tension. Good for morning time when you need to wake up.
Neutral white (four to four and a half thousand kelvins)
Universal, close to daylight. Does not distort colors, comfortable for the eyes, suitable for any time of day. This is the optimal choice for a bathroom: in the morning it provides enough light for shaving and makeup, in the evening it is not irritating.
Warm white (three thousand kelvins)
Soft, cozy, relaxing. Gives warmth to the interior, makes wood more expressive, creates an intimate atmosphere. Suitable for classic interiors with wooden panels, for evening use. But with insufficient brightness, it can make the room dim.
Dynamic lighting
Modern LED systems allow changing the temperature and brightness of light. In the morning — cool bright light for alertness. In the evening — warm dim light for relaxation. This creates flexibility, adapting the space to different needs.
Colored lighting
RGB LED strips can glow in different colors. Blue — relaxes, green — calms, red — tones, purple — creates a mystical atmosphere. This is a decorative function, for special occasions (e.g., party, romantic dinner). For everyday use, neutral white is better.
The main rule: light should be bright enough for practical tasks (shaving, makeup, cleaning), but not harsh or tiring. Multi-level lighting (general + local) provides flexibility and comfort.
Combination with other decorative elements: ceiling, floor, hardware
The panel and mirror are the dominant elements of the interior, but they should harmonize with the other elements.
Ceiling
White matte — classic, visually raises the height, reflects light. Light gray — modern, softer than white, creates depth. Stretch glossy — reflects the room, doubles the height, but requires regular cleaning from condensation. Dark (graphite, black) — dramatic, intimate, suitable for high ceilings (from two hundred seventy centimeters), in low ones it can feel oppressive.
Floor
Porcelain tile — practical, durable, moisture-resistant. Color matching the panel (dark) creates unity at the bottom. Light floor (white, beige, light gray) contrasts with a dark panel, lightens the interior. Tile under wood — warm, natural, combines with a wooden panel. Marble or porcelain tile under marble — luxurious, classic, status.
Important: the floor should not be slippery. Choose tiles with a matte or textured surface, slip resistance class R10 or higher.
Hardware (faucets, holders, hooks)
The material and color of the hardware set the tone for the entire interior.
-
Chrome — universal, neutral, modern. Combines with any colors.
-
Matte black steel — fashionable, brutal, graphic. Perfect with dark panels.
-
Gold or brass — luxurious, classic, warm. Combines with white panels, marble, wood in warm shades.
-
Bronze or copper — vintage, characteristic, expressive. Suitable for classic and eclectic interiors.
All hardware elements in the bathroom should be made of the same material. Chrome faucet — chrome hooks, chrome paper holder. Mixing different metals looks chaotic and cheap.
Doors
The bathroom door should harmonize with the overall style of the apartment but can be an accent piece. If the panel inside the bathroom is dark, the door on the outside can also be dark (graphite, wenge). This creates a sense of cohesion. Or it can be contrasting: a dark interior with a white door. The door hardware (handle, hinges) should be in the same style as the hardware inside the bathroom.
Why choose STAVROS products
When it comes to creating a stylish, long-lasting interior, the choice of materials is critical. You can buy cheap baseboards at a construction superstore, but within a year they will deform, lose color, and start peeling. Or you can invest in quality products from a reputable manufacturer and get a result that will last for decades.
STAVROS is a company with years of experience in producing wooden decor and moldings. The range includes —wooden and MDF baseboards — with heights from sixty to two hundred millimeters,Moldings, cornices, wall panels, carved elements. Everything is made from selected solid oak and beech or high-density MDF.
Why STAVROS?
Material quality. The wood undergoes chamber drying to a moisture content of eight to nine percent. This guarantees stability: baseboards will not deform, crack, or swell from moisture.
Profile precision. All products are milled on high-precision equipment. The profile is perfectly even, repeatable, and flawless. This is important for joining elements: seams become invisible, and the surface is smooth.
Wide selection. Dozens of baseboard profiles — from simple straight ones to complex carved ones. You can choose exactly the one that suits your style.
Possibility of painting in any color. STAVROS offers a factory painting service in the RAL or NCS catalog. You receive ready-made elements in the desired color, with an even coating that requires no on-site finishing.
Eco-friendliness. Natural wood, safe water-based varnishes and paints. No harmful emissions, formaldehyde, or toxic substances.
Support at all stages. Consultations on selection, calculation of required material quantities, installation recommendations. You won't be left alone with a problem.
Creating an interior that makes an impression is an investment. An investment in materials, in the work of craftsmen, in your own comfort and status. And STAVROS is a partner that helps bring your idea to life at the highest level of quality.
Conclusion: Turn a flaw into a signature feature
A narrow, windowless bathroom is not a sentence. It's an opportunity to show creativity, to demonstrate that even in limited conditions, something outstanding can be created. A tall decorative panel made from a baseboard combined with a floor-to-ceiling mirror is a proven, effective technique that turns a cramped box into a stylish, spacious, memorable space.
A dark panel creates depth and a sense of status. A light mirror expands volume and height. The contrast between them forms visual structure, rhythm, and drama. Wall-hung plumbing adds airiness. Thoughtful lighting enhances all effects. Quality materials guarantee durability. Details and accessories complete the look.
The result? A guest bathroom that evokes admiration. That is memorable. That works as a signature feature of your home. That proves: size doesn't matter, the approach does.
If you decide to implement this idea, start by choosing quality materials. Visit the STAVROS website, explore the catalog of baseboards, moldings, and wall panels. Contact the managers for a consultation. Order samples to see and feel the material in person. Find a good craftsman who understands the specifics of working with wood in humid environments. Plan the lighting, choose a mirror, select plumbing and hardware.
And in a few weeks, your guest bathroom will no longer be a boring corner you're ashamed to show guests. It will become a space that surprises, impresses, and evokes emotions. It will become that very "wow" we talked about at the beginning of the article.
Because good design is not about big budgets and huge spaces. It's about knowing techniques, paying attention to details, and being able to see potential where others see only a problem. And a tall panel with a floor-to-ceiling mirror is exactly such a technique: simple, effective, and unfailingly reliable.
Create interiors that inspire. Turn flaws into advantages. Trust quality materials from STAVROS. And let every square meter of your home work for beauty, comfort, and visual splendor.