Article Contents:
- What is plant polymer and why it has become professionals' choice
- Purpose of each profile in the decorative system
- Baseboard: foundation of visual harmony
- Cornice: crown of architectural composition
- Molding: universal styling tool
- Profile compatibility: creating a harmonious ensemble
- Principles of stylistic compatibility
- Technical aspects of compatibility
- Selecting height and width: mathematics of beauty
- Ceiling height and cornice size
- Baseboard and room proportions
- Cornice to baseboard ratio
- Molding width
- Stylistics: from classic to minimalism
- Classic and neoclassic
- Minimalism and Modern Style
- Scandinavian Style
- Provence and Country Style
- Basic rules for installing plant polymer profiles
- Surface Preparation
- Marking and Cutting
- Choosing adhesive composition
- Adhesive application technology
- Element joints
- Joint sealing and preparation for painting
- Painting and care of plant polymer decor
- Choosing paint
- Painting Technology
- Decorative painting techniques
- Care for painted profiles
- Typical errors when working with plant polymer decor
- Incorrect selection of profile sizes
- Incompatible profile styles
- Installation on unprepared surface
- Incorrect cutting of angles
- Using inappropriate adhesive
- Insufficient fixation during installation
- Painting without primer
- Ignoring temperature regime
- Rushing during installation
- Creating complex decorative compositions
- Wall panels with moldings
- Multi-level cornices
- Zoning accents
- Decorative pilasters and columns
- Coffered Ceilings
- Practical tips from professionals
- Material Quantity Calculation
- Material acclimatization
- Using painter's tape
- Sequence of work
- Working with uneven walls
- FAQ: Frequently Asked Questions
- Conclusion

Interior design of modern housing has long ceased to be a simple combination of walls, floor, and ceiling. Today, it is a space where every detail plays its part in creating a harmonious atmosphere. And if you ever wondered why one interior looks complete and cohesive, while another seems like a collection of disconnected elements, the answer lies in the details. We’re talking about those very decorative profiles that unite space into a single composition:Baseboard made of phytopolymer, Cornice made of phytopolymerandmolding made of phytopolymer.
Phytopolymer decor is not just a trendy term, but a material of the future that has already won the hearts of designers and homeowners. Lightweight, durable, moisture-resistant, and incredibly malleable, it allows you to realize the boldest interior solutions. But its main advantage is the ability to create a cohesive decorative system, where each element complements the other, forming a unified stylistic ensemble.
In this article, we will thoroughly examine how to properly select and usephytopolymer decorative profilesto create a harmonious interior. You will learn the purpose of each profile type, how to select sizes and styles, master basic installation and painting rules, and become familiar with typical mistakes to avoid.


What is phytopolymer and why it has become professionals' choice
Before diving into the details of a systematic approach to decor, it is important to understand what material we are dealing with. Phytopolymer is a modern composite material based on polyurethane, enriched with natural fillers of plant origin. It is precisely this combination that gives the material unique properties.
Unlike traditional polystyrene or plaster, phytopolymer combines the lightness of plastic with the strength of wood. It is not afraid of moisture, does not deform under temperature fluctuations, does not crack over time, and does not lose its geometry. At the same time, the material is completely safe for health, does not emit toxic substances, and is suitable even for children's rooms.
For installers, phytopolymer products are a real find. They are easy to cut with a regular saw, adhere well to any surfaces, and do not require special skills for installation. Andphytopolymer decor for paintingallows you to realize any design ideas, from classic whiteness to bright accent solutions.


Purpose of each profile in the decorative system
Our factory also produces:


Baseboard: the foundation of visual harmony
Baseboard is not just a strip at the junction of wall and floor. It is an element that performs several important functions. First, it hides the technological gap between the floor covering and the wall, necessary to compensate for material thermal expansion. Second, it protects the lower part of the wall from mechanical damage during cleaning, moving furniture, or accidental impacts.
But the main role of the baseboard is aesthetic. It visually completes the space, creates a clear horizontal line that structures the perception of the room. A properly selected baseboard can visually expand a room, add elegance to it, or emphasize the interior's stylistic concept.
Modern phytopolymer baseboards offer a wide variety of profiles: from minimalist rectangular sections for minimalist interiors to richly decorated classic models with relief ornaments. Profile height ranges from modest 60 mm to impressive 200 mm and more, allowing you to maintain proper proportions in rooms of any height.
Get Consultation
Cornice: the crown of architectural composition
Ceiling cornice is a classic architectural element that has been used for centuries to decorate the junction of wall and ceiling. In modern interiors, its functions have expanded and become more complex. The cornice not only masks imperfections and technological seams, but also serves as a powerful tool for visual transformation of space.
A properly installed cornice can "raise" low ceilings, add volume to a room, and create a floating ceiling effect when using hidden LED lighting. In classic interiors, the cornice becomes an accent element, showcasing the richness of decoration and attention to detail. In modern minimalist spaces, it is a minimalist line that emphasizes the geometry of the room.
Ceiling cornices made of phytopolymer come in a variety of shapes: from simple coves to complex multi-level profiles with coffered sections, rosettes, and modular units. The width of the cornice can reach 300 mm, allowing you to create impressive architectural compositions even in standard apartments.
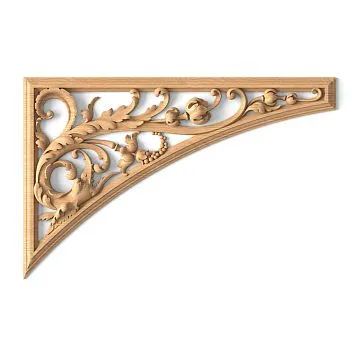
Molding: a universal styling tool
Moldings are decorative applied strips used for dividing walls, creating panels, framing door and window openings, decorating fireplaces, mirrors, and paintings. While baseboards and cornices have clearly defined roles in interior design, moldings are elements of free creativity.
Using moldings, you can create classic wall panels, separate different types of wallpaper, form accent frames on monochromatic walls, and mask material joints. They allow you to add architectural expressiveness to the interior without major space restructuring.
Phytopolymer moldings are available in a vast range of profiles: flat and three-dimensional, ornate and smooth, wide and narrow. This allows you to select the exact variant that perfectly fits your interior concept and complements your chosen baseboards and cornices.
Profile Compatibility: Creating a Harmonious Ensemble
The most common mistake when working with decorative profiles is purchasing elements from different collections or even from different manufacturers. As a result, the baseboard "conflicts" with the cornice in style, moldings stand out from the overall composition, and the interior appears disjointed.
Principles of Stylistic Compatibility
The first rule: all profiles must belong to the same stylistic group. If you have chosen a classic cornice with rich relief, the baseboard and moldings should also have decorative elements of comparable complexity. A minimalist interior requires simple geometric profiles without excessive ornamentation.
The second important point: repetition of decorative motifs. Professional collections of phytopolymer decor are designed so that ornaments on different elements correspond to each other. The same plant pattern may appear on the cornice and baseboard, but in different scales. This creates visual unity in the composition.
The third aspect: profile geometry. Radii of rounded corners, angles of bevels, proportions of protruding elements must be proportionate to each other. In other words, if the cornice has soft, flowing lines, a baseboard with sharp angular transitions will look out of place.
Technical Aspects of Compatibility
In addition to visual harmony, technical compatibility is important. Profiles must have comparable material density to ensure even color application across all elements. Differences in surface structure may cause paint to absorb and reflect differently, creating an undesirable effect.
It is also important to consider the method of installation. If the baseboard is intended for adhesive mounting, the cornice and moldings must have a similar installation system. This ensures uniformity of mounting joints and simplifies the work.
Modern manufacturers, understanding the importance of a systematic approach, produce complete decor collections where all elements perfectly complement each other. Choosing profiles from one series guarantees a harmonious result.
Selecting Height and Width: The Mathematics of Beauty
Choosing the sizes of decorative profiles is not a matter of personal preference, but of correct proportions. There are time-tested principles that help create a visually balanced space.
Ceiling Height and Cornice Size
Basic rule: the higher the ceiling, the wider the cornice should be. This is not just an aesthetic recommendation, but a law of visual perception. In rooms with ceilings 2.5–2.7 m high, the optimal cornice width is 80–120 mm. At a height of 3–3.5 m, profiles 120–180 mm wide can be used. In rooms with ceilings higher than 3.5 m, cornices 180–250 mm and wider are appropriate.
A narrow cornice in a high room will disappear, fail to perform its decorative function, and make the space visually "empty" at the top. An overly wide cornice in a low room will create a sense of pressure, visually "lowering" the ceiling even further.
Baseboard and Room Proportions
The height of the baseboard also depends on the ceiling height, but another factor is at play — the room’s area. In small rooms up to 15 sq. m, the optimal baseboard height is 60–80 mm. For medium-sized rooms (15–25 sq. m), profiles 80–120 mm high are suitable. In spacious rooms over 25 sq. m, tall baseboards 120–200 mm can be used.
There is also the "twenty rule": the baseboard height should be approximately 1/20 of the ceiling height. That is, for ceilings 2.7 m high, the optimal baseboard height is about 135 mm (2700/20). This mathematical ratio yields a visually harmonious result.
Cornice-to-Baseboard Ratio
The cornice and baseboard should be proportionate to each other. The classic rule states: the cornice width should equal or slightly exceed the baseboard height. If the baseboard is 100 mm high, the cornice should be 100–130 mm wide. This creates a visual balance between the upper and lower parts of the room.
However, there are exceptions to this rule. In minimalist interiors, emphasis is often placed on only one element: either a wide cornice with a modest baseboard, or vice versa. This technique works when you need to shift visual accents or adjust room proportions.
Molding Width
Moldings are selected based on their function. For creating wall panels, profiles 30–80 mm wide are used — they should be noticeable but not overwhelm the composition. For framing doors and windows, narrower options 20–40 mm are suitable. For accent decoration, you can use either very thin decorative strips (10–15 mm) or wide relief profiles (100–150 mm).
Important point: the molding width should be a multiple of the width of the panels being created. If you plan to divide a 2.5 m high wall into three horizontal zones, a 5 cm wide molding will "consume" 10 cm of height, resulting in zones of unequal size. Plan your composition taking into account the profile dimensions.
Stylistics: From Classic to Minimalism
Phytopolymer decor is versatile and can support virtually any stylistic direction. Let’s consider how to properly select profiles for major interior styles.
Classicism and neoclassicism
Classic interiors require rich, detailed decoration. Here, profiles with relief ornaments such as acanthus leaves, rosettes, meanders, and Ionic scrolls are appropriate. Cornices may have multi-tiered structures with coffers and modillions, skirting boards - high with pronounced relief.
Classicism is characterized by symmetry and repetition of decorative elements. If a vegetal ornament is present on the cornice, a similar motif should repeat on the skirting boards and moldings. Often, the "frame composition" technique is used: walls are divided by moldings into rectangular panels, within which wallpapers, murals, or decorative plastering are placed.
Neoclassicism is a more restrained version of the classical style. Decoration is present but in a lesser volume. Profiles have clear, graphic lines, and ornaments are more minimalist. Instead of lush acanthus leaves - strict geometric patterns, instead of multi-tiered cornices - two- or three-level profiles with minimal relief.
Minimalism and modern style
Minimalist interiors require restraint in decoration. Here, profiles of simple geometric shapes without ornamentation are used. Skirting boards - rectangular or trapezoidal cross-section, cornices - simple coves or flat profiles, moldings - narrow strips for creating graphic lines.
In modern style, the "shadow seam" technique is often used - instead of volumetric profiles, thin strips are used to create linear accents on walls and ceilings. This allows structuring space without visually overloading it.
An interesting technique in minimalism - using wide flat skirting boards and cornices painted in wall color. Such decoration does not stand out as a separate element, but creates a clear geometric space and emphasizes architectural lines.
Scandinavian style
Scandinavian interiors lean toward simplicity and functionality. Here, profiles of medium height and width with minimal decoration are appropriate. Often, skirting boards with slight rounding of the top edge, simple cornices, and moldings for creating unobtrusive frame compositions are used.
A characteristic feature of Scandinavian style - white color of decoration. Fito-polymer profiles suitable for painting are ideal for this direction, allowing to create the characteristic light, airy atmosphere of northern interiors.
Provence and country
Provence and country styles allow the use of decorative profiles, but in a special, "light" interpretation. Here, skirting boards and cornices of medium size with subtle relief are appropriate, often imitating wood texture. Moldings are used to create wall panels in the lower third of the wall.
A feature of these styles - the possibility of painting profiles not only white, but also pastel tones: soft blue, pale pink, mint, lavender. This creates the characteristic Provence atmosphere of tenderness and romance.
Basic rules for installing fito-polymer profiles
Quality installation is the guarantee of durability and aesthetic appeal of decoration. Let's consider the main stages and rules for installing different types of profiles.
Surface preparation
The first and most important stage - surface preparation. Walls and ceilings must be flat, dry, and free of dust and oily stains. All significant irregularities must be eliminated with plaster or spackle. Minor defects will be hidden under the profile, but height differences exceeding 5 mm will cause problems during installation.
If walls are painted with glossy paint or covered with wallpaper, the surface must be treated with primer to improve adhesive bond. Concrete and plastered walls must be primed - this prevents excessive moisture absorption from the adhesive and ensures reliable adhesion.
Marking and Cutting
Before starting installation, precise marking must be performed. For cornices, the distance from the ceiling is measured, for skirting boards - from the floor. Marking lines are drawn using a laser or water level along the entire perimeter of the room.
Profiles are cut using a hacksaw with fine teeth or a circular saw. To create precise angles, a miter box or a circular saw with angle adjustment capability is used. The standard internal angle is cut at 45 degrees, but in rooms with uneven walls, angle adjustment may be necessary.
Important point: before gluing, all parts must be "dry-fitted" to check the alignment of corners and straight sections. This will allow identifying and eliminating potential problems before applying adhesive.
Choice of adhesive composition
For installing fito-polymer profiles, special polymer adhesives or acrylic-based liquid nails are used. It is important to choose white-colored compositions - they will not show through the material when painted. The adhesive should have a thick consistency to prevent the profile from sliding under its own weight before setting.
For wide and heavy cornices, additional mechanical fasteners are used: dowels, self-tapping screws. Holes for fasteners are drilled in advance and spackled after installation.
Gluing technique
Adhesive is applied to the back of the profile in a dashed line or solid strip - depending on the width of the element. For narrow moldings, a thin dashed line in the center is sufficient, for wide cornices - two or three strips across the entire width.
After applying adhesive, the profile is pressed against the surface and firmly held for 30-60 seconds. Excess adhesive is immediately wiped away with a damp sponge - after drying, this will be more difficult.
When installing long straight sections, it is important to constantly monitor the profile's position level. Even small deviations per meter will result in significant misalignment over the entire wall length.
Element Joints
Joints between straight profile sections should be as inconspicuous as possible. To achieve this, ends are cut strictly perpendicular, the joint area is coated with adhesive, and elements are pressed tightly together. The formed seam is filled with acrylic sealant and carefully smoothed.
Corner joints require special care. When joining two elements at a 45-degree angle, it is important to achieve perfect fit across the entire cut surface. Sometimes, angles need to be sanded or re-cut.
Sealing joints and preparing for painting
After the adhesive has fully dried (usually 24 hours), all joints and areas where profiles meet walls are filled with acrylic sealant. This ensures a perfectly smooth surface and prevents cracks from forming due to building settlement.
Sealant is applied in a thin strip and smoothed with a damp putty knife or finger. Excess is immediately removed. After the sealant dries, the profile surfaces are sanded with fine-grit sandpaper to remove any possible irregularities and prepare for painting.
Painting and care of fito-polymer decoration
Proper painting not only gives profiles a finished look, but also provides additional material protection. Let's consider the painting technology and subsequent care.
Paint Selection
Water-based acrylic and latex paints are suitable for painting phytopolymer profiles. They create a strong, elastic coating, emit no toxic substances, and dry quickly. You can use either matte or glossy finishes—the choice depends on the interior style.
For classic interiors, semi-matte or satin paints are often chosen—they provide a subtle noble sheen that highlights the relief of the decor. For minimalist spaces, deep matte paints are better, creating a velvety surface without glare.
Important point: the paint must be intended for interior use and have good coverage. Quality formulations allow for even coverage in two coats.
Painting Technology
Before painting, the profile surfaces must be primed. This ensures even paint absorption and reduces paint consumption. Use acrylic primer applied in a thin layer with a brush or roller.
After the primer dries (usually 2–4 hours), apply the first coat of paint. For painting profiles, brushes with synthetic bristles 40–60 mm wide are most convenient. They allow you to carefully paint all recesses of the relief without leaving bristles on the surface.
Paint is applied in a thin, even layer along the profile. It is important to avoid drips and runs—they will be visible after drying. If the paint starts to run, immediately blend it with a brush.
The second coat is applied after the first has fully dried (the drying time is indicated on the paint packaging, usually 4–6 hours). The second coat finalizes the tone and covers any possible gaps.
Decorative painting techniques
In addition to classic single-color painting, there are decorative techniques that allow you to create interesting effects. Patination involves applying contrasting paint to raised parts of the relief, followed by blending. This emphasizes the depth of the decor and creates an effect of noble antiquity.
Gilding and silvering—applying metallic paints to raised ornamental elements. This technique is often used in classic interiors to create a luxurious, palace-style look.
Ombre—a smooth transition of color from darker to lighter. This technique allows you to create a sense of depth and visually alter the perception of space.
Care for Painted Profiles
Phytopolymer decor is low-maintenance. Dust is removed with a dry, soft cloth or brush. For more thorough cleaning, use a slightly damp sponge with a mild detergent.
Avoid abrasive cleaning agents and stiff brushes—they may scratch the painted surface. Also, do not use solvents or aggressive chemical compounds.
Local damage (scratches, chips) can be easily repaired by touch-up. The damaged area is lightly sanded with fine-grit sandpaper, primed, and painted in two coats with the same paint originally used.
Properly installed and painted phytopolymer decor retains its appearance for decades without requiring special maintenance.
Common Mistakes When Working with Phytopolymer Decor
Even experienced professionals sometimes make mistakes when installing decorative profiles. Let’s consider the most common ones and how to avoid them.
Incorrect Profile Size Selection
The most common mistake is choosing too narrow profiles for high rooms or too wide ones for low rooms. This disrupts the interior proportions and makes the decor either invisible or overly bulky.
Solution: Always follow the rule of proportion between profile size and room height. If unsure, choose medium sizes—they are universally suitable for most standard apartments.
Incompatibility of Profile Styles
Purchasing skirting boards, cornices, and moldings from different collections often leads to stylistic dissonance. Profiles may differ in decorative character, proportions, and wall thickness.
Solution: Choose all decorative elements from one collection of a single manufacturer. This guarantees compatibility across all parameters.
Installation on unprepared surface
Attaching profiles to dusty, greasy, or uneven surfaces is a direct path to decor peeling. Adhesive cannot provide reliable bonding under such conditions.
Solution: Carefully prepare the surface before installation. Cleaning, leveling, and priming are mandatory steps that cannot be skipped.
Incorrect Mitering of Corners
Mismatched corners when joining profiles is one of the most noticeable errors. Gaps in corners ruin the entire decor appearance, and it is very difficult to mask them.
Solution: Use a quality miter saw or a dado blade. Always check the fit of the parts dry before applying adhesive. Keep in mind that in rooms with non-ideal geometry, corners may deviate from standard 90 degrees, and mitering must be adjusted accordingly.
Using Unsuitable Adhesive
Using adhesives based on organic solvents may damage the phytopolymer or cause deformation. Adhesives of insufficient viscosity cannot hold the profile until it sets, and it will slide off.
Solution: Use only specialized polyurethane adhesives or high-quality white acrylic "liquid nails" with thick consistency.
Insufficient fixation during installation
If the profile is released immediately after applying it to the surface, it may slide or detach. This is especially relevant for wide cornices on the ceiling.
Solution: Press the profile against the surface for at least 30-60 seconds until the adhesive initially sets. For wide and heavy elements, use additional mechanical fastening.
Painting without priming
Applying paint directly onto the fitopolymer often results in uneven tone, spots, excessive paint consumption. The material absorbs paint unevenly, and achieving an ideal finish is difficult.
Solution: Always use acrylic primer before painting. This creates an even base and reduces paint consumption.
Ignoring temperature regime
Installing and painting profiles at temperatures below +5°C or under high humidity disrupts the polymerization processes of the adhesive and paint. Result: weak adhesion and prolonged drying time.
Solution: Perform all work at room temperature and normal humidity. In cold seasons, ensure the room is well-heated.
Hastening installation
Attempting to speed up the process without waiting for the adhesive or paint to dry between stages leads to displacement of elements, smudging freshly painted surfaces, and profile deformation.
Solution: Strictly observe technological pauses. Allow the adhesive to fully dry (24 hours) before sealing joints. Each paint layer must dry according to the manufacturer's instructions.
Creating complex decorative compositions
After mastering the basic principles of working with fitopolymer profiles, you can move on to creating more complex decorative solutions.
Wall panels with moldings
A classic approach is dividing walls into rectangular frames using moldings. This allows creating an expressive architectural composition even on a completely flat, monochromatic wall.
To create panels, the wall is marked into equal rectangles or squares. Usually, a symmetrical layout with equal gaps between panels is used. Moldings are cut and installed according to the marking, with corners joined at 45 degrees.
Contrasting wallpapers, decorative paint, or fabric upholstery can be used within the panels. This creates a multi-layered, three-dimensional composition typical of classical interiors.
Multi-level cornices
To create the illusion of a high ceiling, use the technique of multi-level cornices. The main wide cornice is mounted at some distance from the ceiling, and above it, a second, narrower profile or simply a strip of molding is installed.
An LED strip is placed between levels, creating the effect of a floating ceiling. The light reflecting off the upper level visually increases the room's height and creates a sense of lightness.
Framing functional zones
Moldings can be used to highlight functional zones in a room: framing a TV to create the effect of an integrated panel, defining a dining or work area, or forming decorative niches.
This technique is especially effective in studios and large open spaces, where it is necessary to visually zone the area without using partitions.
Decorative pilasters and columns
By combining different types of profiles, you can create an imitation of architectural elements - pilasters and columns. Vertical moldings form the body of the pilaster, special profiles form the base and capital. Such decoration transforms an ordinary wall into an element of classical architecture.
Coffered Ceilings
Combining ceiling cornices and moldings allows creating the effect of a coffered ceiling. The surface is divided into squares or rectangles by profiles, within which decorative rosettes are installed. Such a ceiling looks luxurious and visually increases the room's height.
Practical tips from professionals
Material quantity calculation
Always purchase profiles with a 10-15% surplus. This compensates for losses during cutting, possible defects, and provides a reserve in case of damage to elements during installation. It is better to have a small leftover than to buy additional profiles - batches may differ in material shade.
Material acclimatization
After purchase, allow profiles to acclimate in the room where installation will take place for at least 24 hours. This allows the material to adjust to the room's temperature and humidity, preventing deformation after installation.
Use painter's tape
When painting already installed profiles, use painter's tape to protect adjacent surfaces. Apply it carefully, pressing edges firmly — this prevents paint bleeding.
Work sequence
Correct sequence: install the crown molding first, then the baseboard, then the moldings. This allows starting with the most complex elements and makes it easier to correct possible errors in subsequent stages.
Working with uneven walls
If walls have significant unevenness that cannot be corrected, use flexible sealants to fill gaps between the profile and the wall. After painting, these areas will be invisible.
FAQ: Frequently Asked Questions
Can fitopolymer decor be used in a bathroom?
Yes, fitopolymer withstands high humidity and temperature fluctuations excellently. It does not swell from water, does not develop mold, does not deform from steam. This makes it an ideal material for bathrooms and toilets. The only condition — use moisture-resistant paints for the final finish.
How long does fitopolymer decor last?
With proper installation and use, fitopolymer profiles last 25–30 years or more. The material does not lose its properties over time, does not yellow, does not crack. The only thing that may be needed — refreshing the painted surface every 10–15 years.
How does fitopolymer differ from polystyrene?
Fitopolymer is significantly stronger and more elastic than polystyrene. It does not crumble when cut, does not break under minor impacts, better withstands mechanical loads. Additionally, fitopolymer is denser and heavier, giving a sense of quality and solidity. Decor made from fitopolymer looks more expensive and noble.
Do fitopolymer profiles need to be painted?
Although profiles often come white upon purchase, painting is strongly recommended. Paint creates an additional protective layer, ensures uniform color across all elements, hides spackled joints. Moreover, painted surfaces are easier to clean and retain their original appearance longer.
Can profiles be mounted on wallpaper?
Theoretically possible, but not recommended. Wallpaper may not withstand the weight of the profile and peel off along with it. If no alternatives exist, use the strongest adhesive and additional mechanical fastening. However, the best option — mount on a prepared plastered surface before wallpapering.
How to choose between fitopolymer and wood?
Fitopolymer is significantly cheaper than natural wood, requires no complex processing, does not deform from humidity, does not crack. Wood looks more noble and natural, has a pleasant texture, but requires regular maintenance and fears moisture. For most interiors, fitopolymer is the optimal choice in terms of price-to-quality ratio.
How long does it take to install decor in one room?
For a typical room of 18–20 sq.m, installing baseboards, crown molding, and simple moldings takes 1–2 days for an experienced craftsman. Add another 1–2 days for filling joints, priming, and painting. Total project duration — 3–4 days. Complex decorative compositions may require more time.
What adhesive is best for fitopolymer?
The optimal choice — specialized adhesives for polyurethane products or high-quality acrylic "liquid nails". They provide strong adhesion, set quickly, and contain no harmful solvents. Avoid adhesives based on organic solvents — they may damage the material.
Can fitopolymer profiles be bent for arched openings?
Standard fitopolymer profiles are not designed for bending. For arched and curved elements, there are special flexible models or segmented profiles that easily take the required shape. Attempting to bend a standard profile will result in breakage or cracking.
How to calculate the required amount of profiles?
Measure the room's perimeter for baseboards and crown molding. Divide by the length of one profile (usually 2 or 2.4 m) and round up. Add 10–15% for trimming and reserve. For moldings, calculate the total length of all planned elements and also add a reserve.
Conclusion
Creating a harmonious interior usingdecorative profiles made of fitopolymeris an art requiring understanding of proportions, style, and installation techniques. Correctly selected and installedBaseboard made of phytopolymer, Cornice made of phytopolymerandmolding made of phytopolymertransform an ordinary space into an architecturally expressive environment.
Systematic approach - this is the key to success. All decorative elements must work in a unified stylistic and compositional key, complementing and enhancing each other. Only then does the interior achieve completeness and coherence, demonstrating taste and attention to detail.
Modernphytopolymer decor for paintingOpens up boundless creative possibilities. This material forgives mistakes for beginners and allows professionals to realize the boldest ideas. Easy to process, durable in use, affordable - it is perfectly suited for modern renovation.
STAVROS Company offers the widest range of fitopolymer profiles for any interior styles. From minimalist solutions to luxurious classical compositions - you will find everything needed to create the perfect decor. High-quality material, thoughtfully designed collections with compatible profiles, detailed consultations from specialists - all this makes working with decor simple and enjoyable, and the result is impressive and long-lasting.
Create dream interiors with confidence in the quality and durability of each element. Fitopolymer decor is an investment in the beauty and comfort of your home for decades to come.