Article Contents:
- Can wooden panels be used in the bathroom
- What types of wooden panels are available for bathrooms
- Panels made of solid wood
- MDF panels
- Primed panels for painting
- Veneered and decorative solutions
- What's better for the bathroom: solid wood or MDF
- Slatted panels in the bathroom: why they're convenient
- Where panels can be used in the bathroom
- Wall behind mirror and sink
- Storage and cabinet area
- Niches and decorative inserts
- Bath screen
- Accent wall outside the shower area
- Where panels are best not used
- How to choose material based on operating conditions
- Which color and format is best for the bathroom
- Light panels for a small bathroom
- Warm wood tones for a spa effect
- Vertical slats for visual ceiling height
- Dark panels as an accent
- How to combine wooden panels with tiles
- Installation of wooden panels in the bathroom
- How to protect panels from moisture and extend their service life
- Mistakes when choosing and installing wooden panels in the bathroom
- Which panels are suitable for a modern bathroom interior
- FAQ: Answers to Frequently Asked Questions
- Final selection algorithm in five steps
Wood in the bathroom is both a long-standing dream and an old fear. The dream is understandable: no other material creates such a feeling of natural warmth, turns morning washing into a small spa ritual, or makes the most functional room in the apartment truly beautiful. The fear is also understandable: wood and water are a known problem. Swelling, mold, deformation, darkening—these are all real stories that happen to those who don't understand the difference between 'wood in the bathroom is possible' and 'wood in the bathroom everywhere.'
The article is honest and practical. Not about abstract inspiration, but about concrete solutions: which wooden panels for the bathroom really work, where they can be installed, which material will withstand humid conditions, and which will deteriorate after a season. And most importantly—where that boundary lies that cannot be crossed.
The thesis is simple: wooden panels in the bathroom are possible, durable, and beautiful—if the material, zone, and installation method are chosen correctly. Violate even one condition—and expensive finishing will turn into a problem.


Is it possible to use wooden panels in the bathroom
Let's start with an honest answer: yes, it's possible. But with limitations that cannot be ignored.
The bathroom is not a monolithic wet space. It contains several fundamentally different zones with varying levels of moisture load. Professionals clearly divide these zones.
Wet zone—the area of direct contact with water: inside the shower tray, bathtub rim, shower area without a partition, walls within 50–60 cm of the water source. Here, wooden panels are prohibited. Neither solid wood, MDF, nor veneer will withstand systematic direct water contact without catastrophic consequences. Tile or special moisture-resistant stone is the only correct choice for the wet zone.
Wet zone – a space where water is present as vapor and droplet condensation: walls behind the sink outside direct splash reach, the area above the bathtub above 50–60 cm level, walls near the mirror, the wall opposite the shower, storage area. With good room ventilation and properly chosen material – wooden panels are quite appropriate here.
Dry zone – a space with minimal moisture load: walls near the door, the area opposite the bathroom unit in a combined bathroom, the upper part of walls with good ventilation. Here wooden panels work without restrictions.
Conclusion: the boundary is not between 'possible' and 'impossible', but between the correct and incorrect installation zone. Finishing a bathroom with wooden panels outside the wet zone is a viable and durable solution if material and protection requirements are met.


What types of wooden panels are available for bathrooms
Our factory also produces:


Solid wood panels
Solid wood – the most natural, most 'alive', and simultaneously the most finicky material in bathroom conditions. Dense species with high natural moisture resistance withstand the wet zone with quality surface protection. Which species are appropriate?
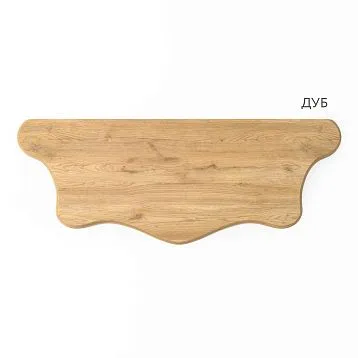
Oak – density 700–750 kg/m³, high content of tannins (tannin glucosides), creating a natural antiseptic barrier. With quality varnish or oil-wax coating, oak panels are successfully used in bathrooms with good ventilation. The natural grain of oak is especially valuable in the bathroom: it creates that spa-like look which cannot be replicated by any film.
Teak – traditionally used in marine interiors. Natural oil content makes teak one of the most moisture-resistant species in principle. Used in exclusive bathrooms, requires minimal maintenance with proper initial treatment.
Thermowood – solid wood that has undergone high-temperature heat treatment (160–220 °C without oxygen). During heat treatment, organic compounds that feed fungus and mold are removed from the wood. Moisture absorption is reduced by 40–50% compared to untreated solid wood. An excellent choice for bathrooms with moderate humidity.
Important: solid wood panels in a bathroom always require the densest possible finish coating – varnish with a high degree of moisture protection, oil-wax, or a special water-repellent compound. Without protective coating, even the densest oak will begin to darken and lose geometry after several months in the bathroom.
Get Consultation
MDF panels
MDF is a fine-dispersed board made from pressed wood fibers. Standard MDF and bathrooms are a bad combination: the standard board swells, delaminates, and loses its shape with regular exposure to steam.
But there is moisture-resistant MDF (MDFV or HMR-MDF — High Moisture Resistance). Its difference from standard MDF: melamine resin is used in production instead of urea resin, and a special hydrophobic additive is included in the composition. Moisture-resistant MDF has a characteristic green cut color — it's easy to distinguish from standard MDF. This is the material suitable for bathrooms.
STAVROS MDF Slatted Panelsare produced with a density of 750–850 kg/m³ — a high-density composition that, with additional protective finishing, performs well in wet zone conditions. For painting with moisture-resistant enamels, such panels create a functional and durable solution for accent walls in bathrooms.
Primed panels for painting
MDF panels with factory-applied primer are an ideal base option when you need to precisely match the interior color of the bathroom. The primed surface is ready for final painting with any paints, including specialized moisture-resistant enamels for bathrooms.
The advantage of this option: maximum color freedom at a reasonable budget. White, gray, powder, terracotta, blue-green — any RAL palette without restrictions. For a bathroom with neutral tiles and a specific accent color for furniture — this is the technically optimal choice.
Veneered and decorative solutions
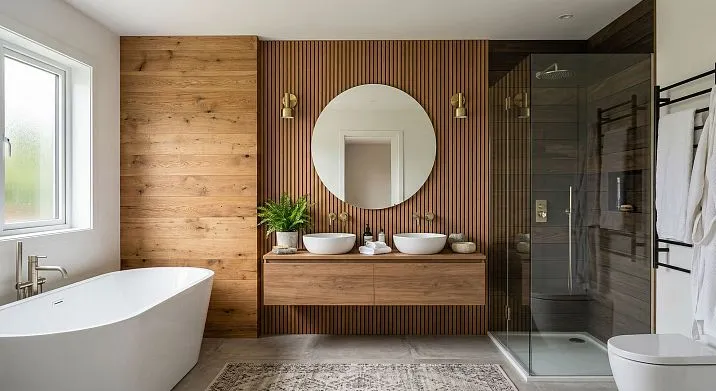
Veneered panels (MDF with a face layer of natural wood veneer) in the bathroom — at the level of solid wood in terms of requirements: a moisture-resistant base plus high-quality finishing coating is needed. But the result is worth it: the natural pattern and tone of real wood with the stability of an engineered material. For spa bathrooms with an accent wooden wall — oak veneer on a moisture-resistant MDF base under varnish — is a professional solution.
What is better to choose for a bathroom: solid wood or MDF
| Parameter | Solid wood (oak, teak, thermowood) | Moisture-resistant MDF for painting |
|---|---|---|
| Natural aesthetics | Maximum — live fiber pattern | Geometric and color |
| Moisture resistance | High with dense finishing | Medium (good with moisture-resistant composition) |
| Geometry stability | Medium (sensitive to sharp fluctuations) | High |
| Freedom in color | Limited to finishes | Maximum (any enamel) |
| Bathroom durability | 10–20 years with care | 8–15 years |
| Cost | High | Low–medium |
| Best scenario | Spa bathroom, accent, high budget | Modern bathroom with a color accent |
When is oak justified? When you specifically need a natural look — a bathroom in Japandi style, spa concept, warm natural interior. When the bathroom is large (from 8 m²) and well-ventilated. When the budget allows investing in a material with a reserve of durability.
When is MDF more reasonable? When you need a specific color — to match tiles, furniture, or a specific designer concept. When the bathroom is small and ventilation is not ideal. When the budget is limited, and the visual task is to create rhythm and character of the surface without natural texture.
Slatted panels in the bathroom: what makes them convenient
Wooden slat panels— the most popular decorative format for bathrooms in modern interiors. And this is no coincidence: slatted solutions in humid environments offer several practical and aesthetic advantages.
Ventilation. Unlike solid, blind cladding, a slatted structure with open gaps between the planks does not create an isolated cavity behind the panel — air circulates through the slats, reducing the likelihood of condensation forming on the wall behind the structure.
Visual effects. Vertical slats in the bathroom raise the ceiling — this is especially valuable for standard bathrooms with a height of 2.5 m. Horizontal ones visually expand a narrow room. In a small bathroom of 3–5 m², the slatted rhythm creates a sense of space that neither tiles nor smooth cladding can provide.
Accent. One slatted wall in the bathroom changes the look of the entire room — this is exactly what most standard bathrooms with gray or white tiles 'from floor to ceiling' lack.
Built-in lighting. Slatted panels are an ideal structure for built-in LED lighting: the LED strip is laid in the grooves between the slats or behind them and creates soft, uniform illumination along the surface. This is one of the main designer techniques in modern spa bathrooms.
Niche zoning. Slatted panels neatly conceal the installation box, frame the niche under the sink, and create a decorative backdrop behind the mirror. A separate slat on a substrate transforms a structural element into a design object.
Where can panels be used in the bathroom
Wall behind the mirror and sink
One of the most 'safe' zones in terms of moisture exposure. If the sink is countertop-mounted or wall-hung, the upper part of the wall behind the mirror is out of direct reach of splashes. Wooden or slatted panels are appropriate here provided the joint between the panel and the countertop or wall is sealed with high-quality waterproof silicone sealant.
Visually: vertical slats from floor to ceiling behind the mirror create depth, rhythm, and a natural warm backdrop. Bottom or side lighting on the mirror against a slatted background is one of the most 'effective' techniques in a modern bathroom.
Storage and cabinet zone
A wall with wall-mounted cabinets or open shelves is an excellent place for decorative panels. Here, moisture exposure is minimal, and the decorative function is maximized: the panel creates a natural backdrop behind storage items, visually unifying the area into a single ensemble.
Niches and decorative inserts
A decorative wall niche with slatted or veneered panels inside is an architectural accent that transforms a structural recess into a striking interior object. If the niche is removed from direct water contact, it's an excellent place for a wooden panel. Lighting inside the niche against a wooden backdrop creates a spa-like feel on a minimal budget.
Bathtub screen
The screen-box concealing pipes and the bathtub base is one of the areas where wooden panels are often used. Material is crucial here: moisture-resistant MDF painted with waterproof enamel or solid oak with a lacquer finish. The top edge of the panel must be sealed with silicone sealant—it's precisely through an unprotected edge that moisture penetrates the material.
Accent wall outside the shower area
The wall opposite the shower cabin, the wall by the door, the end wall behind the sink—these are the right places for a full decorative wooden panel. Vertical slats running the full height, from floor to ceiling, create an accent focal point in the bathroom that works powerfully and durably when material and finish requirements are met.
Where panels are best not used
Honest breakdown — without pretty euphemisms.
Inside an open shower area. If the shower has no partition, the zone of direct water contact inevitably covers the adjacent walls. No wooden material can withstand systematic direct wetting without consequences.
Bathtub rim and constant splash zones. The lower 40–60 cm of the wall along a bathtub with a horizontal rim is a regular splash zone. Even with quality protection, wood is a risky choice here. Tile or moisture-resistant stone is the correct solution.
In bathrooms without ventilation. A room without a working extractor fan and without a window means constant condensation on all surfaces after every bath or shower. Wooden panels will not survive in such conditions even with maximum protection. First — ventilation, then — wood.
Walls with unstable dampness due to leaks or condensation from utilities. If a pipe behind the wall constantly 'sweats' or there has been a leak — the wall is unstable and damp from within. Mounting wooden panels on such a substrate means accelerating their destruction.
How to choose material based on operating conditions
Five questions to ask yourself before choosing:
1. Bathroom area and ceiling height. A bathroom up to 4 m² with a low ceiling — choose lighter and narrower slats to avoid creating a cramped feeling. A bathroom from 6–8 m² — here solid oak, wide slat spacing, dark accent tones are possible.
2. Is there a window? A window in the bathroom critically improves the microclimate: natural ventilation reduces peak humidity after bathing. A bathroom with a window is significantly more comfortable for wooden panels. Without a window — only forced ventilation with a powerful exhaust fan.
3. How does ventilation work? This is the key question. Good exhaust ventilation (capacity from 50–80 m³/h for a 4–6 m² bathroom) removes steam within 15–20 minutes after taking a bath. With such ventilation, wooden panels in the wet zone will last a long time. Without proper ventilation, the risks multiply.
4. How much direct contact with water? The area behind the sink — moderate contact. The area above the bathtub — high. The area near the door — minimal. Answer honestly — and choose the material and finish accordingly.
5. Is an exact color needed? If it's important to match a specific shade to the tile, furniture, or countertop — MDF for painting. If natural texture is important — solid wood or veneer. Don't try to solve both tasks with one material.
What color and format is best for the bathroom
Light panels for a small bathroom
Light tints are the main tool for visually enlarging a small bathroom. Whitewashed oak, natural ash, light gray MDF under enamel — these solutions work in bathrooms with an area of 2.5–5 m². Light vertical slats on one wall plus white tiles on the others — a classic and fail-proof formula.
Warm wood tones for a spa effect
Warm natural oak, cognac, warm walnut, tobacco — shades that create that very spa look. The natural tone of wood combined with a matte white ceiling and natural stone countertop — an interior that reproduces the atmosphere of luxury hotels. For bathrooms with an area of 6 m² and above with good lighting.
Vertical slats for visual ceiling height increase
Vertical slatted panels in a bathroom with a 2.5 m ceiling visually raise the ceiling by 20–30 centimeters. This is not a metaphor — it's a documented visual effect. It works especially powerfully with full-height panels from floor to ceiling adjoining the ceiling cornice.
Dark panels as an accent
Dark graphite, anthracite, dark walnut — striking tones for large bathrooms with good natural or quality artificial lighting. One dark slatted wall in a 7–10 m² bathroom, when properly lit, creates a very strong designer image. In a small, dark bathroom without a window — these tones create an oppressive, confined effect.
How to combine wooden panels with tiles
This is a separate art form with a clear logic.
Lower part — tile, upper part — panels. A classic technique for dividing a wall horizontally. The wet lower zone (up to 100–120 cm) — tile. The dry upper zone — slatted or smooth wooden panels. A horizontal molding or a metal decorative strip at the transition between materials creates a neat boundary.
Panels as an accent next to porcelain stoneware. One wooden wall opposite a tiled wall — a contrast of natural and mineral. Both materials compete neutrally with each other if tonally coordinated: warm oak next to beige or terracotta porcelain stoneware, cold gray slats next to anthracite tile.
Combination with microcement and solid paint. Microcement on walls plus a slatted wooden panel on one accent wall — a modern formula for a premium bathroom. Neutral gray microcement + warm oak = a professional designer ensemble.
How to avoid overloading textures. The rule of one accent: one material with an active texture (slats, relief stone, large tile) + the rest neutral. Wood + marble tile + decorative plaster on three walls of a small bathroom — this is visual chaos, not richness.
Installing wooden panels in the bathroom
Surface preparation is the key stage. The wall for panels in the bathroom must be dry, level, and degreased. No installation on fresh plaster or on a wall after a leak — the substrate must be completely dry: moisture content no higher than 3–5% according to a moisture meter. In bathroom conditions, this requirement is especially strict.
Two installation methods. First - adhesive: MS-polymer-based mounting compound without solvents (they damage MDF) and recommended by the manufacturer for wet areas. Second - frame: metal profile or wooden batten lathing with subsequent panel fastening. The frame method is preferable in bathrooms because it creates an air gap between the wall and panel - critically important for ventilation.
Technical gap. A 10–15 mm gap between the back side of the panel and the wall is not unnecessary but a mandatory element in bathrooms. It ensures air circulation and prevents condensation formation behind the panel.
Protecting edges and joints. Exposed MDF edges are the main moisture entry points. All panel edges (especially bottom and side edges at junctions with tiles or floors) must be protected: wooden molding, decorative metal profile, or high-quality moisture-resistant silicone sealant. Joints between panels and adjacent surfaces - silicone without exceptions.
Do not install on wet substrate, on unstable crumbling surfaces, without technical gap, and without edge protection. Violating even one condition significantly reduces service life.
How to protect panels from moisture and extend service life
Coating selection. For solid wood in bathrooms: polyurethane varnish with high moisture protection (at least 3 coats with intermediate sanding) or specialized oil-wax for wet areas. Oil coatings create less visual shine but require more frequent renewal - every 2–3 years in bathroom conditions. For MDF: moisture-resistant enamel for bathrooms or toilets - specialized formulations with antibacterial additives.
Ventilation - the main protection. No coating compensates for poor ventilation. After each bath or shower, additional 15–20 minute ventilation is recommended. An exhaust fan with timer - automated solution operating without user involvement.
Regular visual inspection. Every six months inspect joints, edges, and areas adjacent to tiles. Any color change, hint of darkening, or beginning edge swelling - signal for immediate sealant or coating restoration. Delay turns minor prevention into expensive repair.
Maintenance. Dry cleaning with soft microfiber cloth - sufficient for regular care. For stubborn stains - barely damp cloth, immediate drying. No abrasive agents, no aggressive chemical cleaners on wooden surfaces - they damage the finish coating.
Mistakes when selecting and installing wooden panels in bathrooms
This is a list that needs to be read carefully—each item here is paid for by someone's renovation.
-
Mount panels in a wet area. The bathtub rim, the shower area without a partition, walls near an open shower—these are zones where wood in any form will not survive.
-
Use standard MDF where moisture-resistant MDF is needed. A standard board will swell within one or two seasons under regular exposure to steam.
-
Mount on an undried base. Moisture from the wall will migrate into the panel from below—this is exactly how material destruction begins from the inside.
-
Ignore ventilation. Any wooden panels in a bathroom without proper exhaust ventilation are a temporary solution.
-
Do not protect edges and joints. An exposed MDF edge will absorb moisture within a few months of use in a bathroom. This is a death sentence for the entire panel.
-
Choose based on a photo without assessing the conditions. A panel in a beautiful photo in a large, bright bathroom with excellent ventilation and natural light is a different context. Your small, dark bathroom without a window requires a different solution.
-
Do continuous finishing with dark panels in a small bathroom. Dark color + small area + insufficient lighting = a feeling of a cramped, enclosed space.
-
Do not combine panels with tiles according to zone logic. Arbitrary mixing of two materials without a thoughtful boundary creates visual chaos.
-
Skimp on the mounting compound. Unsuitable adhesive or adhesive without moisture-resistant properties—panel detachment in the very first heating season due to temperature fluctuations.
-
Do not plan the finish in advance. If the coating requires renewal every 2–3 years, you need to have the same product from the same manufacturer in reserve — otherwise, a tonal mismatch is guaranteed.
Which panels are suitable for a modern bathroom interior?
Minimalism. MDF with a matte enamel finish matching the wall color. Concealed installation. Only the rhythm of slats — no moldings, no color contrast. The wall literally 'disappears' into the space, leaving only geometry.
Japandi. Narrow 10–15 mm slats with uniform spacing, made of ash or oak with a light beige oil finish. No unnecessary details. The quietness of natural material in a neutral frame.
Modern classic. Smooth MDF panels in a molding system with white or cream enamel. Geometric wall divisions near the mirror. Ceiling cornicemade of MDFcompletes the vertical system.
Warm spa. Vertical slats made of solid oak in 'cognac' or 'natural' tinting on an accent wall. Warm white backlighting profile behind the slats. Natural stone countertop and neutral cream tiles as a backdrop. Bamboo and linen accessories.
Accent bathroom with wood. One full-height slatted wall made of oak outside the shower area + neutral large-format tiles on the remaining surfaces. This is enough to make the bathroom memorable.
FAQ: Answers to Frequently Asked Questions
Can wood panels be used in the bathroom?
Yes — provided the correct installation zone is chosen (outside the wet area), suitable material is used (moisture-resistant MDF or solid dense wood), and high-quality protective finishing is applied. The main conditions are: good ventilation and protection of ends and joints.
Which panels are better for the bathroom: solid wood, MDF, or veneer?
Moisture-resistant MDF for painting with moisture-resistant enamel is the most technological choice with maximum color freedom. Solid oak, teak, or thermowood with polyurethane varnish is for natural aesthetics with a sufficient budget. Veneer on a moisture-resistant base provides a natural look with engineered stability.
Can panels be installed next to a bathtub or shower?
Next to — yes, provided they are away from the direct splash zone (more than 50–60 cm). In the direct water spray zone — no. All joints and edges adjacent to the bathtub or tiles — silicone sealant.
Are slatted panels suitable for a small bathroom?
Perfectly suitable. Vertical slats visually raise the ceiling, creating a sense of more space. Choose light tints and not too narrow slat spacing — 30–50 mm.
Is ventilation needed behind the panels?
Yes — it is fundamentally important. A 10–15 mm technological gap between the wall and the panel during frame installation allows air to circulate and prevents condensation from forming behind the structure.
How to coat wooden panels in the bathroom?
Solid wood: polyurethane varnish (3+ coats) or specialized oil-wax for wet areas. MDF: moisture-resistant enamel for bathrooms with antibacterial additives. All edges — additional sealing.
Can panels be painted to match the tile or furniture color?
Yes — that's exactly what MDF panels for painting exist for. Any shade from the RAL palette without restrictions. Use specialized moisture-resistant enamels for bathrooms.
What is better for the bathroom: wood-look panels or wood-look porcelain tile?
Different purposes. Wood-look porcelain tile — in the wet zone, where real wood is impossible. Real wood panels — in the dry and damp zones, where the natural tactility and warmth of real material are needed. Combining both is a professional designer concept.
How to care for panels in the bathroom to prevent them from swelling?
Ventilate the room regularly after bathing. Ensure the exhaust ventilation is working. Check joints and edges twice a year and renew the sealant if necessary. Renew the oil finish every 2–3 years.
What mistakes most often ruin panels in damp rooms?
Installation in the wet zone, using standard MDF instead of moisture-resistant MDF, ignoring ventilation and edge protection — these are the four main reasons for the failure of wood panels in the bathroom.
Final selection algorithm in five steps
Step 1. Determine the zone. Wet zone — wood is excluded. Damp zone — possible if conditions are met. Dry zone — no restrictions.
Step 2. Assess ventilation. Good exhaust ventilation is a mandatory requirement for any wood panels in the bathroom. Without ventilation — address this issue before choosing the finish.
Step 3. Choose the material. Need a natural look — solid oak or veneer on a moisture-resistant base. Need a specific color — moisture-resistant MDF for painting. Need to save while maintaining design — MDF panels for enamel.
Step 4. Plan the protection. Proper coating, sealing of ends and joints, and a technological gap during installation are not options but mandatory conditions.
Step 5. Choose the format. Vertical slats — to visually increase height. Smooth panels — for a monolithic natural background. A combination of tiles at the bottom and panels at the top — for proper distribution of materials across load zones.
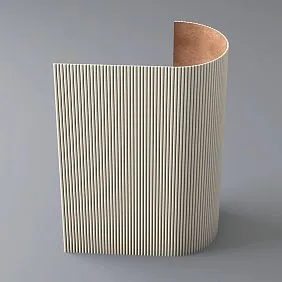
If you are looking for slatted panels for the bathroom — slatted panels made of MDF and solid oak by STAVROS include rigid panels on a substrate, flexible panels on a fabric base for curved surfaces, and panels made of semi-round battens. For an accent wall in the bathroom to be painted with moisture-resistant enamel, for decorating a niche or installation box — a full range for a project of any scale.
STAVROS is a manufacturer of decorative panels, moldings, and interior wood and MDF products since 2002. Over 4,000 models, 20,000 modifications, controlled chamber drying, and production in a stable microclimate. STAVROS — when wood in the bathroom is not a risk, but a thoughtful decision.