Article Contents:
- What is polyurethane wall molding and why it has conquered interiors
- Advantages of polyurethane over other materials
- Creating decorative wall panels: geometry as art
- Classic rectangular panels
- Square and round sections
- Asymmetrical compositions
- Panel creation technology
- Vertical space zoning: dividing the wall into functional zones
- Horizontal division
- Vertical divisions
- Combination of horizontals and verticals
- Framing door and window openings: accent on architecture
- Framing Doorways
- Window framing
- False windows and mirrors
- Accent wall with molding decor: focal point of the interior
- Wall behind the bed headboard
- Wall with TV
- Dining area
- Imitation of boiserie with classic moldings: luxury of palace interiors
- Structure of classic boiserie
- Adaptation of boiserie for modern apartments
- Combining polyurethane with other materials
- Modern minimalist solutions: when less is more
- Concise straight lines
- Hidden mounting and shadow lines
- Monochrome and texture play
- Focus on functionality
- Choosing a Molding Profile: From Simple to Complex
- Simple rectangular strips
- Classic profiles with one shelf
- Ornamented moldings
- Flexible moldings for curved surfaces
- Color and Finish: How to Enhance the Effect of Molded Decor
- White on White: A Classic Genre
- Contrasting combinations
- Color Matching the Wall
- Metallic and Pearlescent Effects
- Patination and artificial aging
- Wall Molding Installation: Error-Free Technology
- Surface Preparation
- Marking
- Cutting Elements
- Adhesive Application
- Joint sealing
- Painting
- Combining polyurethane moldings with other materials
- Molding and wallpaper
- Molding and Paint
- Moldings and decorative plaster
- Moldings and wood
- Moldings and mirrors
- Typical Mistakes When Using Wall Molding
- Scale mismatch
- Overloaded with decoration
- Crooked Lines and Uneven Joints
- Mismatch with interior style
- Ignoring Color
- Frequently Asked Questions About Polyurethane Wall Molding
- Can Moldings Be Installed on Wallpaper?
- How Much Does It Cost to Decorate a Wall with Molding?
- How to care for polyurethane molding?
- Can It Be Used in the Kitchen and Bathroom?
- Does polyurethane molding differ in appearance from plaster molding?
- How Long Does Polyurethane Stucco Last?
- Can Regular Moldings Be Bent?
- Can Molding Be Painted with Regular Water-Based Emulsion?
- Conclusion: Transformation Begins with the Walls

Walls in modern interiors have long ceased to be just a background for furniture and paintings. Today, they are turning into a full-fledged architectural element that creates character, sets the rhythm of the space, and shapes the mood of the entire home. And if you are looking for a way to transform a room without major renovations, without complex construction work, without astronomical expenses—Polyurethane wall moldingwill become your best ally.
Polyurethane wall decor opens up endless possibilities: from refined classic boiserie to strict minimalist lines, from complex architectural compositions to laconic accents. This material combines ease of installation with impressive visual effects, affordability with durability, practicality with aesthetics.


What is Polyurethane Wall Molding and Why It Has Conquered Interiors
Polyurethane is a synthetic polymer with unique properties. Dense but lightweight. Strong but elastic. Moisture-resistant but breathable. It is not afraid of temperature fluctuations, does not deform over time, and does not yellow from sunlight. And most importantly—it can be used to create decorative elements of any complexity with perfectly clear relief details.
Modern polyurethane wall molding is manufactured using injection molding. This ensures absolute uniformity of all elements, geometric precision of profiles, and reproduction of the finest ornaments. Every curl, every line, every pattern comes out as clear as if carved by a sculptor by hand.


Advantages of polyurethane over other materials
Why Exactly Polyurethane Became the Material of Choice for Wall Decor?
Lightweight. A square meter of polyurethane molding weighs only 2-4 kilograms. This is dozens of times less than plaster molding. Lightweight decor does not create a load on walls, is mounted with ordinary polymer adhesive without dowels, screws, or anchors. It can even be installed on drywall partitions, plywood cladding, or any surfaces.
Moisture Resistance. Polyurethane is completely inert to water. It does not absorb moisture, does not swell, and does not deform.polyurethane wall moldingscan be installed in bathrooms, kitchens, swimming pools, and even on building facades. Where plaster crumbles and wood rots, polyurethane lasts for decades.
Ease of Processing. It can be cut with a regular handsaw or miter saw. It is glued to the wall in just minutes. It does not require special tools, professional skills, or complex technologies. Even a beginner can handle installing polyurethane molding on their own.
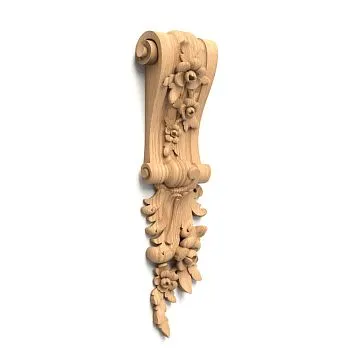
Variety of Shapes. Manufacturers' catalogs feature thousands of profiles: from simple strips to the most intricate ornamental cornices. Classic and Baroque, Empire and Modern, Art Deco and Minimalism—every style will find its decor.
Durability. High-quality polyurethane molding lasts 30-50 years without losing its shape, color, or texture. It does not crack, crumble, or require periodic restoration.
Affordable Price. The cost per linear meter of polyurethaneof wall decor moldingsranges from 200-1200 rubles depending on the complexity of the profile. This is 3-5 times cheaper than wooden decor of similar detail level and 5-10 times cheaper than handmade plaster molding.
Our factory also produces:


Creating decorative wall panels: geometry as art
One of the most spectacular applications of wall molding is creating decorative panels. These are rectangular or square frames made of moldings that structure the wall, divide it into rhythmic segments, and create volume and depth.
Get Consultation
Classical rectangular panels
Imagine a wall divided into symmetrical rectangles. Each is framed with an elegant border made ofpolyurethane moldings. Inside the frame — contrasting paint, patterned wallpaper, textile covering, mirror insert. Such composition instantly transforms an ordinary wall into an architectural element worthy of a palace interior.
The classical scheme involves dividing the wall horizontally into two or three zones. The lower zone — 90-120 cm high from the floor — is decorated with larger panels, often with rich color or texture. This is the foundation of the composition, its substantial part. The middle zone occupies the remaining space up to a conditional line at 2-2.2 meters height. Here panels can be vertically elongated, creating an illusion of high ceilings. The upper zone, if present, is a frieze under the ceiling, a narrow strip with fine decor.
Panel size is chosen based on room proportions. In small rooms, panels should be compact — 40x60 cm, 50x70 cm. Large frames will visually shrink the space. In large halls, conversely, small panels will get lost. Here, large-scale compositions are appropriate: 80x120 cm, 100x150 cm and even larger.
Square and circular sections
You don't have to limit yourself to rectangles. Square panels create a static, balanced composition, ideal for minimalist interiors. And circular sections (yes, that's possible with flexible polyurethane moldings!) bring dynamism, softness, elegance.
Circular panels require special flexible molding that bends along a radius without breaking. Such elements exist in professional collections and allow creating unique compositions: medallions on walls, circular mirror frames, oval inserts with painting.
Asymmetric compositions
For contemporary interiors where symmetry gives way to free layout, asymmetrical panel compositions are suitable. Differently sized rectangles arranged in random order. Panels extending beyond wall boundaries and transitioning to adjacent surfaces. Overlapping frames creating a layered effect.
Such decor requires boldness and compositional sense, but the result is impressive. The wall transforms into an art object, an installation that attracts the eye and invites detailed examination.
Panel creation technology
How are these panels created? The process is simple but requires precision.
First, the wall is marked. Lines determining molding placement are drawn with a pencil. It's important to maintain horizontals and verticals, using a level and square. The slightest deviation will be noticeable.
Moldings are cut to size considering corners. Straight joints are cut at 90 degrees, corner joints at 45 degrees (for frame formation). Cuts must be perfectly even, without chips or burrs.
Polymer adhesive (like liquid nails) is applied to the back of the molding in a zigzag or dots. The element is placed against the wall along markings and pressed firmly. Adhesive sets in 15-30 seconds, full drying occurs after 24 hours.
Joints between elements are filled with acrylic sealant, smoothed, and sanded with fine sandpaper after drying. Then the entire composition is painted in the chosen color.
The interior space of panels is decorated according to design: paint, wallpaper, fabric, decorative plaster. You can keep the same color as the wall, but then the panel will serve as a relief ornament creating play of light and shadow.
Vertical space zoning: dividing walls into functional zones
Zoning is one of the key techniques in contemporary design. Especially relevant in studio apartments, combined spaces, large multi-functional rooms. Andpolyurethane wall panelsplay the leading role here.
Horizontal division
A classic technique — dividing the wall with a horizontal molding line at 90-120 cm height. Below this line — one finish (patterned wallpaper, dark paint, wooden panels). Above — another (light paint, plain wallpaper, textured plaster).
This division has deep roots. In historical interiors, the lower wall section was always finished with more practical and durable materials: wood, stone, tile. This protected the finish from stains, mechanical damage, moisture. The upper part was decorated elegantly: fabrics, wallpaper, painting.
Today such zoning is more decorative, but it works flawlessly. The dark bottom visually grounds the interior, makes it stable, substantial. The light top raises ceilings, adds air, spaciousness.
The molding dividing zones becomes an accent line. It can be simple and laconic — for contemporary interiors. Or richly ornamented — for classical spaces. The main thing is that its width corresponds to room scale. In a small room, 3-5 cm wide molding is enough. In a spacious hall, 8-12 cm profile is appropriate.
Vertical divisions
Vertical moldings divide the wall into narrow sections, creating a colonnade effect with rhythmic repetition. This is an excellent technique for elongated rooms that need to be visually shortened and made more intimate.
Verticals can be uniform (equal spacing between moldings) or variable (rhythmic alternation of wide and narrow gaps). The first option creates a calm, orderly composition. The second — dynamic, attention-grabbing.
Vertical zoning is often used to highlight functional areas. For example, in a living room, moldings can delineate the TV area, separating it from the seating area. In a bedroom — to accentuate the headboard. In a study — the desk area.
Combining horizontals and verticals
The most complex and impressive compositions are achieved by combining horizontal and vertical zoning. The wall transforms into a grid of moldings, with each cell inside decorated uniquely.
This approach is characteristic of classic boiserie — wooden panels used to decorate walls in palace interiors of the 17th-18th centuries. Today, boiserie is recreated using polyurethanedecorative panels— lighter, faster, cheaper, but the visual effect is practically identical.
Framing door and window openings: accent on architecture
Doors and windows are natural architectural accents in any room. They attract the eye, organize movement, and shape spatial perception. And if they are decoratedwith polyurethane wall overlays, the effect is greatly enhanced.
Framing doorways
A simple door in a wall is a functional opening. A door framed with moldings is a portal, a ceremonial entrance, an element of composition.
Classic framing consists of vertical pilasters on the sides of the opening and a horizontal cornice or pediment on top. Pilasters can be simple rectangular strips or complex profiles with capitals. The top element can be straight, triangular (like an antique pediment), or segmental (arched).
The width of the framing is chosen proportionally to the door size. For a standard 80-90 cm opening, a molding 6-10 cm wide is suitable. For wide double doors or arches — 12-15 cm or more.
The color of the framing can match the door leaf color, creating a unified composition. Or contrast with the wall, highlighting the opening as an independent element. White framing on a colored wall is a classic, foolproof choice.
Window framing
Windows deserve no less attention. Molded framing turns a window into a picture, a frame through which the view of the world opens.
Framing can be symmetrical — identical elements on all four sides of the window. Or asymmetrical — for example, the top part is decorated with a cornice, while the sides and bottom are more modest strips.
An interesting effect is achieved with extended framing, where moldings are placed not flush with the window frame but at a distance of 10-20 cm from it. A kind of double contour is formed, giving the window significance and monumentality.
If the window is set in a niche (typical for houses with thick walls), not only the outer contour but also the reveals are framed. Moldings running along the perimeter of the reveals emphasize the depth of the niche, create a play of light and shadow, and enhance architectural expressiveness.
False windows and mirrors
The same framing technique is applied to mirrors, turning them into decorative 'windows'. Tall vertical mirrors framed as arched windows with a semicircular or pointed top look especially impressive.
You can also create a fully decorative composition: frame a section of the wall with moldings, inside which place a fresco, landscape wallpaper, or a relief panel. Such a false window works as an art object, adding depth and narrative to the interior.
Accent wall with molded decor: the focal point of the interior
Every room should have a focal point — the place that first catches the eye upon entry. Often, this role is played by an accent wall, decorated differently from the other surfaces. Andpolyurethane wall molding— is one of the best ways to create such an accent.
Wall behind the bed headboard
A classic location for an accent wall in a bedroom is behind the bed headboard. Here, you can create a complex multi-level composition of moldings forming a frame around the bed or a series of panels rising from floor to ceiling.
The center of the composition can be decorated with a contrasting color, patterned wallpaper, or a soft wall panel with tufting. The moldings frame this center, creating a worthy setting for it.
The height of the decor can match the height of the bed headboard (120-140 cm) or rise significantly higher, up to 2-2.5 meters, visually increasing the room's height.
The composition can be complementedon the walls, creating a complete classical composition.in the upper corners of the panels with wall sconces placed symmetrically relative to the central axis, and with textile draperies.
TV wall
In the living room, the accent is often the wall where the TV is placed. To prevent modern technology from looking alien in a classic interior, it is integrated into a decorative composition made of moldings.
A frame is created around the TV, visually turning the screen into a painting. Symmetrical panels for decor, shelves, and speakers are placed nearby. The entire composition is united by a common horizontal molding running along the top.
You can go further and create an imitation of a built-in cabinet or library. Molding panels form niches where shelves, decorative items, and books are placed, with the central niche reserved for the TV.
Dining area
In the dining room or kitchen-living room, the accent wall can be located behind the dining table. Here, medium-height panels (150-180 cm) in calm tones are appropriate, creating an atmosphere of coziness and hospitality.
Inside the panels, you can place paintings, framed photographs, wall plates, mirrors—anything that matches the spirit of family meals and friendly gatherings.
For the dining area, moldings are usually chosen to be of medium width (5-8 cm), not too massive but not lost against the furniture. The color is often white or matching the walls, so as not to draw attention away from the table, where the main action unfolds.
Imitation of boiserie with classic moldings: the luxury of palace interiors
Boiserie is a French word for wooden wall panels that were a mandatory element of rich interiors in the 17th-19th centuries. Today, creating real wooden boiserie costs a fortune. But you can create an imitation usingwall molding made of polyurethane, and visually the result will be almost indistinguishable.
Structure of classic boiserie
Boiserie consists of several levels. The lower level is a plinth or panel 90-120 cm high. This is the most massive part, often finished with dark wood or a rich color. The panel is divided by vertical moldings into sections, inside which there can be panels—rectangular inserts with relief or smooth surfaces.
The middle level is the main wall surface from the panel to the cornice. Here, decorative frames made of moldings are placed, inside which there is wallpaper, fabric, or painting. The frames repeat rhythmically, creating a structured composition.
The upper level is the frieze, a narrow strip under the ceiling, often decorated with an ornamental molding. The ceiling cornice completes the composition.
Adaptation of boiserie for modern apartments
In historical interiors, ceilings were high—3.5-4 meters or more. Modern apartments are more modest—2.5-2.7 meters. Therefore, the classic boiserie scheme needs to be adapted.
You can limit yourself to two levels: a lower panel 80-100 cm high and the main wall surface above. In low rooms, it's better not to include a frieze—it will visually lower the ceiling.
The size of decorative frames is also reduced. Instead of large panels 100x150 cm, more compact ones like 50x80 cm or 60x100 cm are used.
The color palette can be softened. Historical boiserie was often dark and rich: walnut, mahogany, dark green, or burgundy panels. In a modern interpretation, you can use light shades: beige, gray, pastel tones, preserving the structure but making the interior more airy.
Combining polyurethane with other materials
Real boiserie is made of wood. But nothing prevents combiningMoldings made of polyurethane(which form the structure) with other materials for filling.
The lower panels can be covered with wooden slats, MDF panels imitating wood, or laminate. Polyurethane moldings create the framing, while wood provides a noble texture.
Mirrors can be glued into the decorative frames on the middle part of the wall, creating the effect of mirror panels that visually expand the space. Or fill them with textile panels with tufting, adding softness, sound absorption, and tactile coziness.
Such a mix of materials enriches the interior, making it multi-layered and interesting upon closer inspection.
Modern minimalist solutions: when less is more
Moldings are associated with classicism, baroque opulence, and palace luxury. But polyurethane moldings work excellently in modern minimalist interiors as well. They are simply used differently.
Concise straight lines
Minimalism loves clean lines, right angles, and the absence of ornamentation. And here, smooth moldings without relief come into play—simple rectangular strips of varying widths.
Such moldings are used to create geometric compositions on walls: strict rectangles, vertical or horizontal stripes dividing the wall into sections.
The color of moldings in minimalism most often matches the wall color or differs by one or two tones. Contrasting moldings (white on a dark wall) also work, but this is a more graphic, less pure minimalism.
Hidden installation and shadow lines
An interesting technique is a molding recessed into the wall. A niche 5-10 mm deep is created, into which the molding is glued. Only a shadow line remains on the wall—a thin, clear outline, almost weightless, yet structuring the space.
Such shadow lines can be used for zoning, framing functional areas, creating boundaries that are not immediately visible but are perceptible.
The technology is more complex than standard surface mounting. It requires milling the wall or creating a drywall structure with built-in niches. But the result is worth it—the interior becomes refined, thought out to the smallest detail.
Monochrome and texture play
Minimalism does not mean boredom. You can create a rich visual composition using only one color but playing with textures.
The wall is covered with smooth matte paint. The moldings are the same color but with a different texture: glossy, velvety, with a metallic sheen. Under different lighting, the moldings appear and disappear, creating a dynamic, lively surface.
Or vice versa: a wall with textured plaster, moldings—perfectly smooth. The contrast of textures with color unity is a subtle, elegant technique characteristic of high-end design.
Focus on functionality
In minimalism, decor cannot be just decor. It must serve a function. And here, moldings work as dividers, as frames for functional zones.
Moldings can frame a built-in wardrobe, visually integrating it into the wall. Highlight a niche for a TV. Define a work area. Create a frame for a collection of posters or photographs.
Functionality + visual purity = the formula of modern minimalism, into which polyurethane moldings fit flawlessly.
Choosing a Molding Profile: From Simple to Complex
The profile of a molding is its cross-section, the shape that determines how the element will look on the wall. And the choice of profile is critical to the success of the entire composition.
Simple rectangular strips
The most basic option is a rectangular strip 2 to 15 cm wide. Absolutely smooth, without relief. Suitable for minimalist, Scandinavian, and modern interiors. Creates clear lines, structures space without overloading it with details.
The thickness of such a strip is usually 5-10 mm. This is enough to create a small shadow that marks the boundary but does not protrude too much from the wall.
Classical profiles with one shelf
Slightly more complex—a molding with one shelf (protruding edge). Has an L-shaped cross-section: the main plane adheres to the wall, and the shelf protrudes forward by 5-15 mm.
Such a profile creates a more expressive shadow, emphasizing the architectural quality of the composition. Suitable for neoclassical interiors, for transitional styles between classicism and modernism.
Ornamented moldings
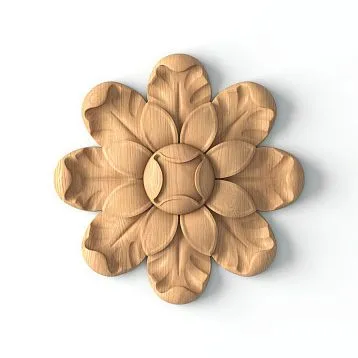
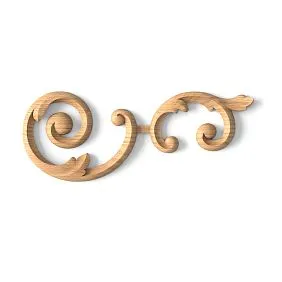
For classical interiors, moldings with relief ornamentation are chosen: floral motifs, geometric patterns, pearl strings, egg-and-dart (egg-shaped elements), acanthus leaves.
Such moldings can be very complex, with relief depth up to 10-15 mm, with many small details. They turn a simple frame into a work of art but require careful application. Too many ornamented moldings—and the interior becomes overloaded, heavy.
Rule: the more complex the molding's ornament, the less of it should be in the interior. Richly decorated moldings are used sparingly, to frame main focal points. Simpler profiles are chosen for filler lines.
Flexible moldings for curved surfaces
A special category—flexible moldings made of elastic polyurethane. They bend along a radius, allowing framing of arches, round columns, curved niches, oval panels.
The bending radius depends on the width of the molding. Narrow (3-5 cm) moldings can bend into a circle with a diameter of 30-40 cm. Wide (8-10 cm) moldings require a larger radius — from 80-100 cm.
Flexible molding can be heated with a construction heat gun before installation — this increases its plasticity and allows it to be bent into a tighter arc without the risk of breakage.
Color and Finish: How to Enhance the Effect of Decorative Molding
Polyurethane molding is supplied white, primed, and ready for painting. And the final appearance of the interior depends on how you paint it.
White on White: A Classic Genre
White moldings on a white wall are a foolproof option. Even when the colors match, the molding stands out due to its relief, which creates a play of light and shadow.
White visually expands space, adds light, and creates a sense of cleanliness and freshness. In small rooms, in spaces with insufficient natural light, white molding works perfectly.
Contrasting Combinations
For a more dramatic effect, contrast is used: white moldings on a dark wall (graphite, blue, burgundy) or dark moldings on a light wall.
Contrast emphasizes the geometry of the composition, making it graphic and clear. Every line, every frame is read extremely clearly. This is a good choice for interiors where architectural expressiveness is important.
But contrast requires precision. The slightest installation unevenness, a crooked joint, a carelessly filled seam — everything will be visible. Therefore, contrasting decoration is only suitable with impeccable work quality.
Color Matching the Wall
Moldings painted the same color as the wall create a softer, more delicate effect. They structure the wall but don't shout for attention. This is a choice for interiors where molding plays a supporting role, creating a background for furniture, textiles, and decor.
When painting to match the wall color, it's better to choose moldings with pronounced relief so that the play of light and shadow is strong enough for visual highlighting of the element.
Metallic and Mother-of-Pearl Effects
For luxurious interiors in Art Deco, glamour, or Neo-Baroque styles, moldings can be painted with a metallic effect: gold, silver, bronze, copper.
It's not necessary to use pure gold or silver — this can look vulgar. It's better to choose muted metallic shades: champagne, antique gold, aged bronze. Such colors are noble, refined, and look expensive.
Mother-of-pearl paints with a slight shimmer create a magical effect: depending on the viewing angle and lighting, the molding changes shade, shimmers, and plays. This is a complex, subtle decor for sophisticated interiors.
Patina and Artificial Aging
For interiors in Provencal, country, or vintage styles, moldings can be artificially aged. A base coat of paint (usually light: white, cream, blue) is covered with a second coat of a different color (often contrasting: brown, gray). Then the second coat is partially wiped away, revealing the base. This creates an effect of peeling paint, years of use, and history.
Patina is the application of a dark shade (brown, black, green) into the recesses of the relief. This emphasizes the ornament, makes it more voluminous and expressive, and creates the illusion of noble age.
Installation of Wall Molding: Error-Free Technology
The quality of the final result directly depends on the correctness of installation. Even the most expensive and beautiful molding will look shabby if installed crookedly, with gaps in the joints, and with peeling elements.
Surface preparation
The wall must be level, clean, dry, and sturdy. Molding is glued not to wallpaper, not to whitewash, not to crumbling plaster, but to a stable base.
If the wall is wallpapered, the areas under the moldings need to be cleaned: remove the wallpaper, fill with putty, and prime. Or glue the moldings over the wallpaper, but understand that they will hold as well as the wallpaper itself holds.
The ideal base is a puttied and primed wall. Primer ensures good adhesive adhesion and prevents moisture from the adhesive being absorbed into the wall.
Marking
Accurate marking is mandatory before installation. Lines are drawn with a pencil along which the moldings will be glued. A laser or bubble level is used for horizontals, a plumb line for verticals, and a square for right angles.
If a composition of many elements (panels, frames) is being created, the entire scheme is marked out first. This allows you to ensure that the proportions are correct, the distances are even, and the composition is balanced. Adjusting the marking on paper or the wall is easy. Re-gluing an already glued molding is torture.
Cutting Elements
Moldings are cut to size using a miter saw (for precise angled cuts) or a regular fine-toothed saw. The cut should be even, without chips, and perpendicular to the plane of the molding (or at the required angle for corner joints).
To form a frame, corners are cut at 45 degrees. Two moldings, cut at 45 degrees and joined, form a right angle. It is important that the cuts are perfectly accurate — even a deviation of 1-2 degrees will create a visible gap in the joint.
Professionals use a miter box or a miter saw with angle fixation. This guarantees accuracy. Beginners often cut 'by eye' — and end up with crooked joints.
Adhesion
Polymer adhesive (liquid nails, construction adhesive, special polyurethane adhesive) is applied to the back side of the molding. The adhesive is applied in a zigzag pattern or dots spaced 10-15 cm apart. Do not apply a continuous layer—excess adhesive will squeeze out when pressed, staining the wall and molding.
The molding is placed against the wall according to the markings and pressed firmly. The adhesive sets in 10-30 seconds (depending on the adhesive type). During this time, the position can be adjusted.
If the molding is long and heavy, it is temporarily secured with painter's tape or pins (carefully inserted into the joint between the molding and the wall, removed after the adhesive dries, and the holes are filled with putty).
Joint sealing
After all elements are glued, the joints are filled. White acrylic sealant is used (if the moldings will be white) or paintable sealant.
Sealant is squeezed from the tube into the joint gap, smoothed with a wet finger or rubber spatula. Excess is immediately removed with a damp cloth. After drying (4-6 hours), joints are sanded with fine sandpaper if necessary.
Properly sealed joints become invisible after painting. The molding looks like a single element grown from the wall, not assembled from pieces.
Painting
The final stage is painting. Water-based acrylic or latex paints are used. Applied with a brush (for detailed relief painting) or a short-nap roller (for smooth moldings).
Usually, two coats of paint are sufficient. The first coat may apply unevenly, revealing joints filled with sealant. The second coat evens out the coverage, creating a uniform surface.
It is better to paint after installation, not before. Molding painted before installation may be damaged during cutting, gluing, or joint sealing. Touch-ups will be required, and these touch-ups will be noticeable.
Combining polyurethane molding with other materials
Molding rarely exists in an interior on its own. It interacts with other materials, and the success of the design depends on the harmony of this interaction.
Molding and wallpaper
Classic combination. Moldings frame sections of the wall covered with wallpaper. Inside the frames—wallpaper with patterns, designs, or textures. Outside—solid-color paint.
When choosing wallpaper, it is important to consider the style of the moldings. Classic ornamental moldings pair with traditional wallpapers: damask, floral patterns, medallions. Modern smooth moldings—with geometric patterns, abstraction, solid-color textured wallpapers.
The scale of the wallpaper pattern should match the size of the frames. In small panels, a large pattern will look fragmented and unclear. A small pattern or texture is needed. In large panels, conversely, a small pattern will get lost—it is better to choose something large-scale and expressive.
Molding and paint
The most common combination. The wall is painted in one or several colors, moldings create boundaries between colors or relief decor on a solid-color surface.
Paint can be matte, semi-matte, or glossy. Matte creates a calm, noble background. Glossy adds shine, dynamism, visually expands the space but highlights any wall imperfections.
An interesting effect is achieved with gradient painting inside the panel: a smooth transition from one shade to another. Moldings frame this color stretch, turning it into a standalone art object.
Molding and decorative plaster
Textured or Venetian plaster inside molding panels creates a rich, multi-layered surface. The interplay of textures (smooth molding + relief plaster) enhances the visual impact.
Venetian plaster with its marble-like sheen is especially good in classic interiors. It creates a sense of noble stone, luxury, and serious finishing.
Textured plasters like 'cork,' 'lamb,' or 'fur coat' are more democratic. They add volume to the wall, hide minor defects, and create an interesting tactile surface.
Molding and wood
Combining polyurethane moldings and wooden panels is a way to achieve classic wainscoting without huge costs. Moldings form the structure, wood provides material nobility.
Wood can be natural (solid wood, veneer) or imitation (MDF panels, laminate). It is important that the color and texture of the wood harmonize with the overall interior palette.
Polyurethane moldings are usually painted in a color contrasting with the wood. White moldings on dark wood—a classic. But they can also be painted to match the wood, creating a more monolithic composition.
Molding and mirrors
Mirror inserts inside molding frames visually expand the space, add light, and create a depth effect. This is especially useful in small rooms, narrow hallways, or windowless spaces.
The mirror can fill the entire panel or be one of the composition elements, alternating with painted or wallpapered panels.
Moldings around the mirror serve as a frame, turning the mirror from a utilitarian object into a decorative interior element.
Typical mistakes when using wall molding
Even with such a universal and easy-to-work material as polyurethane, mistakes can be made that ruin the result.
Mismatch in scale
Too large moldings in a small room visually shrink the space and feel oppressive. Too small moldings in a large room get lost and look pitiful.
Rule: the width of the molding should be proportional to the wall size and ceiling height. For a standard apartment with ceilings 2.5-2.7 m, moldings 5-8 cm wide are suitable. For high rooms (3 m and above)—8-12 cm or more.
Over-decorated
More is not necessarily better. A wall covered with numerous panels, frames, and moldings can look cluttered, heavy, and tense.
Principle: less is more. Choose one accent wall and decorate it richly. Leave the others more subdued. Or create a composition on all walls, but use simple moldings without ornamentation.
Crooked lines and uneven joints
This is a technical defect that immediately catches the eye. A molding glued crookedly, deviating from horizontal or vertical, ruins the entire composition. A joint with a gap through which the wall is visible looks sloppy.
Solution: careful marking before installation, using a level, precise corner cutting, neat joint sealing. Don't rush. It's better to spend an extra hour on preparation than to get a result that will have to be redone.
Mismatch with interior style
Baroque moldings with lush ornamentation look alien in a minimalist loft. Smooth modern planks in a classic interior are boring and unexpressive.
Moldings should match the style of the room. Classic — classic profiles. Modern — modern ones. Minimalism — minimalist ones. Eclecticism allows mixing, but this requires a designer's touch.
Ignoring color
The color of moldings is critical. An incorrectly chosen shade can destroy the harmony of the interior.
If in doubt — choose white. It's a universal color that works almost everywhere. If you want color — select it carefully, make test swatches, look at it under different lighting (daylight, evening).
Frequently Asked Questions about Polyurethane Wall Molding
Can you install moldings on wallpaper?
Technically — yes, you can glue it. Practically — it's not advisable. The molding holds as well as the wallpaper itself holds. If the wallpaper starts to peel, the molding will fall off with it.
It's better to glue moldings onto a cleaned, plastered wall, and then wallpaper the areas between the moldings. Or use special insert panels that simply fit into molding frames.
How much does it cost to decorate a wall with molding?
The cost depends on the complexity of the composition, the chosen moldings, and the need for professional installation.
Materials (moldings, glue, paint) for decorating one wall with an area of 10-12 sq.m will cost 5000-15000 rubles. Professional installation — another 8000-20000 rubles. Total 13000-35000 rubles turnkey.
DIY installation will cut costs in half but will require time and care.
How to care for polyurethane molding?
Maintenance is minimal. Dust is brushed off with a soft brush or duster. Stains are wiped with a damp cloth and mild detergent. Do not use abrasives or solvents.
If necessary, the molding can be repainted a different color — just clean it from dust and apply a new coat of paint.
Can it be used in the kitchen and bathroom?
Yes, polyurethane is completely moisture-resistant. In the kitchen and bathroom, molding lasts as long as in living rooms. The main thing is high-quality painting with moisture-resistant paint.
Does polyurethane molding look different from plaster molding?
With quality manufacturing and installation — practically no difference. Polyurethane reproduces the finest relief details as clearly as plaster. After painting, the materials are visually identical.
Differences — in weight (polyurethane is 10 times lighter), moisture resistance (plaster is afraid of water), strength (polyurethane doesn't break, doesn't crumble).
How long does polyurethane molding last?
With proper installation and care — 30-50 years or more. Polyurethane does not deteriorate over time, does not yellow, does not deform. Only renewal of the painted coating may be needed every 10-15 years.
Can ordinary moldings be bent?
Ordinary moldings made of standard polyurethane cannot be bent — they will break. For curved surfaces, there are special flexible moldings made of elastic polyurethane.
If you need to frame an arch or a round column with an ordinary molding, it is cut into short segments that form a broken line approximating an arc. The shorter the segments, the smoother the curve.
Can molding be painted with regular water-based emulsion?
Yes, polyurethane paints excellently with any water-based paints: acrylic, latex, water-emulsion. Only oil-based paints and solvent-based nitro enamels are unsuitable — they can damage the polyurethane.
Before painting, the molding does not need special priming — it comes pre-primed. Just clean it from dust and apply the paint.
Conclusion: transformation begins with the walls
Walls are the canvas on which you paint your interior. AndPolyurethane wall moldinggives you the tool to turn this canvas into a work of art.
Whether you aspire to the palatial luxury of classic boiserie or the strict elegance of minimalism. Whether you're creating a family nest with a warm, cozy atmosphere or a showroom with impeccable lines. Polyurethane decor adapts to any task, offering thousands of implementation options.
Lightness. Durability. Moisture resistance. Variety. Affordability. These five qualities make polyurethane molding the material of choice for modern interiors. And the simplicity of installation turns wall transformation from a task requiring a team of professionals and weeks of work into a weekend project.
Start with one accent wall. Create several panels, frame a doorway, divide space with a horizontal molding. See how the perception of the room changes. How a flat surface gains depth. How an ordinary room becomes an architectural space with character and style.
And when the first experience proves successful (and it will be successful if you followed our recommendations), continue. Decorate the remaining walls, move on to ceilings, adddecorative rose outletsand ornaments. Step by step, create an interior that will delight you for years, that will become a source of pride, a reason for compliments, a place you want to return to.
STAVROS Company is your partner in creating the perfect interior. We have been producing polyurethane moldings since 2005 and know everything about it. Our products are distinguished by impeccable quality: material density of 280-350 kg/m³, clarity of relief down to the smallest details, geometric precision of profiles, durability without deformation.
The STAVROS catalog features hundreds of molding profiles, dozens of options fordecorative inserts, rosettes, panels. From classic ornamented elements to modern minimalist strips. From standard solutions to exclusive products based on custom sketches.
We offer not just materials, but comprehensive solutions: designer consultations, calculation of required elements, layout scheme development, recommendations for installation and finishing. When buying from STAVROS, you receive a quality guarantee, professional support at all stages, and delivery throughout Russia.
Start transforming your home today. Turn ordinary walls into architectural masterpieces with polyurethane wall moldings from STAVROS. Because beauty begins with details. And details begin with the right choice.